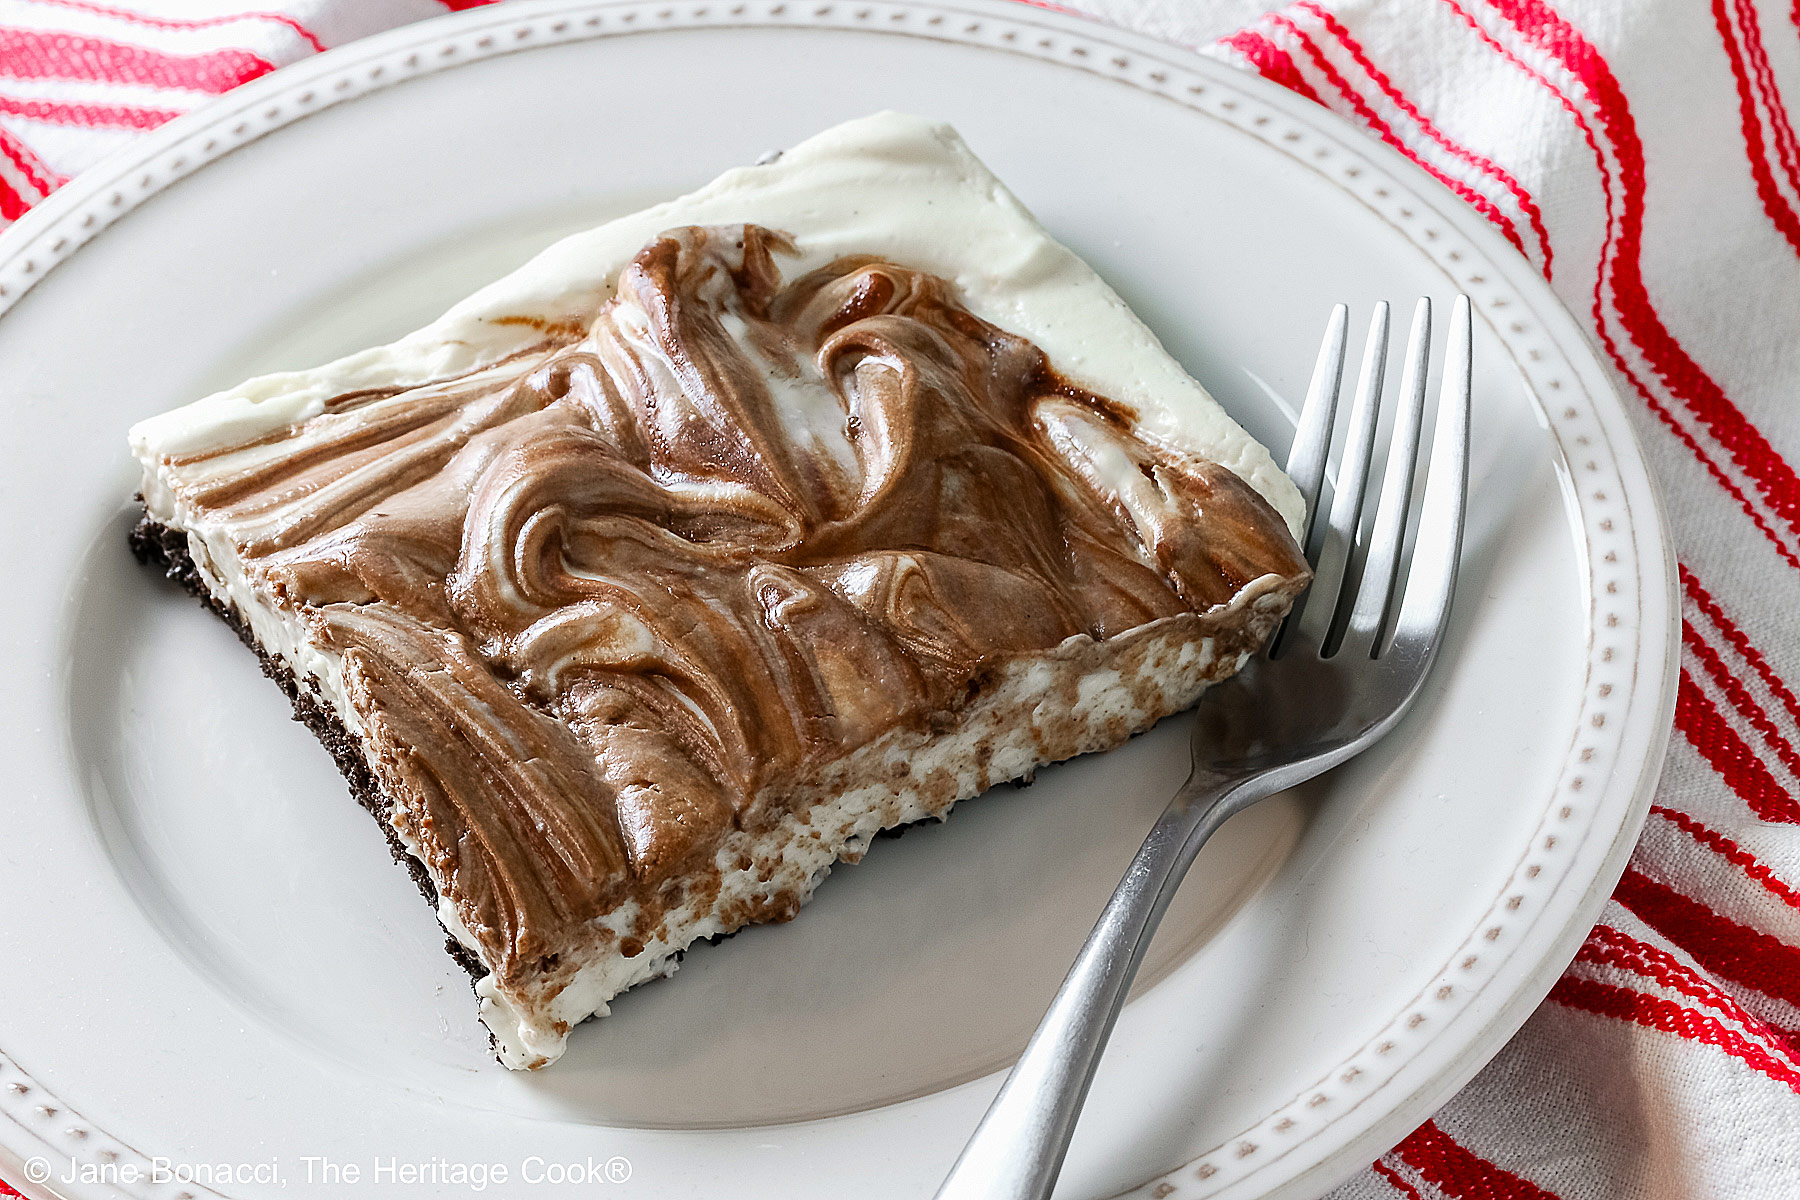
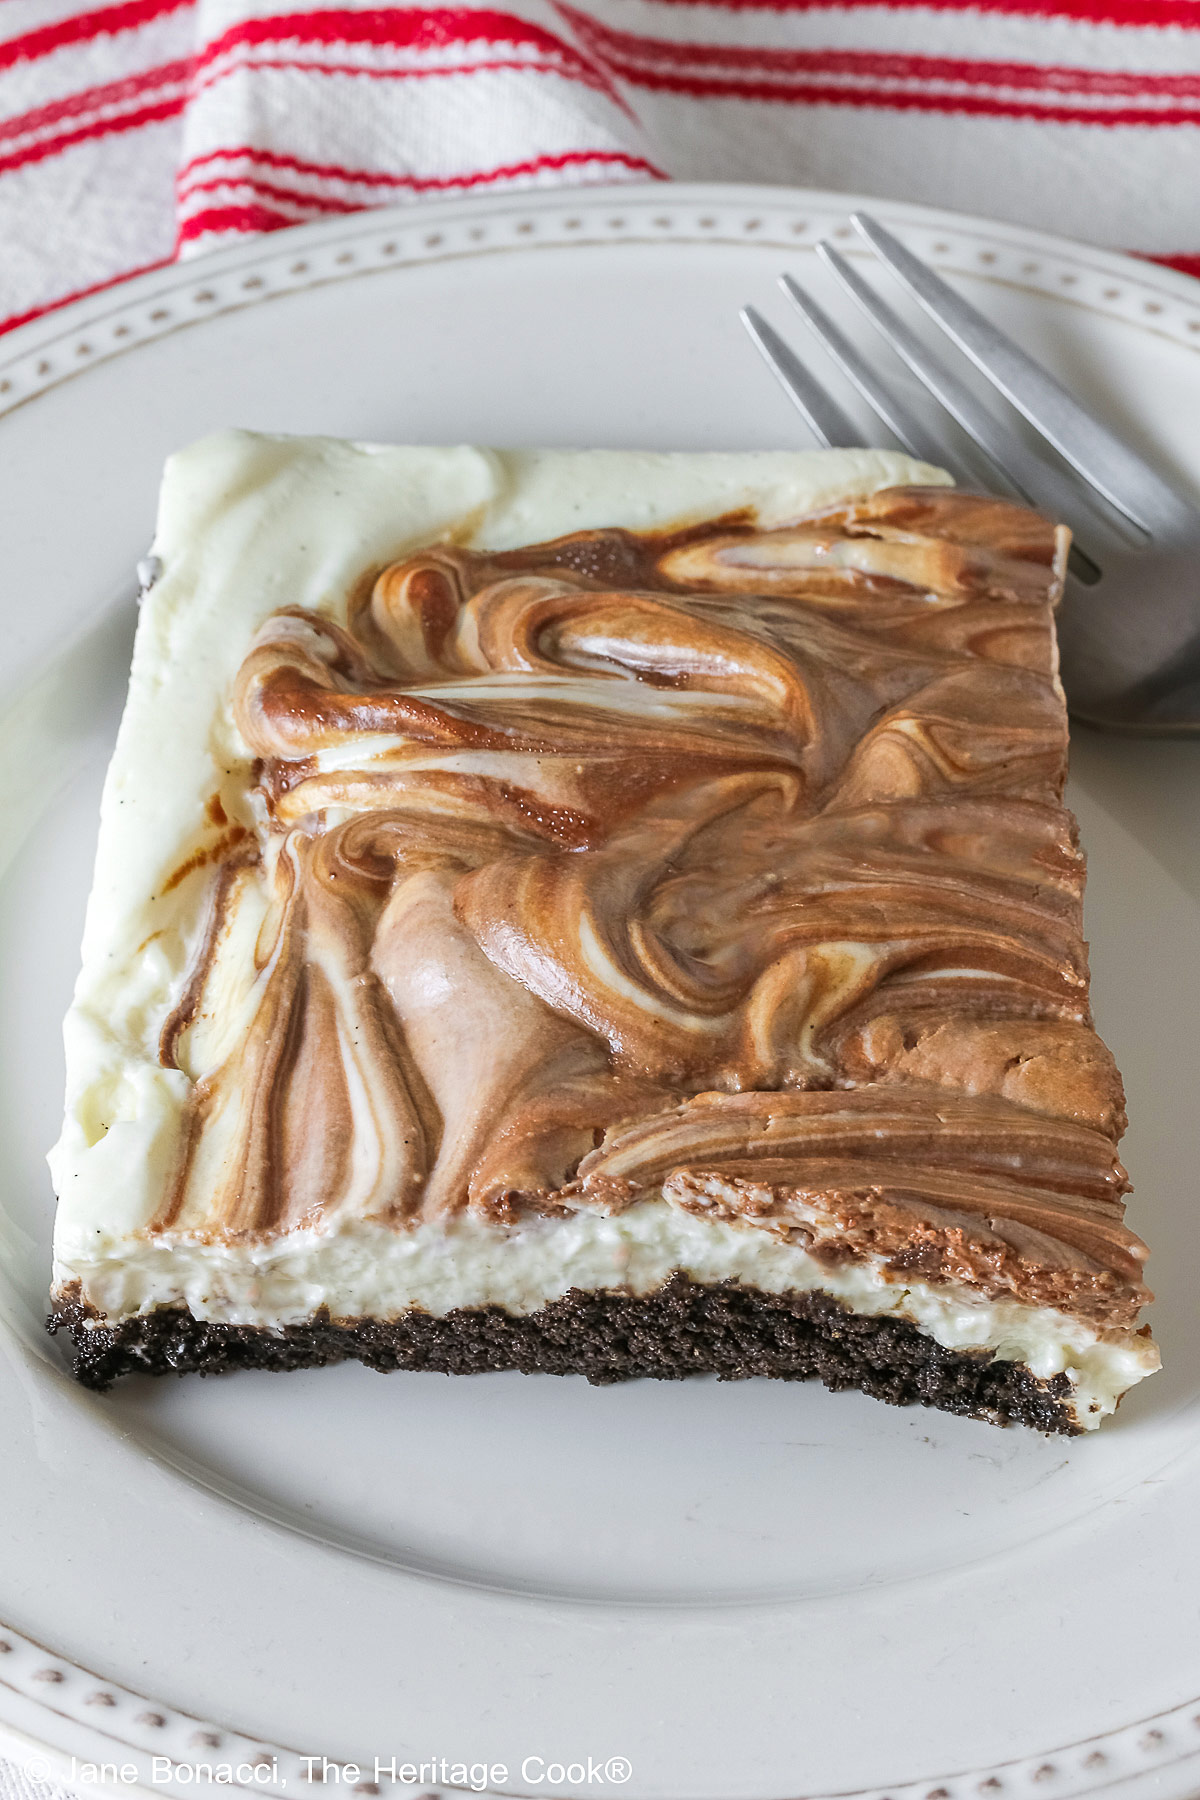
 I love cheesecake but rarely make it myself because my springform pan never keeps the water completely out. But today’s Chocolate Marbled No Bake Cheesecake Bars are a whole different story and one where I don’t have to use a water bath, hallelujah! And since these are no-bake, there are no eggs in the filling and I can share them with my adorable egg-sensitive neighbor – bonus!
I enjoy using gluten-free Oreo cookies to make the crust for these cheesecake bars. It gives tremendous flavor that we all recognize and so darned easy to make. Just pulverize the cookies in a food processor or use a rolling pin and plastic bag if you prefer, and mix in the melted butter. You could use GF graham crackers if you prefer.
Then press the crumbs into your prepared baking dish and use the flat bottom of a measuring cup to compact it into an even layer. Be sure to use a measuring cup with no spout and one that has a perfectly flat bottom surface.
Use brick-style cream cheese and make sure it is completely softened to room temperature so you don’t get any lumps. I prefer Philadelphia brand if you can find it. It provides the most consistent results.
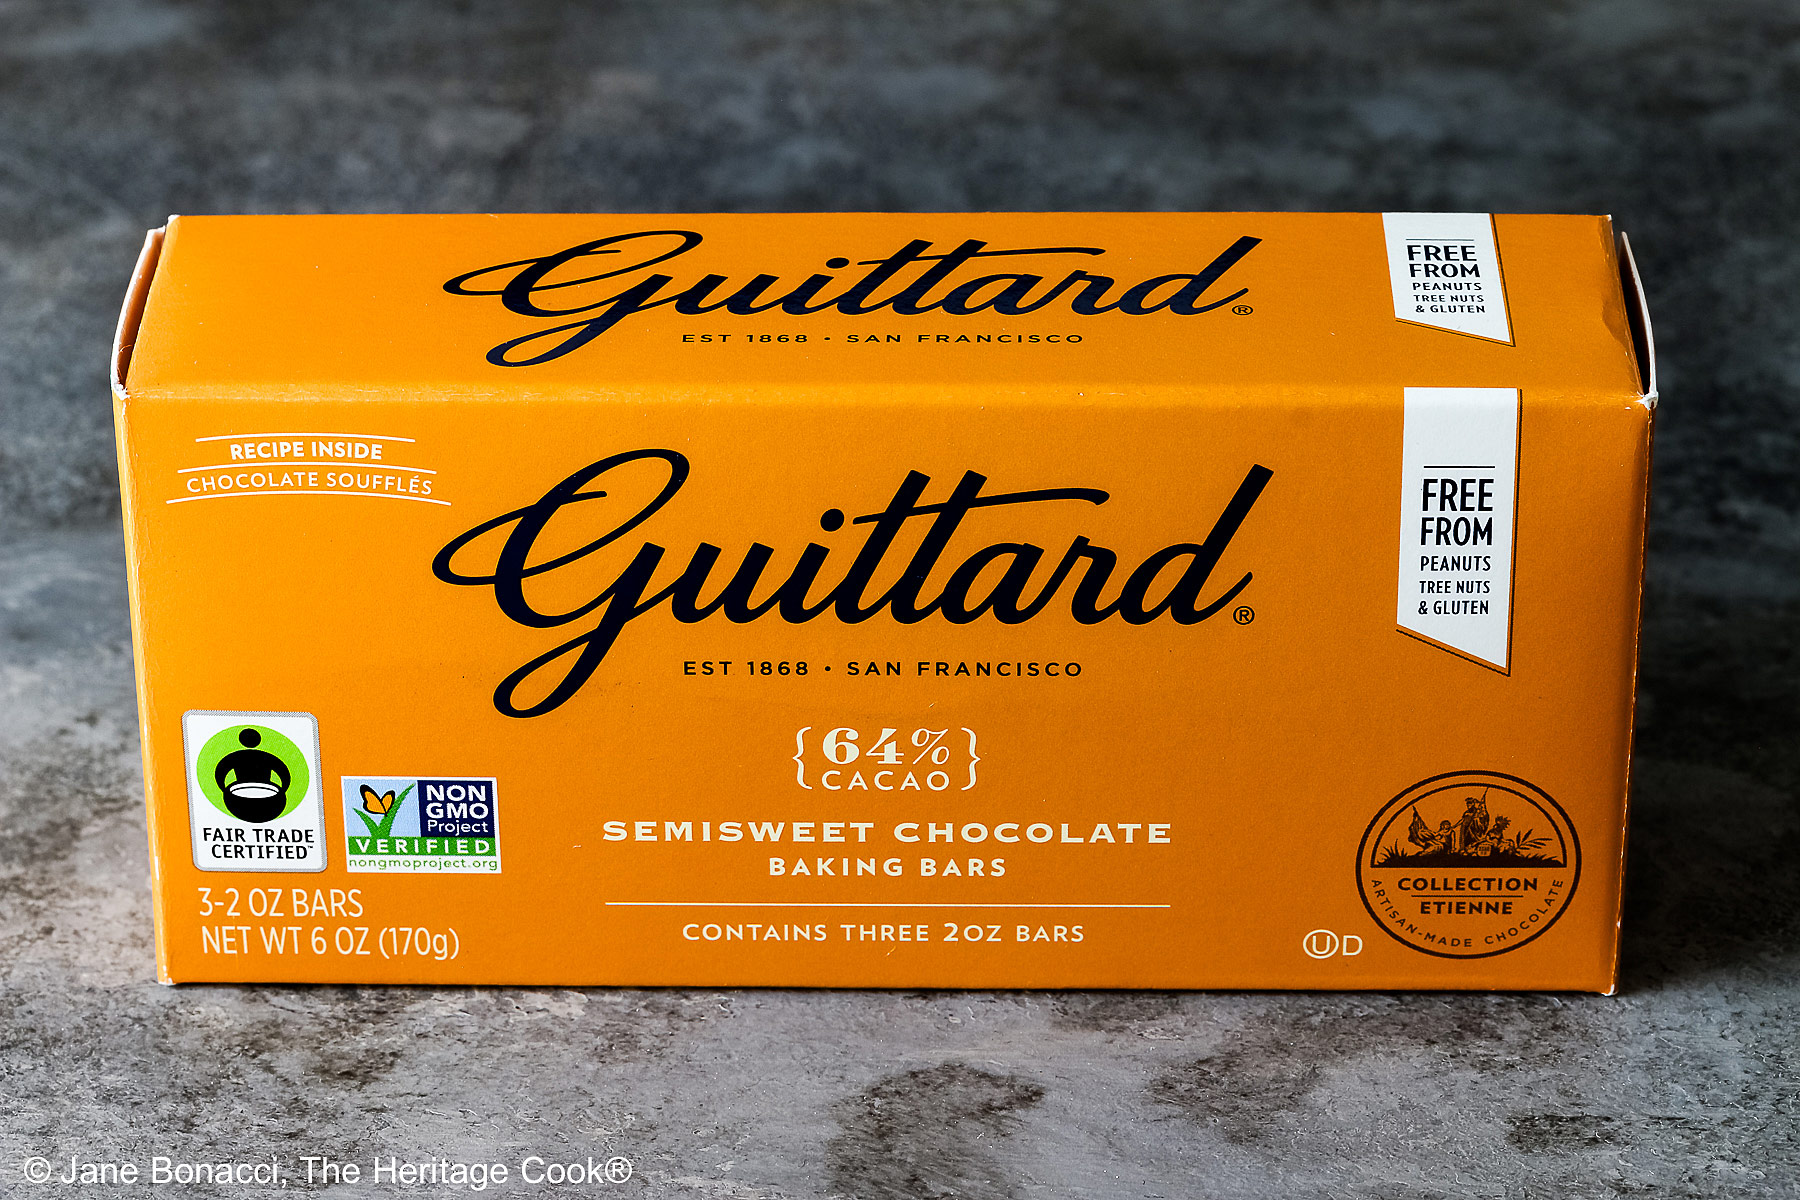
My favorite baking chocolate is from Guittard. The small boxes contain three 2-ounce bars that are easy to chop for melting. They don’t have any stabilizers in them like chocolate chips do. Either will work, but the bars will give you superior results.
If you want a less intense chocolate flavor, you can use milk chocolate in the place of the semisweet. Use the same amount in the chocolate swirl.
Remember that you need plenty of time for these to chill thoroughly – at least 5 hours and up to overnight. This is when the creaminess happens and your dessert becomes lush!
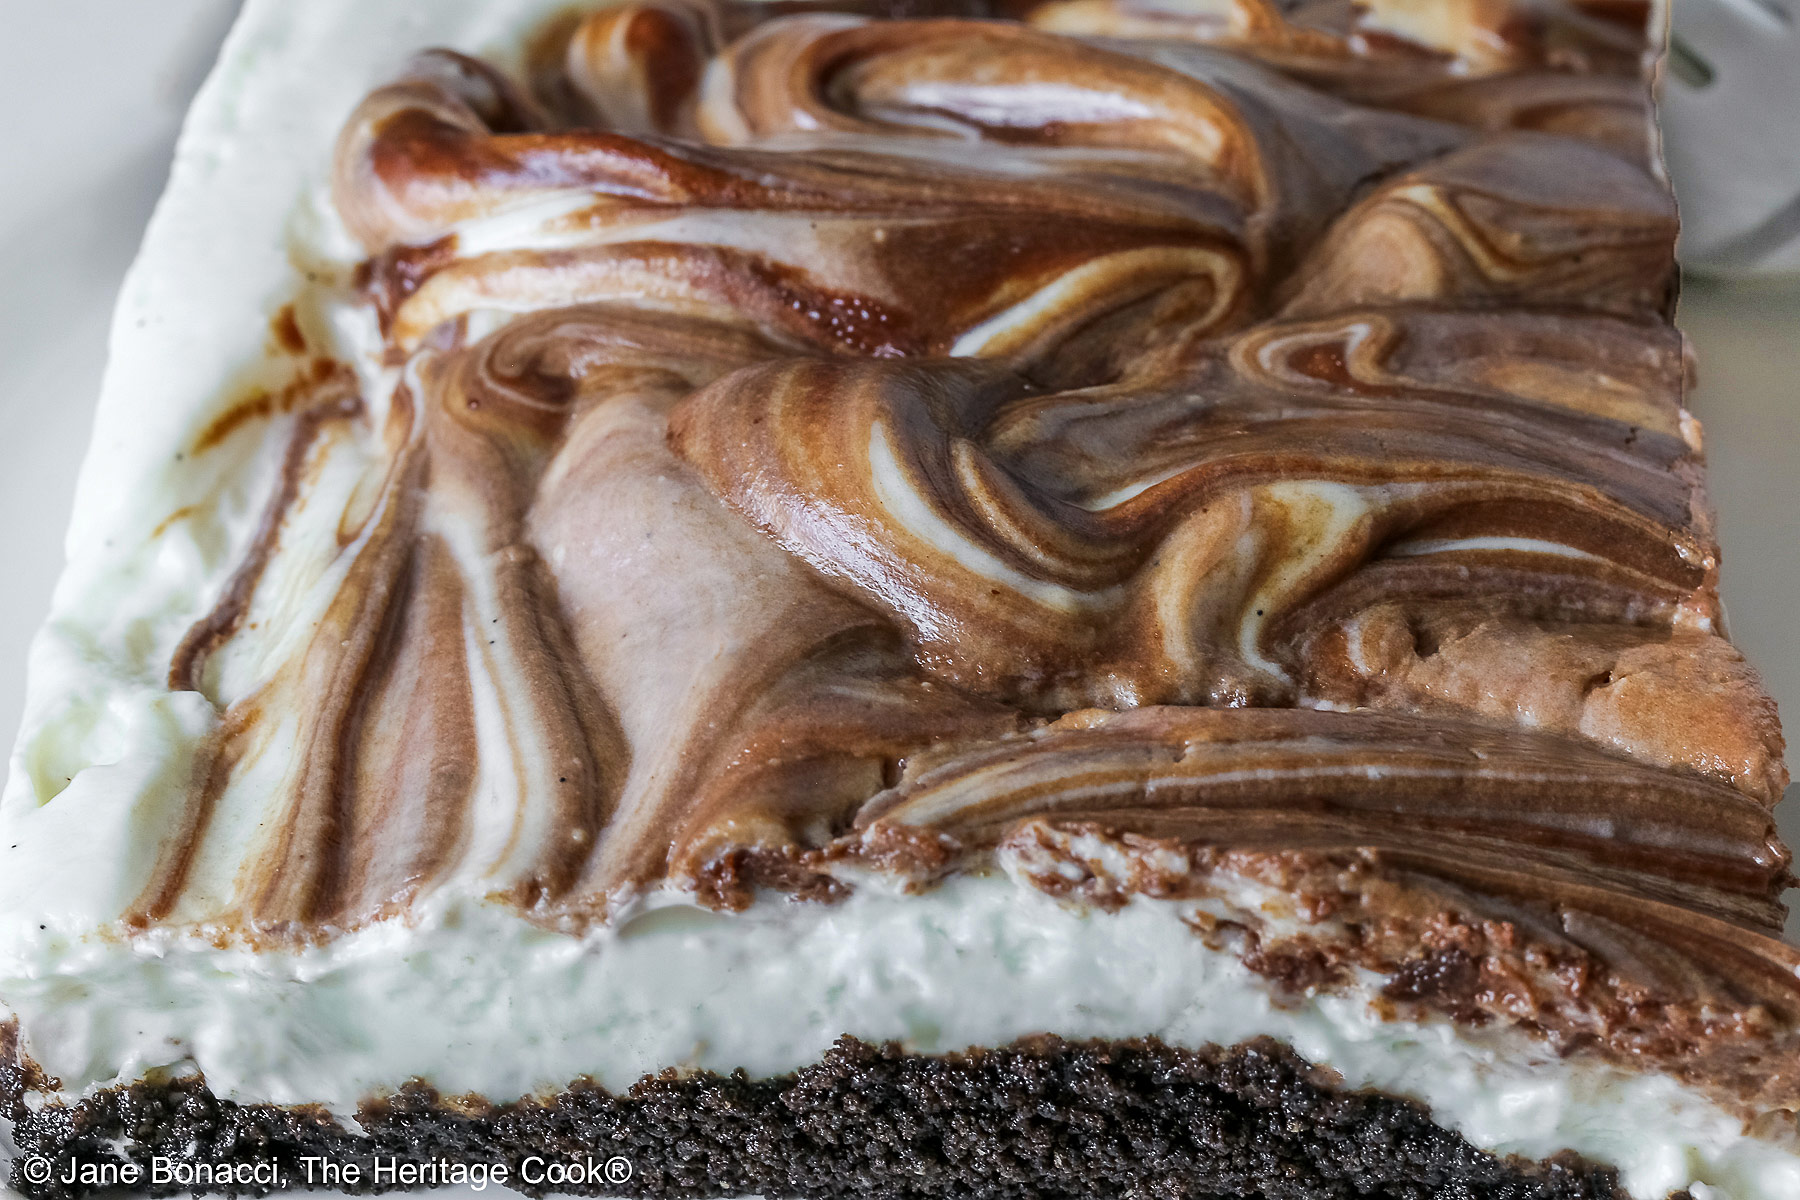
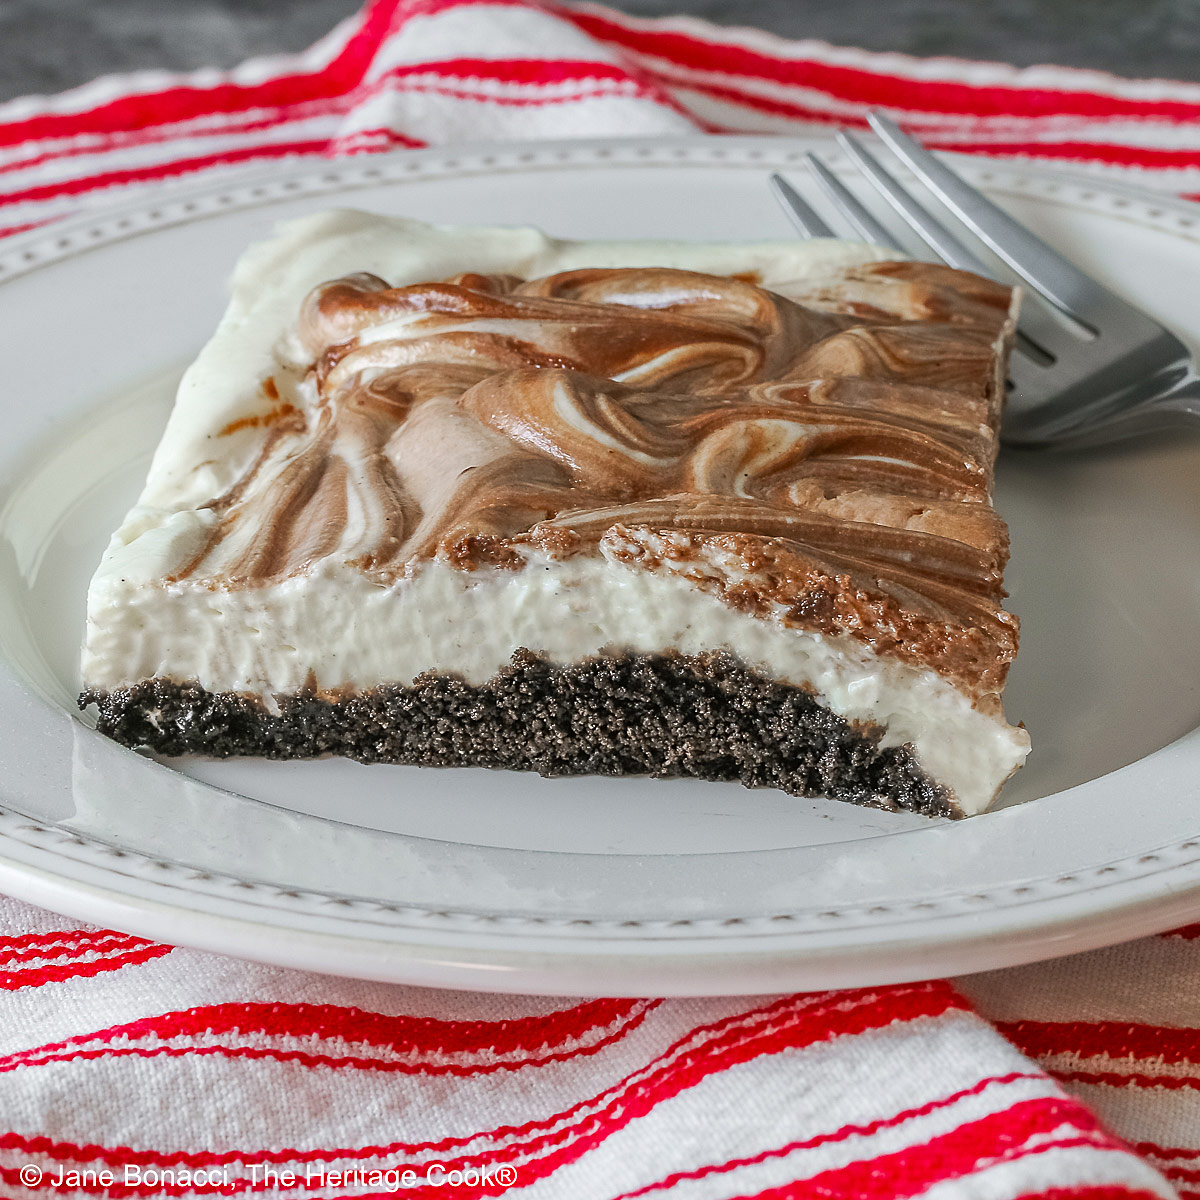
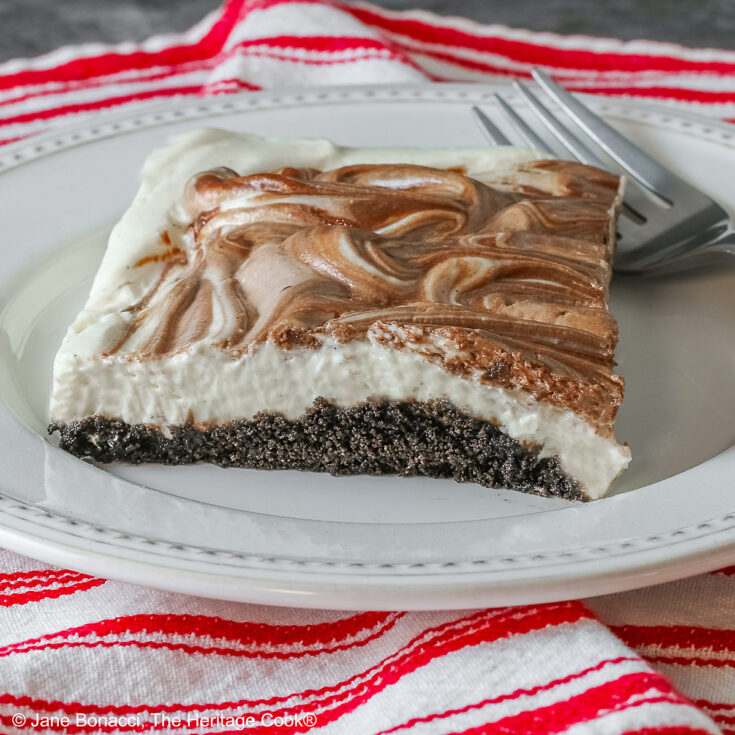
You can decorate the bars with Halloween candies if you want to serve this for a party crowd. Or you can leave them around the base so you can see the beautiful marbled design on the top. Either way is great!
These bars come together quickly and simply. Your kids would love to help you press the crumb crust, mix the filling, and swirl in the chocolate.
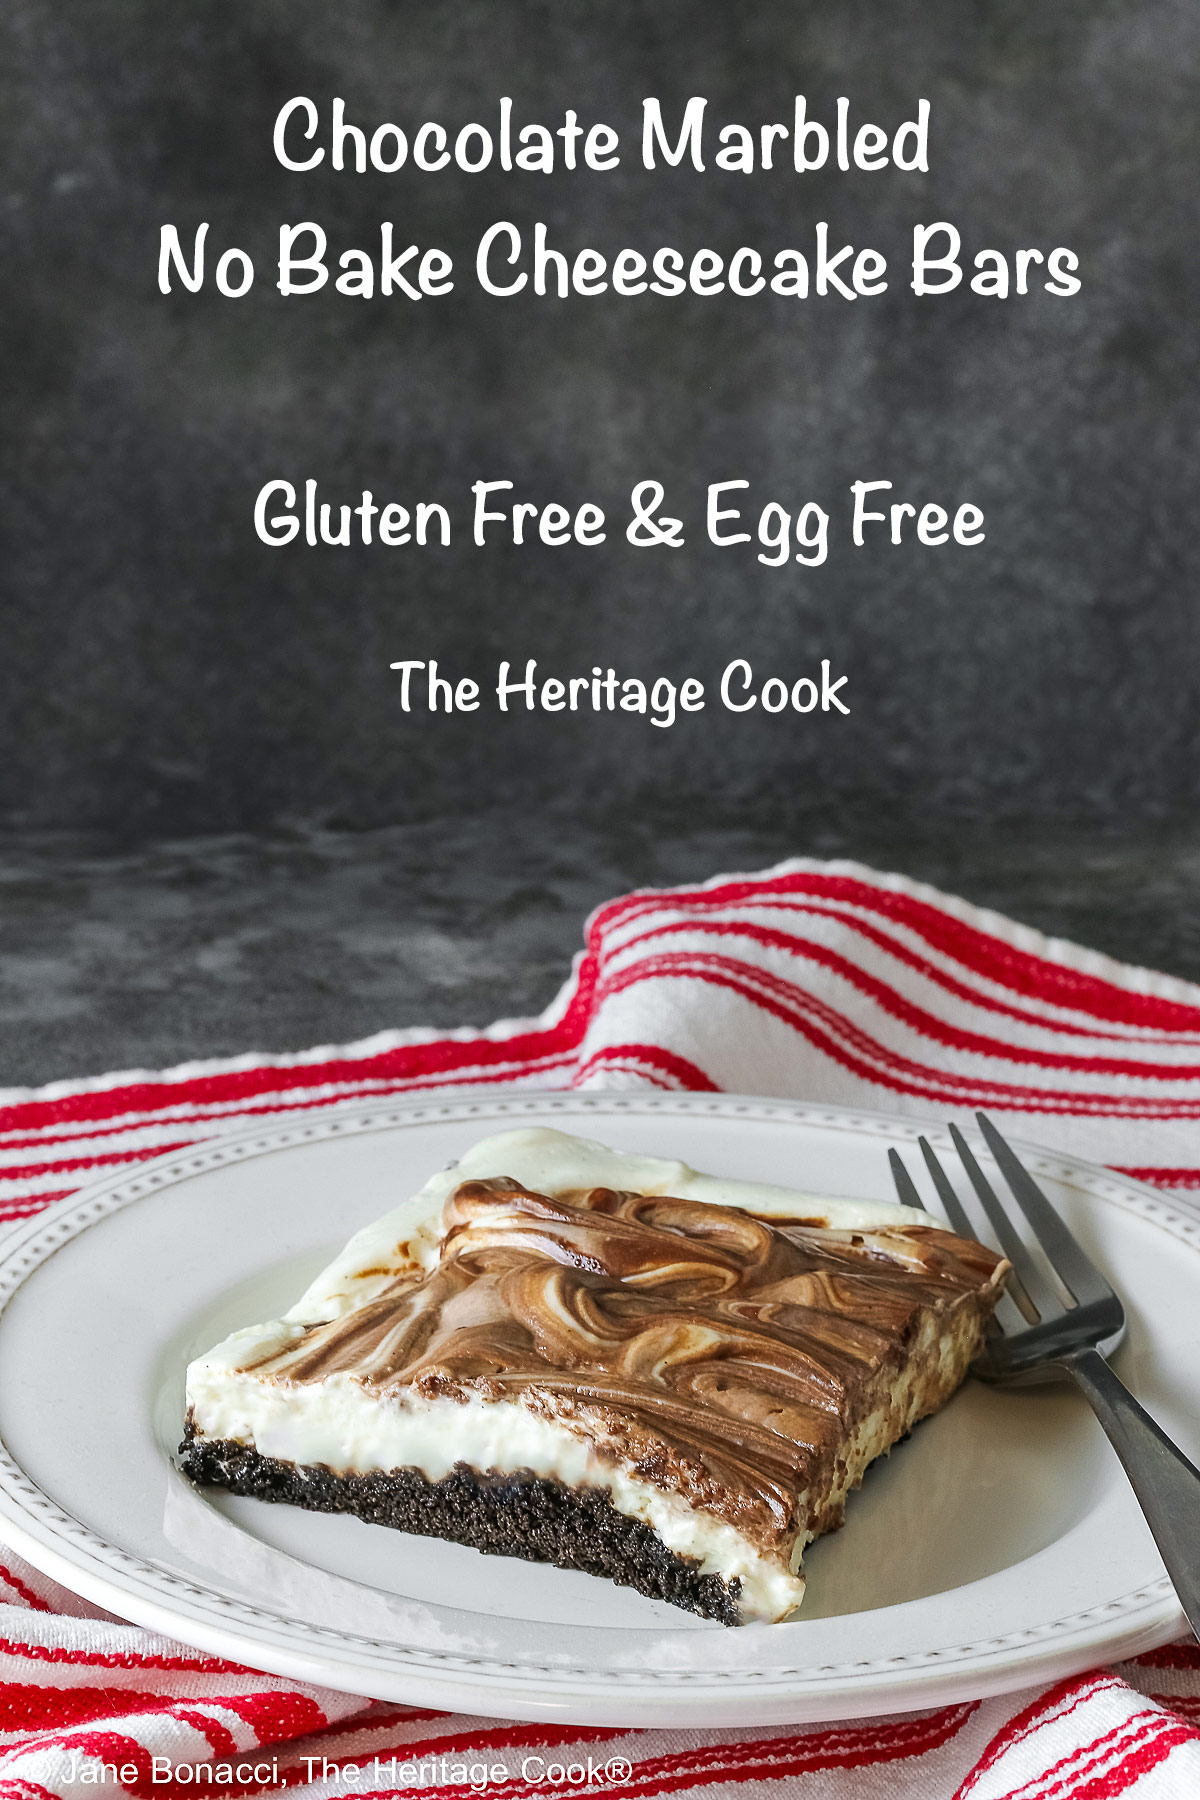
Today’s Chocolate Marbled No Bake Cheesecake Bars are so good and easy to make. Lovely and lusciously creamy bite after bite. With chocolate throughout, this is a dessert your chocoholic family and friends will adore!
If you try this recipe, let me know! Please leave a star rating in the recipe card, comment below, and don’t forget to snap a pic and tag it @theheritagecook on Instagram! Seeing your creations makes my day and I love hearing from you!
Ingredients needed for Chocolate Marbled No Bake Cheesecake Bars:
- Crust: GF Oreo cookies or regular Oreos (if not GF), butter
- Cheesecake Filling: cream cheese, heavy cream, sour cream, confectioners’ sugar, vanilla
- Chocolate Swirl: chopped chocolate, heavy cream, salt
PRO Tip:
Because there are no eggs in this recipe, you can’t really over-mix the filling. This makes it much easier than a traditional cheesecake to make and assemble, plus no baking!
How to make Chocolate Marbled No Bake Cheesecake Bars:
- Make the Crust: Place the cookies in a food processor (or plastic bag if using a rolling pin) and pulse to fine crumbs. Melt the butter and pour into the crumbs, pulsing again until fully combined.
- Pour the crumbs into a parchment or foil-lined 8×8-inch or 9×9-inch (20cm or 23cm) square baking pan, pressing firmly with the bottom of a measuring cup or glass with a flat bottom into an even crust. Refrigerate while making the filling.
- Prepare the Filling: Using an electric mixer, combine the cream cheese, sour cream, and sugar, beating on low to combine then on medium until smooth and creamy, 3 to 4 minutes. Pour into the prepared crust, smoothing the top with an offset spatula.
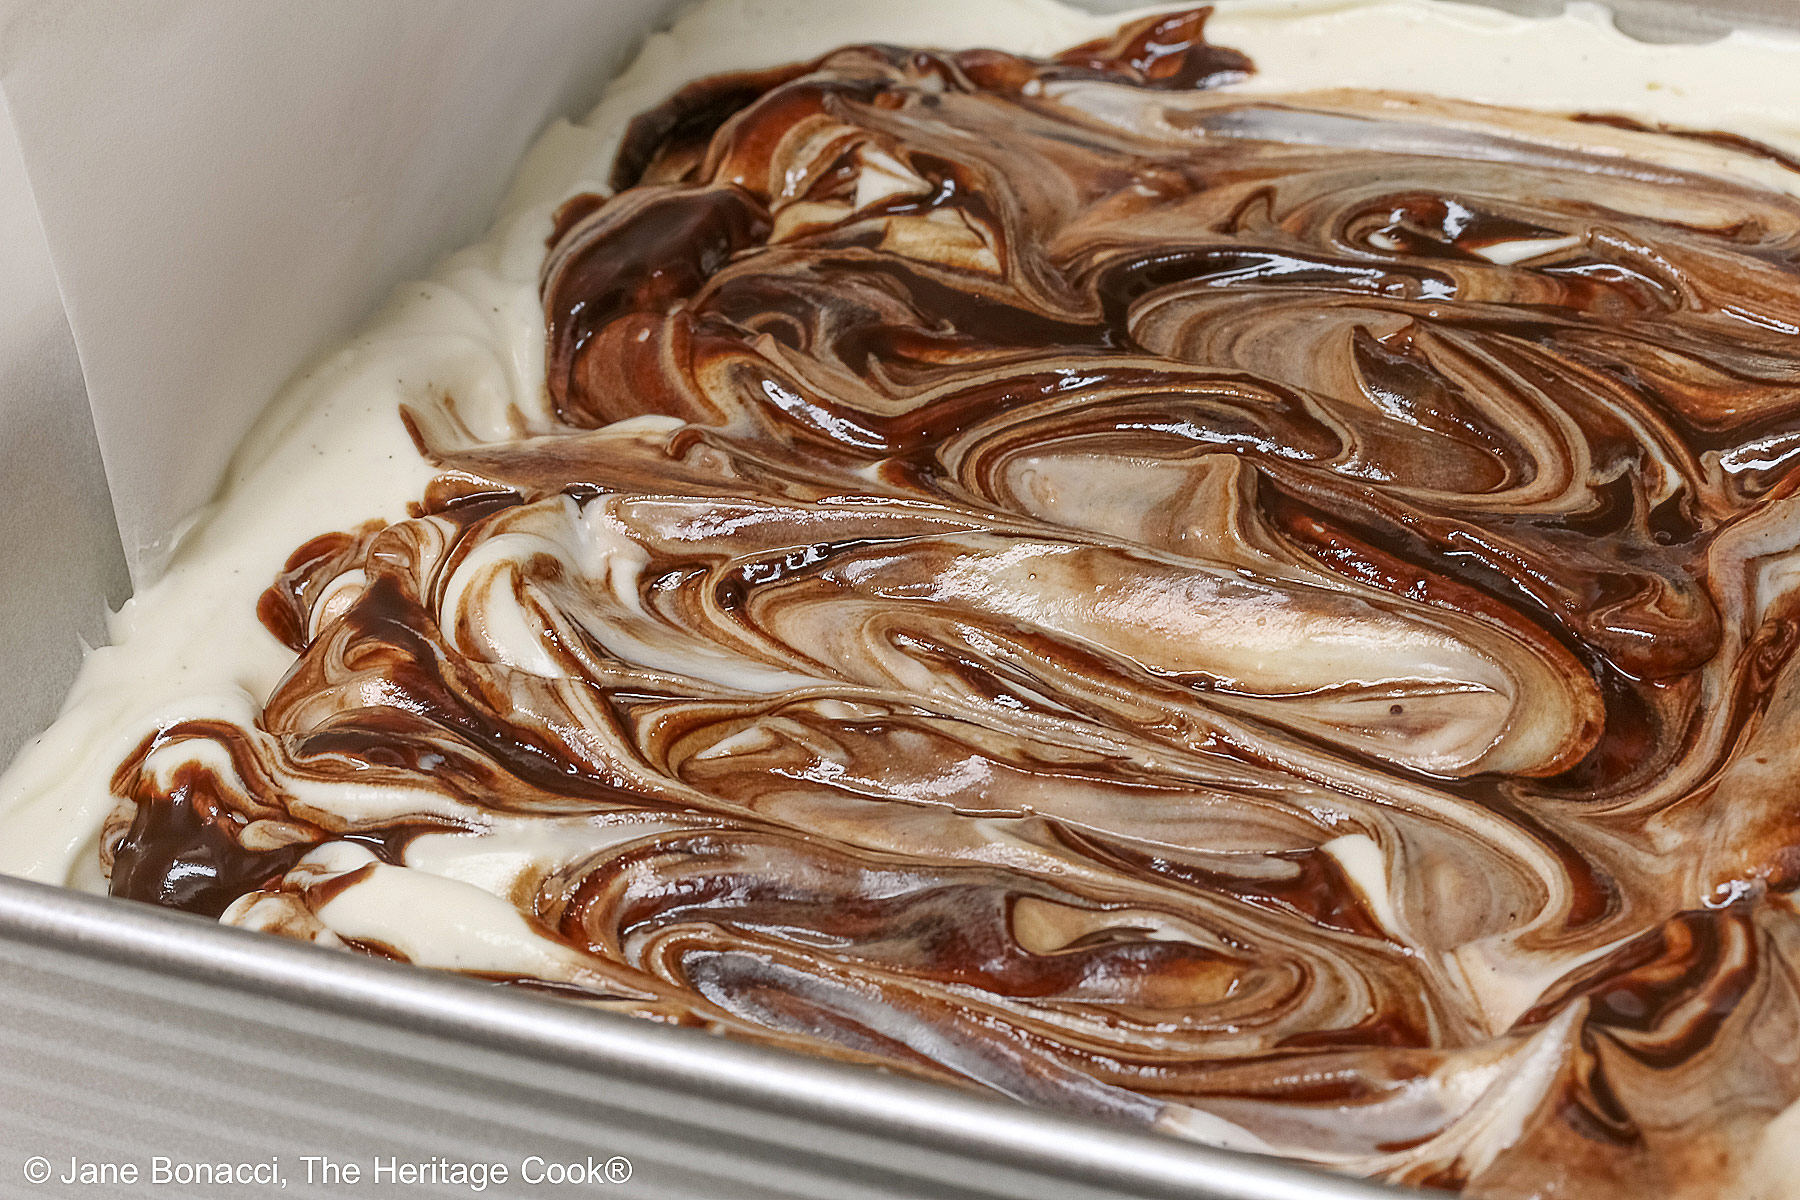
- Make the Chocolate Swirl: In a large microwave-safe bowl, place the chopped chocolate, cream, and salt. Heat in about three 30-second bursts, stirring after each heating until the chocolate is fully melted and can be whisked smooth and silky. If using, add the liquor, whisking until fully blended. Set aside to cool for about 15 minutes.
- Dollop the melted chocolate mixture on top of the cream cheese filling leaving space between them (you won’t use it all) and swirl it in with a small knife or offset spatula until marbled. Cover the pan with plastic wrap and refrigerate at least 5 hours or overnight before slicing and serving.
PRO Tip:
A dollop is about 1 tablespoon of one material that will be mixed into another. In this case it is melted chocolate being mixed into the top of the cheesecake filling for a marbling effect.
Recommended Tools (affiliate links; no extra cost to you):
- Kitchen scale
- 9×9-inch (23x23cm) square baking pan
- Parchment paper
- Food processor
- Stand mixer or hand mixer
- Offset spatula
- Glass mixing bowls
Gluten-Free Tips:
Oreo makes a gluten-free version of their cookies that is really delicious. My other favorite chocolate sandwich cookie is Glutino brand. Both work beautifully in this recipe.
You will get the best and most consistent results by using a digital kitchen scale and weighing your ingredients, especially when you are baking. And use grams, they are much more accurate than pounds and ounces.
All recommended ingredients are gluten-free as of the writing of this article. Always check to be sure the products haven’t changed and are still safe to consume.
Chocolate Marbled No-Bake Cheesecake Bars (GF)
Today’s Chocolate Marbled No Bake Cheesecake Bars are so good and easy to make. Lovely and lusciously creamy bite after bite. With chocolate in every bite, this is a dessert your family and friends will adore!
Ingredients
Crust
- 22 whole gluten-free Oreo cookies or regular Oreos (with the filling)
- 6 tbsp (85g) butter, cubed and melted
Cheesecake Filling
- 2 (8 oz; 454g) brick-style cream cheese, softened to room temperature
- 3/4 cup (180ml) heavy whipping cream
- 1/4 cup (61g) sour cream
- 3/4 to 1 cup (75g to 120g) confectioners’ sugar
- 1 tsp vanilla bean paste or regular vanilla extract
Chocolate Swirl
- 1/2 cup (85g) chopped semisweet chocolate bar or chocolate chips
- 3-1/2 tbsp heavy whipping cream
- Pinch kosher salt
Instructions
1. Line an 8x8-in or 9×9-inch pan (20x20 or 23x23 cm) with aluminum foil or parchment leaving two ends hanging over the opposite edges to create a sling and spray with cooking spray or butter; set aside.
2. Preheat the oven to 350°F (180°C) with a rack in the center.
3. Make the Crust: In a food processor, place the whole GF Oreos (with the filling) and process until you have fine crumbs. Pour the crumbs into a medium bowl.
4. In a microwave-safe bowl, place the butter and heat in two or three 30-second bursts until fully melted. Pour the butter into the crumbs (scrape it all into the bowl!) and fold together with a spatula until completely incorporated and the mixture is like wet sand. Scrape the bottom of the bowl to disperse the butter evenly.
5. Pour the crumb mixture into the lined and buttered pan, and press it firmly with your hand or the flat bottom of a glass or measuring cup to form an even crust. Bake the crust for 10 to 12 minutes. Set the pan on a wire rack and cool thoroughly before filling.
6. Prepare the Filling: In the bowl of your stand mixer or a large bowl if using a hand mixer, place the cream cheese, sour cream, and confectioners’ sugar, beating on low until combined, then increasing the speed to medium and beating until smooth and creamy, 3 to 4 minutes. Pour evenly into the prepared crust and smooth the top with an offset spatula.
7. Chocolate Swirl: In a separate, medium, microwave-safe bowl, add the chopped chocolate, the heavy cream, and salt. Be sure the chocolate is mostly covered by the cream. Heat in about two 30-second bursts and stir after each heating until the chocolate has melted and can be whisked smooth and mixture is silky, watch carefully. Add a little more cream if needed for a smooth mixture. Set aside to cool for about 15 minutes.
8. Dollop some of the melted chocolate on top of the cream cheese filling making sure the little dollops aren’t too close together and swirl it in with a small knife or an offset spatula until marbled.
9. Cover the pan with plastic wrap (not touching the surface) and refrigerate for at least 5 hours, or preferably overnight, before slicing and serving.
10. This will keep for at least 10 days, covered, in the refrigerator.
Recipe found at www.theheritagecook.com
Notes
Oreo brand of cookies makes a gluten-free version that is really delicious. My other favorite chocolate sandwich cookie is by Glutino. Both work beautifully in this recipe.
You will get the best results by using a digital kitchen scale and weighing your ingredients, especially when you are baking. And use grams, they are much more accurate than pounds and ounces.
All recommended ingredients are gluten-free as of the writing of this article. Always check to be sure the products haven’t changed and are still safe to consume.
Inspired by a Pook’s Pantry recipe
Nutrition Information:
Yield:
10Serving Size:
1Amount Per Serving: Calories: 238Total Fat: 12gSaturated Fat: 6gTrans Fat: 0gUnsaturated Fat: 5gCholesterol: 10mgSodium: 122mgCarbohydrates: 32gFiber: 1gSugar: 22gProtein: 2g
The nutritional information for recipes on this site is calculated by online tools and is merely an estimate. If you need nutritional calculations for medical reasons, please use a source that you trust.
If you enjoyed this recipe, be sure to follow me on social media so you never miss a post:
Create a New Tradition Today!
Welcome! The suggestions here are not intended as dietary advice or as a substitute for consulting a dietician, physician, or other medical professional. Please see the Disclaimers/Privacy Policy page for additional details. Unauthorized use, distribution, and/or duplication of proprietary material from The Heritage Cook without prior approval is prohibited. If you have any questions or would like permission, please contact me. We participate in the Amazon Services LLC Associates Program, an affiliate advertising program designed to provide a means for sites to earn advertising fees by advertising and linking to amazon.com. As an Amazon Associate, I earn a small amount from qualifying purchases without any additional cost to you. This page may contain affiliate links. The author makes no claims regarding the presence of food allergens and disclaims all liability in connection with the use of this site.