 Cheesecake is my favorite dessert. I’m always hoping for rich, creamy goodness in every bite. Today’s Egg Free Cheesecake with Oreo Crust is delightful and perfect for Valentine’s Day or any other holiday!
I have to eat gluten free and I usually can’t enjoy cheesecakes in restaurants because they typically have a graham cracker crust which is not safe for me. But our favorite restaurant makes theirs crustless and gluten-free so I indulge whenever we go there!
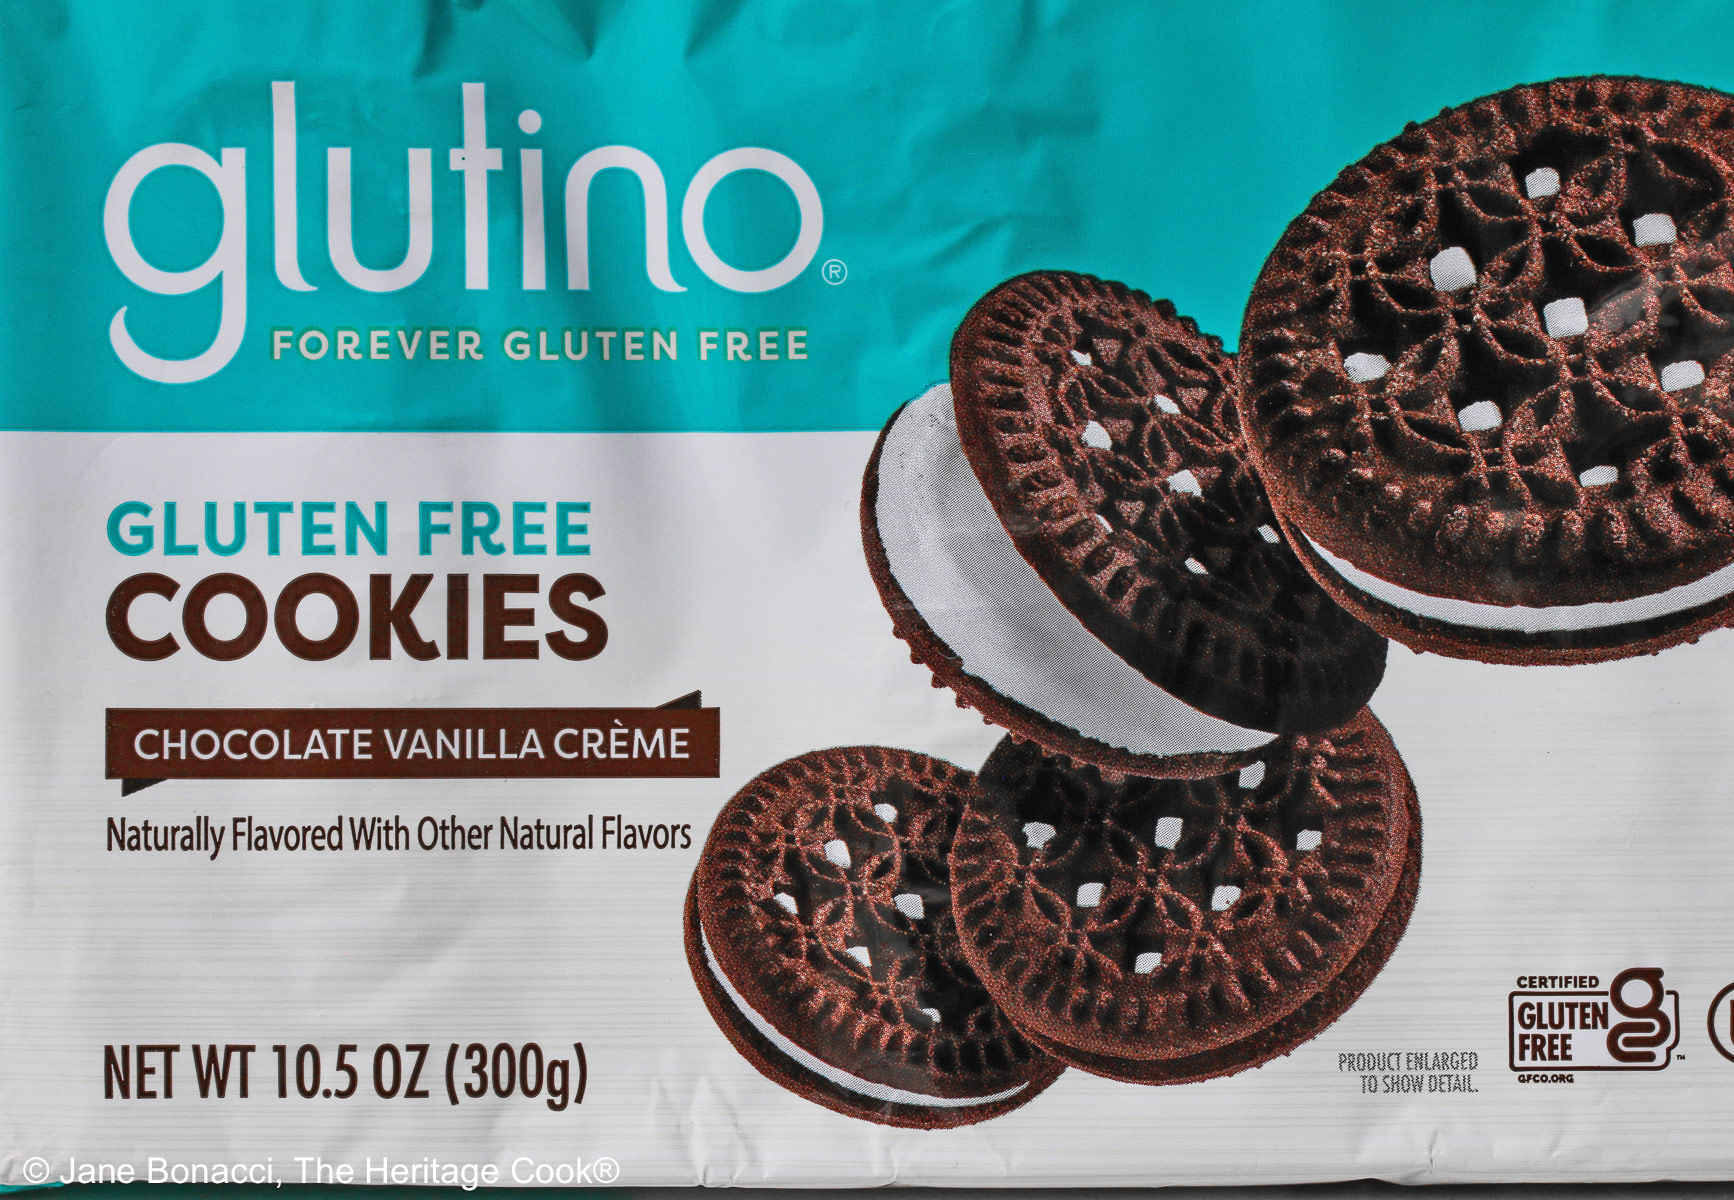
A great gluten free option for Oreo cookie crusts!
We have an adorable neighbor who has an allergy to eggs. I thought it would be fun to make this egg-free version and share it with her. She will have the biggest smile on her face when she sees it!
Because there are no eggs in this version, it doesn’t need to bake as long as more traditional cheesecakes. And you don’t have to bake the crust so this comes together quickly and easily. Bonus – no water bath required!

If you don’t have a food processor, put the cookies in a resealable plastic bag and roll over them with a rolling pin until they are totally crumbled. Then pour in the melted butter, massage it from the outside of the bag until thoroughly blended. Then pour into the prepped springform pan.
You want to pack the cookie crumbs tightly into the base of the pan and slightly up the sides. Start with your hand, spreading them out to cover the bottom, and move some of the extra to the sides. Then use the flat bottom of a glass or measuring cup to tamp it down. This will give you a tight, cohesive crust easily.
I had this assembled and in the oven in about 20 minutes. What takes the longest is waiting for it to cool between stages. Cheesecake does take time, but it is worth it!
Because there are only two ingredients in the crust and it can be crumbly, be sure to cut it when it is very cold, straight from the refrigerator. This will have the butter as solid as possible. And store the whole cheesecake in the refrigerator when not actively working with it or cutting slices.
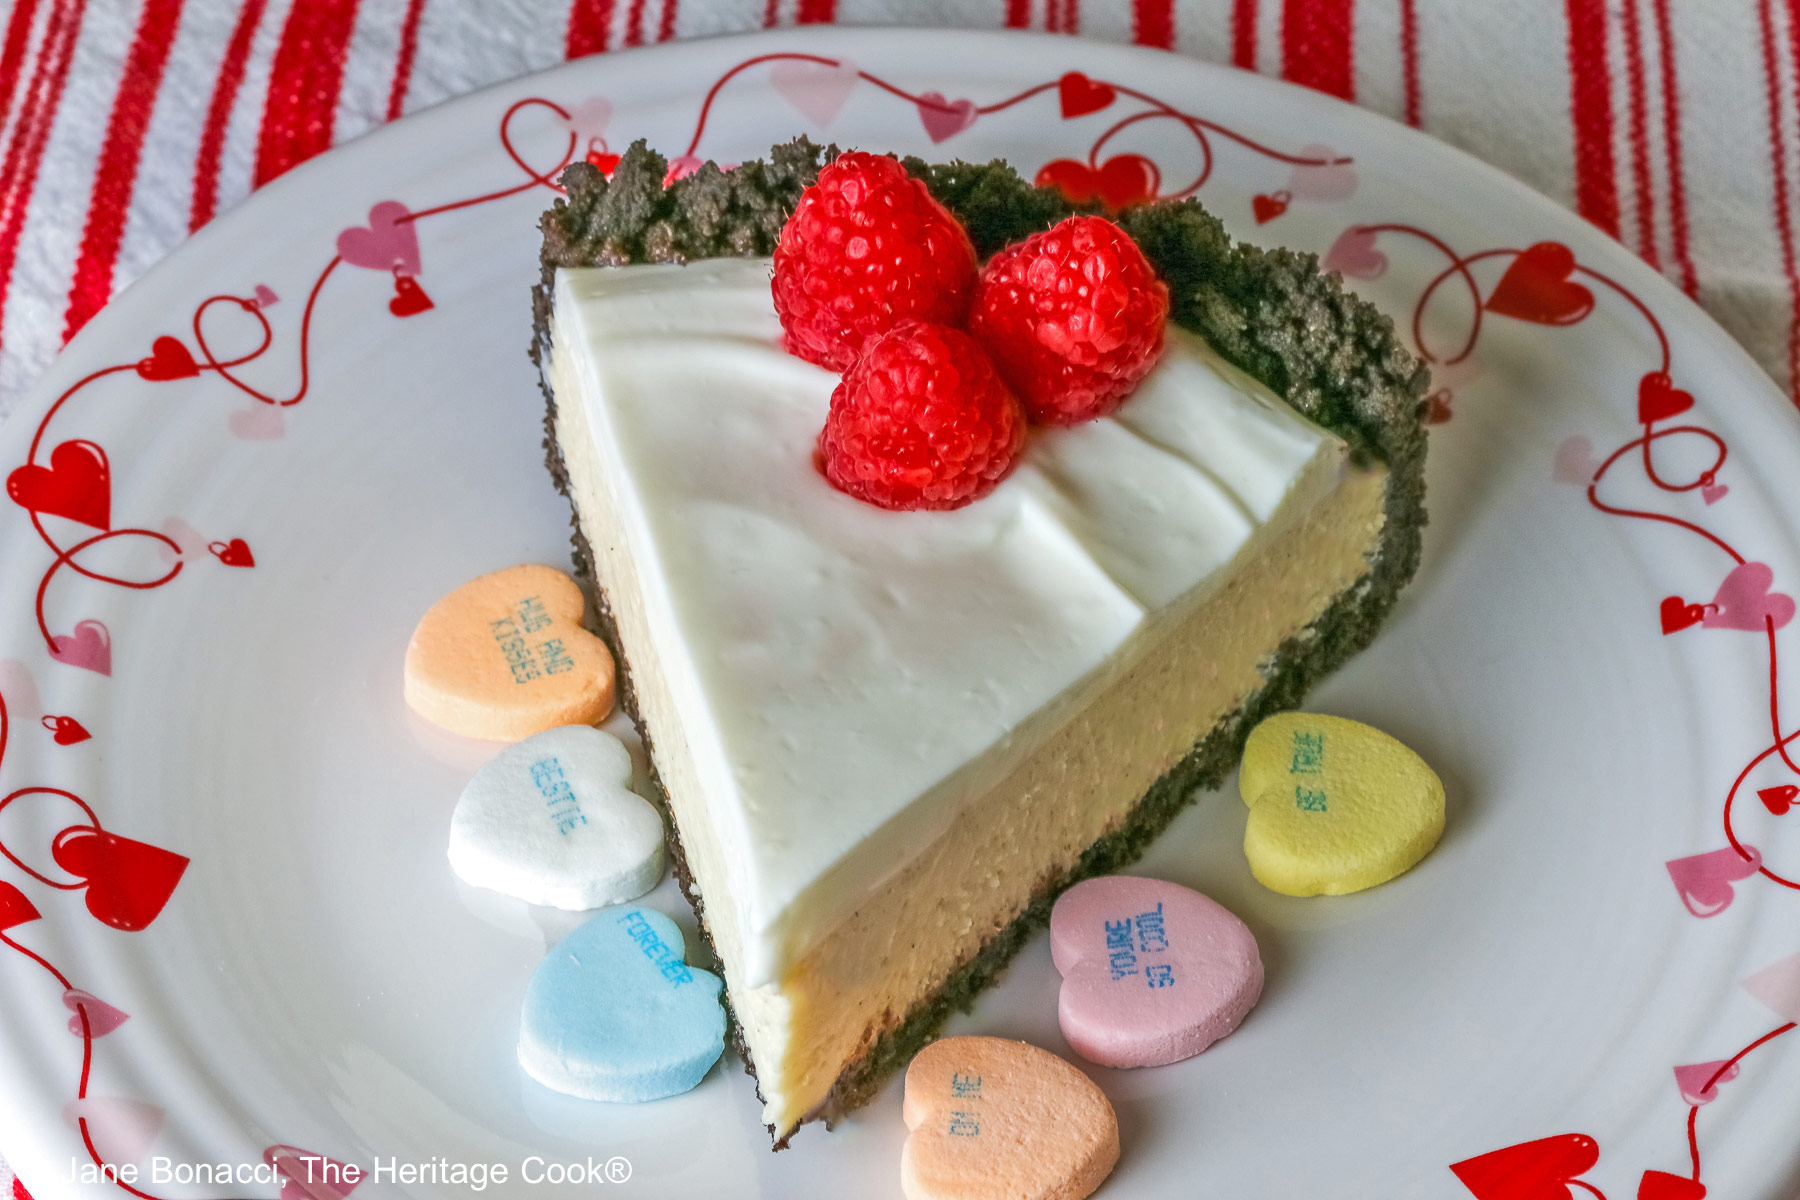
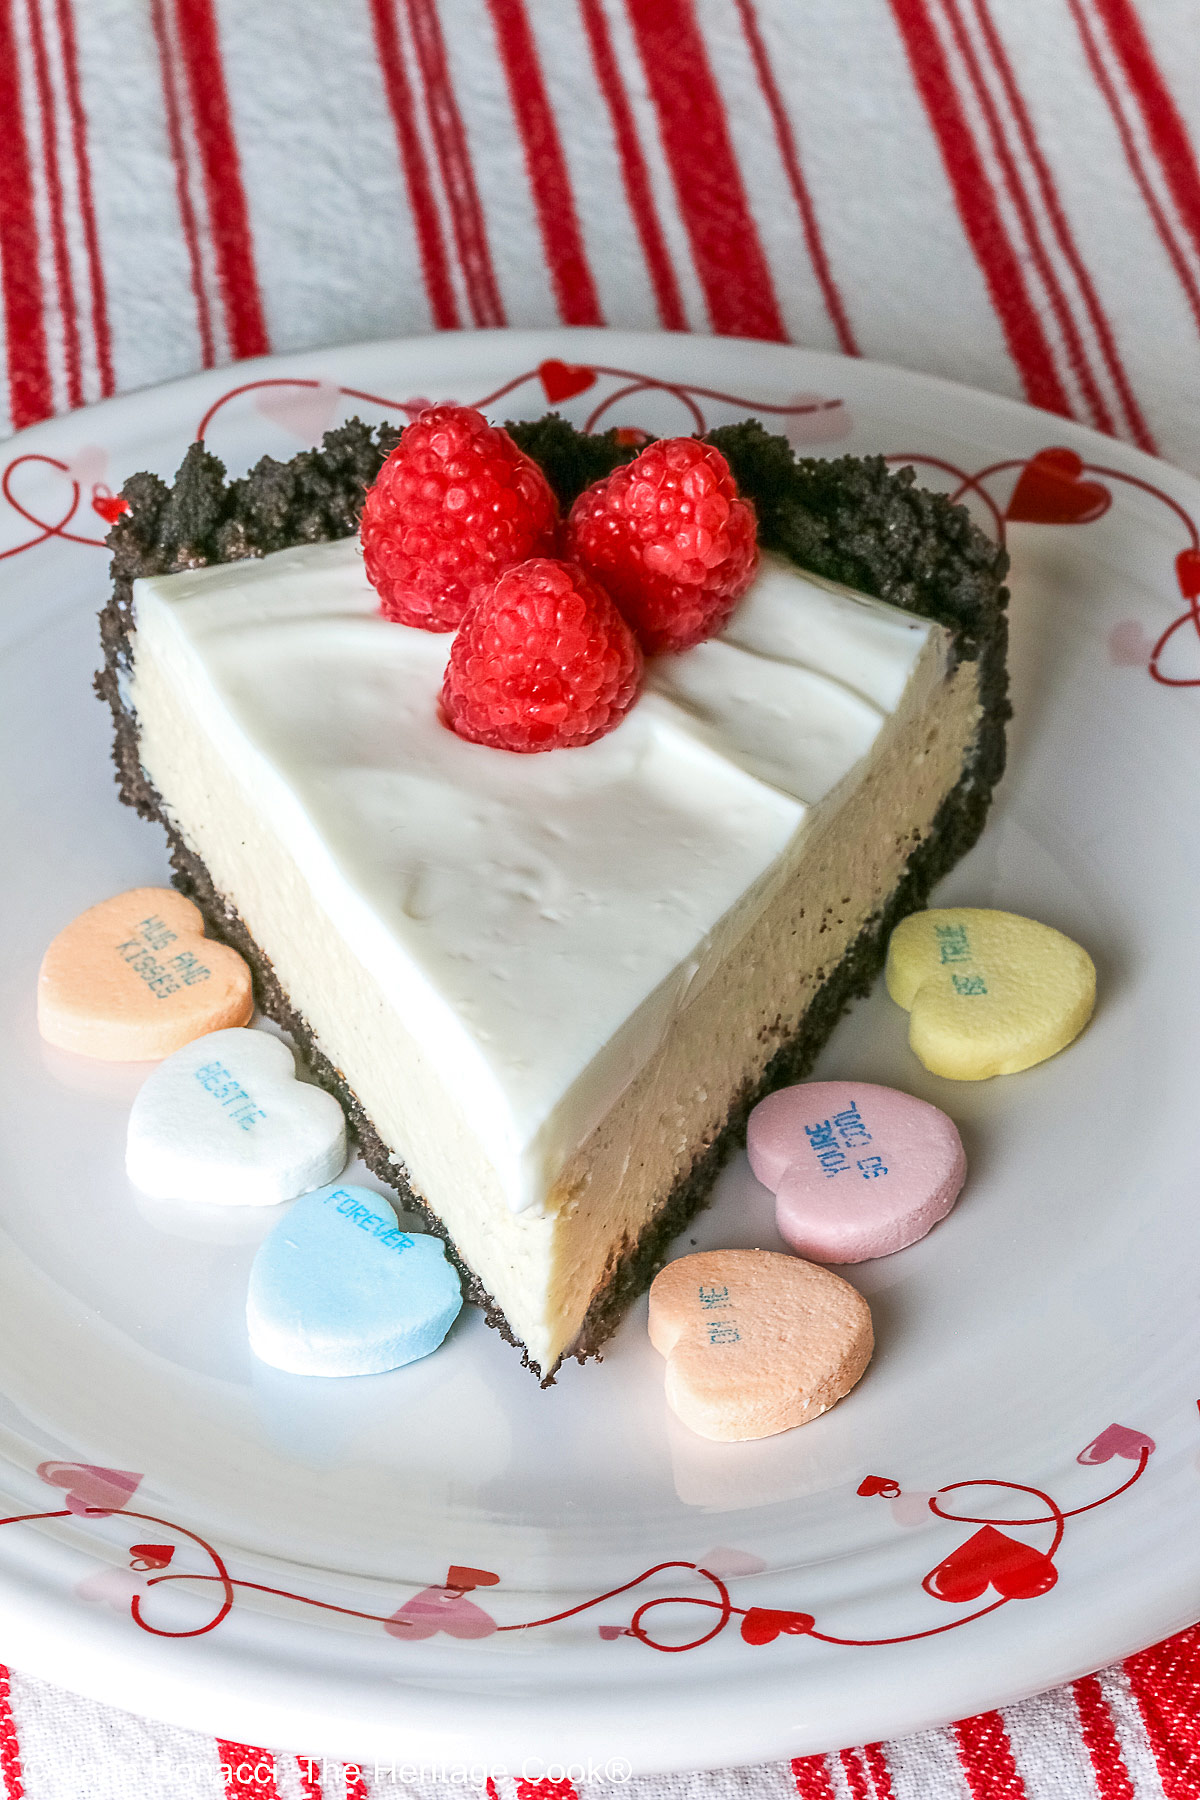
I love my Valentine’s Day plate!
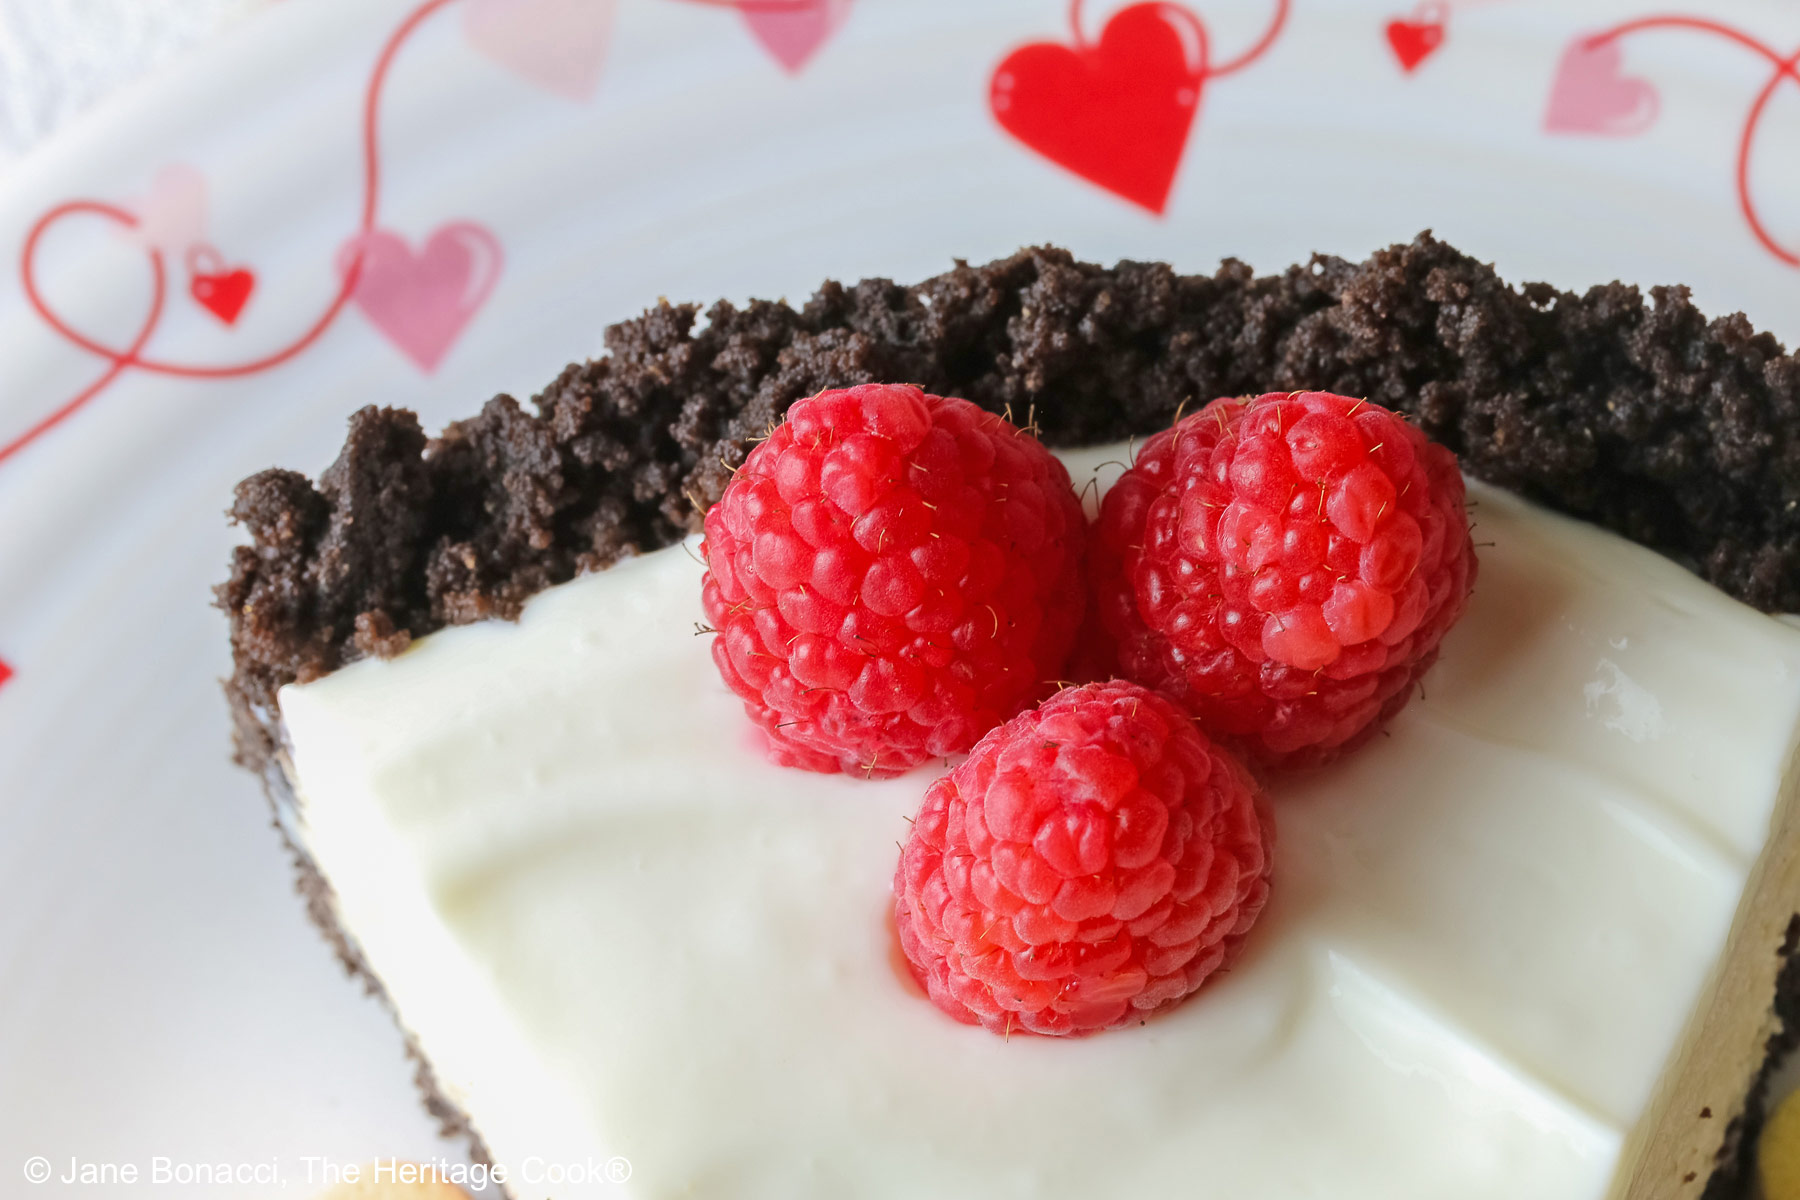
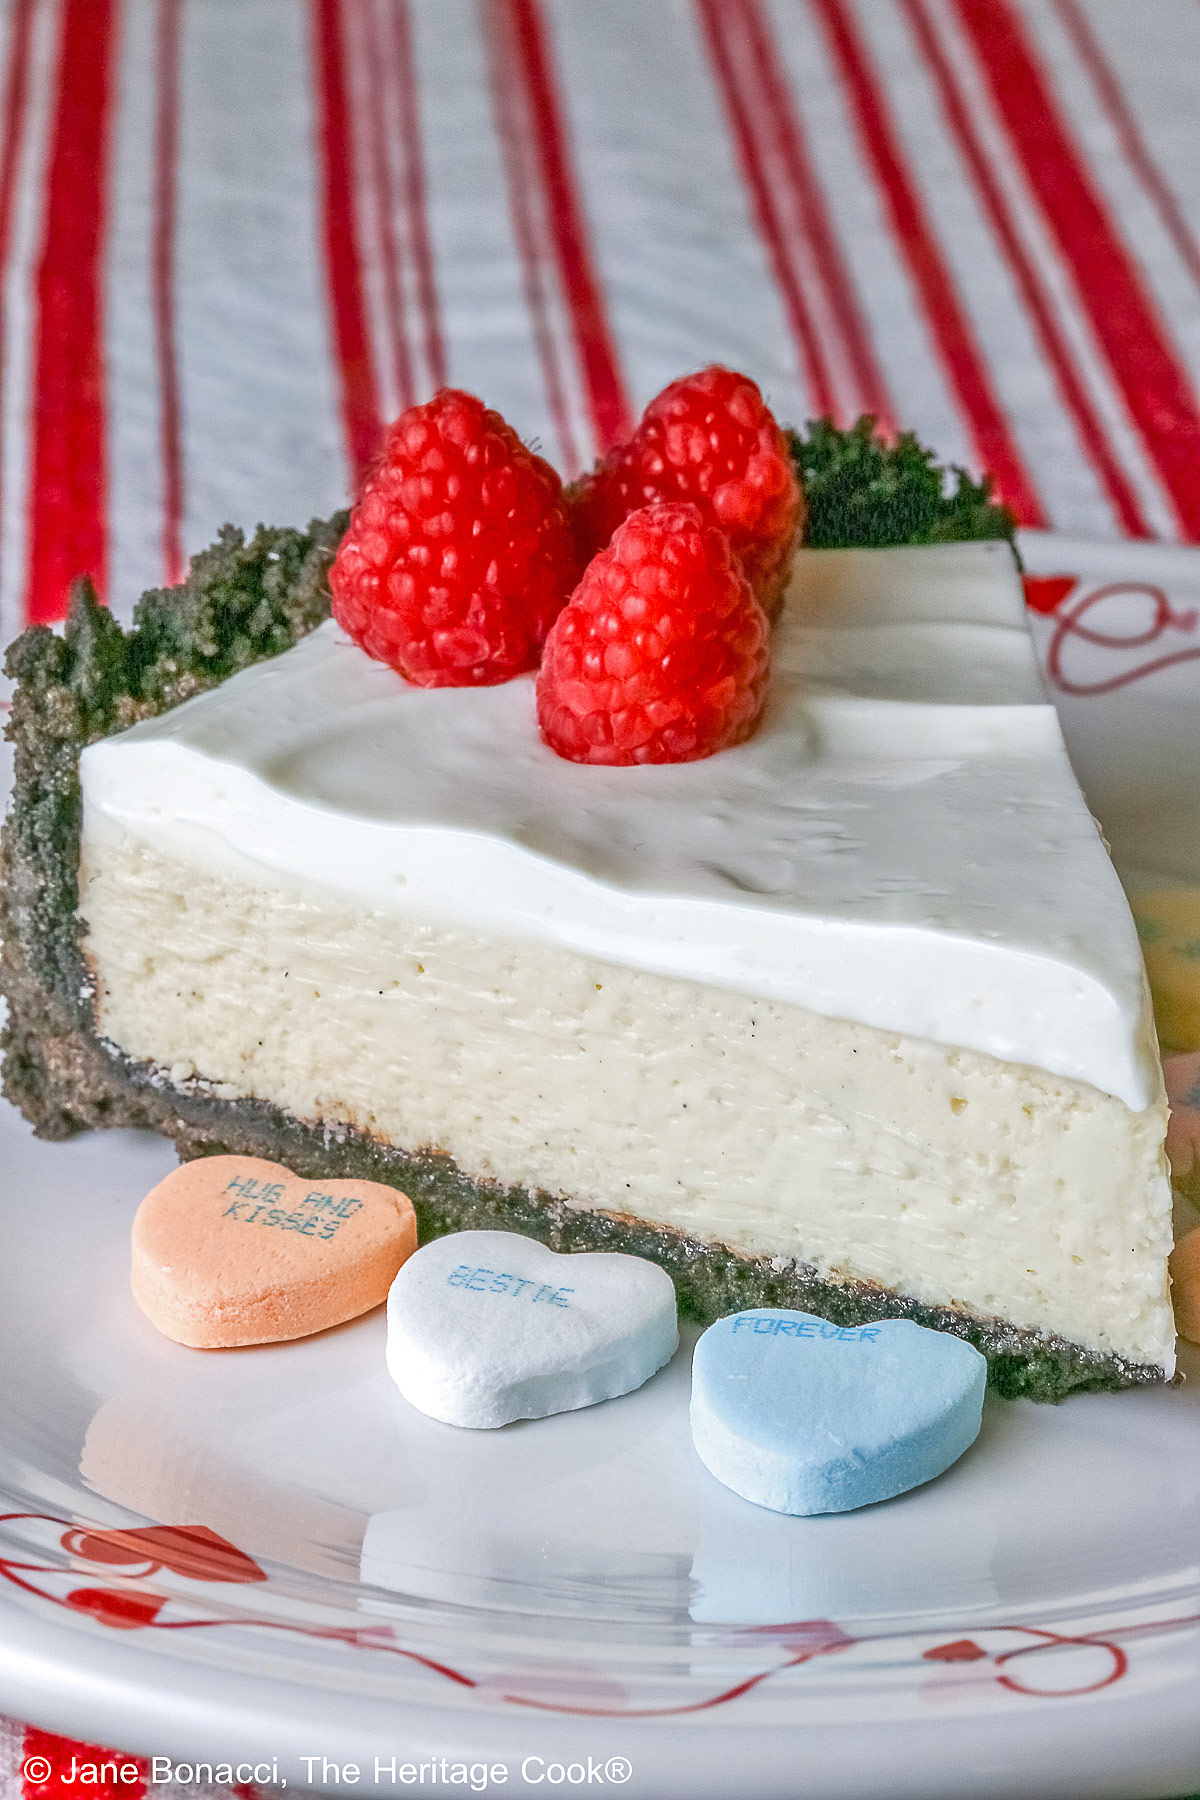
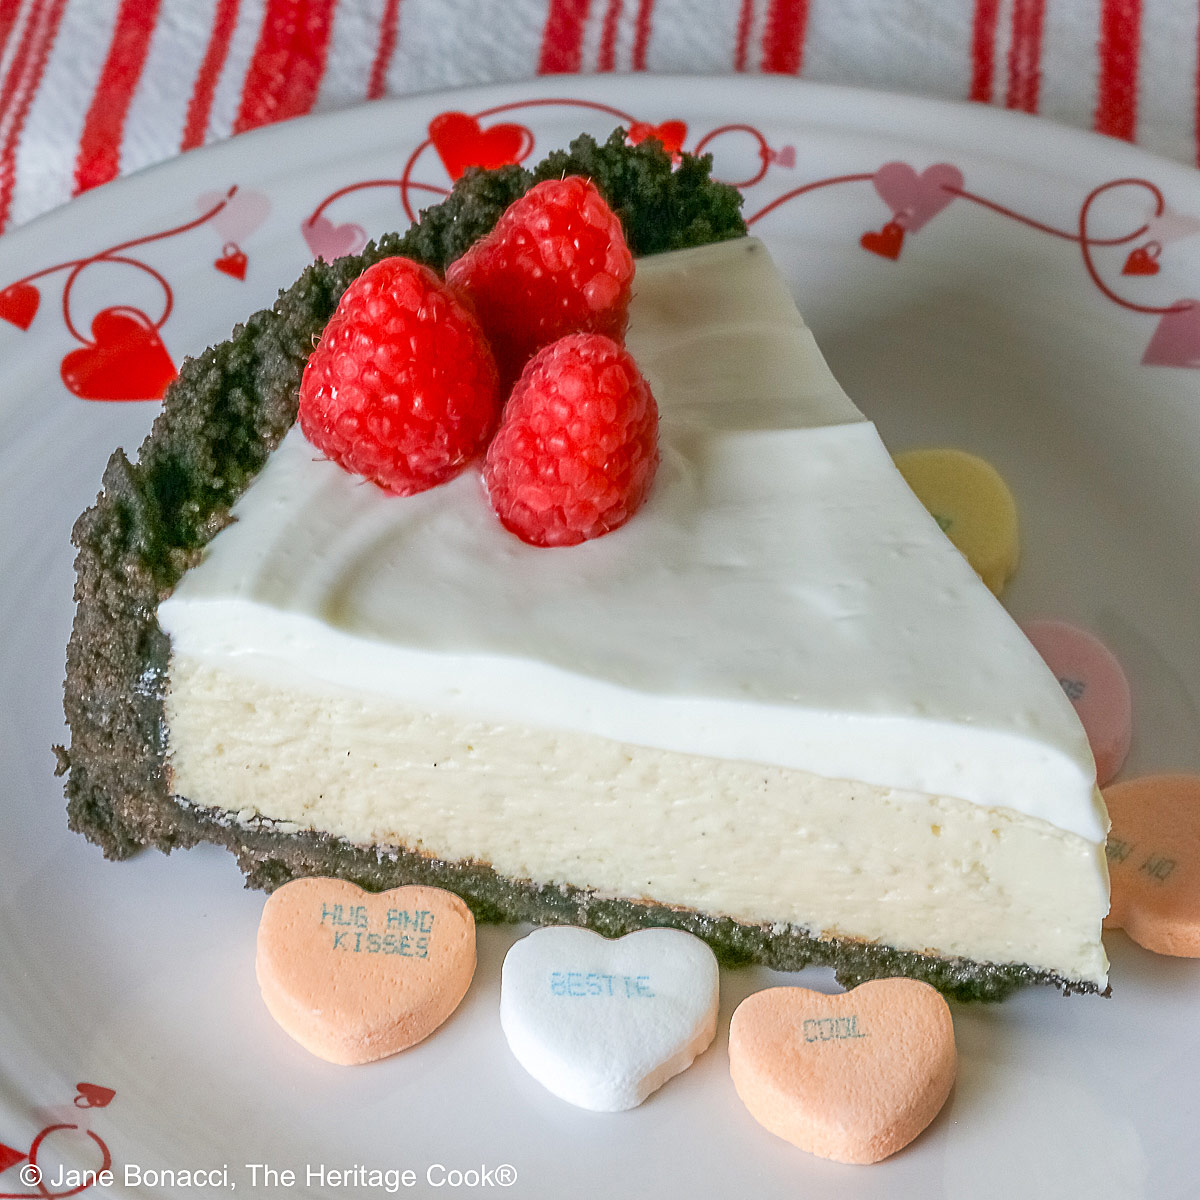
You will see that there are two layers of filling, the cheesecake itself and a sweetened sour cream layer on top. They are incredible together and one of my favorite additions to regular cheesecakes.
The sour cream layer helps hide any imperfections or cracks in ordinary cheesecakes. There was nothing to hide on this cake, I just love the flavor and texture it adds. This cheesecake is exceptionally light and creamy. Not a hint of heaviness anywhere. Just pure delight in every single bite!
I really hope you give this egg free cheesecake a try. It is a lovely way to celebrate Valentine’s Day or any special occasion. And because there are no eggs, it is safe for everyone with egg sensitivities! Feel free to add a sauce over the top if you like – pie fillings are an easy option.
Have a lovely Valentine’s Day! Hope it is a wonderful day filled with joyful laughter! See you here on Friday for another delicious savory offering. Happy Chocolate Monday!!
If you try this recipe, let me know! Please leave a star rating in the recipe card, comment below, and don’t forget to snap a pic and tag it @theheritagecook on Instagram! Seeing your creations makes my day and I love hearing from you!
Ingredients needed for Egg Free Cheesecake with Oreo Crust:
- Crust: Gluten free Oreo cookies, melted butter
- Cheesecake: Cornstarch, milk, cream cheese, sour cream, sweetened condensed milk, fresh lemon juice, vanilla
- Sour Cream Topping: Sour cream, powdered sugar, vanilla
PRO Tip:
If you don’t have a food processor, you can put the cookies in a resealable plastic bag and roll over them with a rolling pin. Be sure you press down firmly as you roll so you get all the cookies broken up and pulverized. Sort through the crumbs and set any large pieces aside and roll them separately then add them to the other crumbs.
How to make Egg Free Cheesecake with Oreo Crust:
- Prep the Springform Pan: Spray the inside of the pan with baking spray (no flour if gluten-free), then line the bottom and sides with parchment; set aside.
- Make the Crust: Pulverize the Oreo cookies in a food processor or in a plastic bag using a rolling pin. Pour in the melted butter and mix until fully incorporated. Pour into the prepared pan and press firmly to cover the bottom and up the sides of the pan. Chill while making the filling.
- Prepare the Cheesecake Filling: Mix the cornstarch with milk and set aside. Beat the cream cheese until light and smooth. Add the cornstarch mixture and remaining filling ingredients, mixing until blended and smooth.
- Bake the Cheesecake: Pour the filling into the cookie crust. Place the springform on a baking sheet pan and slide into a preheated 300°F (150°C) for 45 minutes. It will be firm and only lightly jiggle when you nudge it. Remove from the oven and place on a wire cooling rack to cool for 2 hours.
- Prepare the Sour Cream Topping: Place the sour cream in a small bowl and sift 1 tbsp sugar over the top. Whisk until smooth. Taste and add another tbsp sugar if desired. Spread over the cheesecake with an offset spatula. Cover the pan with plastic wrap without touching the surface and place in the refrigerator for at least 6 hours, preferably overnight to set completely.
- To Serve: Remove the ring from around the cheesecake and peel off the parchment. Transfer to a plate, platter, or cake stand. Use a hot knife to cut each slice, reheating the knife between every cut. Serve and enjoy!
PRO Tip:
You can mix the cheesecake filling with a whisk by hand, but I like how smooth an electric mixer (either stand or hand) gets the cream cheese. I love being able to walk away from my stand mixer and grab other ingredients as needed while it continues to mix.
Recommended Tools (affiliate links; no extra cost to you):
- Springform pan
- Parchment paper sheets and 9-inch (23cm)rounds
- Food processor
- Kitchen scale
- Small mixing bowl
- Stand mixer or hand mixer
- Paring knife
- Citrus reamer
Gluten-Free Tips:
Be sure you use gluten-free Oreo cookies or chocolate sandwich cookies. I like Glutino brand or Oreo’s gluten-free version.
* My preferred brand of kosher salt is from Diamond Crystal. If you use Morton’s or another brand you will likely not need as much because they are saltier.
You will get the best and most consistent results by using a digital kitchen scale and weighing your ingredients, especially when you are baking. And use grams, they are much more accurate than pounds and ounces.
All recommended ingredients are gluten-free as of the writing of this article. Always check to be sure the products haven’t changed and are still safe to consume.
Egg Free Cheesecake with Oreo Crust (GF)

Cheesecake is my favorite dessert. I’m always dreaming of rich, creamy goodness in every bite. Today’s Egg-Free Cheesecake with Oreo Crust is delightful and perfect for Valentine’s Day or any other special occasions or holidays!
Ingredients
Crust
- About 30 whole Oreo cookies
- 5 tbsp butter, sliced then melted
Cheesecake
- 1 tbsp cornstarch
- 2 tbsp cold milk
- 16 oz (2 blocks; 454g) cream cheese, softened (not low fat!)
- 1/2 cup (113g) sour cream, do not use low fat!
- 1 (14 oz can; 396g) sweetened condensed milk
- 1 tbsp freshly squeezed lemon juice
- 1 tbsp vanilla paste or extract
Sour Cream Topping
- 1/2 cup (113g) sour cream, at room temperature, do not use low fat!
- 1 to 2 tbsp sifted powdered sugar
- 2 tsp vanilla paste or extract
Instructions
1. Preheat the oven to 300°F (150°C).
2. Prepare the Springform Pan: Working with your 8 or 9-inch (20 or 23 cm) springform pan, spray the base and sides of the springform pan with non-stick spray (without flour!) and then line the bottom with parchment paper circle. Cut strips of parchment paper and line the sides of the springform pan.
3. Make the Crust: Place the cookies (with the centers included) into your food processor and pulse into crumbs. Pour in the melted butter and process again until the butter is completely incorporated and distributed throughout the crumbs.
4. Pour the crumbs into your prepared springform pan and use a spatula to move the crumbs up the sides of the dish. Then use the bottom of a glass or a measuring cup to press the crumbs and pack them in more tightly for the crust. Place into the refrigerator to chill while you make the filling.
5. Prepare the Cheesecake Filling: In a small bowl, whisk together the cornstarch and milk until smooth. Set aside. Add the cream cheese to your stand mixer and mix until smooth. Re-stir the cornstarch mixture and add it with the sour cream, sweetened condensed milk, lemon juice, and vanilla extract to the stand mixer and mix until smooth.
6. Pour the filling into the cookie crust and smooth the top. Place your springform pan on top of a baking tray and slide into the oven and bake at 300°F (150°C) for 45 minutes. It will feel solid and not quiver much when nudged. Remove from the oven and leave to cool on the baking sheet on a wire rack for 2 hours.
7. Make the Sour Cream Topping: When the cheesecake has cooled, place the sour cream in a bowl and sift 1 tbsp of the powdered sugar over the top. Whisk together until smooth. Whisk in the vanilla. Taste and add the second tablespoon if desired.
8. Using an offset spatula, spread the sour cream topping evenly over the cheesecake. Cover the pan with plastic wrap or foil without touching the surface of the cake. Place the cheesecake (still in the springform pan) in the refrigerator to set for at least 6 hours or preferably overnight.
9. Make Ahead: This is the perfect dessert to make ahead of time as it is best to make it the day before and let it set overnight.
10. To Serve: Release the latch on the pan and carefully lift off the ring and remove the parchment, then transfer the cheesecake to a platter or cake stand. To cut perfectly neat, clean slices, heat your knife by running it under hot water and then wiping it dry. Slice and then run the knife under the hot water and dry it off again before the next slice. Repeat for each slice. Keep your cheesecake stored in the fridge (covered) and enjoy it within 5 days.
Recipe found at www.theheritagecook.com
Notes
Be sure you use gluten-free Oreo cookies or chocolate sandwich cookies. I like Glutino brand or Oreo’s gluten-free version.
You will get the best and most consistent results by using a digital kitchen scale and weighing your ingredients, especially when you are baking. And use grams, they are much more accurate than pounds and ounces.
All recommended ingredients are gluten-free as of the writing of this article. Always check to be sure the products haven’t changed and are still safe to consume.
Adapted from Alison of Gimme That Flavor
Nutrition Information:
Yield:
12Serving Size:
1Amount Per Serving: Calories: 273Total Fat: 22gSaturated Fat: 13gUnsaturated Fat: 9gCholesterol: 64mgSodium: 167mgCarbohydrates: 16gFiber: 0gSugar: 14gProtein: 3g
The nutritional information for recipes on this site is calculated by online tools and is merely an estimate. If you need nutritional calculations for medical reasons, please use a source that you trust.
If you enjoyed this recipe, be sure to follow me on social media so you never miss a post:

Create a New Tradition Today!
Welcome! The suggestions here are not intended as dietary advice or as a substitute for consulting a dietician, physician, or other medical professional. Please see the Disclaimers/Privacy Policy page for additional details. Unauthorized use, distribution, and/or duplication of proprietary material from The Heritage Cook without prior approval is prohibited. If you have any questions or would like permission, please contact me. We participate in the Amazon Services LLC Associates Program, an affiliate advertising program designed to provide a means for sites to earn advertising fees by advertising and linking to amazon.com. As an Amazon Associate, I earn a small amount from qualifying purchases without any additional cost to you. This page may contain affiliate links. The author makes no claims regarding the presence of food allergens and disclaims all liability in connection with the use of this site.