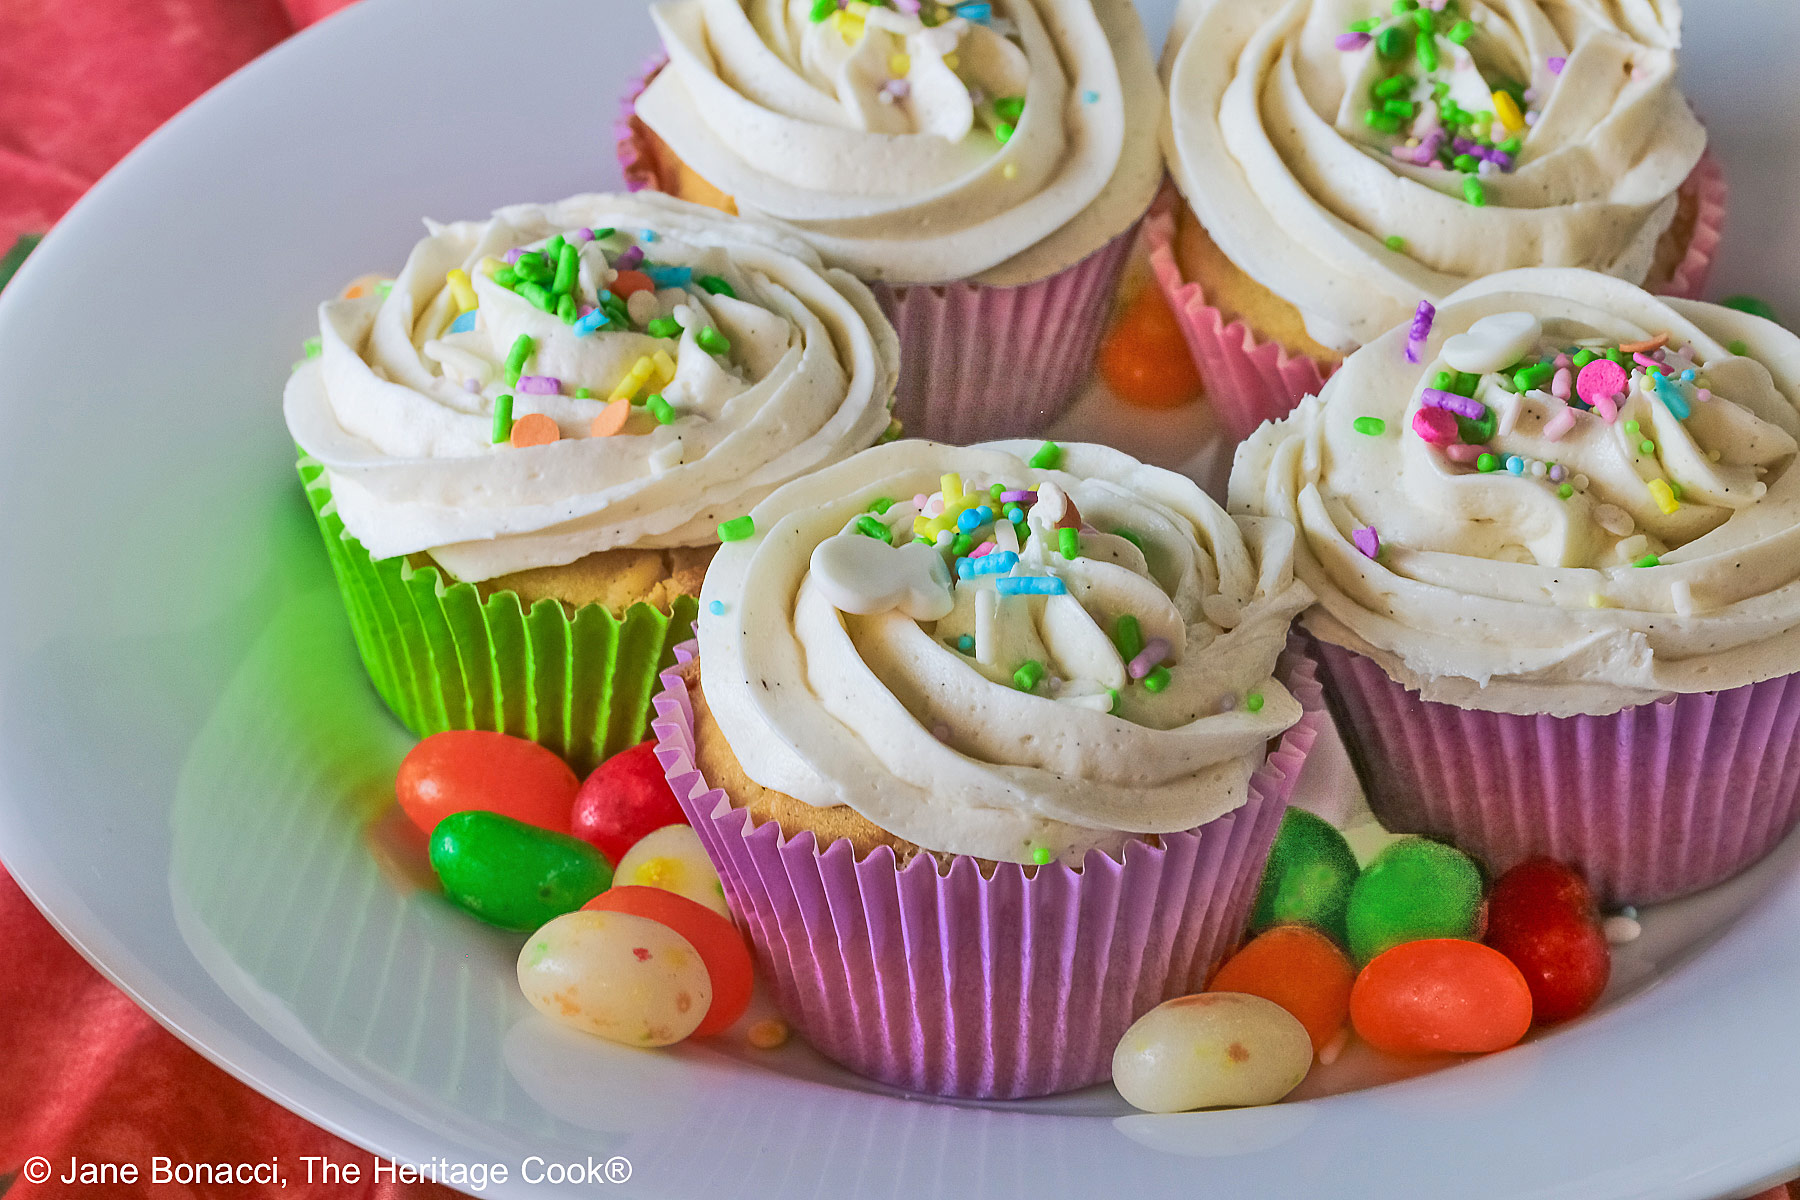
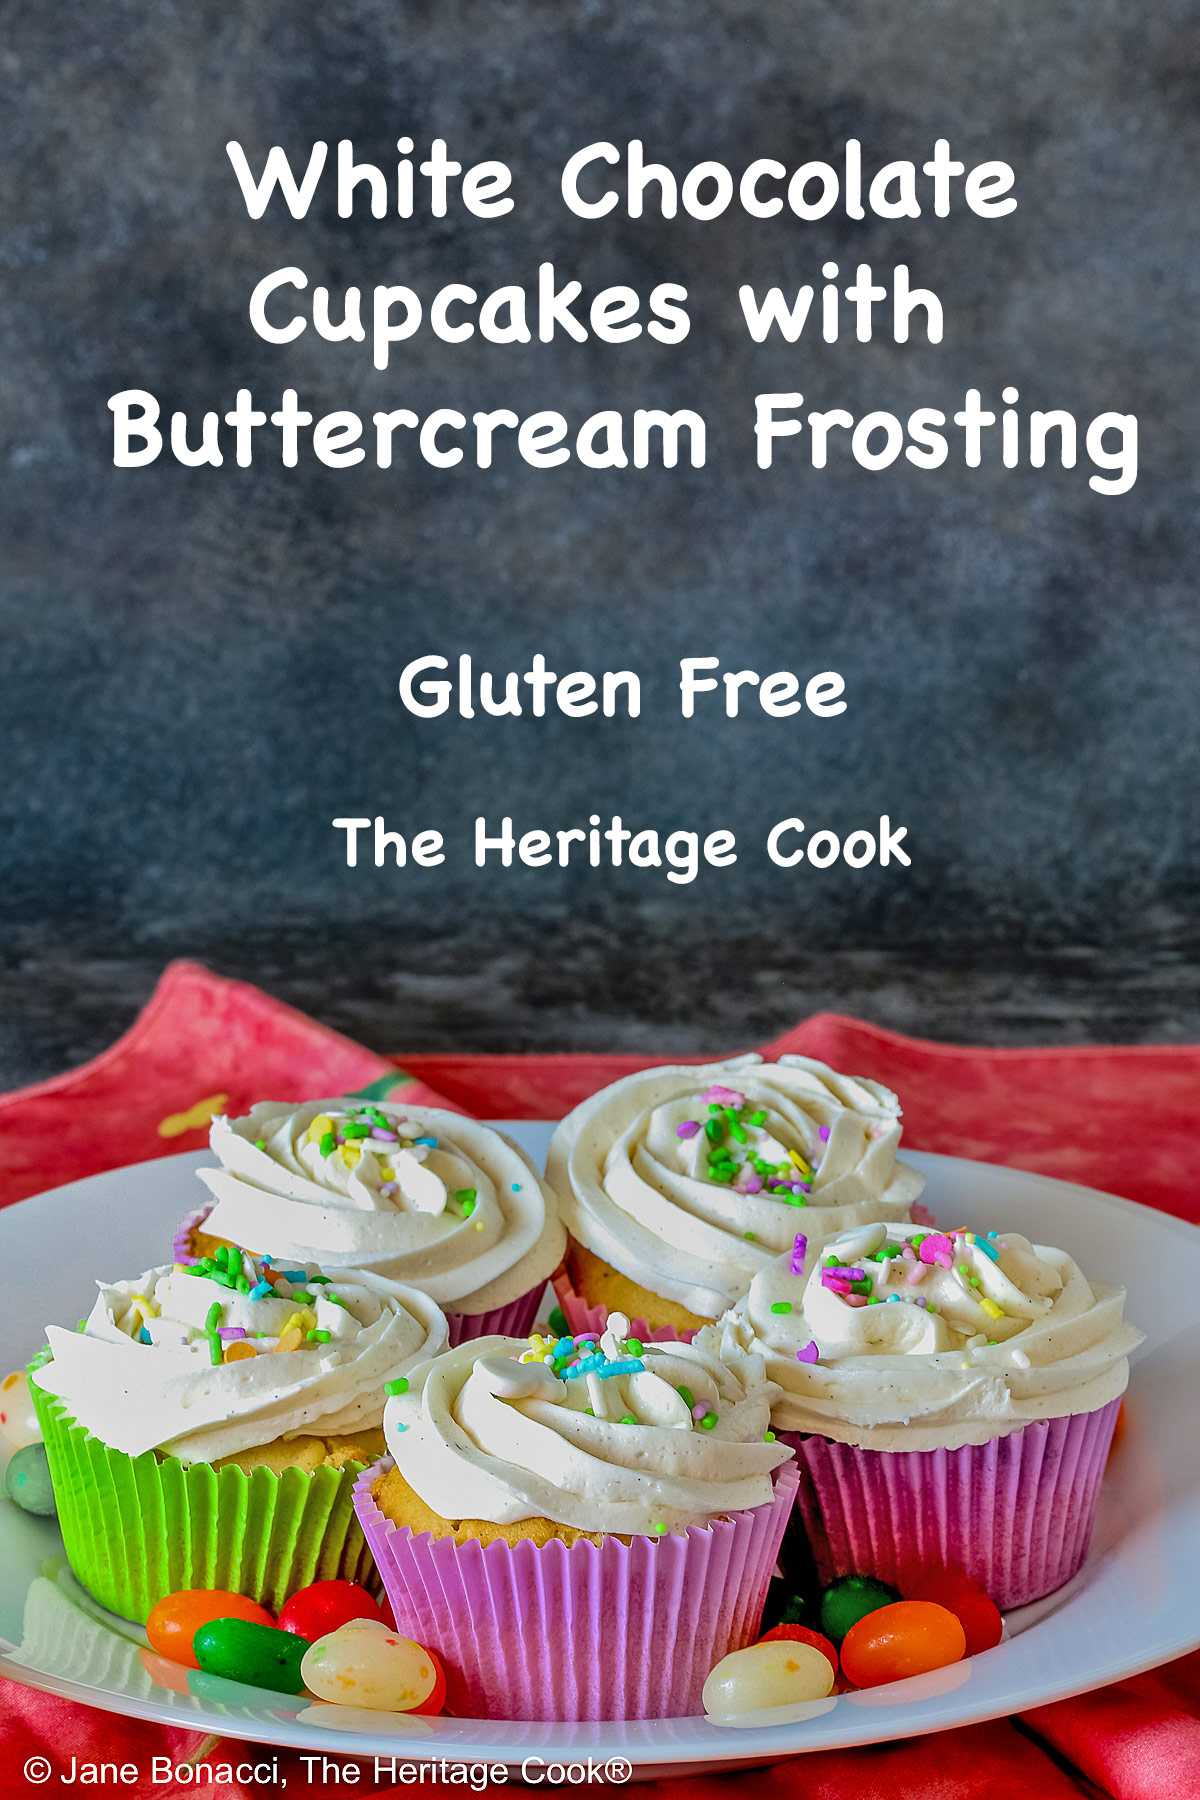
 Easter season is one of the most fun times for dessert making. All the pastel colors and the delight on your children’s faces when they see these beautiful White Chocolate Cupcakes with Buttercream Frosting decorated for Easter fill your heart. The children will be beaming!!
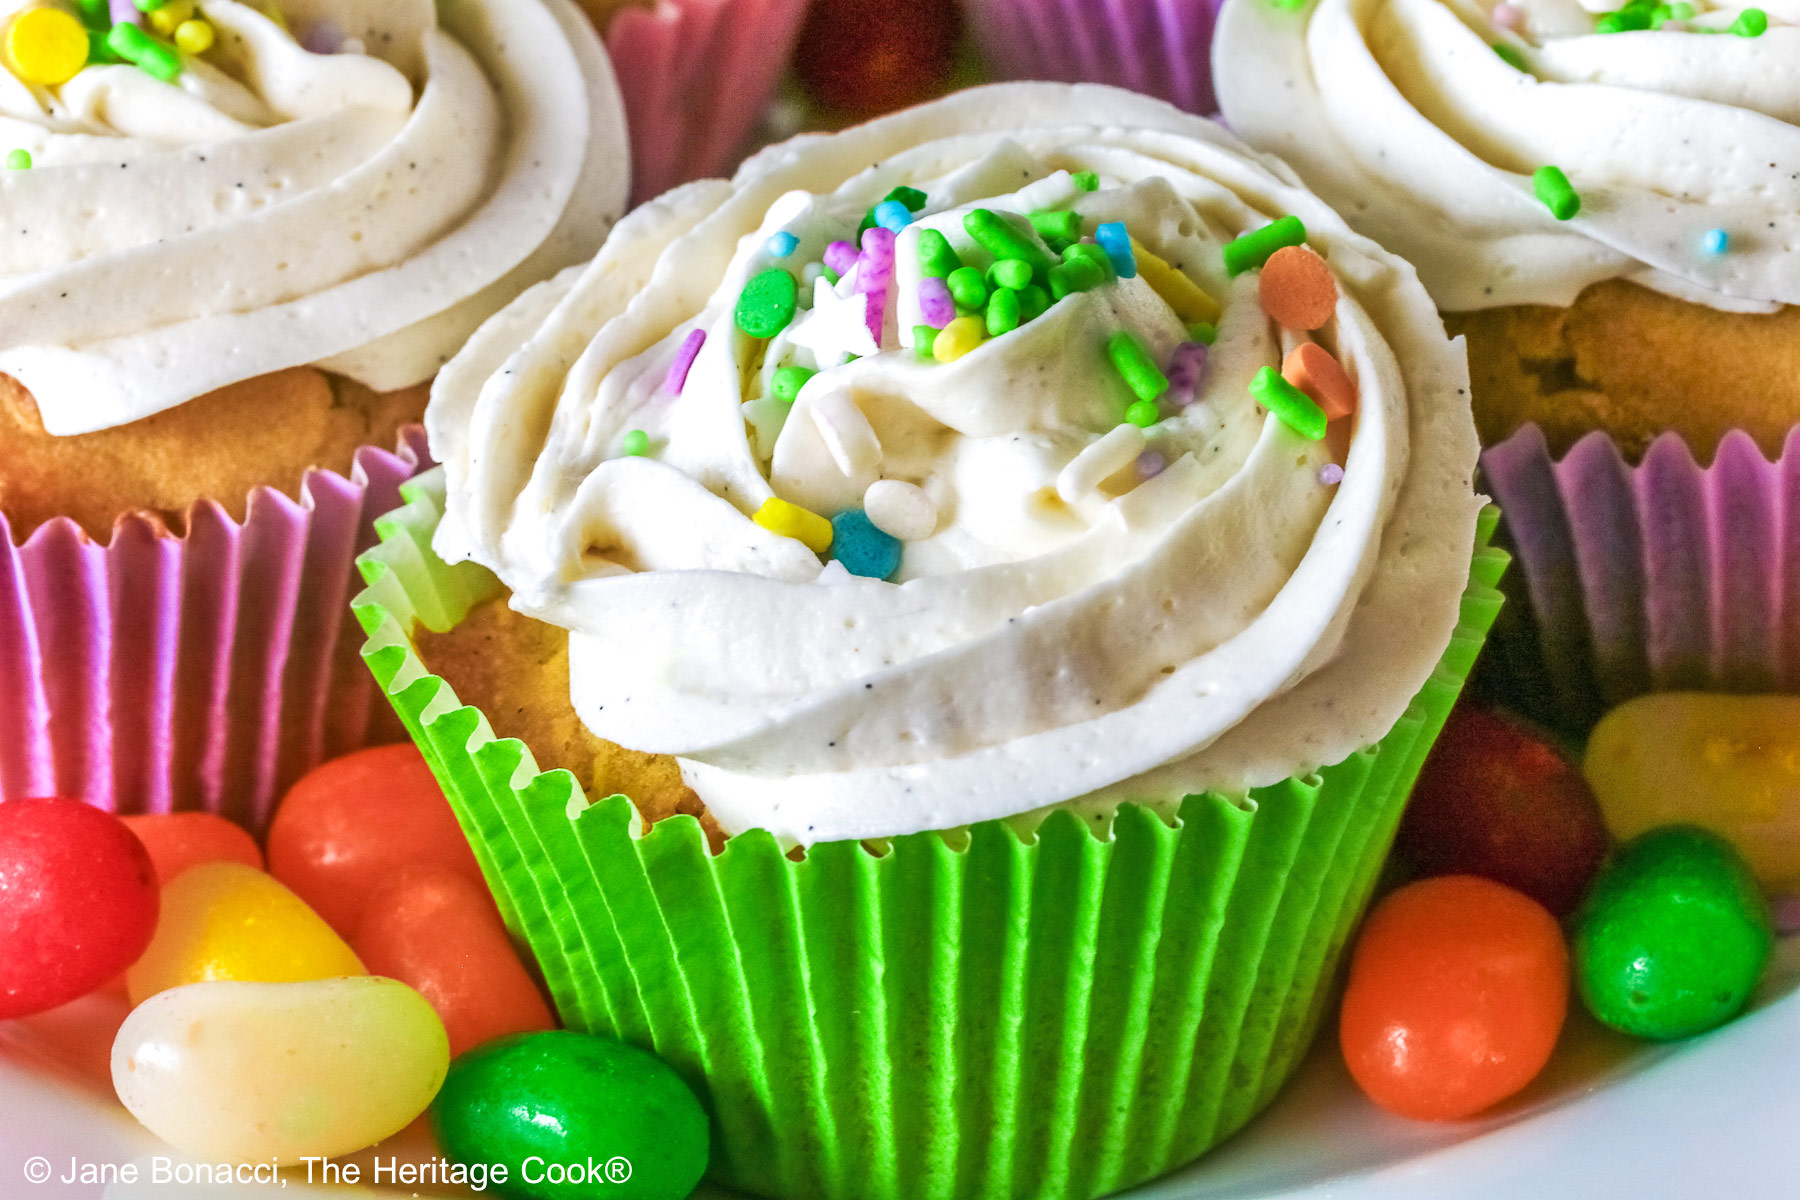
These cupcakes are luscious, rich tasting, and indulgent. Perfect for holidays or other special occasions. They would be lovely for baby or bridal showers, ladies luncheons, or kids birthday parties and of course for Easter!
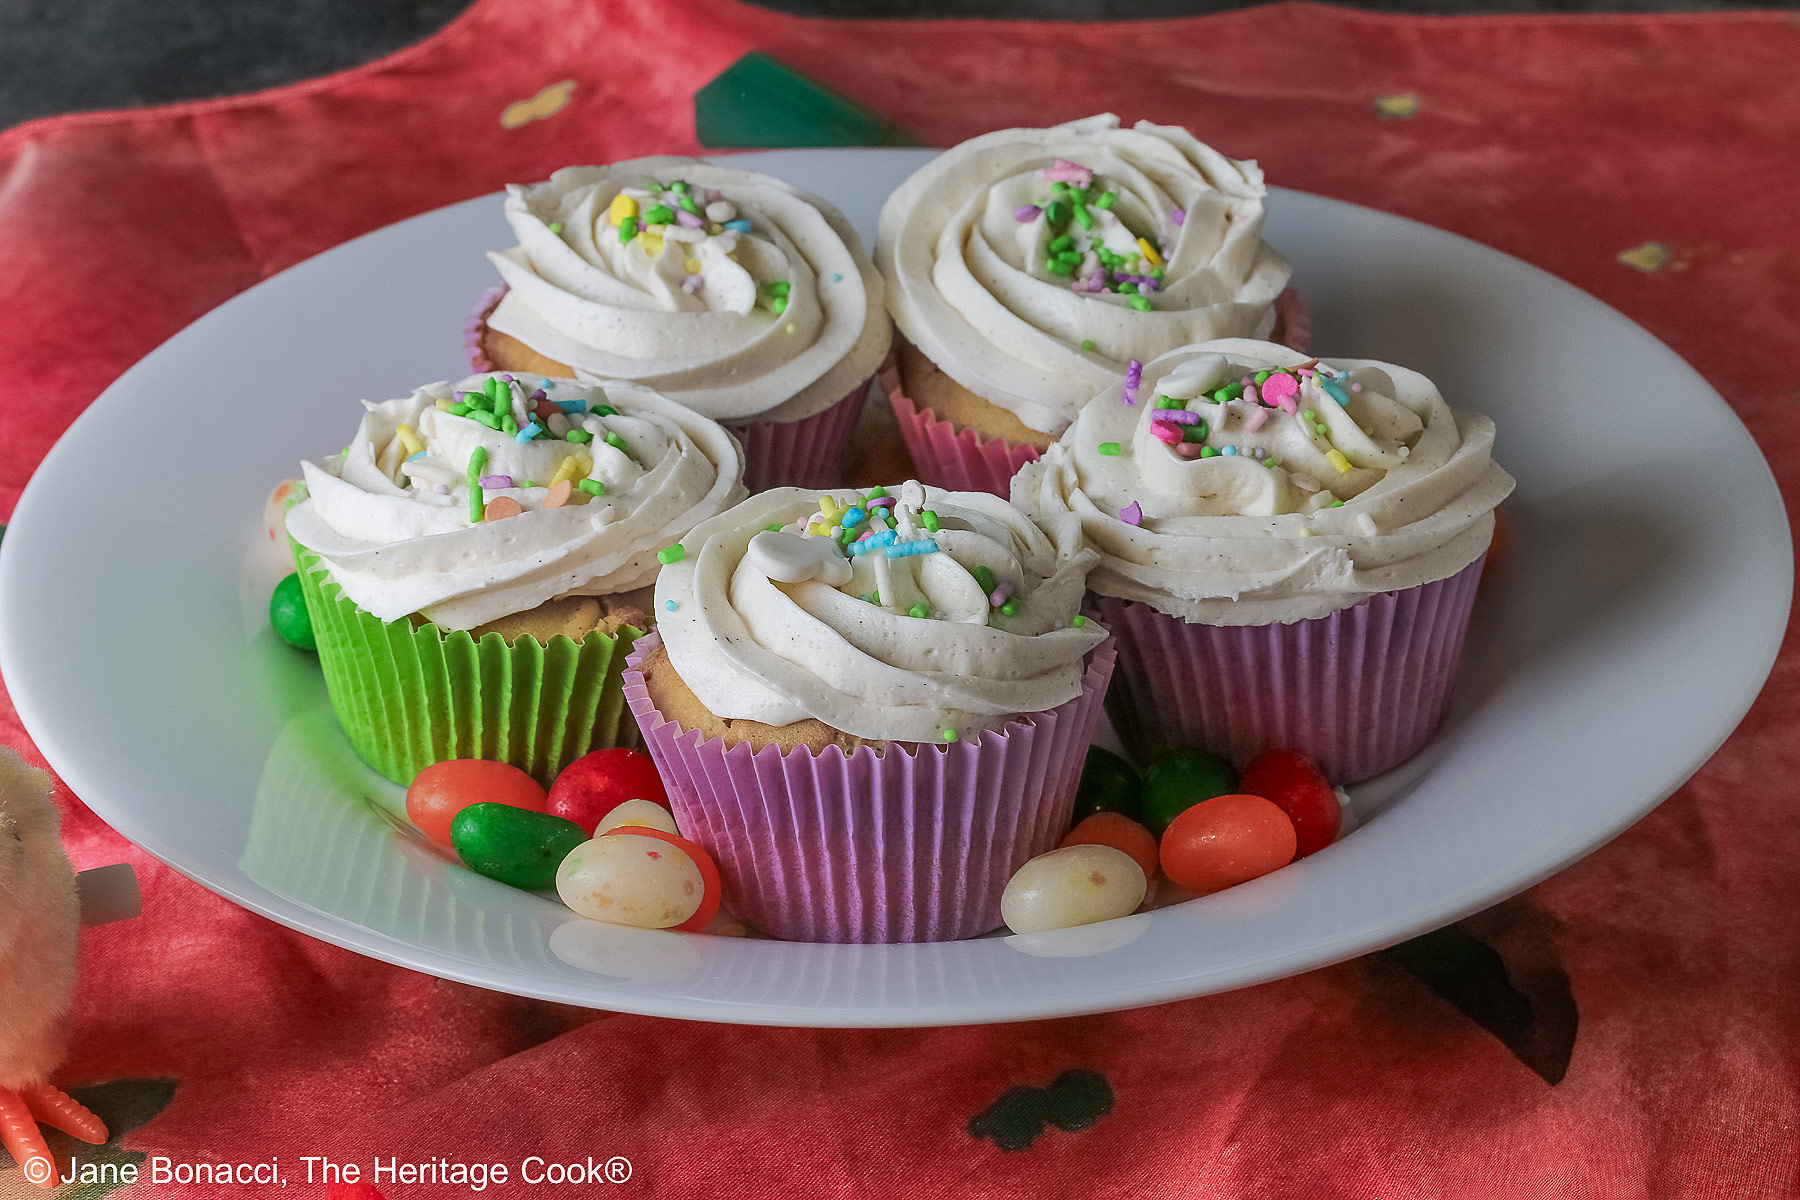
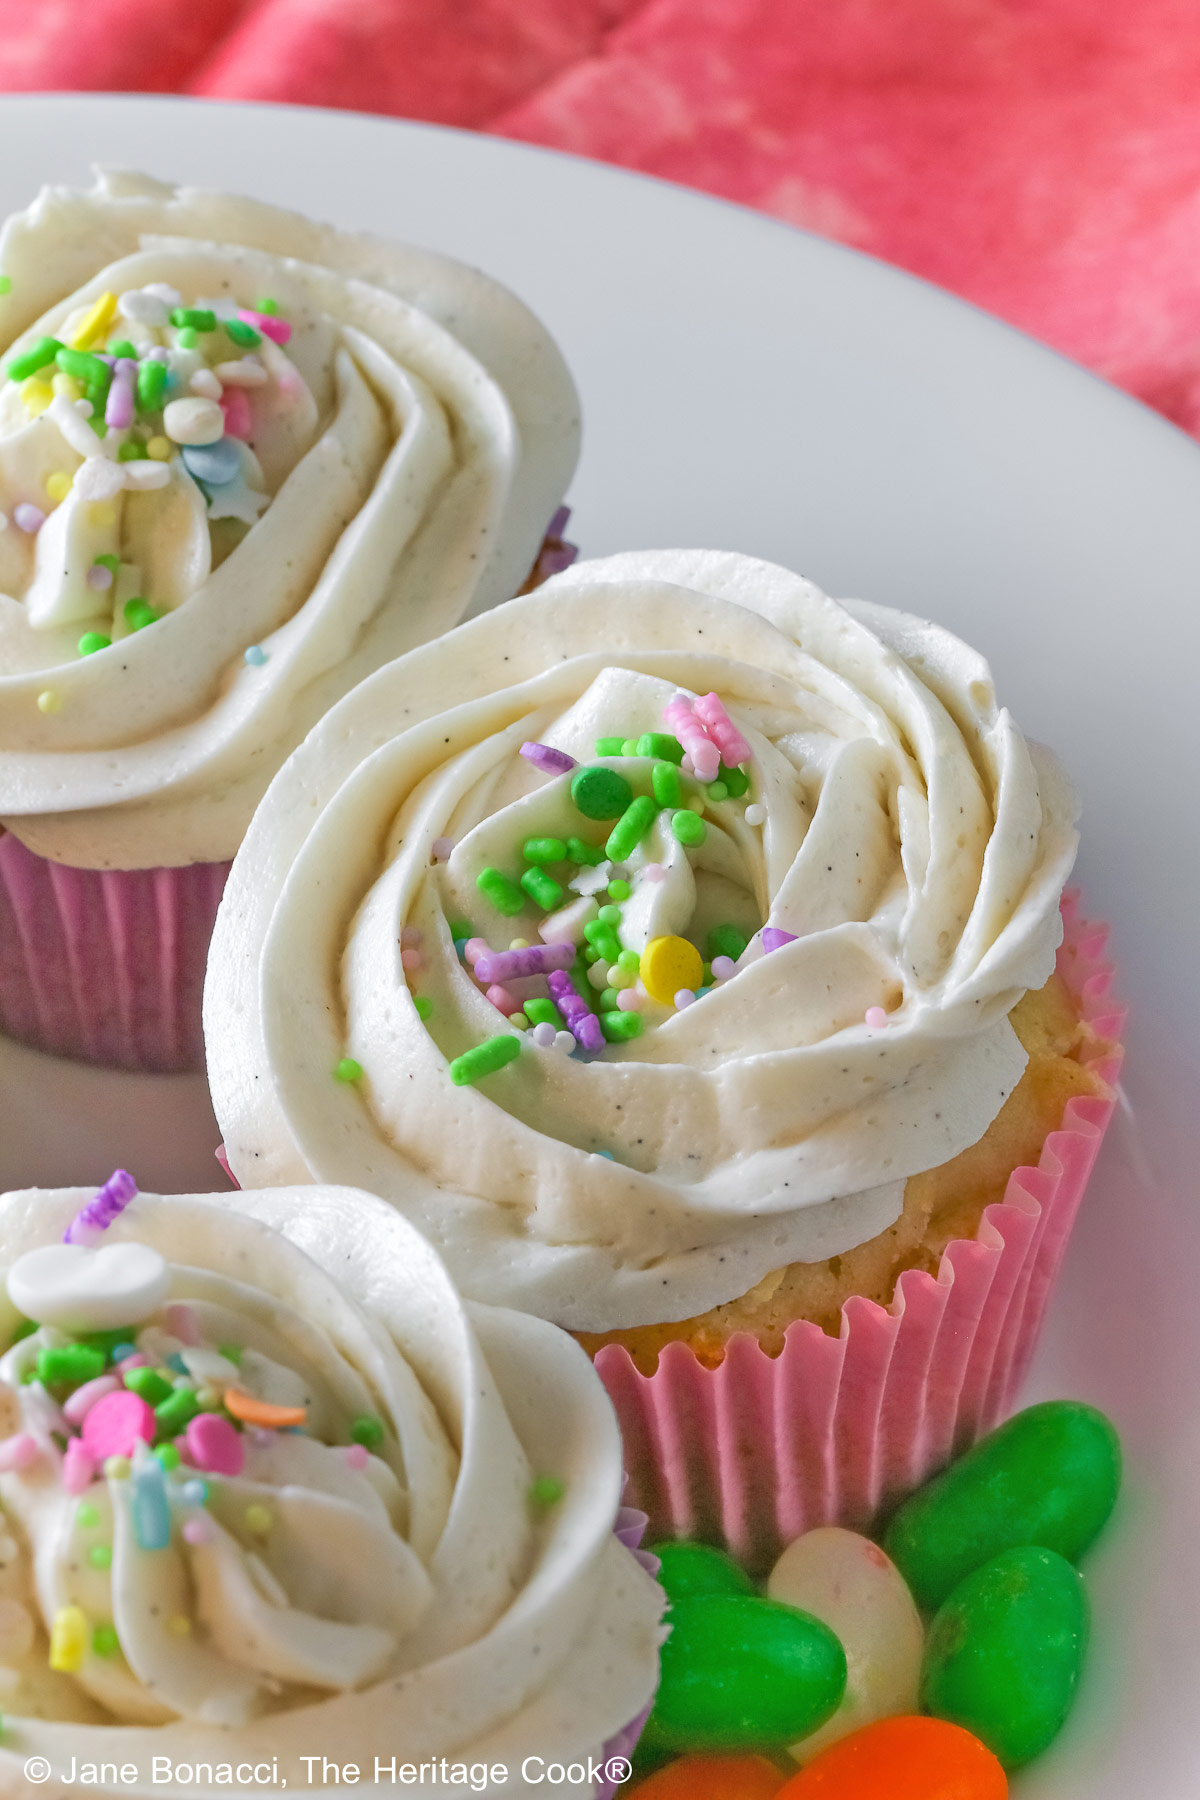
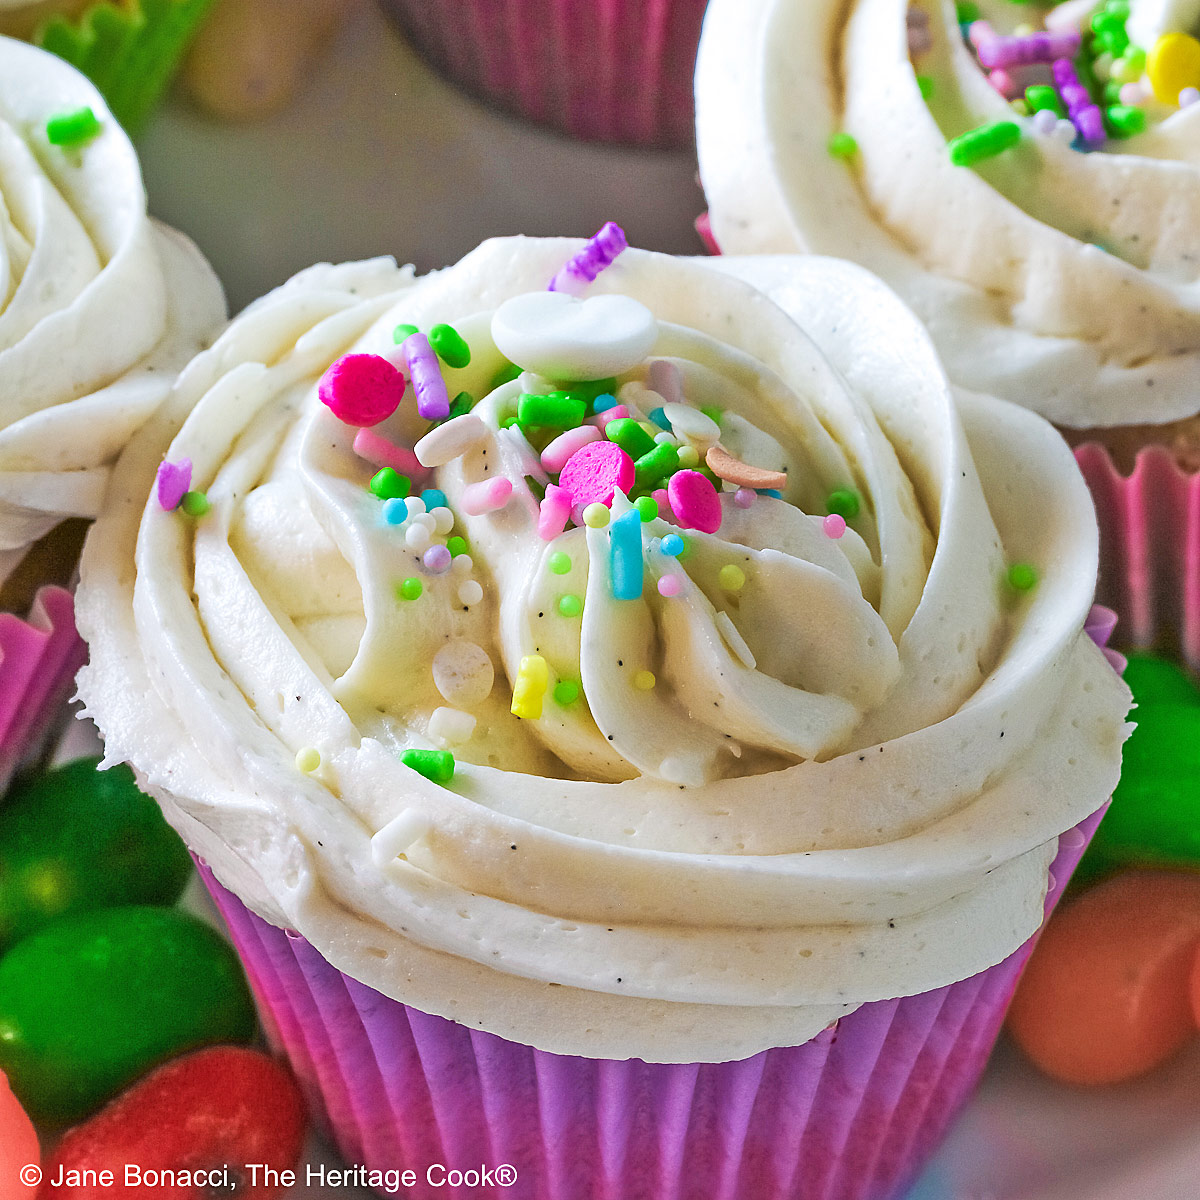
You can easily customize the colors and decorations to suit any occasion. Change the paper liners and add coloring to the frosting if you like. And of course there are tons of specialty sprinkles available for sale. These are not very sweet cupcakes so the white chocolate balances it beautifully and the frosting takes it to another level!
Be sure to use mini white chocolate chips if at all possible. They tend to melt into the cupcakes so there aren’t big bites of white chocolate, just delicate, lovely cupcakes. If you can’t find the mini version, you can chop the larger ones with a chef’s knife to break them up.
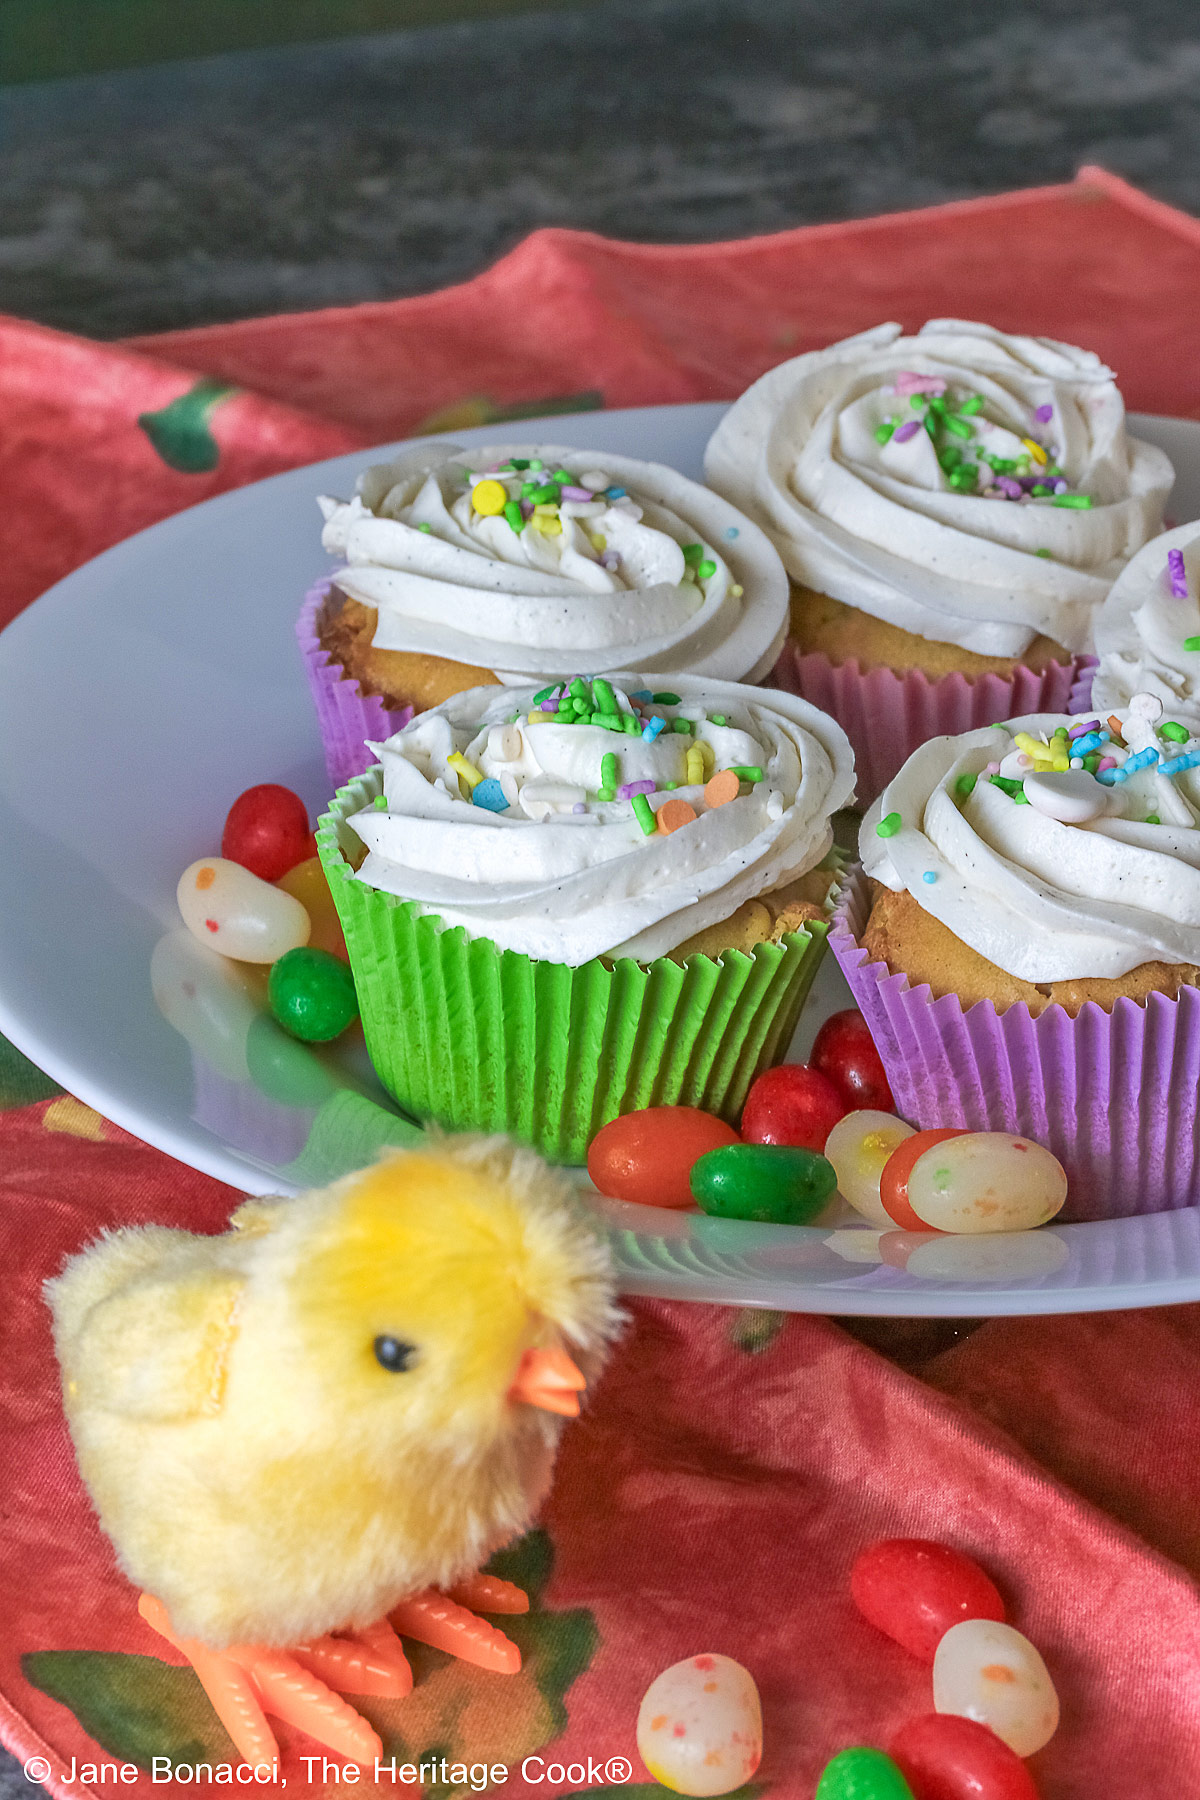
For this Easter display I chose pastel colors to create the color palette I love. Springtime makes me think of the flowers that are arriving and the beautiful mixed bouquets we put together, blending colors, textures, and aromas.
Cupcakes are the perfect dessert. Just the right size and they satisfy your sweet cravings with smaller bites. Natural portion control! Even if you’re on a diet, you can splurge on just one and not feel guilty.
If you don’t already have one, you should consider buying a cupcake pan with a tall lid on it to hold your frosted cupcakes for travel and storage. They really are a lifesaver and last for many years. Be sure you get a locking lid so it doesn’t pop open at an inopportune time!
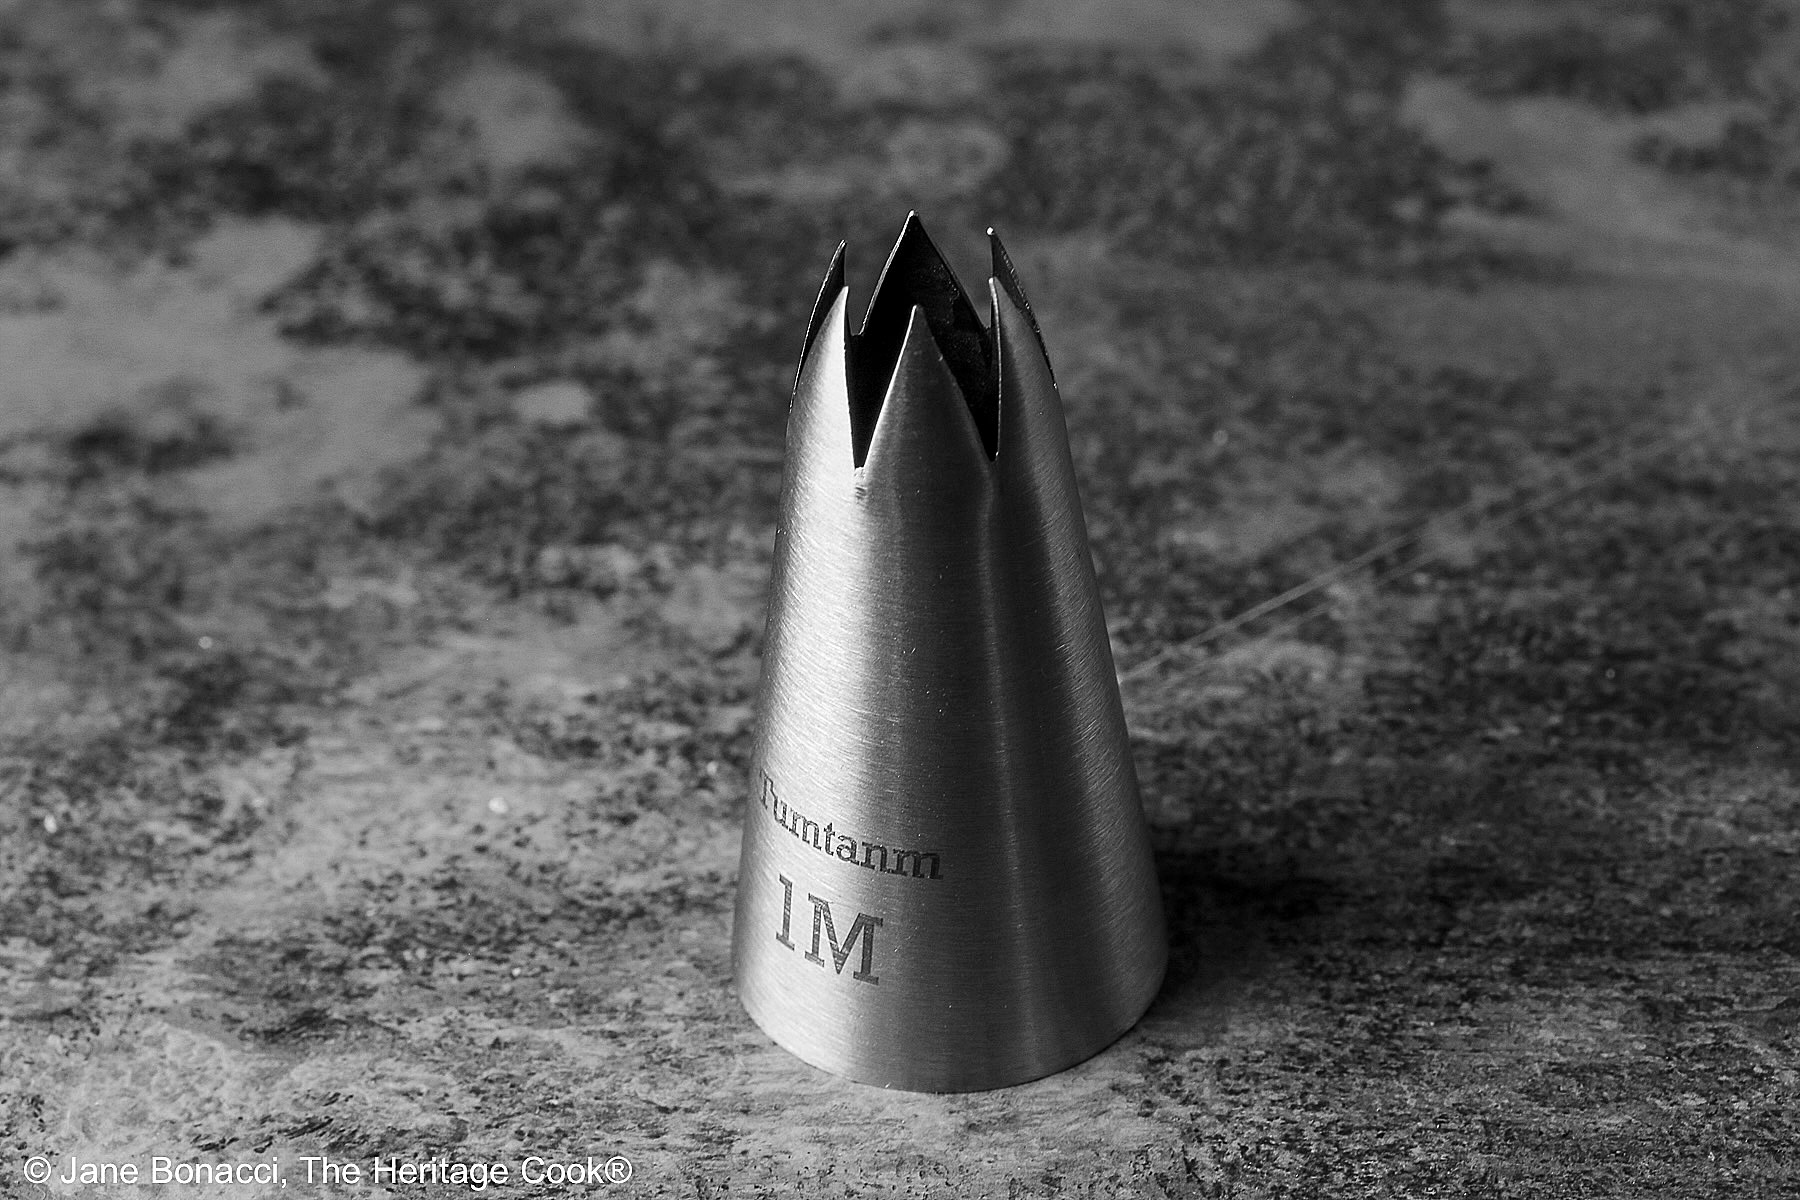
If you want to be able to make professional looking cupcakes with swirly frosting you need to use large or extra large piping tips. My favorite is the 1M – see below – (you can find it online or at Michael’s or another craft store) which gives you a ruffled look as the frosting comes out. Really lovely.
When you are baking cupcakes and don’t have enough batter to fill all the cups, add 1 to 2 tbsp water to the empty ones. This balances the heat in the pans helping your cupcakes bake more evenly.
Another trick is to sprinkle some raw rice in the bottom of the cupcake cups before adding the paper liners. This helps absorb moisture from the bottom of the liners so you don’t wind up with damp cupcake bottoms.
I learned both of these tricks from my grandmother Mimi when I was a tiny child. It was the beginning of my passion for baking and cooking!
Mimi made everything from scratch and scoffed at using a mix. She taught me how to measure small amounts of ingredients in the palm of my hand so I wouldn’t need to pull out the measuring spoons every time. She made cinnamon rolls and twists by hand – no mixer! I am still amazed at her arm strength. And we got to make pulled taffy with her. She was always my idol in the kitchen.
She was equally as gifted at cooking as she was at baking and candy making. No one could match her chicken and dumplings! She made her stock with a whole chicken, getting extra flavor from the carcass. And her dumplings (like square noodles) were as light as air. My mom tried for years to duplicate them and while good, they never matched Mimi’s. What an inspiration.
I hope you make these White Chocolate Cupcakes with Buttercream Frosting for your Easter dessert or any time of the year! They are completely customizable, from the additions (switch to milk chocolate chips if wanted or leave them out entirely), to the colors (you can use food coloring), and the decorations. These cupcakes fit any occasion!
If you try this recipe, let me know! Please leave a star rating in the recipe card, comment below, and don’t forget to snap a pic and tag it @theheritagecook on Instagram! Seeing your creations makes my day and I love hearing from you!
Ingredients needed for Easter White Chocolate Cupcakes:
- Cupcakes: flour, baking powder, xanthan gum (if needed), baking soda, salt, butter, sugar, egg whites, sour cream, vanilla, milk, mini white chocolate chips
- Buttercream Frosting: butter, confectioners’ sugar, cream or milk, vanilla, salt
PRO Tip:
For the neatest filling of the cupcake paper liners, there are two really good options … you can use a cookie scoop and only partially fill it so you don’t overfill the liners. For thinner batters, you can ladle the batter into a pitcher or measuring cup with a spout and pour it into the liners. Both ways are neat and tidy with very little spillage or drips.
PRO Tip:
Try to make all the cupcakes the same size so they all bake at the same rate. Some of mine were much smaller and some larger making it difficult to judge when they were done.
How to make Easter White Chocolate Cupcakes:
- Make the Cupcakes: Set out the ingredients that need to be at room temperature. Assemble all the equipment and ingredients you will need. Line 2 muffin tins with about 14 papers, staggered between the pans.
- Whisk together the flour, baking powder, baking soda, and salt. Set aside.
- Cream the butter and sugar for about 3 minutes, scrape the pan and add the egg whites and vanilla. Continue beating on high about 2 minutes.
- Mix in the sour cream then add half the dry ingredients, then add the milk and beat to combine. Add remaining dry ingredients, mixing until smooth. Scrape the bowl and stir in the white chocolate.
- Scoop the batter into the cupcake liners, filling only 2/3 full for perfectly domed cupcakes. Bake at 350°F (180°C) for 19 to 22 minutes or until a toothpick comes out clean. Set the pan on a wire rack and leave to cool about 20 minutes. The remove cupcakes from the pan and place on the wire rack to cool completely.
- Prepare the Frosting: Beat the butter on medium speed until creamy, about 2 minutes. Add the bulk of the powdered sugar, the cream, and vanilla. Sprinkle in a little kosher salt. Beat on low 30 seconds, then increase to medium-high and beat for 2 minutes. Add food coloring if using, mixing until evenly colored.
- Adjust the consistency of the frosting if needed. You want it creamy but hard to shake off a spoon held upside down over the bowl. Then you have the right consistency for piping!
PRO Tip:
Be sure to use mini white chocolate chips if you can find them (I get mine at Whole Foods). Larger chips are very obvious in the cupcakes – the minis kind of disappear and you’re left with the flavor that makes these cupcakes so special without chunky, chewy pieces in every bite.
Recommended Tools (affiliate links; no extra cost to you):
Gluten-Free Tips:
* You can adjust any recipe to gluten-free by using 120 grams per cup of my favorite gluten-free flour blend. https://theheritagecook.com/gluten-free-3/gluten-free-flour-recipes/ If you are using another brand of gluten-free flour, whisk the mix, spoon it lightly into a measuring cup without a spout until mounded, level off the top, and weigh the flour left in the cup. Use that weight as your standard per cup of that specific flour. Do this for each flour blend you use. Commercial blends such as Pamela’s, Bob’s Red Mill 1-to-1, or King Arthur Measure for Measure are all good gluten-free choices.
You will get the best and most consistent results by using a digital kitchen scale and weighing your ingredients, especially when you are baking. And use grams, they are much more accurate than ounces.
** To make cake flour, for every cup of regular all-purpose flour, replace 2 tbsp of the flour with 2 tbsp of cornstarch. In this recipe that would be 5 tbsp flour removed and replaced with 5 tbsp cornstarch. Whisk thoroughly until combined. This cake flour adjustment is not necessary with gluten-free flour, just use 1-3/4 cups of your GF flour blend as is.
*** My preferred brand of kosher salt is from Diamond Crystal. If you use Morton’s or another brand you will likely not need as much because they are saltier.
**** To warm eggs to room temperature quickly and easily, fill a bowl with very hot tap water and place the whole eggs (in their shells) in the water. Let sit for about 10 minutes to warm up. Then they are ready to separate for this recipe.
All recommended ingredients are gluten-free as of the writing of this article. Always check to be sure the products haven’t changed and are still safe to consume.
White Chocolate Cupcakes with Buttercream Frosting (GF)

These cupcakes are luscious, rich tasting, and indulgent. Perfect for holidays or other special occasions. They would be lovely for baby or bridal showers, ladies luncheons, or kids birthday parties, or holidays!
Ingredients
Cupcake Batter
- 1-3/4 cups (210g*) gluten-free flour blend* or regular wheat cake flour**
- 3/4 tsp baking powder
- 1/2 tsp xanthan gum (only if your GF blend doesn’t already include it)
- 1/4 tsp baking soda
- Pinch kosher salt***
- 1/2 cup (1 stick; 113g) butter, at room temperature
- 1 cup (200g) granulated sugar
- 3 large egg whites, at room temperature****
- 1/2 cup (120g) full-fat sour cream, at room temperature
- 1 tbsp pure vanilla paste or vanilla extract
- 1/2 cup (120g) whole milk or half-and-half, at room temperature
- 3/4 cup (133g) mini white chocolate chips
Buttercream Frosting
- 1 cup (2 sticks; 227g) butter, at room temperature
- 4-1/2 to 5 cups (509g to 565g) confectioners’ sugar
- 1/4 cup (60 ml) heavy cream, half-&-half, or whole milk, at room temperature
- 1 tbsp pure vanilla paste or extract
- Pinch kosher salt ***
- Food coloring, optional
Instructions
1. Preheat the oven to 350°F (180°C). Sprinkle a little uncooked rice in each muffin pan cup you’re using then add the paper liners. The rice gives you nicer cupcakes This recipe makes about 14 to 18 cupcakes so you will need 2 muffin pans and scatter the liners between the two. Pour about a tablespoon water in the empty cups. Set aside.
2. Make the Cupcakes: In a medium bowl, whisk the cake flour*, baking powder, baking soda, and salt together. Set aside.
3. In the bowl of your stand mixer or a large bowl if you are using a hand mixer, beat the butter and sugar on high speed until light and creamy, about 3 minutes. Scrape down the sides and bottom of the bowl. Add the egg whites and vanilla, and beat on high speed until smooth and well blended, about 2 minutes. Turn off the mixer.
4. Add the sour cream and mix just until combined. Add half of the dry ingredients and mix in on low speed, and then with the mixer still on low, slowly pour in the milk and beat just until combined. Add remaining dry ingredients, mixing until smooth. Do not over-mix. Scrape the sides, bottom, and beater thoroughly, mixing in any unincorporated ingredients. The batter will be a bit thick. Stir in the mini white chocolate chips.
5. Portion the batter with a medium cookie scoop into the cupcake liners, filling each only 2/3 full to avoid them getting too high and taking longer to bake. I used my largest scoop and filled it about halfway to fill the liners and wound up with 17 cupcakes.
6. Bake for 19 to 23 minutes, or until a toothpick inserted in the center comes out clean. Cool the cupcakes, still in the pan, on a wire rack for 20 minutes, then remove them from the pan and transfer to the rack to cool completely. This can take up to 30 to 40 more minutes.
7. Prepare the Frosting: When the cupcakes are thoroughly cool, using your stand mixer or a hand mixer with a large bowl, beat the butter on medium speed until creamy, about 2 minutes. Add 4-1/2 cups (509g) confectioners’ sugar, the cream, and vanilla. Sprinkle in a little kosher salt. Beat on low speed for 30 seconds, then increase to medium-high and beat for 2 full minutes. Scrape the bowl thoroughly and incorporate any un-mixed ingredients.
8. You can add some food coloring if you want now and mix it in. If you want to offset the slight yellow color from the butter and vanilla, you can use a tiny amount of violet food coloring (use a toothpick for gel) and beat into the white frosting to brighten it.
9. Adjust the consistency of the frosting if needed, adding up to 1/2 cup (57g) more confectioners’ sugar if frosting is too thin or more heavy cream (1 tbsp at a time) if it is too thick, then mix until smooth. You are looking for a texture that is creamy but is a bit stubborn when trying to shake it off a spoon held upside down over the bowl. That way you know if it is the right consistency for piping!
10. Use to frost your cupcakes or cover tightly and store for up to 1 week in the refrigerator. After chilling beat the frosting on medium speed for a few seconds to return it to its creamy texture. If needed, you can add a teaspoon of heavy cream or milk to help thin the frosting out again.
Recipe found at www.theheritagecook.com
Notes
* You can adjust any recipe to gluten-free by using 120 grams per cup of my favorite gluten-free flour blend. If you are using another brand of gluten-free flour, whisk the mix, spoon it lightly into a measuring cup without a spout until mounded, level off the top, and weigh the flour left in the cup. Use that weight as your standard per cup of that specific flour. Do this for each flour blend you use. Commercial blends such as Pamela's, Bob's Red Mill 1-to-1, or King Arthur Measure for Measure are all good gluten-free choices.
You will get the best and most consistent results by using a digital kitchen scale and weighing your ingredients, especially when you are baking. And use grams, they are much more accurate than ounces.
** To make cake flour, for every cup of regular all-purpose flour, replace 2 tbsp of the flour with 2 tbsp of cornstarch. In this recipe that would be 5 tbsp flour removed and replaced with 5 tbsp cornstarch. Whisk thoroughly until combined. This cake flour adjustment is not necessary with gluten-free flour, just use 1-3/4 cups of your GF flour blend as is, adding xanthan gum if needed.
*** My preferred brand of kosher salt is from Diamond Crystal. If you use Morton’s or another brand you will likely not need as much because they are saltier.
**** To warm eggs to room temperature quickly and easily, fill a bowl with very hot tap water and place the whole eggs (in their shells) in the water. Let sit for about 10 minutes to warm up. Wipe dry and they are ready to separate for this recipe.
All recommended ingredients are gluten-free as of the writing of this article. Always check to be sure the products haven’t changed and are still safe to consume.
Recipe adapted from Sally’s Baking Addiction.
Nutrition Information:
Yield:
18Serving Size:
1Amount Per Serving: Calories: 298Total Fat: 23gSaturated Fat: 14gUnsaturated Fat: 9gCholesterol: 56mgSodium: 204mgCarbohydrates: 21gFiber: 0gSugar: 21gProtein: 2g
The nutritional information for recipes on this site is calculated by online tools and is merely an estimate. If you need nutritional calculations for medical reasons, please use a source that you trust.
If you enjoyed this recipe, be sure to follow me on social media so you never miss a post:
Create a New Tradition Today!
Welcome! The suggestions here are not intended as dietary advice or as a substitute for consulting a dietician, physician, or other medical professional. Please see the Disclaimers/Privacy Policy page for additional details. Unauthorized use, distribution, and/or duplication of proprietary material from The Heritage Cook without prior approval is prohibited. If you have any questions or would like permission, please contact me. We participate in the Amazon Services LLC Associates Program, an affiliate advertising program designed to provide a means for sites to earn advertising fees by advertising and linking to amazon.com. As an Amazon Associate, I earn a small amount from qualifying purchases without any additional cost to you. This page may contain affiliate links. The author makes no claims regarding the presence of food allergens and disclaims all liability in connection with the use of this site.

Leave a Reply