One of the most amazing things about our world is the change of seasons. For me, April truly marks the beginning of spring. The days are noticeably longer, temperatures feel warmer, and the sun seems to shine brighter. I know that summer is right around the corner. After what always seems like a long winter, life begins anew. Baby animals begin to arrive and you can see them romping in the fields. Even here in Northern California where we have what most people consider no real seasonal changes, we are ready for warmth and dry weather again.
Today’s recipe comes from the James Beard Award winning cookbook, “Secrets of a Jewish Baker” by George Greenstein. A third-generation professional baker, George owned and operated a Long Island neighborhood bakery for over 20 years and shares his favorite bread recipes in this wonderful book. It contains recipes for 125 breads from around the world and is one of the go-to books for bakers. He covers yeast and quick breads, sourdough, authentic Jewish rye, Mandelbrot, biscuits, and muffins in a very approachable manner, all geared toward the home baker with instructions for preparation by hand, stand mixer, and food processor. If you are serious about learning to bake bread, this is one book you need in your library.
Some people are natural-born teachers, and George Greenstein is one of the best. This book gives you many of his tried and true methods for baking success. The opening chapters focus on ingredients, tools, and techniques, including a section on understanding why a bread failed. The first recipes are perfect for beginning bakers. They will help build your confidence to tackle the more complex recipes later in the book. And while all the typical recipes are here, he also includes fun and unusual breads such as London Bloomers, Potatonik, Hutzelbrot, and Hawaiian Good Morning Muffins. There is truly something for everyone.
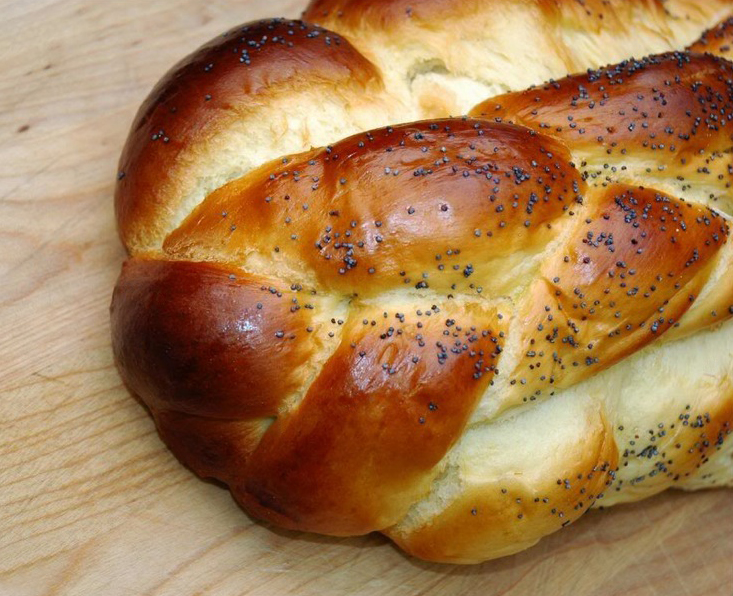
One of my favorite breads is Challah (hah-lah). Similar to brioche, Challah is a tender, slightly sweet, egg bread. Once only found in Jewish bakeries and traditional homes, today Challah is just as likely to be purchased by everyone for regular consumption. It was originally baked for the Sabbath and Jewish holidays, but now you can enjoy it anytime of the year.
Not surprisingly, I love traditions and heritages from all walks of life. According to Jewish tradition, Challah commemorates the manna that fell from heaven when the Israelites wandered in the desert for forty years after their exodus from Egypt. A double portion of manna would fall just before the Sabbath and holidays, allowing them to follow their laws of not working on those days.
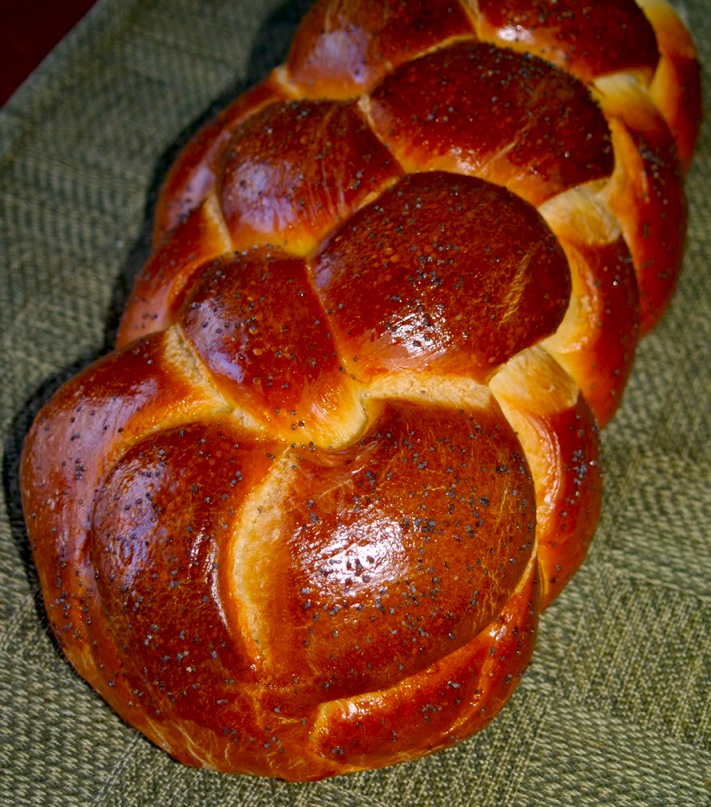
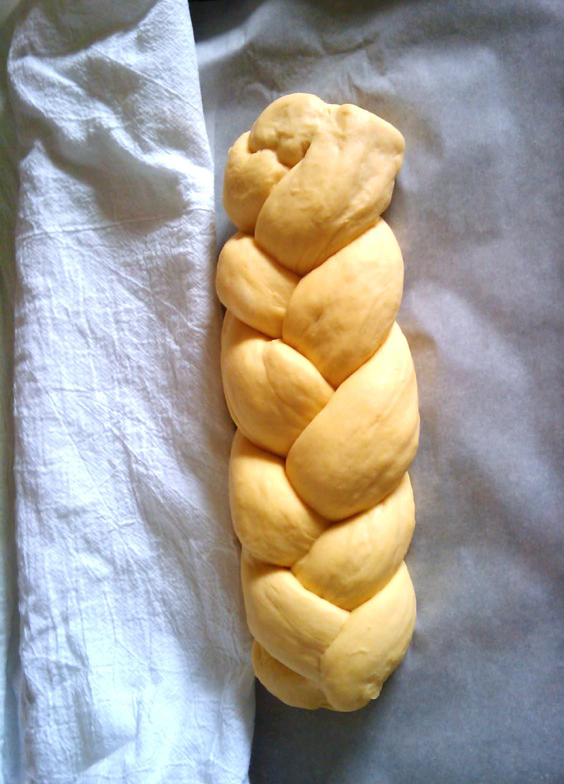
Though it can be presented in many shapes and styles, Challah is traditionally braided. The Sabbath is a time of relaxation for the family. Braiding the Challah is a symbol of the peace that comes with unity in the home. During Rosh Hashanah it is formed into a round as an expression of the complete eternal life celebrated at that time of the year. You can do a simple 3-part braid, the more traditional 6-part braid or even more complicated if you want. The possibilities are nearly endless. You certainly don’t have to braid the dough, but the deep golden undulations in the final loaf are absolutely stunning!
As Greenstein says in the recipe headnote, “Challah or egg bread is a sweet, egg-rich, festive looking bread with an elegant mahogany hue. This bread was originally baked by Jewish families to grace the Sabbath or holiday tables. Years ago, bakery customers who were unfamiliar with the name would ask for “the Friday bread.”
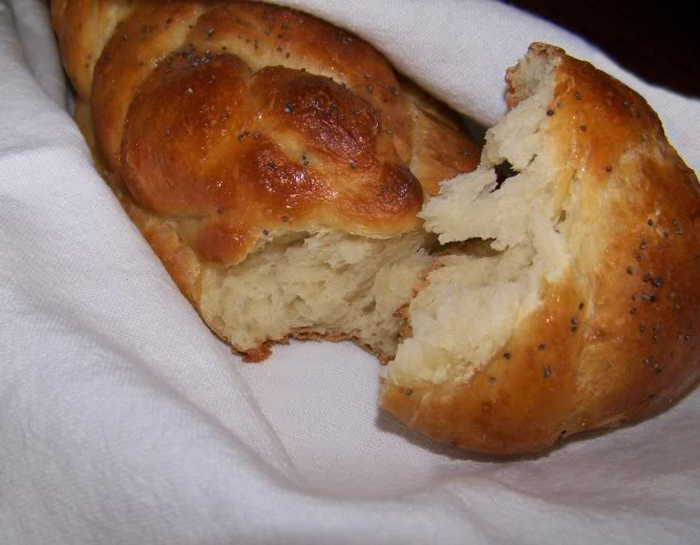
Challah can be made up in different shapes, ranging from a sectioned pan loaf to fancy and intricate braids. On certain holidays it is made into a round, turban-shaped bread. Today its use is becoming universal. It is found in ethnic bakeries and food markets of all kinds. Challah is often used as a centerpiece at Sunday dinner and appears on many Easter tables. When the bread is baked in braided form, it is customary to break off small knobs of it rather than cutting or slicing it. One literally breaks bread with guests and family. Leftover challah makes the best French toast I’ve ever eaten.
Challah dough is also used as rich egg roll dough and is made into many varieties of party or dinner rolls. In hot weather it is advisable to use cold ingredients to keep the dough temperature from becoming too high.”
With the increasing incidence of gluten intolerance, I have also included a recipe for gluten-free Challah. Family and friends of mine have discovered that gluten is the cause for many of their non-specific physical discomforts. I want everyone to be able to enjoy this wonderful bread. We are so fortunate that non-gluten flours are becoming more readily available in normal grocery stores.
Even if you have never baked bread before, give this a try. There is something so satisfying when you make your own and there is nothing that smells better than bread baking in the oven. Have a wonderful time celebrating the beginning of our lovely spring weather!
Kitchen Skill: How to Measure 1/2 Egg
This may seem to require magic, I mean, how in the heck can I figure out what half of an egg is? It is simple once you know the trick. Break the egg into a bowl and whisk it until smooth. Then use half of this mixture. Voila! You have half an egg!


- 1 cup warm water (no higher than 110°F.)
- 2 packages active dry yeast (1-1/2 tbsp)
- 1 egg, lightly beaten
- 2 egg yolks
- 1/4 cup vegetable oil
- 1/4 cup plus 1-1/2 tsp sugar
- 4 to 4-1/2 cups bread flour (see Note)
- 2 tsp salt
- Vegetable oil, for coating bowl
- 1 egg beaten with 1 tbsp water and a pinch of salt, for egg wash
- Poppy or sesame seeds, for topping (optional)
- Cornmeal, for dusting baking pan
- To Make by Hand:
- In a large bowl, sprinkle the yeast over the warm water and allow to soften. Add the egg, yolks, oil, sugar, 4 cups of the flour, and the salt. Stir until the dough comes away from the sides of the bowl.
- Turn dough out onto a lightly floured work surface and knead, adding more flour 1/4 cup at a time if the dough is sticky or very soft. The dough should be firm. Knead until the dough is smooth and elastic and the gluten is well developed, about 10 to 15 minutes. When you push down on the dough, it should feel firm and push back.
- Rising: Transfer to a large oiled bowl; turn to coat, and let rise, covered, until tripled in volume (30 to 40 minutes.) When fully risen, an indentation made with a finger pushed down into the center of the dough should remain and not recede. This is a fully aged, or ready dough. Deflate the dough, cut in half, cover, and allow to rise for 15 minutes.
- Shaping: Punch down again and, on a very lightly floured work surface, use your palms to roll the pieces into 2 ropes, at least 12 inches long. Cut each into 3 or 6 equal pieces and braid or make into a 6-section pan challah (directions follow). Brush with the egg wash, using care to cover completely, but do not let excess egg drip into the crevices. Allow to air dry, and then brush with egg wash a second time. Sprinkle with poppy seeds or sesame seeds if desired. This will give the bread its characteristic shine.
- If you are making the braided challah, transfer to a cornmeal-dusted baking pan. For section-style challah, place the loaves in 2 well-greased 8 or 9-inch loaf pans. Place in a warm draft-free area, preferably enclosed, and allow to rise until doubled in size.
- Baking: Preheat the oven to 350°F. Bake on the middle rack of the oven until the loaves have a rich mahogany color and emit a hollow sound when tapped lightly on the bottom with your fingertips, about 35 minutes. If the top begins to brown excessively and the bottom is still raw, cover the bread with a sheet of parchment paper or aluminum foil that has been creased down the center to form a tent.
- To test for doneness, press lightly between the braids on the highest part of the bread; it should be firm. If you feel the creases give when lightly pressed, continue baking until they firm up. Let cool on a wire rack. Challah keeps very well for several days in a plastic bag in a breadbox. It can be frozen; defrost slowly, preferably wrapped, overnight in the refrigerator.
- Yield: 2 loaves.
- NOTE: You can substitute all-purpose flour for the bread flour, but the challah will not be as light or tender.
- Food Processor Method
- 1/4 cup warm water
- 3/4 cup ice water
- In the work bowl, sprinkle yeast over the warm water and allow to stand for a few minutes to soften. Add the ice water, egg, yolks, oil, sugar, 2 cups of the flour, and the salt; pulse to combine. Add 2 more cups of flour 1 cup at a time. More flour can be added 1/4 cup at a time if necessary. The dough should be firm. Pulse until the dough forms up into a ball, and then continue pulsing for 2 to 3 minutes. If the machine strains divide the dough in half and process each half separately, then knead together by hand. If using a dough thermometer, keep the dough at 78°F to 82°F. Do not overmix. If necessary, knead by hand until the dough is smooth and elastic and the gluten is well developed. When you push down, the dough should be firm and push back. Knead together and shape into a ball. Proceed as in Rising, Shaping, and Baking, above.


- 1/2 cup warm water
- 3 packages active dry yeast (2 heaping tbsp)
- 1 cup ice water
- 1-1/2 eggs, lightly beaten
- 3 egg yolks, lightly beaten
- 6 tbsp vegetable oil
- 7 tbsp sugar
- 6 to 6-3/4 cups bread flour (see Note)
- 1 tbsp salt
- Vegetable oil, for greasing bowl
- 1 egg beaten with 1 tbsp water and a pinch of salt, for egg wash
- Poppy or sesame seeds, for topping
- Cornmeal for dusting baking pan
- In the bowl of a standing mixer, sprinkle the yeast over the warm water and allow to soften. Add the ice water, eggs, yolks, oil, sugar, 6 cups of the flour, and the salt. Pulse with the on/off switch until the dry ingredients are incorporated enough that the flour won’t be thrown out of the bowl. Mix until the dough comes away from the sides of the bowl, adding more flour 1/4 cup at a time if necessary. This bread requires a firmer dough than normal.
- Remove and scrape down the beater and insert the dough hook. Mix at first speed for 15 minutes, or until the dough feels firm and pushes back. Do not leave the mixer unattended. Proceed as in Rising, Shaping, and Baking, above, except shape into 3 loaves.


- 1 package (2-1/4 tsp) active dry yeast
- 1 tsp sugar
- 1 cup (8 oz) warm water (120°F)
- 1-1/2 cups (192 g) cornstarch
- 3/4 cup (90 g) white rice flour
- 1/2 cup (60 g) brown rice flour
- 1/4 cup (34 g) tapioca flour
- 3 tbsp (21 g) almond meal
- 1 tbsp xanthan gum
- 1 tsp salt
- 2 tbsp dry potato flakes
- 1/4 cup (4 tbsp) butter, melted
- 1/4 cup (4 tbsp) honey
- 4 eggs + 1 extra egg yolk (at room temperature)
- 1/8 tsp vanilla extract
- Optional extra ingredients:
- Poppy seeds, sesame seeds, raisins, chocolate chips
- Add yeast and sugar to warm water. Cover with plastic wrap. Put in oven with oven light on for about 10 minutes or until frothy. Oven should not be turned on yet!
- Mix cornstarch, white rice flour, brown rice flour, tapioca flour, almond meal, xanthan gum, salt, and potato flakes in a heavy duty mixer.
- With mixer running, add yeast mixture, and then add melted butter and honey.
- Add eggs and vanilla extract. Mix until blended.
- Beat on high speed for 2 minutes – batter will look like pudding.
- Spoon batter into greased 9-inch springform pan or 9x5-inch loaf pan.
- Smooth top surface of batter using your WET hand.
- Cover pan with plastic wrap sprayed underneath with vegetable spray so it won’t stick to batter as it rises.
- Let rise in warm place for about 45 minutes or until it reaches the top of the pan. The rising time will change depending on the humidity and temperature of your room.
- Using a fine serrated knife, cut 2 diagonal lines across top of bread about 1/8 inch deep (allows steam to escape).
- Sprinkle poppy or sesame seeds on top. I haven’t tried it with raisins or chocolate chips, but I imagine they could be added to the batter while it’s being mixed.
- Bake in preheated 350°F oven for 45 minutes. Cover with foil after first 20 minutes if top gets too brown.
- Transfer to wire cooling rack, rub top with butter while it’s still hot, if desired. First time I made it, I sprinkled poppy seeds over the top of the bread before baking. I didn’t rub top with butter when it was finished.
- Yield: one loaf.
- - To proof the yeast, empty the packet into the water. Add sugar. Cover with plastic wrap and put in your oven with the pilot light on. (The oven shouldn’t be on yet).
- - If you don’t have time to allow the eggs to come to room temperature, put them in a small bowl filled with warm water. Allow to sit in the water for at least 5 minutes before cracking.
- - Turn oven on for 30 to 60 seconds, then turn off and use it as a warm place for the dough to rise.
Let’s connect! If you ever need any entertaining or cooking advice, need to alter a recipe for gluten-free, or want recipe suggestions, don’t hesitate to ask. Feel free to quote me, just give credit where credit is due, link to the recipe, and send people to my website. Unauthorized use, distribution, and/or duplication of proprietary material from The Heritage Cook without prior approval is prohibited. If you have any questions or would like permission, please contact me. The suggestions here are not intended as dietary advice or as a substitute for consulting a dietician, physician, or other medical professional. Please see the Disclaimers page for additional details. Thanks for joining the Heritage Cook Family!


ginni quinn
hi there do you have a recipe for making gluten free bread i have your challah recipe and will try that but wondering if you have any others.
many thanks