When I was little my metabolism was sky high and I came home from school every day absolutely famished. There was no way I could wait until dinner so my mother always gave me a snack. Sometimes it was as simple as buttered bread, but if she had baked that day, there would be a warm sweet treat to enjoy. I always loved coming in the house when she had been baking. I knew I was going to get something wonderful.
Two of my favorite desserts are cheesecake and brownies. Who knew they could be combined into one of the most fabulous treats known to the modern world! If you like one or both, you are going to love this decadent Chocolate Monday offering!
Similar in technique to lemon bars, you first lightly bake the brownies in a pan then spread the cheesecake mixture over the top and bake again. Finally drizzle it with a light chocolate glaze just in case the brownies weren’t enough chocolate for you, LOL. This is a wonderful dessert for any party, a terrific after-school treat, or just for one of those days when chocolate is a mandatory food group.

I don’t know about you, but cheesecakes have traditionally given me headaches. My springform pan leaks so the crust gets soggy, the top cracks, and other assorted challenges always seem to make my cheesecake baking a pain in the neck. But these brownies are a snap and renew my faith in cheesecake!!
One of the tricks when working with cream cheese – especially when you are making cheesecake or frosting – is to make sure it is thoroughly softened before you start beating it. If you don’t there will be small pieces of solid cream cheese throughout that don’t disappear. If they are large they will be noticeable when you eat the dessert and can be distasteful.
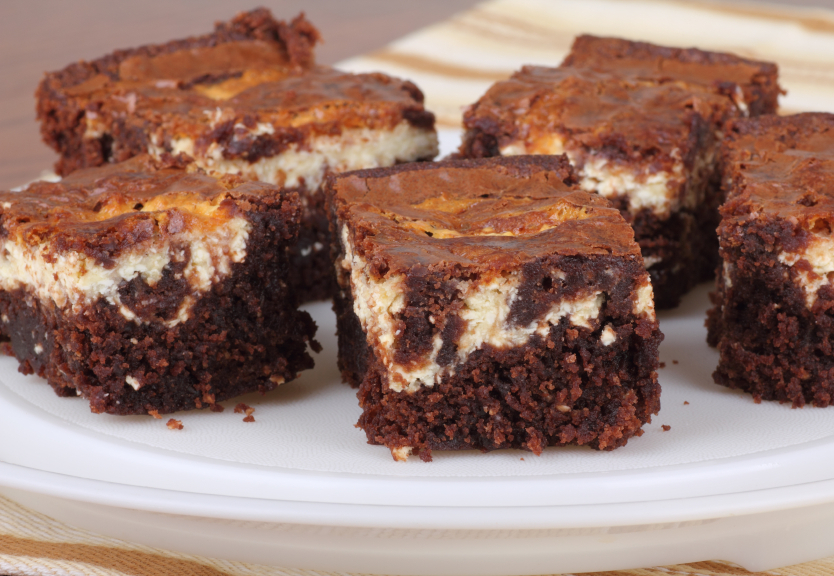
Some people like their layers to be very distinct and others like a more marbled appearance. For distinct layers make sure that the brownie batter and cheesecake topping are both completely smooth before baking. For a more rustic look, you can use a spatula to make indentations and peaks in the brownie batter. When you spread the cheesecake layer over this it will sink into the hollows and when you cut the brownies, they will look like the photo above.

Whipped Cream Cheese
In addition to the cheesecake version, you can also bake the brownies without the cheesecake topping. These make wonderful treats all on their own if you want a less complex dessert. To do this, spoon the brownie batter into the baking pan, smooth the top and bake by for a bit longer than the recipe calls for. Remember, with the cheesecake topping the brownies bake twice, if you are serving them on their own they need to cook all the way through.
This recipe is from one of America’s favorite cookbook authors, Nancy Baggett. A lovely woman who is always very generous with her time, Nancy has written a number of award winning cookbooks that everyone will love. In addition to three books on low-fat delicious cooking, she has also written five books on baking. Today’s recipe comes from her All-American Dessert Book that covers a wide variety of sweets to please anyone. Nancy has a terrific way of writing a recipe so that everyone feels comfortable trying it, even if they are beginners.
Nancy has a fantastic food blog at http://www.kitchenlane.com/ where she shares more of her recipes, wisdom, and experiences. Please check it out when you have a moment. You will fall in love with her writing just as everyone else has and rush out to buy all of her cookbooks (they are available on her site and on Amazon).
Have fun with today’s recipe. I know it will be the perfect way to start your week. Happy Chocolate Monday!
Jane’s Tips and Hints:
For the cleanest edges, layer the pan with parchment paper long enough to drape over the edges at either end of the pan. When brownies are cooled, using the overhanging parchment as handles, very gently lift the brownies out of the pan. Set on a cutting board and using a long knife, preferably with a Granton edge, slice a very thin piece off of each side. The cut into squares as directed in the recipe.

- Brownie Layer
- 3/4 cup unsweetened Dutch process cocoa powder
- 2 cups superfine sugar (process granulated sugar in food processor until very fine, almost powdery)
- 1/2 tsp salt
- 4 large eggs
- 18 tbsp (2-1/4 sticks) unsalted butter, melted and cooled to warm
- 2-1/2 tbsp light corn syrup
- 2 tsp vanilla extract
- 1-1/2 cups all-purpose flour or gluten-free all-purpose flour blend
- 1 cup semisweet chocolate mini-morsels
- Cream Cheese Layer
- 1 lb (two 8 oz packages) cream cheese, at room temperature
- 2/3 cup granulated sugar
- 2 large eggs
- 1 tsp vanilla extract
- Glaze
- 2/3 cup heavy (whipping) cream
- 1/4 cup powdered sugar, sifted after measuring if lumpy
- 6 oz bittersweet (not unsweetened) or semisweet chocolate, broken up or coarsely chopped
- 1/2 tsp vanilla extract
- Position a rack in the middle of the oven and preheat to 350°F. Generously grease a 9 x 13-inch baking pan or generously coat with nonstick spray.
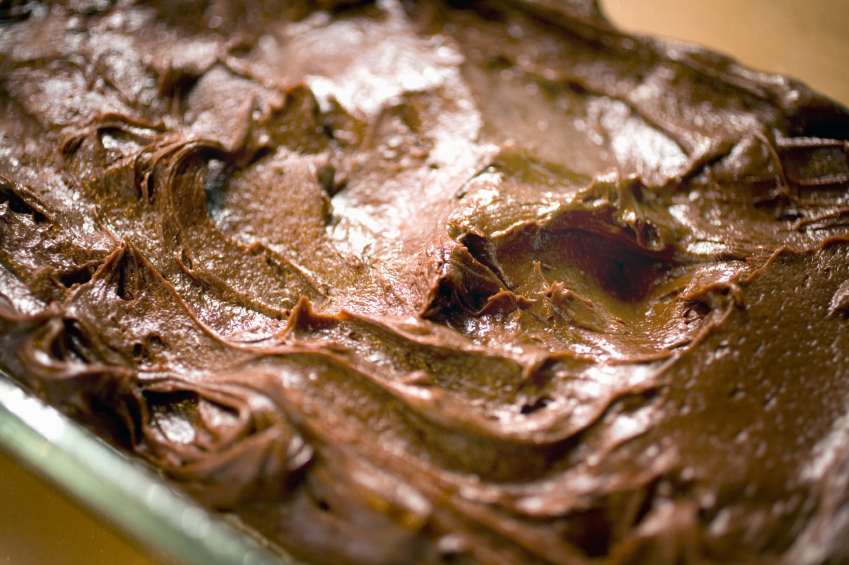
- To make the brownie layer: Sift the cocoa into a large bowl. Stir in the superfine sugar and salt. Vigorously stir in the eggs one at a time until well blended and smooth. Stir in the melted butter, corn syrup and vanilla until thoroughly incorporated. Stir in the flour and mini morsels, mixing until very well blended. Pour the batter into the baking pan, spreading it evenly to the edges.
- Bake for 20 to 24 minutes, or until a toothpick in the center comes out clean except for the bottom 1/4 inch, which should still look wet. Don’t overbake or it will by dry when finished baking cheesecake layer.
- Meanwhile, to make the cream cheese layer: In a large bowl with a mixer on medium speed, beat the cream cheese and granulated sugar for 2 to 3 minutes, or until completely smooth, and well blended, scraping down the sides of the bowl as needed. Add the eggs, one at a time, beating for 20 seconds after each addition. Add the vanilla. Continue beating until the mixture is very smooth.
- Top the hot brownie with the cream cheese mixture, spreading it evenly to the edges. Bake for 15 to 19 minutes, or until all but the very center looks set when tapped; the center should still be jiggly. Transfer to a wire rack. Let cool to warm.
- To make the glaze: Stir together the cream and sugar in a microwave-safe 4-cup measure. Microwave on high power for 1-1/2 minutes, or until steaming hot. Stop and stir. Add the chocolate, without stirring, and microwave on medium power for 1 minute longer. Remove from the microwave and let stand for 1 minute.
- Add the vanilla and gently stir for 1 to 2 minutes until the chocolate completely melts and the glaze is very smooth and glossy.
- (Alternatively, stir together the cream and sugar in a 1-quart saucepan. Heat over medium high heat, stirring, until it comes almost to a boil. Remove from the heat. Immediately add the chocolate and vanilla without stirring. Let stand for 5 minutes. Stir until the chocolate completely melts and the glaze is very smooth and glossy.)
- To glaze and cut the brownies: Using a long-bladed offset spatula, spreader or table knife, spread the glaze smoothly and evenly over the brownie. For the best appearance, smooth out quickly and don’t overwork the glaze.
- Let stand for at least 1-1/2 hours at room temperature or 1 hour in the refrigerator before cutting. Using a large sharp knife dipped in hot water and wiped dry between cuts, cut into quarters lengthwise and sixths crosswise (or as desired).
- The brownies will keep, tightly covered, in the refrigerator for 4 to 5 days or in the freezer for up to a month. (If frozen, let thaw in the refrigerator.) Let warm up slightly before serving.
- Yield: 24 pieces
Thank You!


Lisa~~
Breakfast, lunch and dinner I would be eating these…YUM.
Lisa~~
Cook Lisa Cook
Jane Bonacci, The Heritage Cook
I’m with you Lisa … anytime is a good time for these!
Barbara @ Barbara Bakes
What a rich, heavenly treat. Is it wrong to want one for breakfast.
Jane Bonacci, The Heritage Cook
It is never wrong to want these for breakfast!