Rich and satisfying, fast and easy to make, you will love these Gluten Free Layered Congo Bars! Perfect for picnics, lunch bags, snacks, dessert buffets – you name it, they fit the bill.
My mom was really good at a lot of things but did not like making our holiday pies, birthday cakes, and baked goods for school fundraisers. When I was nine years old I made my first cake all by myself (from a box mix) and was incredibly proud.
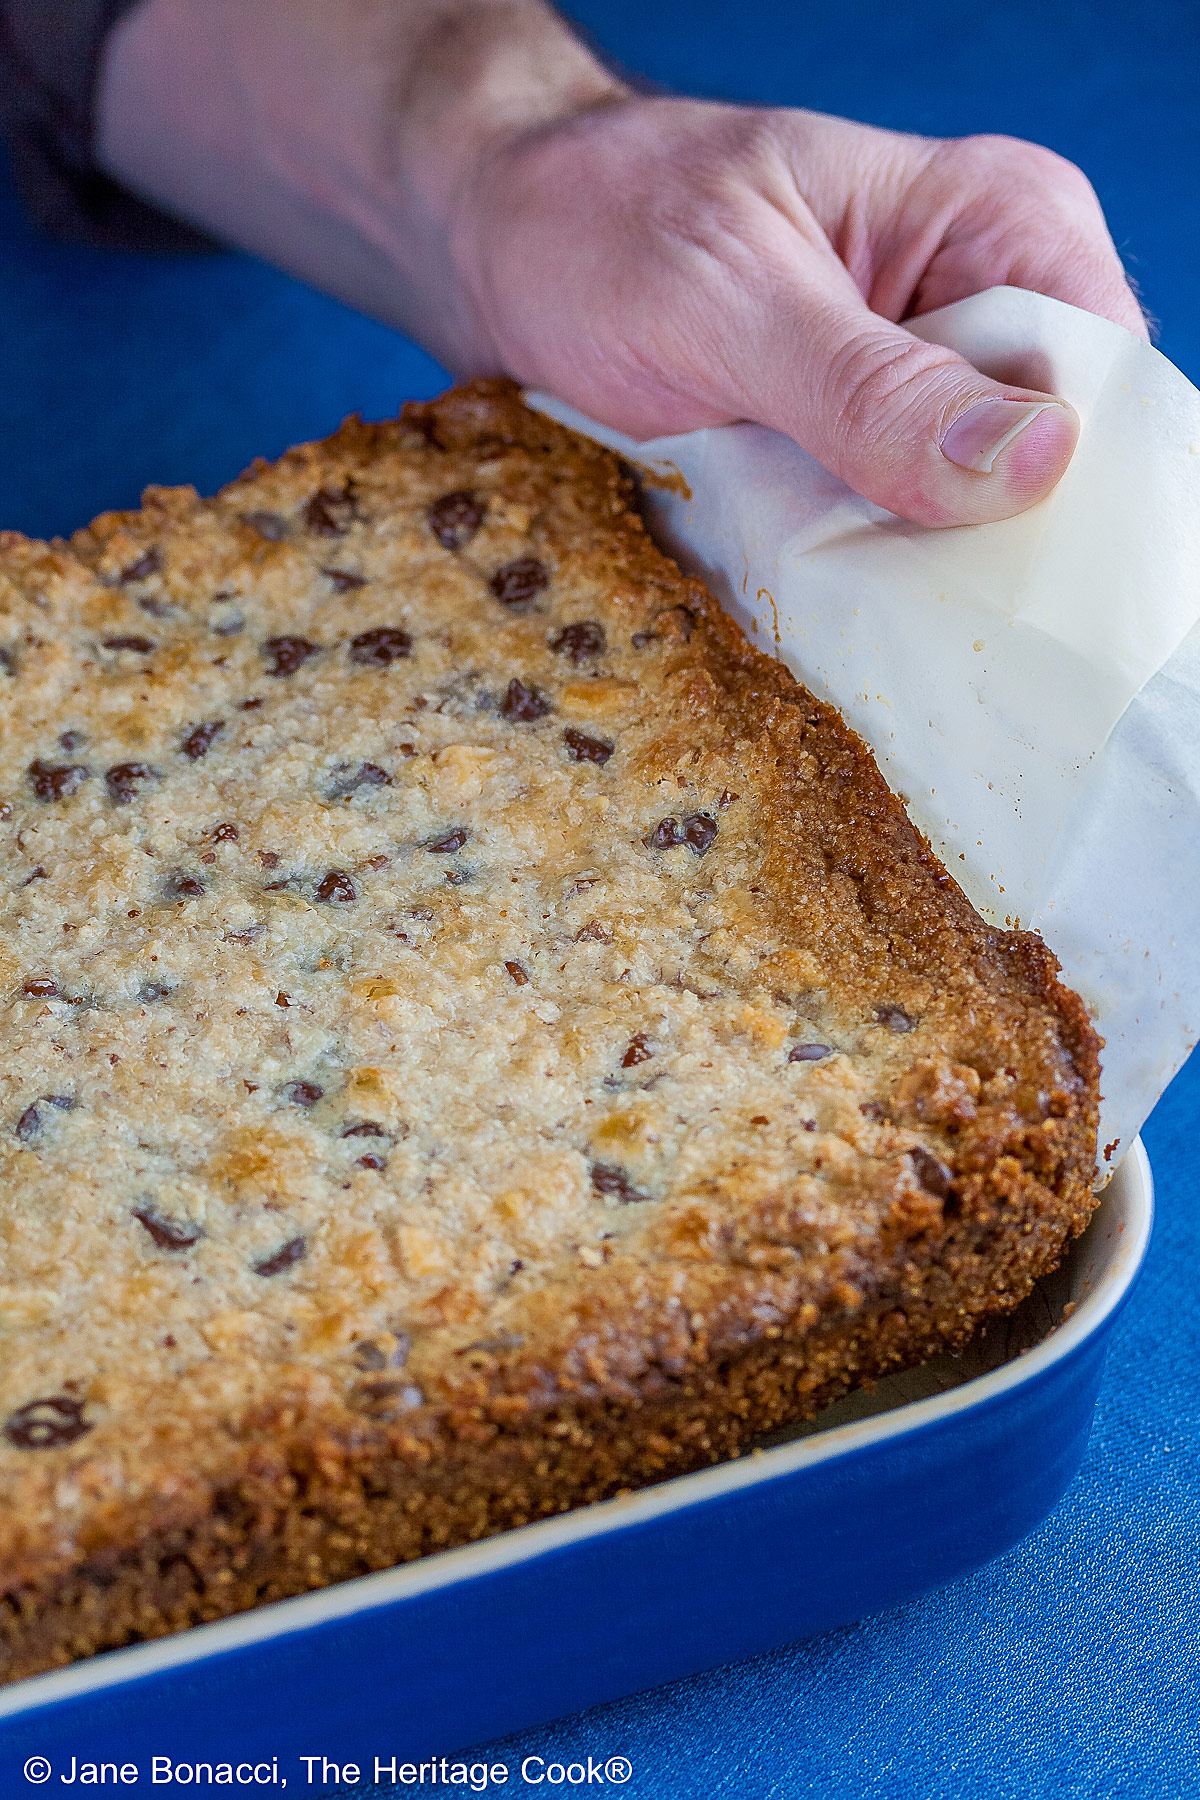
Using the parchment paper to lift the bars out of the pan
Within a couple of years, I was making everything from scratch like my grandmother had taught me. And by the time I was a teenager I was pretty fearless in the kitchen, happily experimenting with any recipe that looked interesting. My mother gladly turned over the family baking to me, relieved not to have that responsibility anymore.
Surprisingly, layered congo bars were not part of my childhood. My brothers and parents were not as crazy about chocolate as other people and being the youngest, I followed their lead. It is funny that I would grow up to write Chocolate Mondays. I had to become an adult before I got to taste and fall in love with these wonderful congo bars!
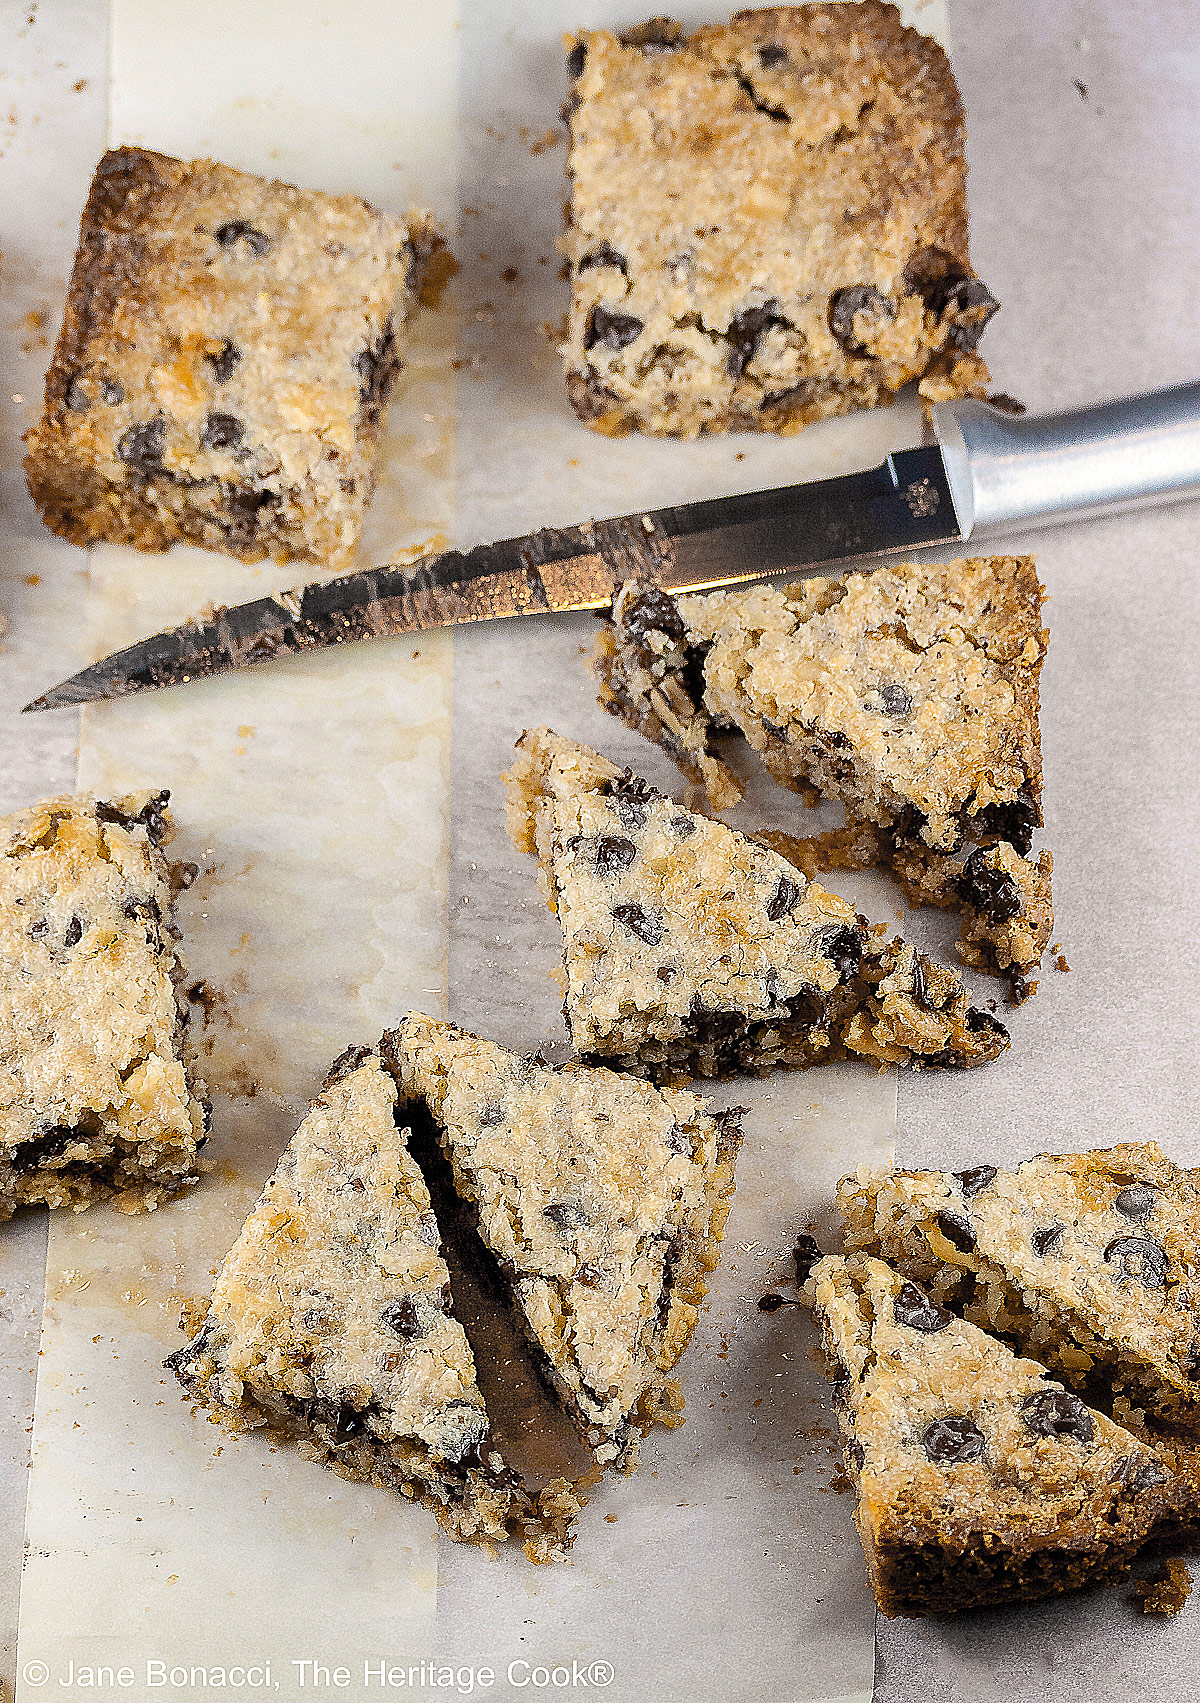
Regular bar cookies are pretty sturdy, but when you convert them to gluten-free, they can become more delicate. Using xanthan gum will help with this. Don’t be surprised if these are a little crumbly as you lift them out of the pan and they may be challenging to cut cleanly. But no matter what, they are still delicious!

Left: chocolate chips look solid but are actually partially melted; Right: smooth melted chocolate
The Artist and I like desserts that are in individual servings, making it easier to sneak little bites when no one is looking. I love having treats for friends and neighbors who drop by and small bites are easy to take to events, parties, and picnics.
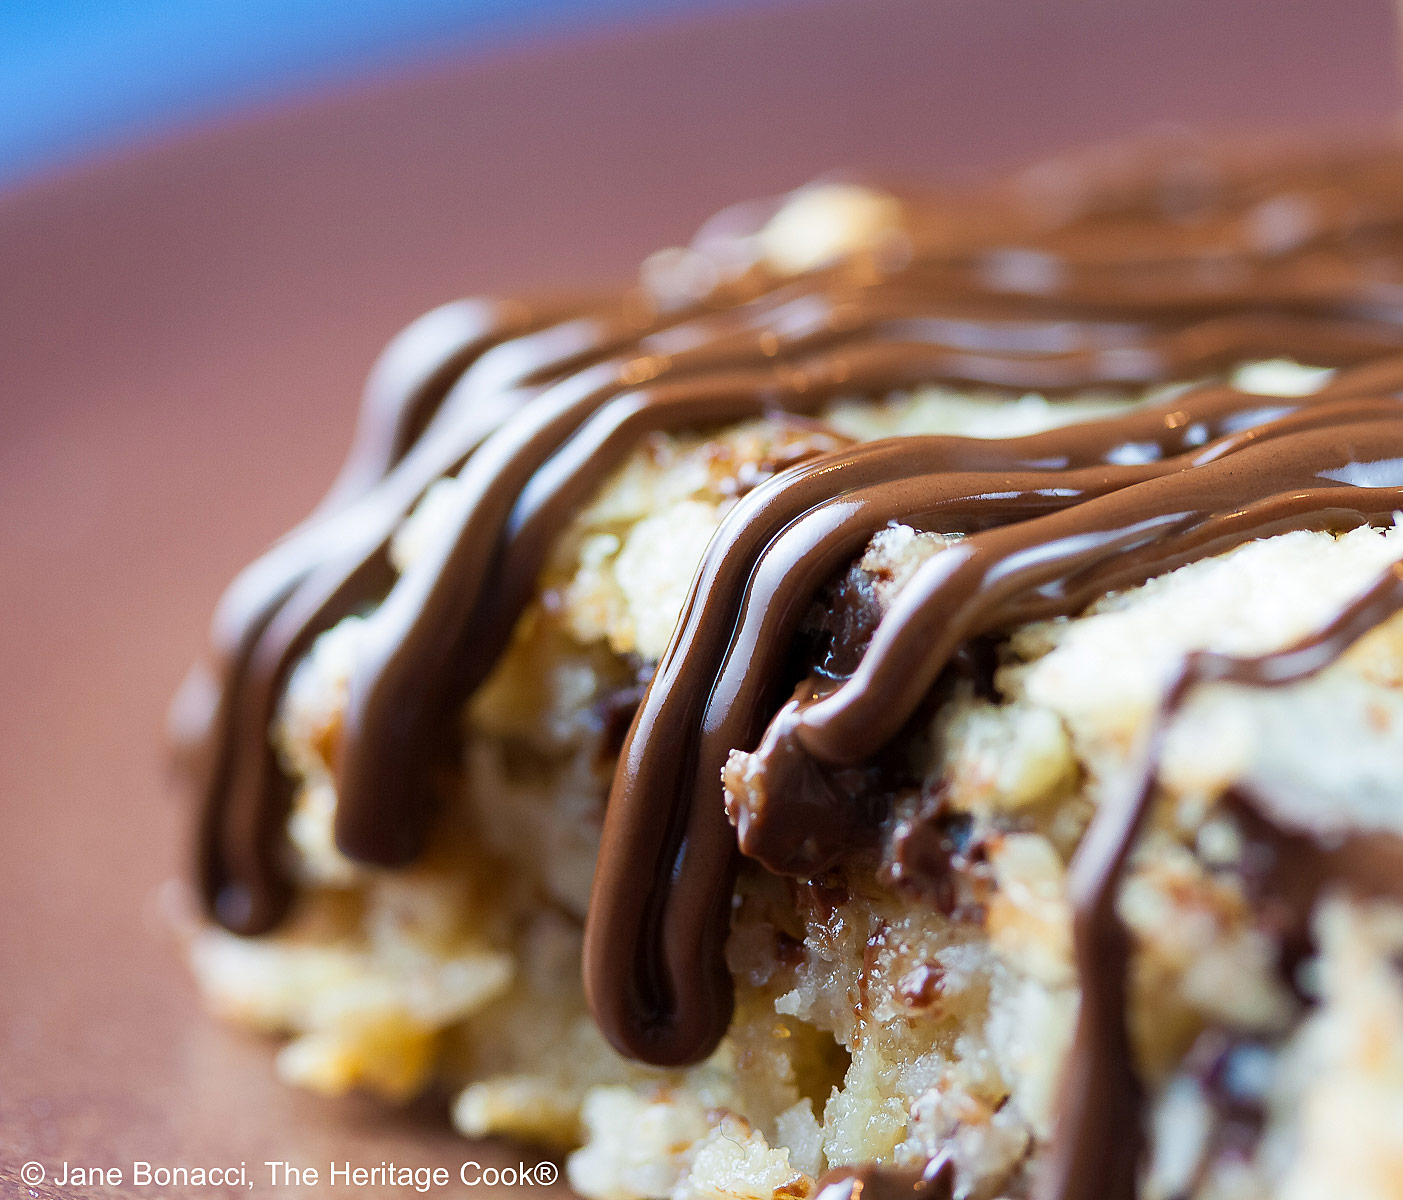
I decided to add a little more chocolate to these bars – who doesn’t want more chocolate? So I melted a small amount of extra chocolate chips in the microwave. Melting chocolate in the microwave can be deceiving. The chips look like they are still solid, but they are melted inside and collapse the second you touch them! Heat in bursts of about 20 seconds at a time and check the chips between each heating. You definitely do not want to scorch the chocolate! And if you do, throw it away and start over.

The next time you are looking for the perfect after-school snack for your kids, a sweet treat to finish your picnic, or want something for those chocolate cravings we all get, give these Gluten Free Layered Congo Bars a try. I think you will find they are the perfect choice for any occasion!
Happy Chocolate Monday – have a fabulous week!
If you try this recipe, let me know! Please leave a star rating in the recipe card, comment below, and don’t forget to snap a pic and tag it @theheritagecook on Instagram! Seeing your creations makes my day and I love hearing from you!
Ingredients needed for Gluten Free Layered Congo Bars:
- Crust: butter, flour, xanthan gum, baking powder, salt, GF almond meal, brown sugar
- Filling: unsweetened coconut, semisweet chocolate chips, white chocolate chips, salt, sweetened condensed milk, pecans, extra chocolate chips (for melting and drizzling over the top)
What’s the difference between Evaporated Milk and Sweetened Condensed Milk?
Sweetened condensed milk is not the same thing as evaporated milk. Evaporated milk has reduced liquid, making it a little thicker than regular milk but very similar. Sweetened condensed milk is very thick, extremely sweet, and sticky. The two are not interchangeable.
How to make Gluten Free Layered Congo Bars:
- Make the crust and press into a parchment-lined baking pan; bake 10 minutes then cool about 45 minutes.
- Stir together the filling ingredients with 3/4 cup (177 ml) of the milk, adding more if needed; press gently into the cooled crust.
- Bake bars for 20 minutes then cool at least 2 hours to fully set the filling.
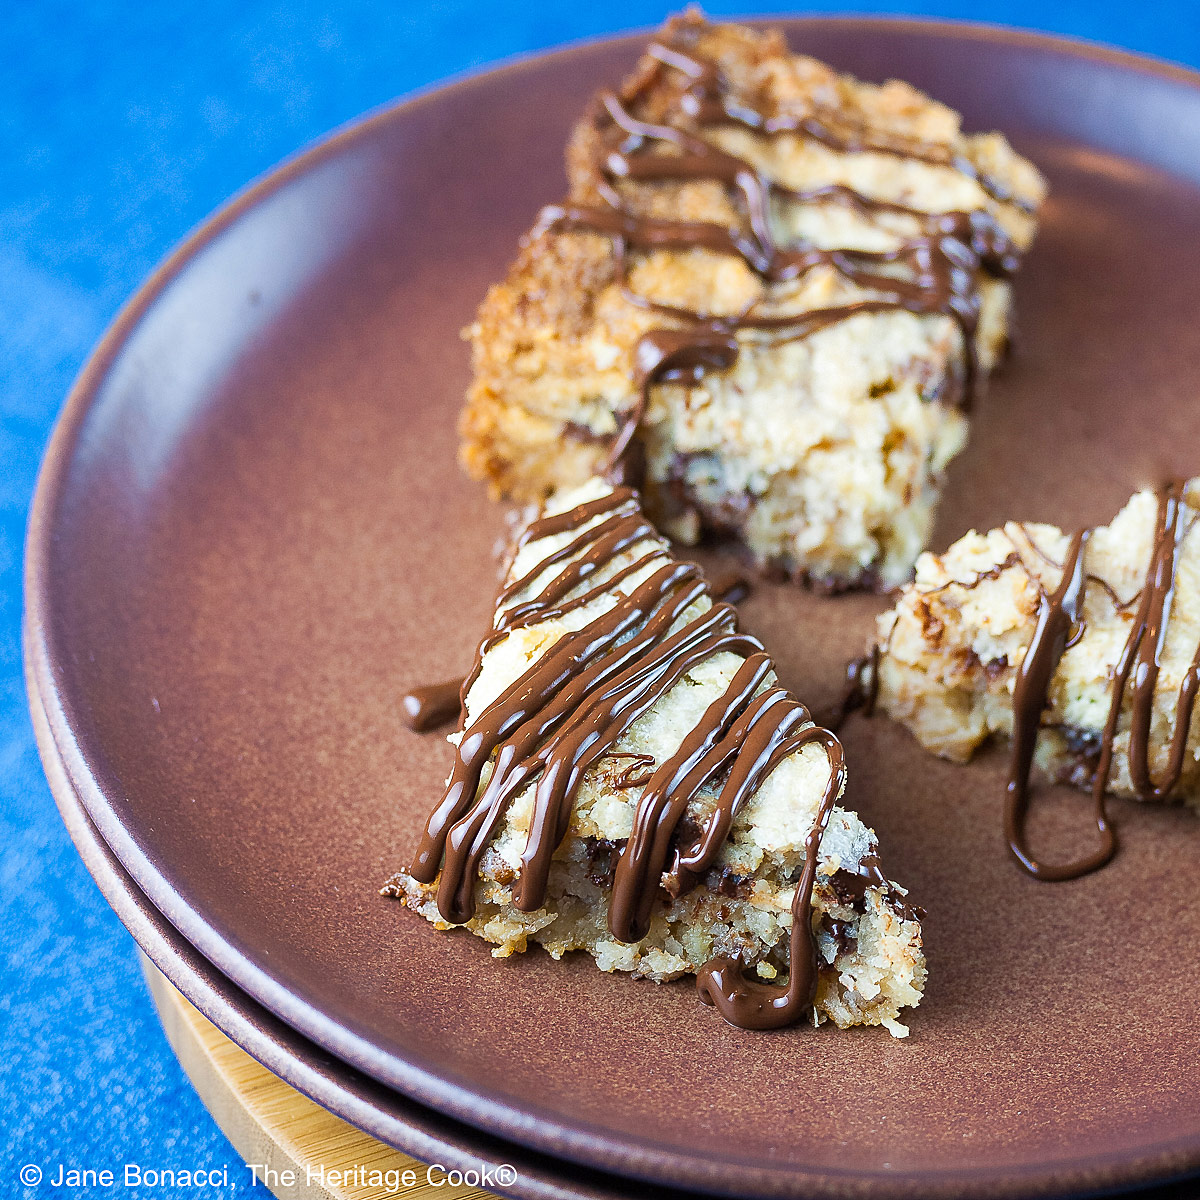
- When cooled and firm, pop the bars out of the baking pan and cut into squares or triangles; drizzle with chocolate if desired and serve.
PRO Tip:
If you want to serve these in triangles instead of squares, cut the block into slightly larger squares and then cut each square from one corner point to the opposite one to create triangles.
Recommended Tools (affiliate links at no cost to you):
Gluten-Free Tips:
* You can adjust any baking recipe to gluten-free by using 120 grams per cup of my favorite gluten-free flour blend. If you are using another brand of flour or regular flour, whisk it, spoon it lightly into a measuring cup until mounded, level off the top with a knife, and weigh the flour left in the cup. Use that weight as your standard per cup of that specific flour. Do this for each flour blend you use. Commercial gluten-free blends such as Pamela’s All-Purpose Artisan Blend, Bob’s Red Mill 1-to-1, or King Arthur Measure for Measure are all good choices. If your blend does not include xanthan gum or guar gum, add 1/4 tsp to the dry ingredients.
You will get the best and most consistent results by using a digital kitchen scale and weighing your ingredients, especially when you are baking. And use grams, they are much more specific than pounds and ounces.
All recommended ingredients are gluten-free as of the writing of this article. Always check to be sure the products haven’t changed and are still safe to consume.
Gluten Free Layered Congo Bars

Rich and satisfying, fast and easy to make, you will love these Gluten Free Layered Congo Bars! Perfect for picnics, lunch bags, snacks, dessert buffets - you name it, they fit the bill.
Ingredients
Crust
- 5 tbsp (71g) butter or margarine, melted, plus more for the pan
- 1/4 cup (30g*) gluten-free flour blend* or all-purpose flour
- 1/4 tsp xanthan gum, only if your GF flour blend doesn't include it
- 1/4 tsp baking powder
- 1 tsp kosher or fine sea salt
- 1 cup (84g) almond meal (Bob’s Red Mill is certified gluten-free)
- 1/4 cup (53g) firmly packed light brown sugar
Filling
- 1-1/4 cups (106g) unsweetened (desiccated) coconut
- 2/3 cup (113g) semisweet chocolate chips
- 1/2 cup (85g) white chocolate chips
- 1/2 tsp kosher salt
- 3/4 to 1 cup (177 to 237 ml) sweetened condensed milk or sweetened condensed coconut milk for dairy-free (see Note below)
- 1/2 cup (57g) chopped pecans, walnuts, almonds, optional
- Extra chocolate chips for drizzling over the top, optional
Instructions
1. Make the crust: Preheat the oven to 350°F (180°C). Lightly butter an 8-inch (20 cm) or 9-inch (23 cm) square baking pan. Line the pan with a sheet of parchment, leaving two ends hanging over the ends of the pan. This will create a sling to help you remove the bars from the pan. Butter the parchment and add an extra layer of butter to the exposed sides of the pan not covered with parchment.
2. Combine the flour, baking powder, and salt in the bowl of your food processor. Add xanthan if using. Pulse a few times to blend. Add the almond meal and brown sugar, and pulse to combine. Pour the butter over the top and pulse until the butter is completely incorporated and the mixture starts to clump together.
3. Spread the crumb mixture in the bottom of the prepared baking pan, pressing down gently with your hands. Spread to the edges of the pan to fully cover the bottom.
4. Using your food processor or a knife, quickly chop the pecans or other nuts for the filling and set aside.
5. Bake the crust for 10 minutes, or until lightly golden. Remove from the oven and let cool at least 30 to 45 minutes on a wire rack to firm up. The crust is delicate and needs time for the butter to harden again. You can also refrigerate to speed things up if you want.
6. Make the Filling: While the crust is cooling, in a large mixing bowl, stir together the coconut, dark and white chocolates, salt, and the nuts, if using. Add 3/4 cup (177 ml) of the condensed milk. Stir well using a flexible spatula until all the coconut is moistened. Using a spatula to fold the ingredients makes it easier to be sure you’ve incorporated all of the coconut. If the mixture is too dry, add the rest of the condensed milk. The mixture will be heavy and very sticky.
7. Drop dollops of the filling around the crust and then use an offset spatula to gently press the mixture together and into the corners. Try to get it fairly evenly spread over the top.
8. Bake the Bars: Place in the hot oven and bake for 20 minutes, or until the top is set and light brown. If the edges start to get too brown, tent loosely with foil. When the center is set, remove from the oven and place on a wire rack to fully cool and let the filling firm up, at least 2 hours before cutting. If desired, once it has cooled to room temperature you can place it in the refrigerator to speed up the chilling.
9. When the bars are completely firm, run a knife around the edges not covered with parchment and lift the block out of the pan using the parchment paper as handles of the sling. Cut into squares or triangles for serving.
10. If desired, you can melt some more chocolate, pour into a resealable plastic bag, press it into one corner and snip off a bit of the point of that corner. Set the cut pieces onto a wire rack set over a sheet of parchment. Drizzle the chocolate over the pieces in a random pattern.
Recipe found at www.theheritagecook.com
Notes
* You can adjust any recipe to gluten-free by using 120 grams per cup of my favorite gluten-free flour blend. If you are using another brand of gluten-free flour, whisk the mix, spoon it lightly into a measuring cup without a spout until mounded, level off the top with the back of a knife, and weigh the flour left in the cup. Use that weight as your standard per cup of that specific flour. Do this for each flour blend you use. Commercial blends such as Pamela's, Bob's Red Mill 1-to-1, or King Arthur Measure for Measure are all good choices.
If your GF blend doesn't already contain xanthan or guar gum, add 1/4 tsp xanthan to the dry ingredients.
To make your own sweetened condensed coconut milk for a dairy-free version of recipes, check out this article from Detoxinista.
You will get the best results by using a digital kitchen scale and weighing your ingredients, especially when you are baking.
All recommended ingredients are gluten-free as of the writing of this article. Always check to be sure the products haven’t changed and are still safe to consume.
Adapted from a recipe by David Leite
Nutrition Information:
Yield:
16Serving Size:
1Amount Per Serving: Calories: 167Total Fat: 9gSaturated Fat: 5gTrans Fat: 1gUnsaturated Fat: 4gCholesterol: 1mgSodium: 199mgCarbohydrates: 21gFiber: 1gSugar: 6gProtein: 3g
The nutritional information for recipes on this site is calculated by online tools and is merely an estimate. If you need nutritional calculations for medical reasons, please use a source that you trust.
If you love this recipe, be sure to follow me on social media so you never miss a post:
| Facebook | Pinterest | Instagram | Threads | Bluesky |

Create a New Tradition Today!
Welcome! The suggestions here are not intended as dietary advice or as a substitute for consulting a dietician, physician, or other medical professional. Please see the Disclaimers/Privacy Policy page for additional details. Unauthorized use, distribution, and/or duplication of proprietary material from The Heritage Cook without prior approval is prohibited. If you have any questions or would like permission, please contact me. We participate in the Amazon Services LLC Associates Program, an affiliate advertising program designed to provide a means for sites to earn advertising fees by advertising and linking to amazon.com. As an Amazon Associate, I earn a small amount from qualifying purchases without any additional cost to you. This page may contain affiliate links. The author makes no claims regarding the presence of food allergens and disclaims all liability in connection with the use of this site. This post was first shared in Feb 2015. The article was updated in 2025.