I love the seasonings of the Mediterranean and North African nations. They are so different from what I grew up with. My parents were from Indiana and their idea of highly spiced food was adding extra salt and pepper. If it wasn’t for cookbooks and my grandmother teaching me to never be afraid of experimenting in the kitchen, I probably would have gotten no further than sprinkling the top of foods with a little paprika! Today I regularly use ground chile powders, turmeric and saffron, tandoori seasoning, garam masala, cardamom, etc. If you haven’t explored these flavors, I urge you to take a chance!
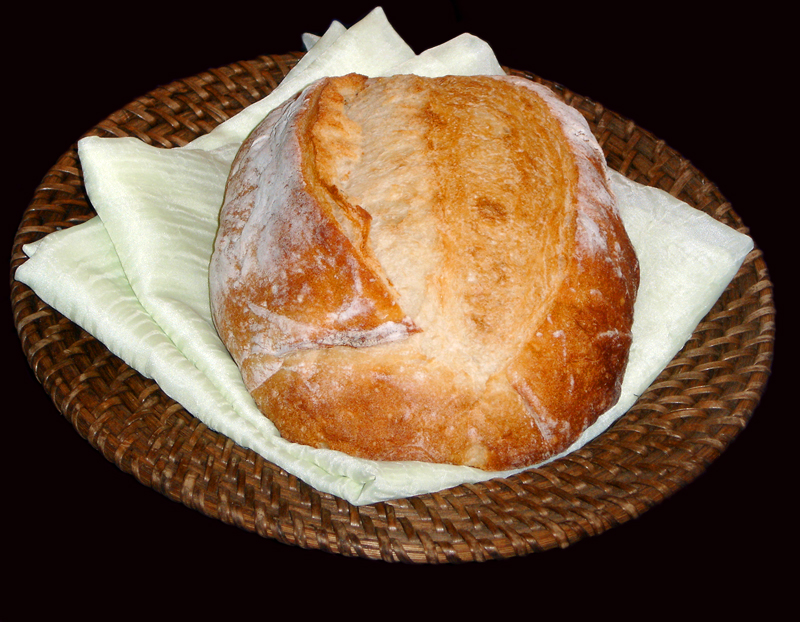
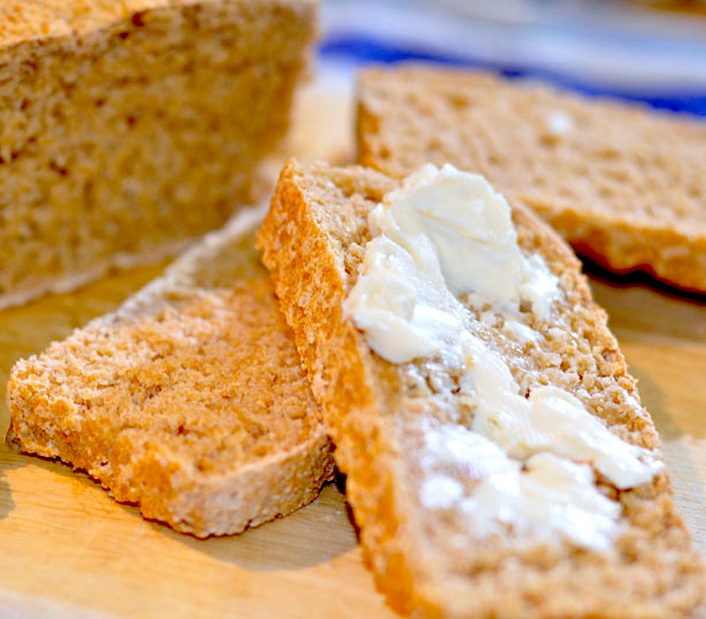
Today’s recipe combines two of my loves; the flavors of the Mediterranean with the baking of bread. You probably have had herb breads from time to time, dill and rosemary are two very popular variations. Hot out of the oven and slathered with butter, they are absolutely delectable. This time I combined chopped onions with spicy chiles and seasonings to create a memorable, zesty bread that I hope you love. If there is a seasoning or herb included that you don’t like, just leave it out – combine flavors that you love!
A samosa is an Indian or Tibetan baked filled pastry, similar to the Greek spanakopita. Typically formed into triangles with pastry or filo dough, they are often filled with curried potatoes, peas, spices, and sometimes cooked chicken or lamb. Usually fried or baked, they come out crispy. They are often served with a sauce of some sort. An appetizer on many menus, you can make an entire meal of samosas – and I have been known to do just that.
Baking bread can be a source of great joy and pride and can also arouse fear in the unprepared. The success or failure of bread lies almost entirely in the starter or other leavener. If it is yeast, you have to keep it alive and feed it. If it is baking powder or soda, you have to activate it at the right time or you run the risk of it failing. Baking bread is like taking a chemistry class in school. You have to be very careful, measure everything exactly, and never lose count while adding ingredients. It drove me crazy in school, but has become invaluable to me in my culinary adventures.
Leaveners fall into three categories: biological, chemical, or mechanical and may be used in conjunction with one another. Biological and chemical leaveners both use the release of gas bubbles when activated to raise baked goods. The most common biological leavener is yeast. Yeast needs warm, not hot, water and a little sugar to feed on, creating the gas (carbon dioxide) needed. On the other hand, to balance the activity of the yeast, salt is added to create a finer crumb (interior structure) and crust as well as to retard the fermentation process. It is a tricky balancing act which is why it is important to follow the direction as to when and how to mix the various ingredients.
While many people are accustomed to yeast as the primary leavener for bread, few have heard some of the other unusual terms such as mother, biga, poolish, or sourdough. Each of these are names for bread starters, a mixture that begins flavoring the dough and starts the rising process. The names vary depending on which country you are in. A biga is used in Italian bread while poolish is the starter most often used by French bakers. The term poolish actually comes from the Polish bakers whose techniques were brought to France.
The most well known chemical leaveners are baking soda and baking powder. Baking soda is the older of the two and one of the first compounds used in ancient baking. It is alkaline and requires an acid in order to work. It activates immediately when combined with acid such as sour cream, buttermilk, vinegar, or even chocolate. It also reacts when it gets wet which is why it is always mixed with the dry ingredients first. Once you have combined the wet and dry ingredients, you want to get them in the oven quickly so they don’t lose their lift.

Baking powder is a combination of baking soda and an acid, usually cream of tartar. Because the acid is already in existence, you use baking powder in recipes where there are no other acids included. There are two forms of baking powder, single action and double acting. Always use double acting because it activates in two separate ways. The first is with liquid and the second with heat. So you will get an initial reaction when you combine it with the wed ingredients, but you have a little more leeway in getting it into the oven. Once it his the heat, the second reaction occurs delivering the final leavening.
Mechanical leavening is utilizing physical manipulation of the ingredients to get the desired result. For example, creaming butter and sugar together effectively traps air, giving you the fluffy mixture after beating. Of course whipped egg whites or cream are very commonly used to lighten mixtures such as mousses and meringues. The final mechanical method is steam – the trick to truly flaky biscuits. Layering butter between slabs of dough and folding them over one another in what are called “turns” effectively creates multiple layers of fat. When fat melts, the liquid in it turns to steam which acts to leaven the layers of dough.
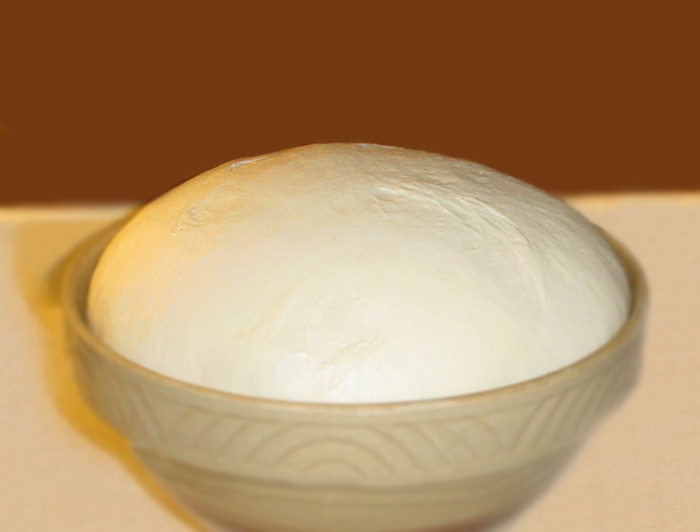
Today’s dough utilizes a biga. A biga is a pre-fermented dough that is started with a tiny bit of yeast, and allowed to work before mixing into bread dough. The advantage of making a biga is that because it ferments for a long time, it adds flavor and character to the bread you make with it. For those who love sourdough bread, this is a great way to learn the basic principles before taking the leap.
I am sure you have heard of bread starters that families have passed down from generation to generation, stating that it is the same starter that their grandmothers used. I have news for you – starters come and go, they live and they die regularly. Someone drops them on the floor or forgets to feed them and oops, there goes another one! The true tradition that is passed on is the love of baking and presenting fresh from the oven homemade breads. Forget worrying about how old the starter is and get your own going. And you won’t be able to get true San Francisco sourdough bread in England or Ohio. The reason is that the naturally occurring yeasts in the air in the San Francisco Bay Area (Lactobacillus sanfrancisco) don’t exist anywhere else. You can buy “San Francisco Sourdough Starter” and it will give you wonderful homemade bread. But even if you start with that specific lactobacillus, your own natural yeasts will eventually take over. Never fear though, your efforts will always be welcomed with huge smiles by your loved ones, happy to get anything that you baked for them.
Have fun with this unusually flavored bread. I think it is absolutely perfect served with a steaming hot bowl of hearty soup. What about you? Happy Tuesday!

- Biga
- 7/8 cup (7 oz) water
- 3/4 cup (3 oz) pumpernickel or all-purpose flour
- 1 cup + 2 tbsp (5 oz) King Arthur Unbleached All-Purpose Flour **
- 1/4 tsp salt
- 1/4 tsp commercial yeast
- Dough
- All of the Biga (from above)
- 1-1/2 cups (12 oz) water
- 1/2 cup (1 oz) Baker's Special Dry Milk or nonfat dry milk
- 2 tbsp (1 oz) sugar
- 1-1/2 tsp instant yeast
- 2 tbsp (1 oz) olive oil
- 2-1/4 tsp salt
- 4 to 4-1/2 cups (18 to 19 oz) King Arthur Unbleached All-Purpose Flour **
- 1/2 tsp garam masala spice
- 1/2 tsp turmeric
- 1 tsp chili powder
- 1/2 tsp cumin
- 1 tbsp finely chopped cilantro, optional
- About half a Vidalia or other sweet onion (7 to 8 oz), chopped finely
- 1 tsp garlic, finely minced
- 1/2 habanero chile or jalapeno for milder flavor, finely minced, optional
- Make the Biga: In the morning or the night before, combine all of the biga ingredients in a small mixing bowl, cover, and set aside to proof at room temperature for 6 to 8 hours.
- Make the Dough: In the bowl of a heavy-duty stand mixer, using a flat paddle or beaters, combine all of the dough ingredients except the onion, garlic, and chile, stirring until the dough becomes cohesive and begins to leave the sides of the bowl. Then switch to the dough hook and knead for 5 to 8 minutes. Knead the onion, garlic, and chile in during the last couple of minutes. Transfer the dough to a greased bowl, cover loosely with a clean kitchen towel, and let it rise for about 45 minutes. Take out the dough, gently deflate it by folding it in half, onto itself, turn it over, and place it back in the bowl. Cover again with the towel and let it continue to rise for an additional 45 to 60 minutes.
- When the dough has finished rising, take it out of the bowl and place it on a lightly floured surface. Cut it in half (use a knife or bench scraper). You can shape each half to make loaves in 8-1/2 x 4-1/2 inch pans or you can make free-form rounds. Cover and let the loaves rise until they're rising over the top edge of the pan (in the case of the pan loaves), or until the rounds appear fully risen. The time will vary depending on the conditions in your kitchen, but it should be 30 to 60 minutes. Cut a 1/4-inch-deep “X” in the top of the rounds if desired.
- Bake the Loaves: If using pans, bake the loaves in a preheated 350°F oven for about 35 to 45 minutes. For free-form rounds, bake in a preheated 425°F oven for approximately 35 to 45 minutes. The rounds will be crustier, more of a rustic artisan loaf.
- Remove the bread from the oven and, if it's in a pan, remove from the pans. Cool the loaves on a wire rack. When thoroughly cooled, wrap in plastic and store in the refrigerator. Remember that homemade breads do not have any preservatives in them and will spoil at room temperature much more quickly than commercially baked breads.
- Yield: 2 loaves.
- The recipe has been developed to take advantage of the specific gluten content of King Arthur flour. Using any other brand will alter the final product.
Thank You!