Mouthwatering aromas wafting skyward from backyard barbecues. The sound of ice clinking in glasses, joyous laughter, the sizzle as new food hits the hot grill, and splashing water as kids play in the pool. Warm, balmy evenings with the whisper of a cooling breeze. The mysterious blue of a twilight sky as day surrenders to night. This is summer to me and nothing says summer more than the Fourth of July celebrations.
When I was growing up, my father, like most dads of that era, declared himself the King of the Grill. He had one of those silly aprons stating this prowess. The only problem was that he had no clue how to barbecue correctly. Everything was overcooked; the chicken in particular was tough as leather and always charred black on the outside. Of course we didn’t know any better and thought everything was delicious.
We have learned a lot in the past 30 years thanks to some very talented chefs and barbecue specialists. Thanks to them we now can turn out perfectly cooked grilled foods every time.

Pour hot coals out of a charcoal chimney
Start by building a 2-tiered fire creating a hot zone and a cooler area. If you are using charcoal, bank the coals on one side of the grill; if using a gas grill turn one side to high and the other to medium or low. Never use lighter fluid with charcoal – it is unhealthy and leaves an unpleasant flavor on your foods. Use a charcoal chimney or electric starter for the best results.

Use a crumpled piece of aluminum foil to clean the grill before cooking
Put the grate on the barbecue while the coals are burning down to preheat it and make it easier to scrub clean, which helps keep the food from sticking. Charcoal should always have a covering of ash on it before you start cooking. Always pat your meats dry before placing on the grill, especially if they are marinated. If you are using an oil-based marinade you will likely get flare ups, but don’t use a water bottle to extinguish them unless they are dangerously high. Instead, cover the grill with the lid and adjust the air holes if necessary to reduce the amount of oxygen getting to the fire. Place your meats “presentation side” down first, which gives the best grill marks. For a perfect diamond shape, place all your pieces facing the 10 o’clock position then switch them all to face the 2 o’clock position. Voila! Everyone will call you a BBQ master!
There are special techniques for each type of protein you cook that help you produce the best results possible. Follow these guidelines and you will impress everyone at the party!

Barbecued chicken breasts
When you are cooking chicken you want to brine the pieces first. Brining adds a bit of flavor but more importantly it guarantees moist grilled chicken. It also gives you a little wiggle room because it is harder to overcook brined chicken. Make sure you remove it from the brine and pat dry with paper towels. This will keep the skin from steaming instead of searing when it hits the hot grill.
Always start chicken over the hot part of the grill to develop grill marks and to sear the surface, trapping the moisture in the meat. Once it is marked, move it to the cooler side of the grill and finish cooking there. If you are using a sauce, you can add it in the final minutes of cooking on the cooler side of the grill without the fear of it burning. Treat each piece individually, removing it from the heat when it is done. The larger pieces and those on the bone will take longer than the wings or boneless breasts.
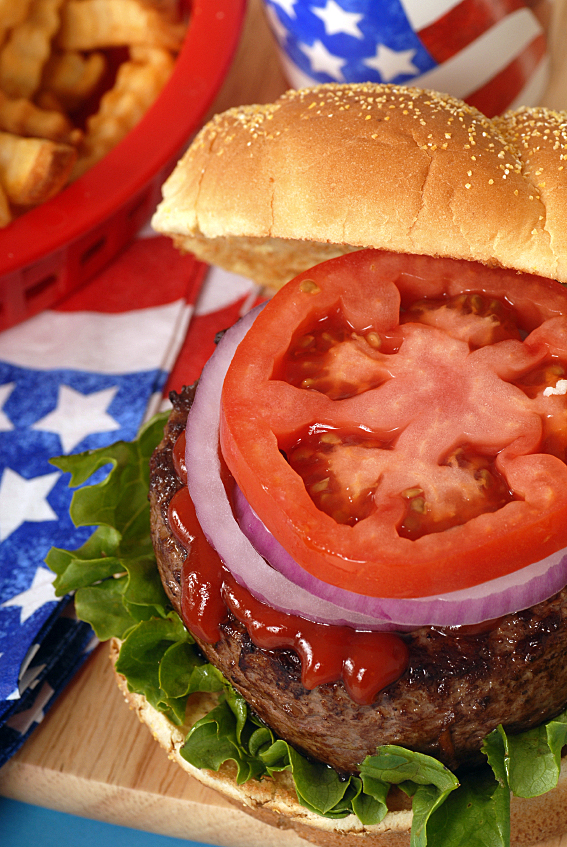
When you throw your burgers on the grill, think about also adding the tomato and onion slices. Cooking them over the fire adds an extra boost of smokiness, enhancing the flavor of the burgers. Onion slices are notorious for falling apart, so I use a skewer to hold them together while they cook. You can also use a grill basket to corral everything.

If you want a real treat, make your own hamburger buns from scratch. They are actually quite easy to make and don’t take as long as bread does to rise. Start the buns about midday and they’ll be baked and ready by the time you are ready to grill the burgers. If this is too much work or you don’t have the time, many gourmet grocery stores are selling very high quality buns. I like brioche if I can find it. It gives you a buttery goodness that is hard to beat.
Throwing some water-soaked wood chips on the fire will create very flavorful smoke. This is one way to boost the flavor without overcooking your grilled foods.
Most hot dogs and many sausages are already cooked so they just need to be warmed up on the grill. There is no need to “cook” them, so they can be placed on the cooler side of the grill while you cook the other items over high heat. If your sausages are raw, start them on the hot side for just a minute or two, and then move them to the cooler side for gentler cooking. When they are firm to the touch, they are done. I usually bring them off the heat a little early and let them finish cooking under foil in the kitchen. Test one and if they need a little more, you can either pop them back on the grill or give them a quick zap in the microwave.
I put a lot of thought into my menus and try to create a good balance of flavors, textures, nutrients and “favorites.” My mother used to say that if a plate of food was “pretty” and had lots of color, then it was healthy. She was way ahead of her time. Today we know that fresh fruits and vegetables are essential for good health and are nature’s rainbow. Just like a leprechaun’s pot of gold, eating fresh produce will give you a happy life!
When you are planning your side dishes, ask yourself these questions: Will it complement the smoky flavors? Does it add texture to the plates? Does the dish have lots of bright colors? Am I serving a different menu than the last time my guests came to dinner? And, if it is a holiday, do I have enough “traditional” foods to satisfy people’s memories? Instead of just making the same things over and over, look for new and unusual sides that will be interesting and fun for your guests to experience.
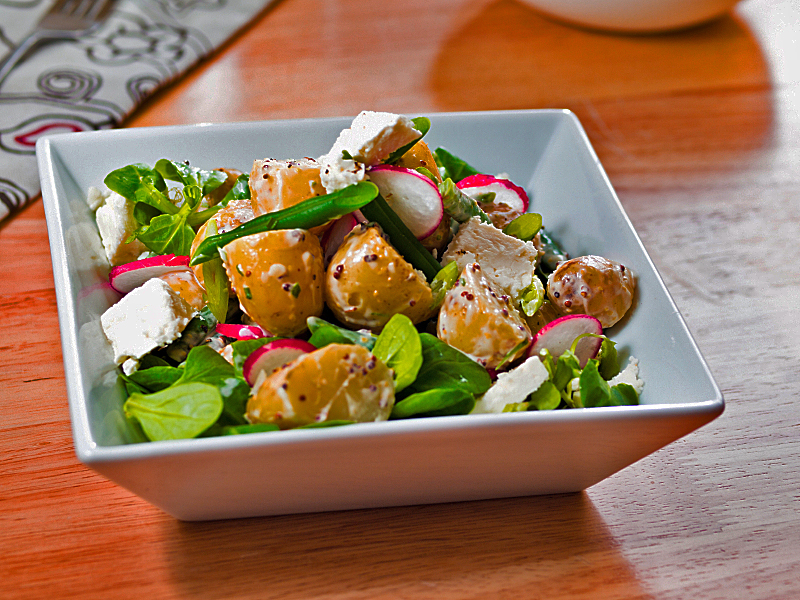
Everyone loves a traditional potato salad, myself included, but if you are concerned about keeping a mayonnaise-based dressing cool enough (important if you are having a picnic), try my other favorite salad. It is also made with potatoes, but in the French-style, it has green beans and a vinaigrette dressing. I like the acidic dressing because it helps cut through the richness and fattiness of burgers and the other dishes. It really wakes up your taste buds!
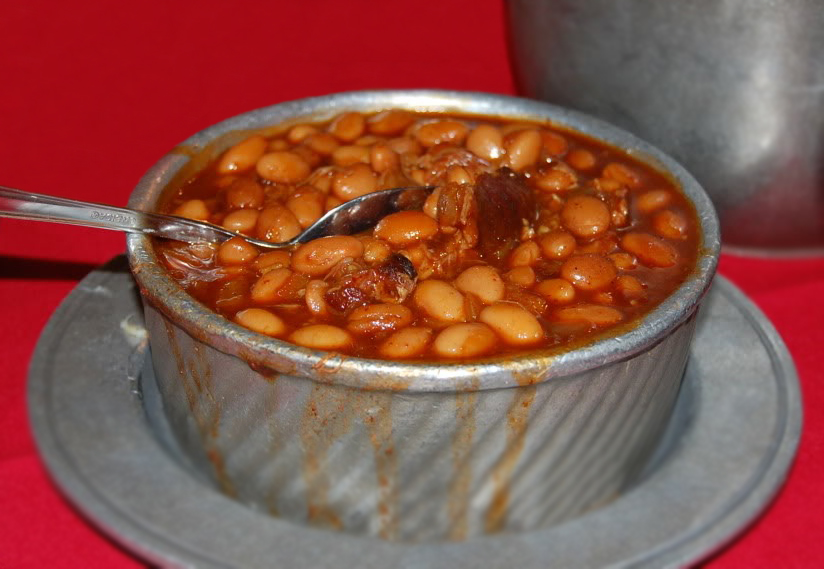
When making baked beans, instead of starting with dry beans, you can save yourself hours by using good quality canned beans. I like a blend of white, black, and pinto for a more interesting look and texture. As with many casseroles, I think the flavor improves with time, so if you can, make the beans a day or two ahead to let flavors meld.
No matter how you choose to spend your holiday, I am sure you will be creating new memories and family traditions to pass down to the next generation. Whether you stay with the traditional ingredients or try something daring, enjoy this American holiday with your family and friends as you watch the fireworks and celebrate our country’s independence. Happy Fourth of July!

Jane’s Tips and Hints:
Picnics take some extra planning and strategy, but it can be easy with the right equipment. You want to plan meals that travel well, nothing with a lot of liquid with the exception of cold drinks. Look for things that don’t have to be kept frozen, or conversely piping hot. You want recipes that can be served at room temperature, that don’t take any last minute preparation, and that go well together. You always want a variety of flavors, textures, and colors to create interest. Remember that you taste first with your eyes, so bring a few sprigs of fresh herbs to garnish your plates.
You need to have non-breakable containers, preferably square or rectangular, with tight fitting lids. These will stack more easily, save room, and stay cooler longer. Freezer packs interspersed throughout keep things at the right temperature and won’t melt when they thaw. And lastly, the right cooler makes all the difference in the world. We have a soft-sided rolling cooler that collapses down to a small flat package when not in use. We have used ours for many years and always have it in the trunk of the car when we take road trips just in case we find something yummy that “needs” to come home with us.
Kitchen Skill: Measuring Reducing Liquids
To know when a liquid has reduced to a specific amount, before starting the recipe, in the saucepan you will be using, pour in the amount of water equal to the final volume your recipe calls for. If it says to reduce to 1 cup, place 1 cup of water in the pan. Stick the handle of a wooden spoon in the water and mark the level with a pencil. Cook your liquid until it is at or below the pencil line on the spoon handle.
- 2-1/2 lb freshly ground chuck and/or sirloin, preferably 20% to 30% fat
- 1 tsp soy sauce or kosher salt
- 1 tsp freshly ground black pepper
- 6 slices of cheese
- 6 large hamburger buns
- 6 thick slices ripe tomatoes
- Crisp iceberg lettuce leaves, stem portion removed
- Thin slices of mild onion, such as Vidalia or red
- Set up your grill for 2-tier cooking. If using charcoal, light the coals and when covered with ash, bank most of them on one side of the grill bed. If using a gas grill, preheat with all the zones on and then turn off one or two to create a cooler area.
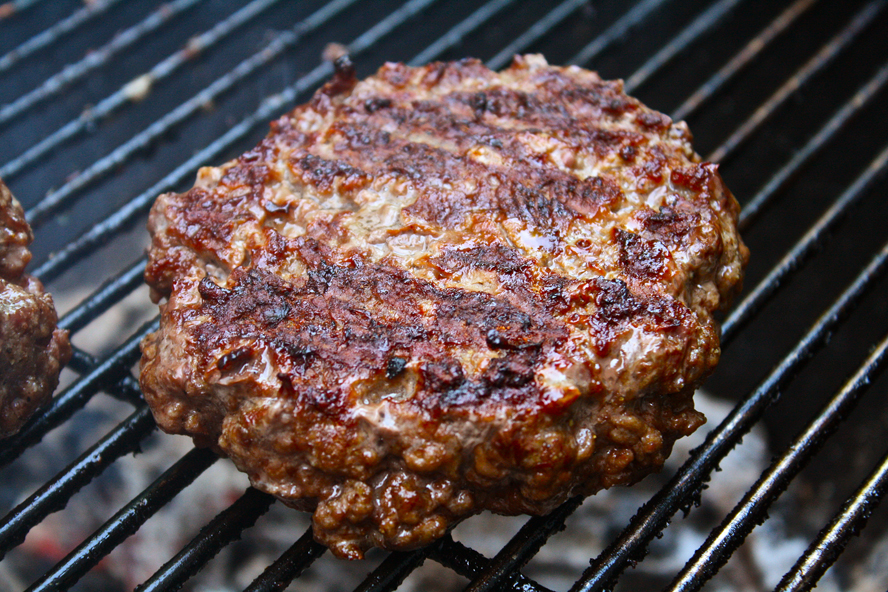
- Place your meat in a large bowl and season with the soy sauce (or salt) and pepper. Toss lightly to distribute the seasonings. Working gently, form into 6 patties. Press the center of each one to create a shallow depression. This will help avoid a bulging burger that looks more like a baseball than a disk. Don’t overwork the meat and handle as little possible to avoid melting the fat with the heat of your hands.
- Place the patties over the direct heat and cook for about 1-1/2 minutes per side. Move them to the cooler side of the grill and continue cooking for about 3 minutes longer per side for medium. If you have freshly ground meat from a reputable butcher you can eat your burgers rare to medium-rare. If you are less sure, cook them to at least medium. But remember that the longer you cook them, the drier they will become.
- When done, transfer to a clean platter and tent with foil. Let them rest off the heat for about 5 minutes. While the meat is resting, you can toast the buns if you like on the cooler side of the grill. Watch them carefully, especially if you are using Brioche buns, so they don’t burn.
- On the bottom half of the buns layer the lettuce, burger patty, tomato and onions. Add any other garnishes that you like and serve immediately.
- Dough
- 3/4 cup lukewarm water
- 2 tbsp butter
- 1 large egg
- 3-1/2 cups unbleached all-purpose flour
- 1/4 cup granulated sugar
- 1-1/4 tsp salt
- 1 tbsp instant yeast
- Toppings
- 1 egg white beaten with 1/4 cup water
- 2 to 5 tbsp sesame seeds, optional
- 2 tbsp melted butter
- In the bowl of a stand mixer fitted with the paddle attachment, combine all the dough ingredients until smooth. Switch to the dough hook and knead until the dough climbs up the hook, about 3 minutes. You can also do this by hand. Combine the ingredients in a bowl and turn out onto a floured work surface, kneading until smooth and elastic, and no longer sticky. Add flour as needed. You can also put the ingredients into a bread machine and let it do the kneading for you.
- Place the dough into a large oiled bowl, cover with a clean kitchen towel and place in a warm draft-free area. Let rise until doubled in volume, about 1 to 2 hours.
- Gently deflate the dough and divide it into 8 pieces. Shape each piece into a round ball, pulling the top taught. Press the top with the palm of your hand to flatten into a rounded disk about 3-inches diameter. Transfer to a lightly greased or parchment-lined baking sheet, cover with a clean kitchen towel, and let rise for 40 to 60 minutes or until noticeably risen.
- While the rolls are rising, preheat the oven to 375°F.
- Brush the tops of the buns with the egg wash, and quickly sprinkle with sesame seeds. Bake for 15 to 18 minutes or until golden brown. Remove from the oven and brush the tops of the buns with the melted butter.
- Transfer to a wire rack and cool completely. When ready to serve, split horizontally with a sharp knife, making the bottom thinner than the rounded top.
- Yield: 8 large buns
- 1 cup root beer
- 1 cup organic ketchup (to avoid HFCS)
- 1/4 cup fresh lemon juice
- 1/4 cup pineapple juice
- 2 tbsp bourbon, optional
- 3 tbsp soy sauce
- 1-1/2 tbsp firmly packed dark brown sugar
- 1 tbsp mild-flavored/light molasses, not blackstrap
- 1 tsp liquid smoke seasoning, smoked paprika, or chipotle powder
- 1/2 tsp grated lemon peel
- 1 tsp dry mustard
- 1/2 tsp ground ginger
- 1/4 tsp ground cloves
- 1/4 tsp ground nutmeg
- 1 clove garlic, minced
- 1/2 med onion, minced
- Combine all ingredients in a medium heavy-bottomed saucepan. Bring to boil over medium heat, stirring occasionally. Reduce heat to low and simmer until reduced to about 1-1/2 cups*, about 20 minutes. Season sauce to taste with salt and pepper.
- Cool slightly. Pour into a blender or food processor (or use an immersion blender), put the cover on with one corner up to release steam. If you don’t do this, it will explode all over your kitchen! Cover the lid with a kitchen towel, and with your hand on it (just in case ...), blend until smooth. Taste and adjust seasonings.
- Transfer to bowl. Cover and refrigerate. (Can be made 2 weeks ahead; keep refrigerated.)
- Yield: about 1-1/2 cups
- Juice of 3 lemons
- 1 tbsp coarsely ground black pepper
- 1 tbsp coarse salt
- 3/4 cup extra-virgin olive oil
- 2 chickens, backs removed and quartered
- 2 peeled and smashed garlic cloves
- Fresh thyme sprigs, plus extra for garnish
- Lemon slices, for garnish
- Combine lemon juice, pepper, salt and oil in jar with a tight lid. Shake vigorously just before using.
- Place chicken in a large zip-top plastic bag with the marinade, garlic, and thyme sprigs. Refrigerate at least 30 minutes or up to 2 hours, turning occasionally.
- When ready to cook, bring chicken to room temperature. Prepare grill for a medium-hot fire on one side. Grill chicken on an oiled rack set 5 to 6 inches over glowing coals until just cooked through, about 4 minutes per side.
- If you want to add BBQ sauce, cook chicken for 3 minutes per side, mop with sauce, and then move to the cooler side of the grill and cook for another minute or two on each side. Serve hot.
- 2 to 2-1/2 lb flank steak
- 4 tbsp freshly squeezed lime juice
- 2 tbsp soy sauce or fish sauce
- 1 tsp minced garlic
- 1 tsp peeled and minced or grated fresh ginger or 1 tsp ground ginger
- 1 tsp sugar
- Salt and freshly ground black pepper to taste
- Score the meat across the grain (helps create a tender steak). This means to make thin cuts opposite the way the grain runs in the meat. Do this on both sides and place in a large zip-top plastic bag.
- Combine remaining ingredients in a jar and shake to blend. Pour over the steak in a zip-and marinate for at least 30 minutes (if the marinating time is longer than an hour, refrigerate). Near the end of the marinating time, start a charcoal fire, hot on one side, cooler on the other.
- Remove the meat from the marinade and pat dry with paper towels. Grill or broil the steak about 4 inches from the heat source for 3 to 4 minutes per side, or until nicely browned. Move the meat to a cooler part of the grill and cook for another 2 minutes per side. Check for doneness by touch, with a thin-bladed knife, or, preferably, with an instant-read thermometer (125°F is about right for rare to medium-rare). Remember that the carry-over cooking will continue and the final temperature will be about 5-degrees higher than when you take it off the heat.
- Let rest for 5 to 10 minutes, tented with foil, before cutting into thin slices, across the grain, using a sharp carving knife.
- 1 (12 oz) bottle of Frontera Chipotle Pineapple Barbecue Sauce
- 1 tbsp Worcestershire sauce
- 1 tbsp maple syrup
- 1 tsp dry mustard
- 4 slices thick-cut bacon, diced, cooked and drained, or use 2 tbsp olive oil instead for vegetarian version
- 1 large onion, chopped finely
- 1 red bell pepper, seeded and chopped finely
- 3 cans cooked white, black, or pinto beans, or a combination; drained and rinsed
- 1/4 to 1/2 cup water, or as needed Hot sauce, optional
- Place rack in center of oven and preheat to 375°F.
- In a bowl, whisk together the barbecue sauce, Worcestershire, maple syrup, and dry mustard. Make sure mustard is completely dissolved.
- Cook bacon in skillet and once done, remove all but 2 tbsp of the renderings, or if you are not using bacon, heat olive oil over medium heat. Sauté onion and bell pepper until translucent and tender, but not mushy, about 3 minutes. Remove from heat.
- Place beans in a large mixing bowl. Add cooked bacon, sautéed onion, and bell pepper. Toss to combine. Pour in barbecue sauce and stir to blend. Add water as needed to get to the consistency you like. Remember that the sauce will thicken as it bakes. Taste and adjust seasonings. You can add some hot sauce if you want a spicier flavor.
- Transfer to a deep ovenproof baking dish Bake 30 to 45 minutes or until it is bubbling around the edges, is hot all the way through, and top is browned. Serve hot, warm, or at room temperature. Store, covered, in the refrigerator for up to 2 days.
- 1 small red onion or sweet onion, peeled and thinly sliced
- 2 cucumbers
- 3/4 cup rice wine vinegar
- 1/4 cup granulated sugar
- 1 tbsp olive oil
- 3 tbsp chopped fresh dill, plus extra sprigs for garnish
- 1-1/2 tsp salt
- 1/2 tsp freshly ground black pepper
- Place onion slices in a bowl and cover with ice water. Let stand about 20 minutes. Drain and pat dry with paper towels.
- Combine vinegar and sugar in a small saucepan. Bring to a simmer and cook until sugar is completely dissolved, about 3 minutes. Remove from heat and stir in olive oil. Let cool.
- While vinegar is cooling, peel cucumbers and either cube or slice thinly. Sometimes I like to remove the seeds first by splitting cucumber in half lengthwise and scraping out the center with a spoon. Place cucumbers in a medium mixing bowl, add drained onions, and sweetened vinegar. Sprinkle with chopped dill, salt, and pepper. Toss to mix.
- Cover and chill. It will hold several weeks in the refrigerator, so make extra and have it on hand for a snack during hot days.
- Yield: 6 to 8 servings
- Dressing
- 2/3 cup mayonnaise
- 1 tbsp maple syrup
- 1/2 tbsp Dijon mustard
- 1 tbsp rice wine vinegar
- 1 tbsp freshly squeezed lime juice
- 1/4 tsp ground cumin
- 1/4 tsp salt
- 1 garlic clove, minced
- 1 or 2 jalapeno chiles, stemmed, seeded, and minced
- Slaw
- 4 cups shredded cabbage (preferably Napa cabbage)
- 1-1/2 cups shredded carrots
- 1/2 cup diced red bell pepper
- 1/2 cup minced cilantro
- To Make the Dressing: Mix together all of the dressing ingredients in a bowl. (If you want a mild salad, add just 1 chile.) May be made 1 or 2 days in advance; refrigerate in a covered container.
- To Make the Slaw: Combine the cabbage, carrots, bell pepper, and cilantro in a large bowl. Add 2/3 of the dressing and toss to combine. (If you want a creamier slaw, add all of the dressing.)
- Refrigerate at least 2 hours before serving. Keeps well for up to 1 day in the refrigerator.

- Salad
- Large bowl of cold water with ice cubes
- 1 lb thin green beans, preferably haricot vert or French-style, trimmed
- 6 cups cold water
- 2 tbsp kosher salt, divided
- 2 lb small red and/or Yukon Gold potatoes, scrubbed
- 1/4 tsp freshly ground black pepper
- 1/4 cup thinly sliced green, red or Vidalia onions
- 2 to 3 tsp fresh thyme leaves
- Dressing
- 1/4 cup red wine or Champagne vinegar
- 1 tbsp water
- 1/3 cup organic California Olive Ranch olive oil
- 2 tsp Dijon mustard
- 2 tbsp minced shallots
- 1/2 tsp kosher salt
- 1/4 tsp freshly ground black pepper
- Set up your ice bath in a large bowl and place beside the stove. Line a baking sheet with paper towels; set aside.
- Prepare the Beans and Potatoes: In a large saucepan, place the beans, water and 1 tbsp salt and bring to a boil over high heat. Reduce the heat to medium and cook until beans are tender but still crisp, about 2 minutes for haricot vert or 4 minutes for larger beans. Use a slotted spoon or spider to transfer the beans to the ice water bath. Drain the beans and place on prepared baking sheet.
- Increase the heat under the saucepan to high and add the potatoes and remaining 1 tbsp salt. Reduce the heat to medium-high and cook until potatoes are tender but still firm, between 5 and 20 minutes depending on the size of potatoes. To tell when they are done, insert a sharp paring knife in the potato - if it meets any resistance, cook another minute and try again. Use a slotted spoon or spider to transfer the potatoes to the baking sheet. The paper towels will absorb any excess water.
- Cut the potatoes into bite-sized cubes (do not peel) and transfer to a large mixing bowl.
- Make the Dressing: Combine the ingredients in a jar with a tight-fitting lid. Shake briskly until dressing is emulsified, about 2 minutes.
- Assemble the Salad: Drizzle the dressing over the potatoes, tossing gently to evenly coat them. Add the beans, black pepper, onions and thyme. Toss gently to evenly distribute ingredients. Let cool to room temperature. Taste and adjust seasoning. Serve warm or at room temperature.
- Yield: 4 to 6 servings
- 6 large russet potatoes, scrubbed
- 2 tbsp kosher salt
- 3 green onions, rinsed
- 2 tbsp sweet pickle relish or 3 sweet gherkins, minced
- 2 stalks celery
- 1/3 to 1/2 cup Light Mayonnaise (preferably Best Foods or Hellman’s)
- About 2 tsp yellow mustard
- 1/2 tsp kosher salt
- 1/2 tsp freshly ground black pepper
- 1 tbsp sweet pickle juice (from jar of pickles)
- Optional ingredients: Chopped hard-boiled eggs, cooked and crumbled bacon, corn, chopped bell peppers, minced mild or hot chiles, chopped pepperoncini, halved cherry tomatoes, etc.
- Place unpeeled potatoes in a large stockpot and cover with water by 2-inches. Bring to a boil over high heat, stir in 2 tbsp kosher salt, reduce heat to medium (keep water at a low boil) and cook until you can easily pierce potatoes with a fork, about 20 minutes. Large potatoes may take longer. Remove from water and set aside to cool.
- Meanwhile, chop onions, sweet pickles and celery into small pieces all about the same size. Transfer to a large mixing bowl.
- In a small bowl, combine the mayonnaise, mustard, salt, pepper, and enough pickle juice to thin it out a bit. Taste and adjust seasonings until you get a flavor balance you like.
- When potatoes are cool enough to handle, but still warm, peel and cut into bite-sized cubes. Add potatoes to bowl with onions, pickles, and celery. Sprinkle liberally with salt and pepper and toss until all ingredients are evenly distributed.
- Pour half of mayonnaise mixture over the top and toss until coated. Add remaining mayonnaise as desired to get the amount of sauce you like. My husband likes his potato salad quite dry, and others like it heavily dressed. Toss until everything is evenly coated. Cover with plastic wrap and chill in the refrigerator until ready to serve, at least 2 hours if possible. Flavors need time to meld and the salad should be served cold.
Thank You!


Melissa @ weber bbq uk
Your recipes seem very delicious, I have eaten grilled lemon-thyme chicken before. Actually it had a good taste, I hope to make that according to your recipe.