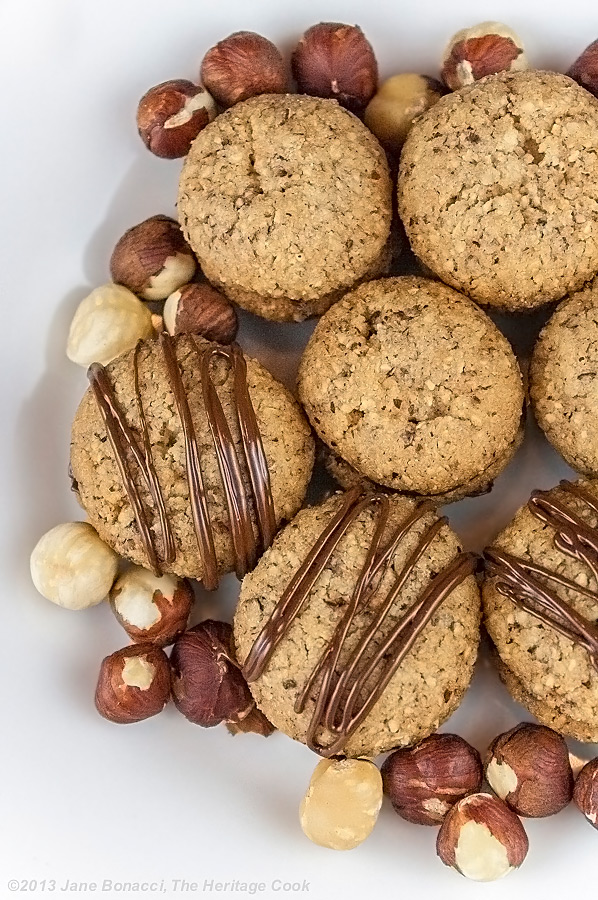
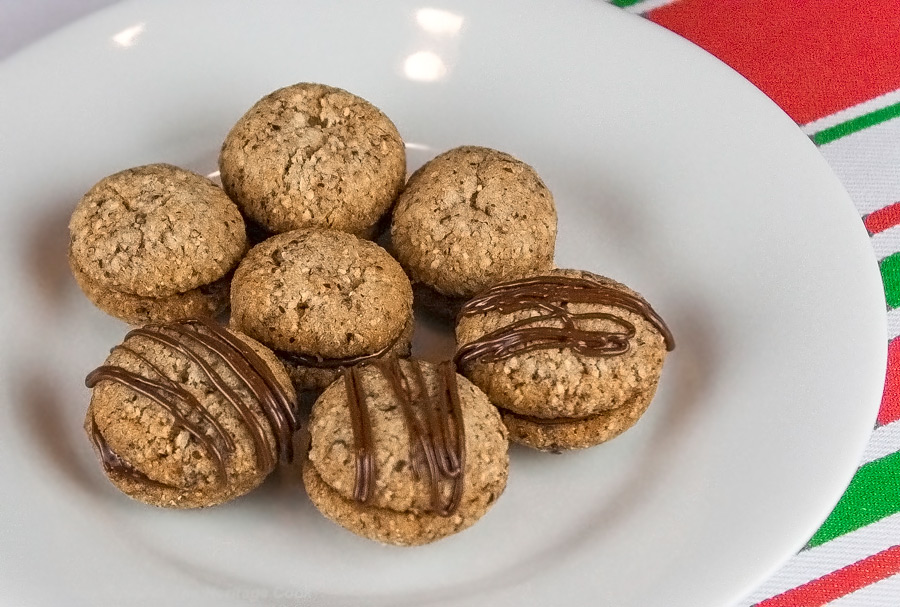
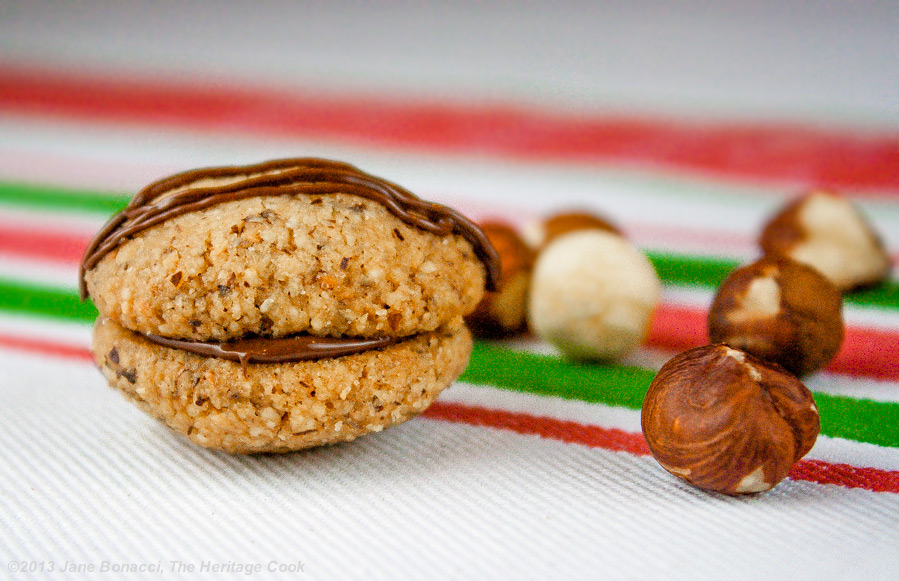
These Chocolate Hazelnut Sandwich Cookies are made from ground hazelnuts with chocolate centers. They are delicate and tender with just the right blend of nuttiness and chocolate for perfect little bites. They are easy to make and can be made ahead and frozen. Then you have fresh cookie dough ready to be baked anytime!
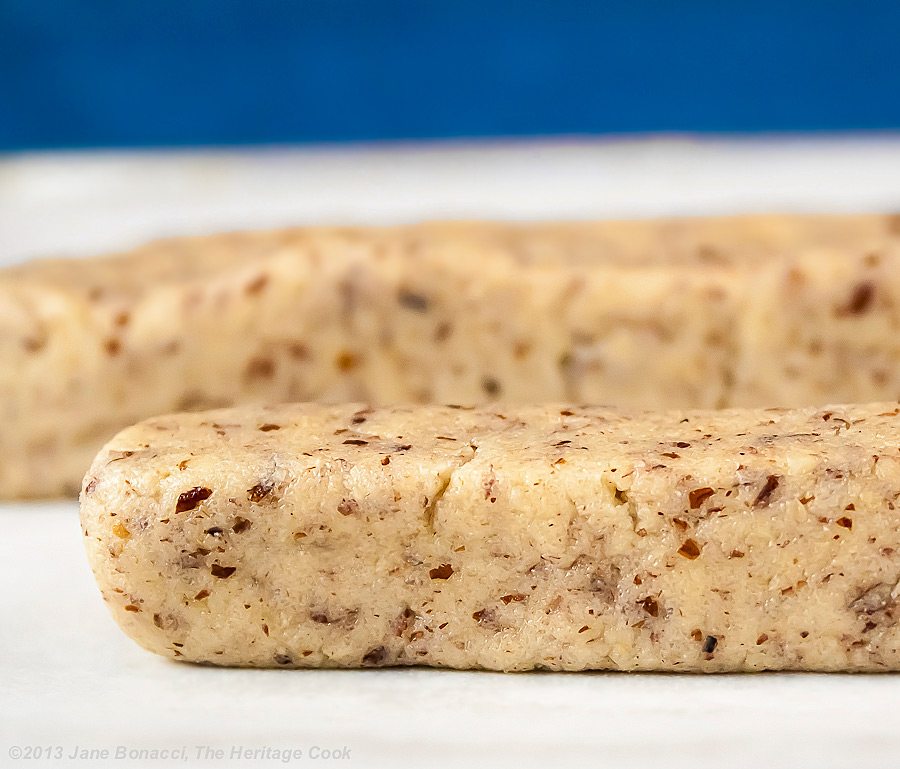
Raw cookie dough formed into “ropes”
I discovered hazelnuts when I was 11 years old. My father’s job got transferred up to Portland, Oregon and we went along with a sense of adventure. It was an amazing, life-changing experience, opening my eyes to life outside of my little California bubble. I have loved Portland since then and that is partly why we decided to move up here.
When we first got to Portland, we discovered this “new” nut that we had never tasted before, the filbert. A filbert is virtually the same as a hazelnut and the terms are often used interchangeably, but they do come from two different yet closely related types of trees. I instantly fell in love with filberts and am delighted to be able to get them so readily up here.
There are some people that do not like the flavor of hazelnuts – I know, how can that be? If you are one of them, or are allergic to them, you can swap in almonds instead. I think they would both be wonderful and it would be fun to have both kinds side-by-side for comparison.
These cookies are fantastic on their own, but even better with the chocolate filling. If you want to change it up, you could use Nutella or raspberry jam as the filling and dip the tops in chocolate. Gee, has it been long enough for me to go back and have some more cookies? 🙂
I hope you enjoy these wonderful little Chocolate Hazelnut Sandwich Cookies and have a fabulous Chocolate Monday!!
Key Ingredients for Chocolate Hazelnut Sandwich Cookies:
- Hazelnut meal or ground toasted and skinned hazelnuts (use almond meal if you prefer)
- Brown or white rice flour or all-purpose flour
- Unsalted butter
- Granulated sugar, salt, vanilla
- Semisweet chocolate chips or chopped chocolate
How Do I Toast and Skin Hazelnuts?
Preheat the oven to 325°F. Place the hazelnuts on a baking sheet. Toast the nuts for about 10 to 15 minutes or until they are golden brown.
Remove from the oven and as soon as they are cool enough that you won’t burn yourself, place half the nuts in a rough towel and rub them briskly to remove the skins. Leaving a few pieces of the skins on the nuts is fine, but it does add a slight bitterness. Set aside and repeat with remaining nuts. Let nuts cool completely before grinding.
PRO Tip:
Bob’s Red Mill sells hazelnut meal/flour that takes all the work out of it! It is a wonderful product and gluten-free. I love keeping a bag of it in the freezer to use whenever the mood strikes. They also sell almond flour, also gluten-free, and a delight to bake with.
Do I Really Need a Stand Mixer?
No, you can use a hand mixer, but this dough is on the heavy side and may strain the motor. If you have one, I recommend using a stand mixer for the ease and speed.
How to make Chocolate Hazelnut Sandwich Cookies:
- Mix together the ground nuts and flour; add in the butter, sugar, salt, and vanilla, blending until becomes a dough
- Divide dough into thirds, forming each into a rope and chill until firm, an hour or two
- Cut a rope into equal piece, about 5 grams each (the size of a marble); roll into balls and bake 10 to 14 minutes until lightly golden brown
- Slide parchment with the cookies onto a wire rack to cool completely
- Melt chocolate whisking until smooth and pour into a piping bag or resealable plastic bag and squeeze a little bit on the bottom of half the cookies
- Top each one with another cookie, flat side down and set aside to cool and firm up; decorate with a drizzle of leftover chocolate if desired
Recommended Tools (affiliate links; no extra cost to you):
- Food processor
- Stand mixer
- Chef’s knife
- Cutting board
- Baking sheet pans
- Parchment paper or Silpat silicone baking mats
- Kitchen scale
- Piping bags
Gluten-Free Tips:
Use your gluten-free all-purpose 1-for-1 style flour or rice flour in place of regular all-purpose flour.
Chocolate Hazelnut Sandwich Cookies (GF)

These Chocolate Hazelnut Sandwich Cookies are made from ground hazelnuts with chocolate centers. They are delicate and tender with just the right blend of nuttiness and chocolate for perfect little bites.
Ingredients
- 140 g hazelnut meal or 1-1/4 cups hazelnuts, toasted & skinned (see above), or you can use almonds/almond meal
- 1 cup (140 g) rice flour, or sifted all-purpose flour
- 3-1/2 oz (100 g / 1 stick) unsalted butter, at room temperature, cut into small pieces, plus more, if needed
- 1/2 cup (100 g) granulated sugar
- Pinch of salt (leave out if using salted butter)
- 1/2 tsp pure vanilla extract
- about 1/2 cup semisweet chocolate, chopped or chips
Instructions
- Make the Dough: If you are using hazelnut meal (or almond meal), skip to the next paragraph. If you are using whole hazelnuts, toast and peel (see directions above), put them in a food processor, and pulse them until about the consistency of coarse polenta.
- Place the ground nuts in the bowl of a heavy-duty stand mixer and add the flour and stir together. Add the butter, sugar, salt and vanilla to the dry ingredients. Blend together on low until the butter is evenly dispersed and the nut mixture starts to come together and clean the sides of the bowl. In my KitchenAid mixer this took about 1 to 2 minutes.
- The dough should be very smooth and hold together. If not, knead it until it does. Keep kneading, either by hand or in the mixer until it comes together. If needed add another 1 to 2 tbsp of butter.
- Form the Dough: Divide the dough into three equal pieces and roll each piece to 3/4-inch (2cm) round ropes. Try to get them as smooth as possible, with no cracks. If it breaks, pinch it back together. Place the three ropes of dough on a baking sheet lined with parchment paper.
- Chill the dough logs until firm. NOTE: gluten-free doughs tend to be easier to work with when they have had time to rest and fully absorb the liquid. I let mine rest in the refrigerator about 2 hours before forming and baking.
- Preheat oven to 325ºF (160ºC) and line two baking sheets with parchment paper or silicone baking mats. Set aside.
- Make the Cookies: Working with one section of dough at a time, keeping the others in the refrigerator, cut off equal-sized pieces, about 5 grams each (about the size of a marble).
- Once you’ve cut a rope of dough, roll the individual pieces into little round balls and place them on the baking sheet, leaving a little space between them. They will not spread much, so you can snug them up fairly close. Continue cutting the dough and rolling it into little balls until you’ve used all the dough.
- Bake the cookies for 10 to 14 minutes, rotating the baking sheets in the oven midway during cooking, top to bottom and spinning front to back, until the tops are lightly golden brown.
- Carefully slip the parchment paper off the baking sheet and onto the wire cooling racks, sliding the cookies with it. Let the cookies cool completely before continuing.
- When they are cool, pair the cookies into twos that are just about the same size. Set half the cookies flat-side up on a baking sheet with their partners next to them.
- Assemble the Sandwich Cookies: In a small saucepan over medium heat, melt the chocolate until smooth, stirring often with a flexible spatula. Transfer the melted chocolate to a piping bag or resealable plastic bag. Cut a small hole in the bag and squeeze a chocolate chip-sized dollop of melted chocolate on the bottom of one cookie and top it with a similar-sized cookie, flat sides together. Wiggle the top cookie gently to spread the chocolate to the edges, sandwiching the two halves together.
- Once filled, set the cookies back on a wire cooling rack until the chocolate is firm. If you have extra melted chocolate (like I did) you can squeeze the extra over the tops of some of the cookies, creating a fun zig zag pattern.
- Storage: The cookies will keep in an airtight container at room temperature for up to one week.
Nutrition Information:
Yield:
45Serving Size:
1Amount Per Serving: Calories: 144Total Fat: 11gSaturated Fat: 1gTrans Fat: 0gUnsaturated Fat: 10gCholesterol: 1mgSodium: 11mgCarbohydrates: 9gFiber: 2gSugar: 2gProtein: 3g
If you enjoyed this recipe, be sure to subscribe above and follow me on social media so you never miss a post:
| Facebook | Pinterest | Instagram | Twitter |
Create a New Tradition Today!
This post was first shared in July 2013. The article was updated in 2020.
Welcome! The suggestions here are not intended as dietary advice or as a substitute for consulting a dietician, physician, or other medical professional. Please see the Disclaimers/Privacy Policy page for additional details. Unauthorized use, distribution, and/or duplication of proprietary material from The Heritage Cook without prior approval is prohibited. If you have any questions or would like permission, please contact me. We participate in the Amazon Services LLC Associates Program, an affiliate advertising program designed to provide a means for sites to earn advertising fees by advertising and linking to amazon.com. This page may contain affiliate links.





Rose @ Our Lady of Second Helpings
These look so cute! Are they firm like biscotti? Hazelnuts are my favorite. I was just in Oregon, I should have grabbed some locally grown nuts.
Jane Bonacci, The Heritage Cook
Thank you so much Rose! They are firm, but break apart more like shortbread than biscotti. Fairly fragile. They are rich so you don’t need a bunch to feel satisfied – the perfect treat!!