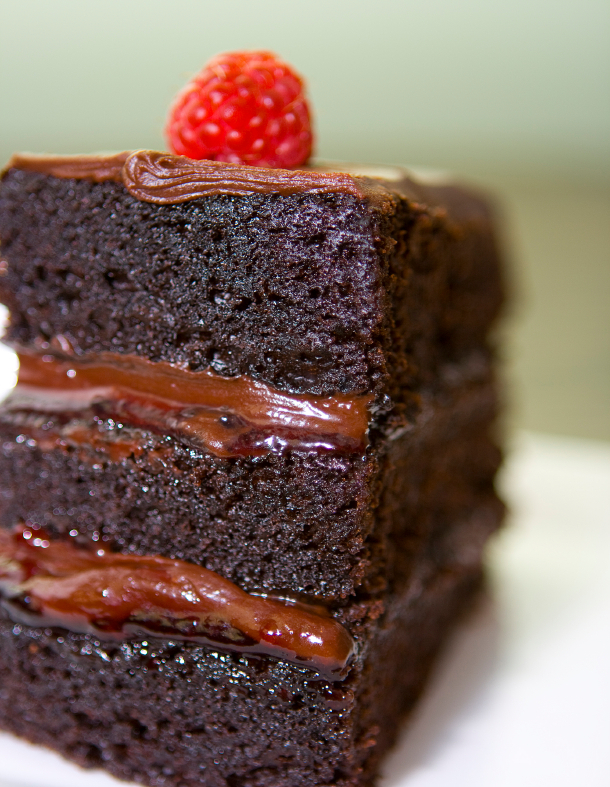
Happy Chocolate Monday! Today I have a fun one for you. A triple layer cake, the layers painted with a raspberry syrup and then filled with whipped ganache. Finish it off with a chocolate glaze and you have a dessert perfect for any party. Incredibly rich, a small slice will be enough for everyone but the most ardent chocoholics.
This recipe does have a lot of parts, but you can make all the components ahead. As a matter of fact, this is one cake that is actually better a day or two after baking. Make the cake layers and raspberry syrup up to a week in advance. The ganache is good for at least 3 days when held in the refrigerator. You can completely assemble the cake, even with the ganache between the layers, up to 5 days ahead and hold in the refrigerator, or freeze up to a month! Imagine, having a couple of these amazing cakes in your freezer, just waiting for impromptu festivities. Thaw them out, glaze and decorate with fresh berries. No one will be the wiser. That’s what I call a winner of a dessert, LOL.
The raspberry syrup is made with Chambord, a delightful liqueur. Made from black raspberries, you can use it in cocktails, sauces, syrups, or desserts like this cake. The liqueur is made at the Chateau de Chambord in the Loire Valley, France and was based on a raspberry liqueur produced in the 17th century. Whole raspberries and blackberries are steeped in French spirits and then blended with vanilla, citrus peel, honey and cognac. One of my favorite cocktails, a Purple Hooter, is made with Chambord.
Genoise is one of the trickier cakes to make, but I have added a lot of extra information to help you get the results you want. Just follow the directions closely and it will turn out perfectly! If Genoise seems beyond your capabilities, or if you don’t have a stand mixer, you can also use my “Ultimate Chocolate Cake” recipe for the cake portion. If you do this, it is a moister cake so you won’t need to use as much of the raspberry syrup between the layers. You can save the extra and serve it over ice cream.
You bake this cake in one pan and then split it into 3 layers. The easiest way to do this is to use an adjustable wire cake cutter, a piece of wire stretched between a guide that you can “drag” through a cake layer. You can also use a ruler to measure the height of the cake and divide into thirds. Insert toothpicks at the top third line around the outside every few inches. With a long sharp knife, slice off the top, using the toothpicks to guide the knife. Set the top aside and repeat, splitting the remaining cake in half. Another option is a long piece of fishing line or dental floss (unwaxed or flavored). Setting the line at the desired level, wrap it around the cake, crossing the ends and then pull it taut. Holding the ends, pull your hands apart and the line will slice the cake.
Nick Malgieri, an acclaimed pastry chef, author and teacher created this wonderful recipe. A graduate of the Culinary Institute of America, Nick has won the respect of the cooking world and has the awards to prove it. He is the winner of an IACP/Julia Child Best Baking cookbook award, a James Beard Foundation Best Baking book award, an inductee into Who’s Who of Food and Beverage in America, and voted one of the ten best pastry chefs in America by Chocolatier and Pastry Art and Design magazines. Former Executive Pastry Chef at Windows on the World he worked alongside another of my favorite chefs, Michael Lomonaco. He currently directs the baking program at the Institute of Culinary Education (formerly Peter Kump’s New York Cooking School). His latest book is BAKE! Essential Techniques for Perfect Baking. When it comes to making Italian desserts for my husband’s family, I turn to Nick’s “Great Italian Desserts” for inspiration. One of the country’s most popular cooking teachers, if you ever have the opportunity, you should take one of his classes.
Put this cake on your list to make for your next birthday party or other celebration. It is worth the time and effort – I promise! You can also use the components to make a trifle or luscious bread pudding. Enjoy your week!
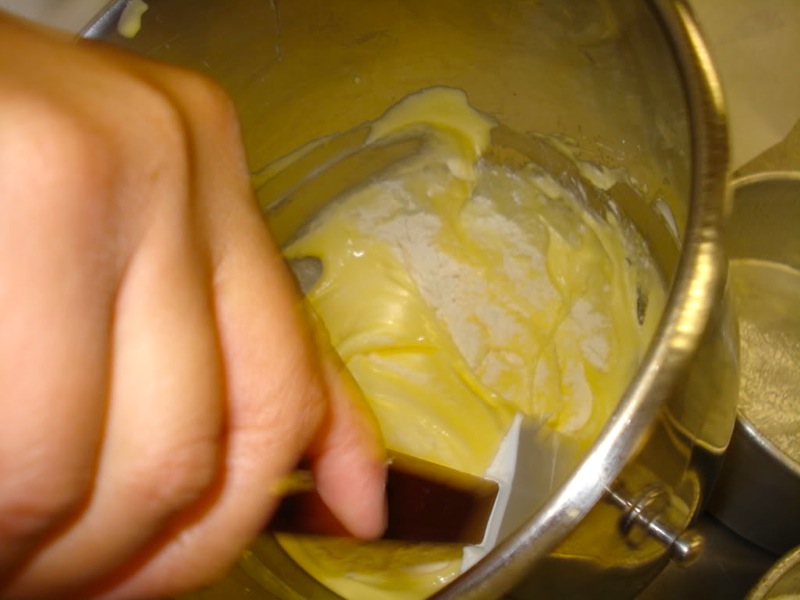
Demonstrating “Folding”
Kitchen Skill: Folding
This is often called for when you are combining one mixture with another that has been whipped, such as egg whites. You spent a lot of time beating air into the mixture, and folding lets you maintain as much of the volume as possible. Using a large, wide bowl and big rubber spatula will help make this easier.
Starting in the center of the bowl, cut straight down to the bottom and pull the batter from the bottom of the bowl up and over the mixture on the top. Turn the bowl slightly and repeat. Continue folding until completely blended.

- For génoise
- 1/3 cup sifted unsweetened Dutch-process cocoa powder (sift before measuring)
- 1/3 cup all-purpose flour
- 1/3 cup cornstarch
- A pinch baking soda
- 3 large whole eggs, at room temperature
- 3 large egg yolks, at room temperature
- 2/3 cup sugar
- 1/4 tsp salt
- For raspberry syrup
- 1/3 cup water
- 1/3 cup sugar
- 1/3 cup raspberry liqueur such as Chambord or liquid from crushed frozen raspberries (thaw before crushing), seeds strained out
- For ganache
- 1-1/4 cups heavy cream
- 2 tbsp unsalted butter
- 2 tbsp light corn syrup
- 1/2 cup seedless raspberry jam
- 1 lb semisweet chocolate, chopped coarsely
- For glaze
- 1 cup heavy cream
- 8 oz semisweet or bittersweet chocolate, chopped coarsely
- Garnish
- Fresh raspberries
- Make génoise: Preheat oven to 350°F. Butter a 9-inch round cake pan (2 to 3 inches deep) and line bottom with a round of parchment paper or foil. Butter the parchment. If you are concerned about the cake releasing from the pan, you can lightly flour it as well.
- In a small bowl whisk together cocoa powder, flour, cornstarch, and baking soda. Sift dry ingredients twice to aerate.
- In a heatproof bowl, preferably metal, whisk together whole eggs, yolks, sugar, and salt until combined. Set mixture over a saucepan of simmering water and continue to whisk until mixture is lukewarm (95°F to 100°F). The sugar should be completely melted - the mixture should not feel “gritty.”
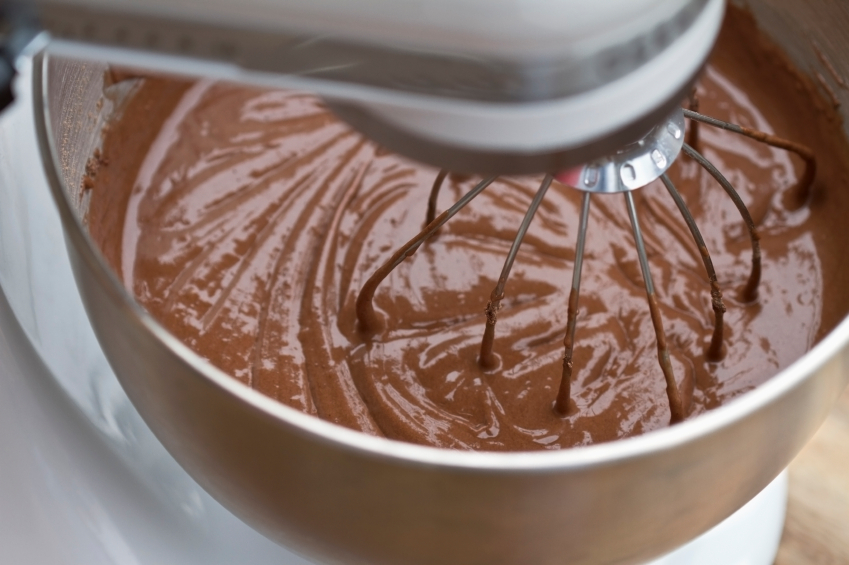
- Remove bowl from heat and using an electric mixer with the whisk attachment, start on low. Beat mixture at low speed until frothy, then on high speed until it has cooled and doubled in volume. Don’t skimp on this step - the eggs are the only leavening in this recipe and need to be beaten fully to help the cake rise. Depending on how powerful your mixer is this could take 10 minutes or more! It should be similar to the texture of whipped cream. Transfer mixture to a large, wide bowl.
- Sift 1/3 cocoa mixture over egg mixture and using a large rubber spatula, fold in by hand. Do not beat or stir, which will deflate the eggs, just gently fold it in. Beating at this stage will result in a tough cake. Repeat with the next 1/3 and then the remaining cocoa mixture. As soon as all traces of flour are gone, stop folding.
- Pour batter into prepared pan and smooth the top gently with an off-set spatula. Carefully transfer to preheated oven. Bake génoise in middle of oven for 25 to 30 minutes, or until it is firm to the touch in the center and pulls away slightly from side of pan. Do not open the oven door during first 15 minutes. If your finger leaves an indent, cook for 3 to 5 minutes longer. Do not overbake.
- Run a knife between the cake and side of pan. Invert génoise onto a rack and immediately flip it back onto another rack to cool right side up. Génoise may be wrapped in plastic wrap and chilled 1 week or frozen 1 month. Thaw génoise before assembling cake.
- Make syrup: In a small saucepan bring water and sugar to a boil over moderately low heat, stirring occasionally until sugar is dissolved. Cool syrup and stir in liqueur. Syrup may be made 1 week ahead and chilled, covered.
- Make ganache: In a saucepan bring cream, butter, corn syrup, and jam to a boil over moderate heat and remove pan from heat. Add chocolate, swirling pan to submerge chocolate in hot mixture, and let stand 3 minutes. Whisk ganache gently until smooth. Chill, covered, at least 2 hours and up to 3 days. (I do this 2 days ahead.)
- Assemble cake: Let ganache stand at room temperature until slightly softened and pliable. Depending on the temperature of your refrigerator, this may take awhile. With an electric mixer, using the whisk attachment, beat ganache until light and fluffy.
- Remove parchment paper from génoise and with a long serrated knife cut cake horizontally into 2 or 3 layers. Invert top layer of génoise onto a springform pan base or a 9-inch cardboard round and brush with 1/3 of syrup. Spread layer with 1/2 of jam and spread 1/3 ganache over jam. Top ganache with middle layer of génoise and repeat layering of syrup, jam, and ganache. Top with third layer of génoise, smooth-side up, and brush with remaining syrup. Spread top and side of cake with remaining ganache.
- Chill cake until ganache is set, about 30 minutes. Cake may be assembled ahead, wrapped in plastic wrap, and chilled 5 days or frozen 1 month. Thaw cake before proceeding. I think the flavor and texture improve with time, so I recommend you make this cake 1 to 2 days in advance.
- Make glaze: In a saucepan bring cream to a boil and remove pan from heat. Add chocolate, swirling pan to submerge chocolate in hot cream, and let stand 2 minutes. Whisk glaze until smooth and pour through a sieve set over a bowl. Cool glaze to room temperature.
- With cake completely cool and set on a rack set inside a sheet pan (to catch drips), pour glaze through sieve onto center top of cake. Quickly spread glaze evenly over top and sides of cake with a long, narrow, metal spatula. Let cake stand until glaze is set, about 5 minutes. Garnish cake with raspberries and keep at cool room temperature until ready to serve.
- Yield: about 8 to 12 servings
Thank You!




Lana @ Never Enough Thyme
Oh. My. Gosh. What a cake! I just finished with dinner and I could eat a piece of that right now anyway. Just pass me a big glass of cold milk and a fork, please.
Jane Bonacci, The Heritage Cook
Grab a fork Lana and join me! Yes, this is THAT good, LOL!
Amanda
Wow that looks incredibly moist and delicious Jane!
Jane Bonacci, The Heritage Cook
Hi Amanda – the syrup that you brush over each layer makes a huge difference in the moistness of this cake. A genoise can be on the dry side, so definitely don’t skip the syrup step!
Katrina
Wow, that cake looks de-lish! And I love chocolate/raspberry!
Jane Bonacci, The Heritage Cook
I do too Katrina! It’s a great way to start the week!!