Heaven help me, I’ve gone over the edge for today’s Chocolate Monday. I started with a simple recipe for brownies and then I went to the dark side … dark chocolate that is, and you are going to be happy to follow me! These Double Decker Brownies are worth it!
This recipe is the result of a couple of oops. I wanted to have a caramel and nut sauce poured over the top, but today was one of those days when everything when wrong. The brownies were baked in a pan too big for the amount of batter making them much thinner than I had anticipated, and the caramel sauce burned when, for some reason, my normally very consistent burner decided to get hotter on one side than the other.
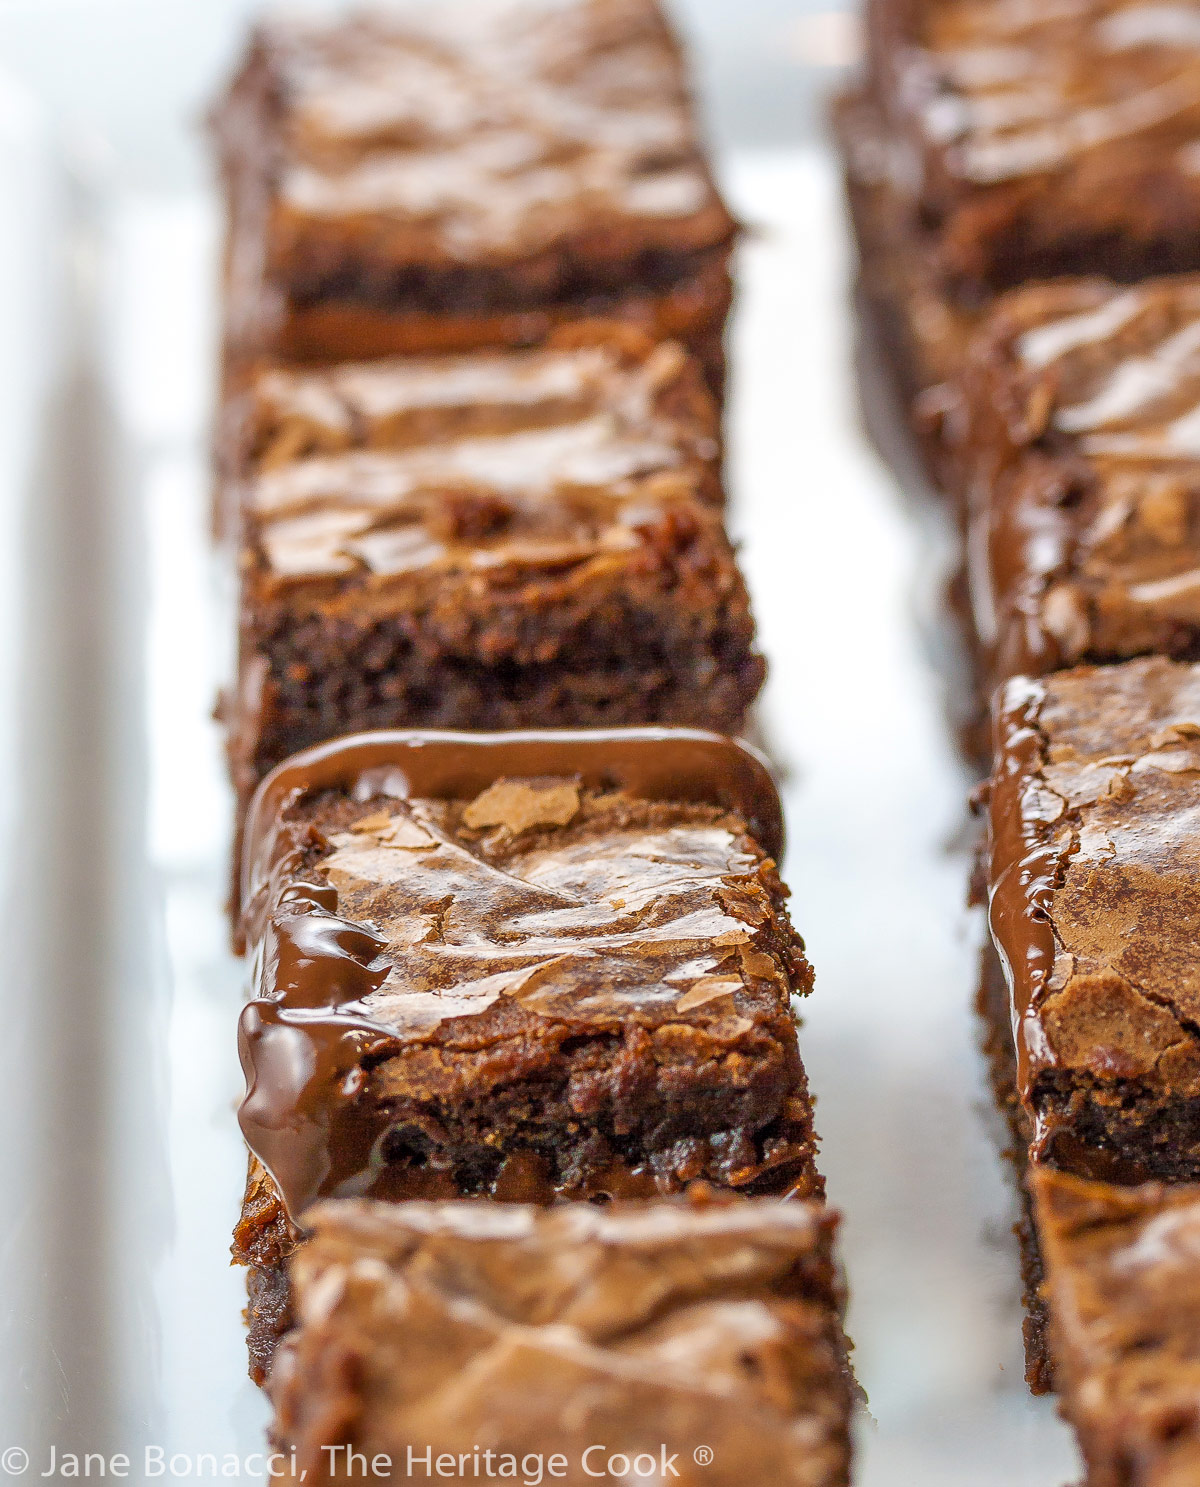
So I stepped away from the stove, took a deep breath, and tried to figure out how to make this into a fun dessert we would all enjoy. And that is how these brownies became double deckers assembled with melted chocolate in between!
Sometimes when you want to change a dessert into something special, it is a matter of adding a second component or converting it into a totally different dessert. Cookies are always wonderful alongside a scoop of ice cream and hot fudge sauce. A cake can become a trifle with a little whipped cream and a pretty bowl. Caramel candy, with a little extra cream and lower cooking temperature, becomes a sauce that will have you swooning.
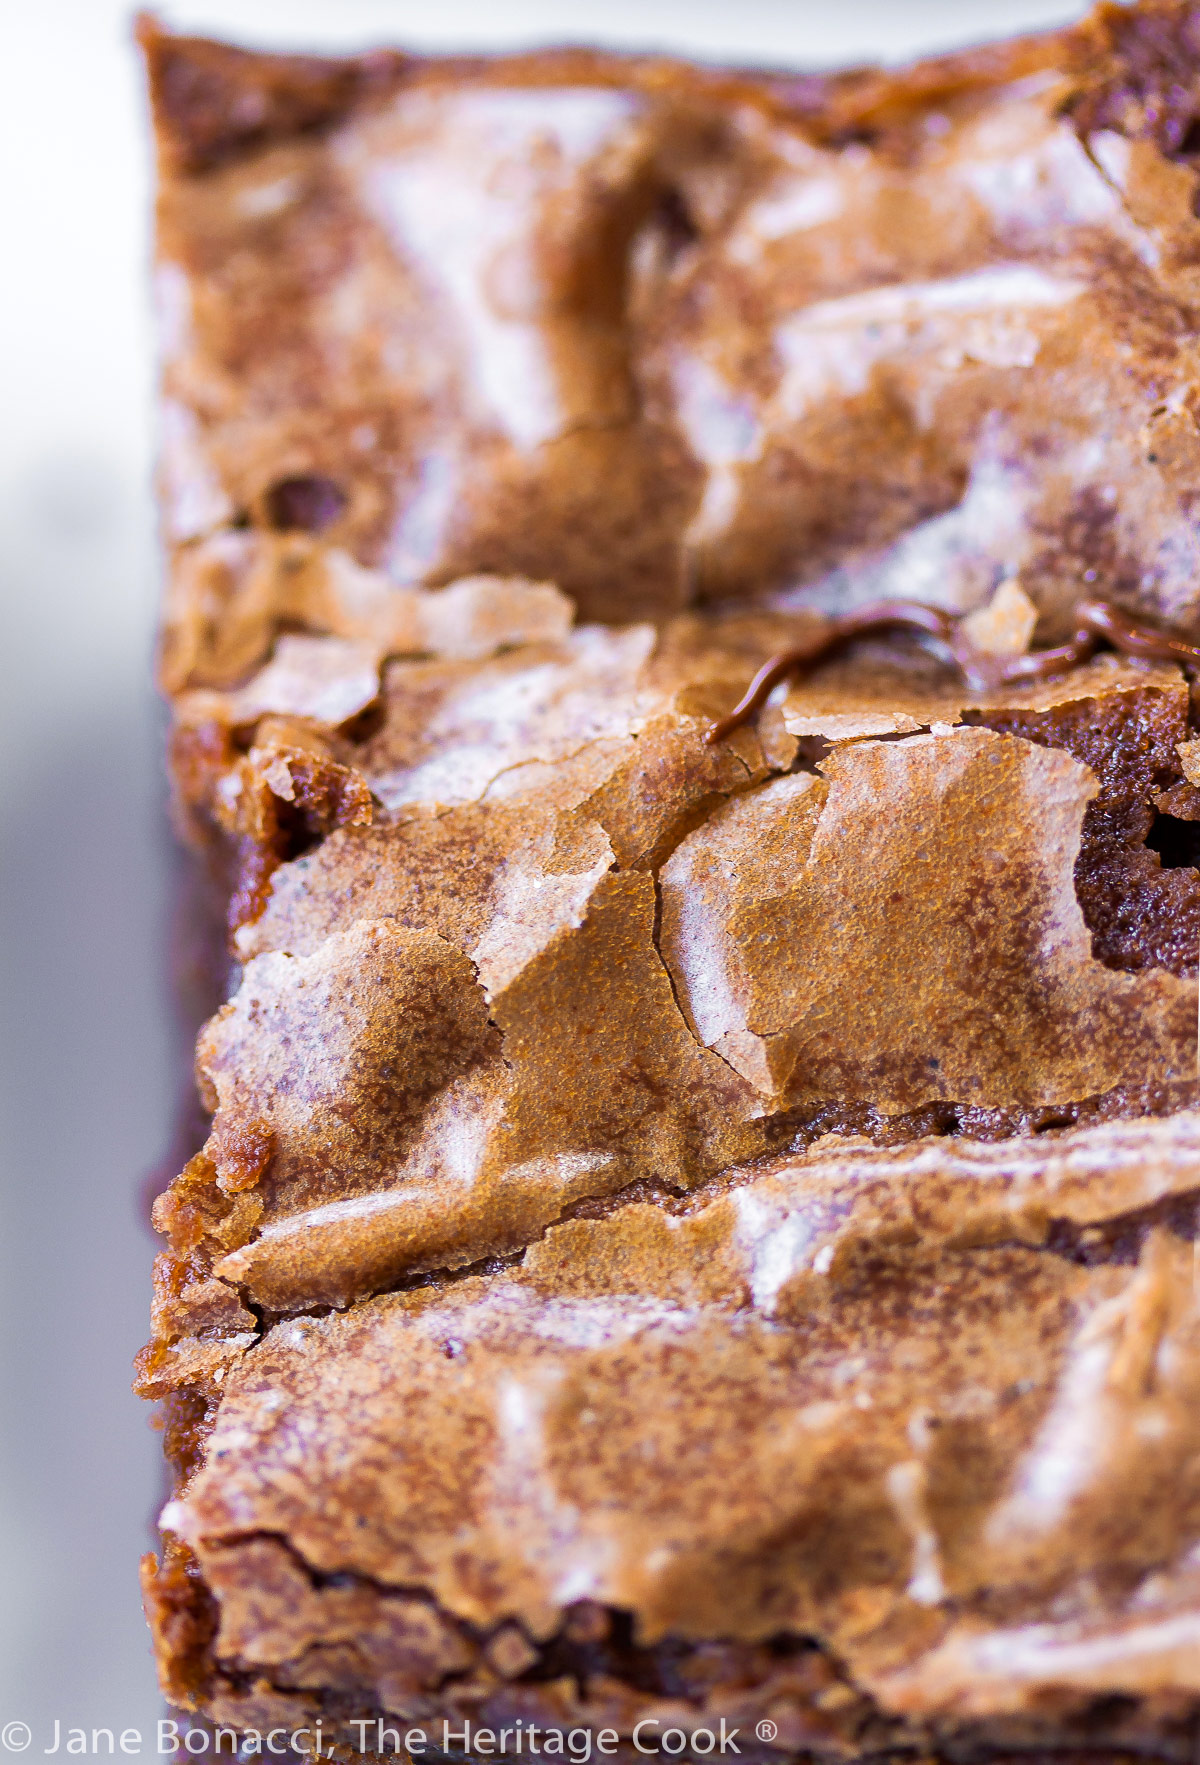
Hot from the oven!
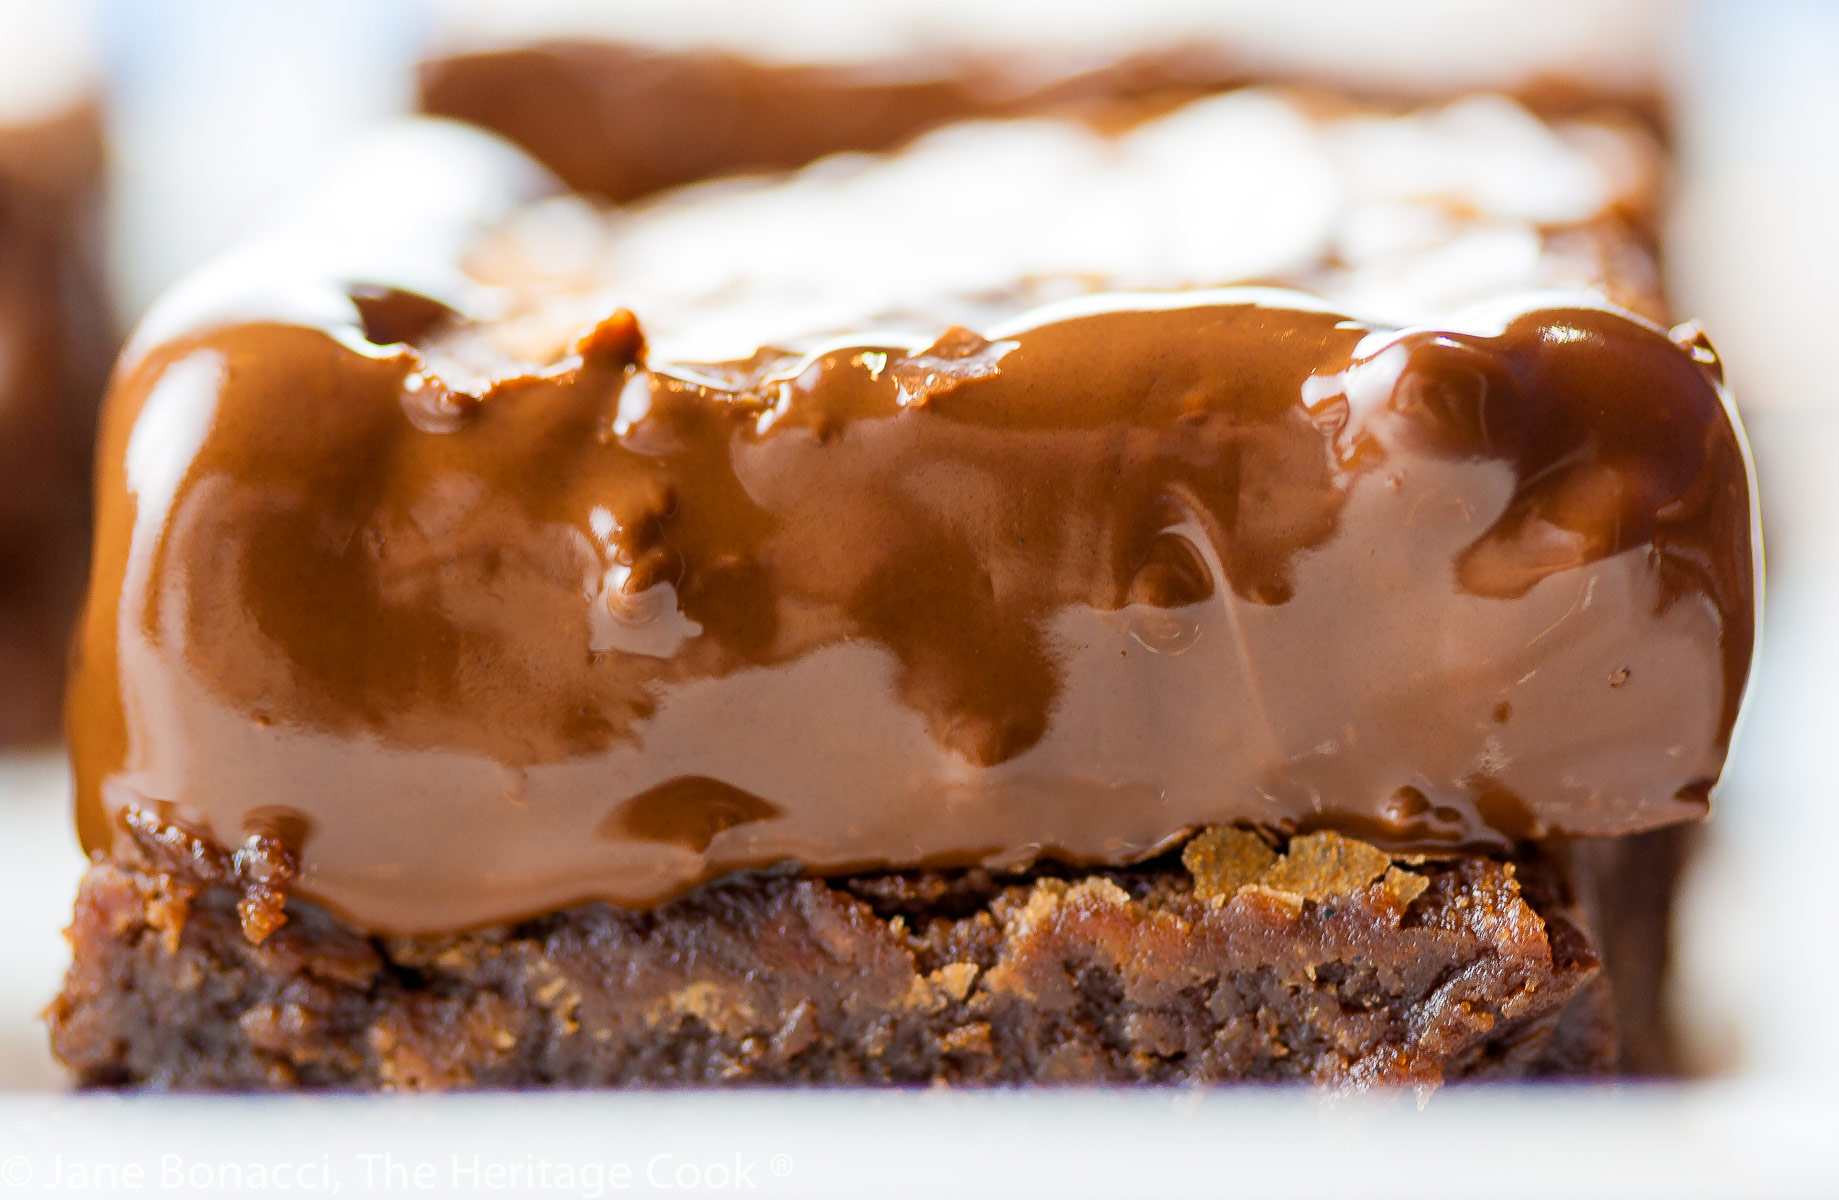
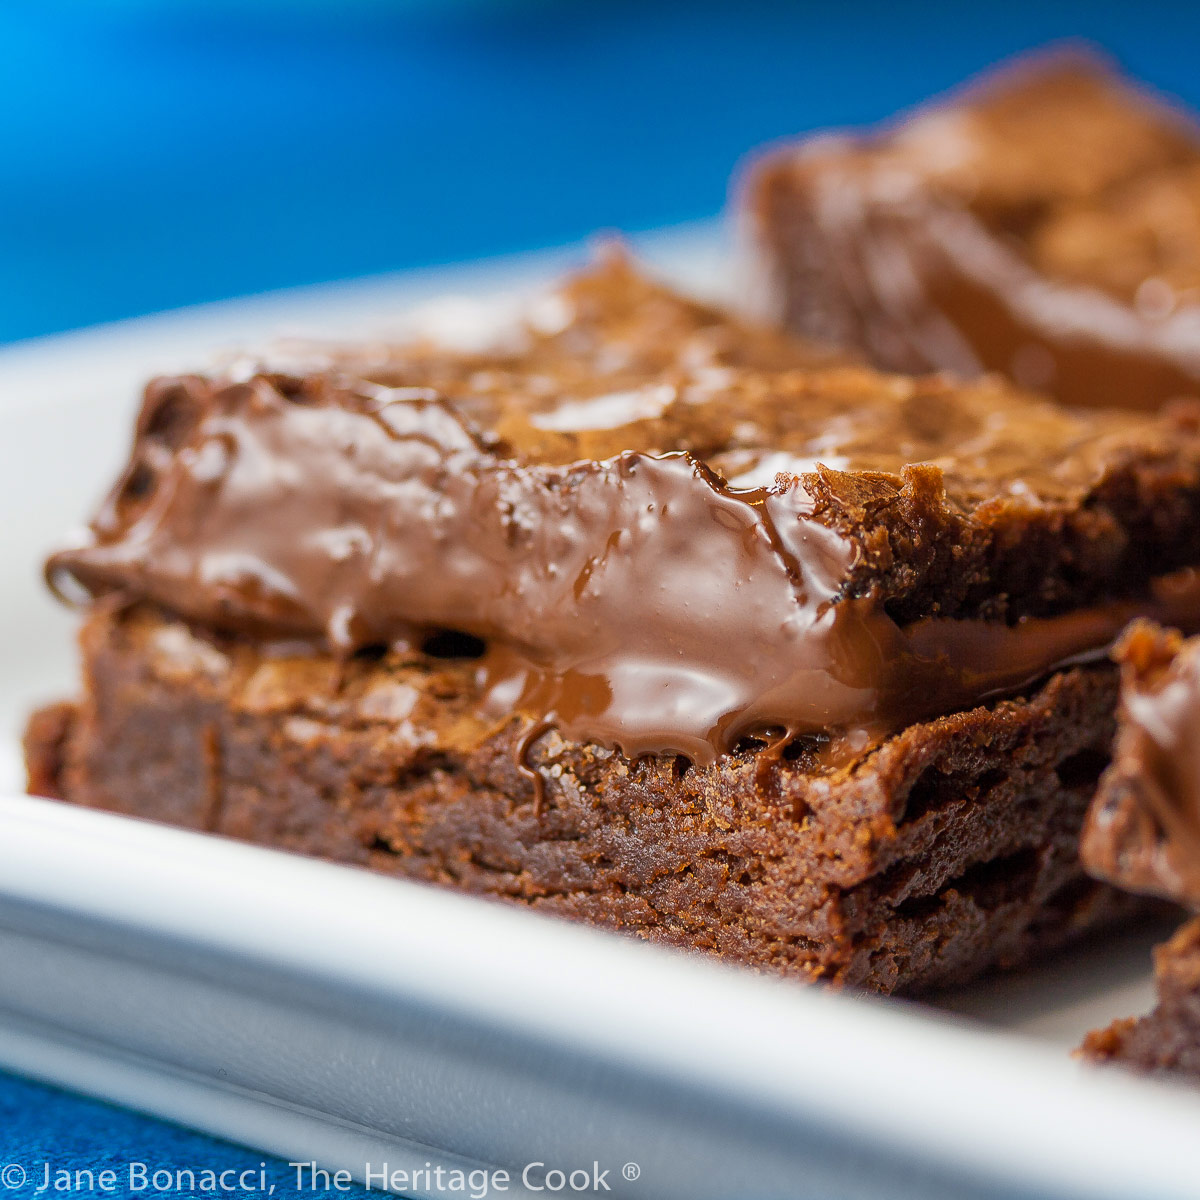
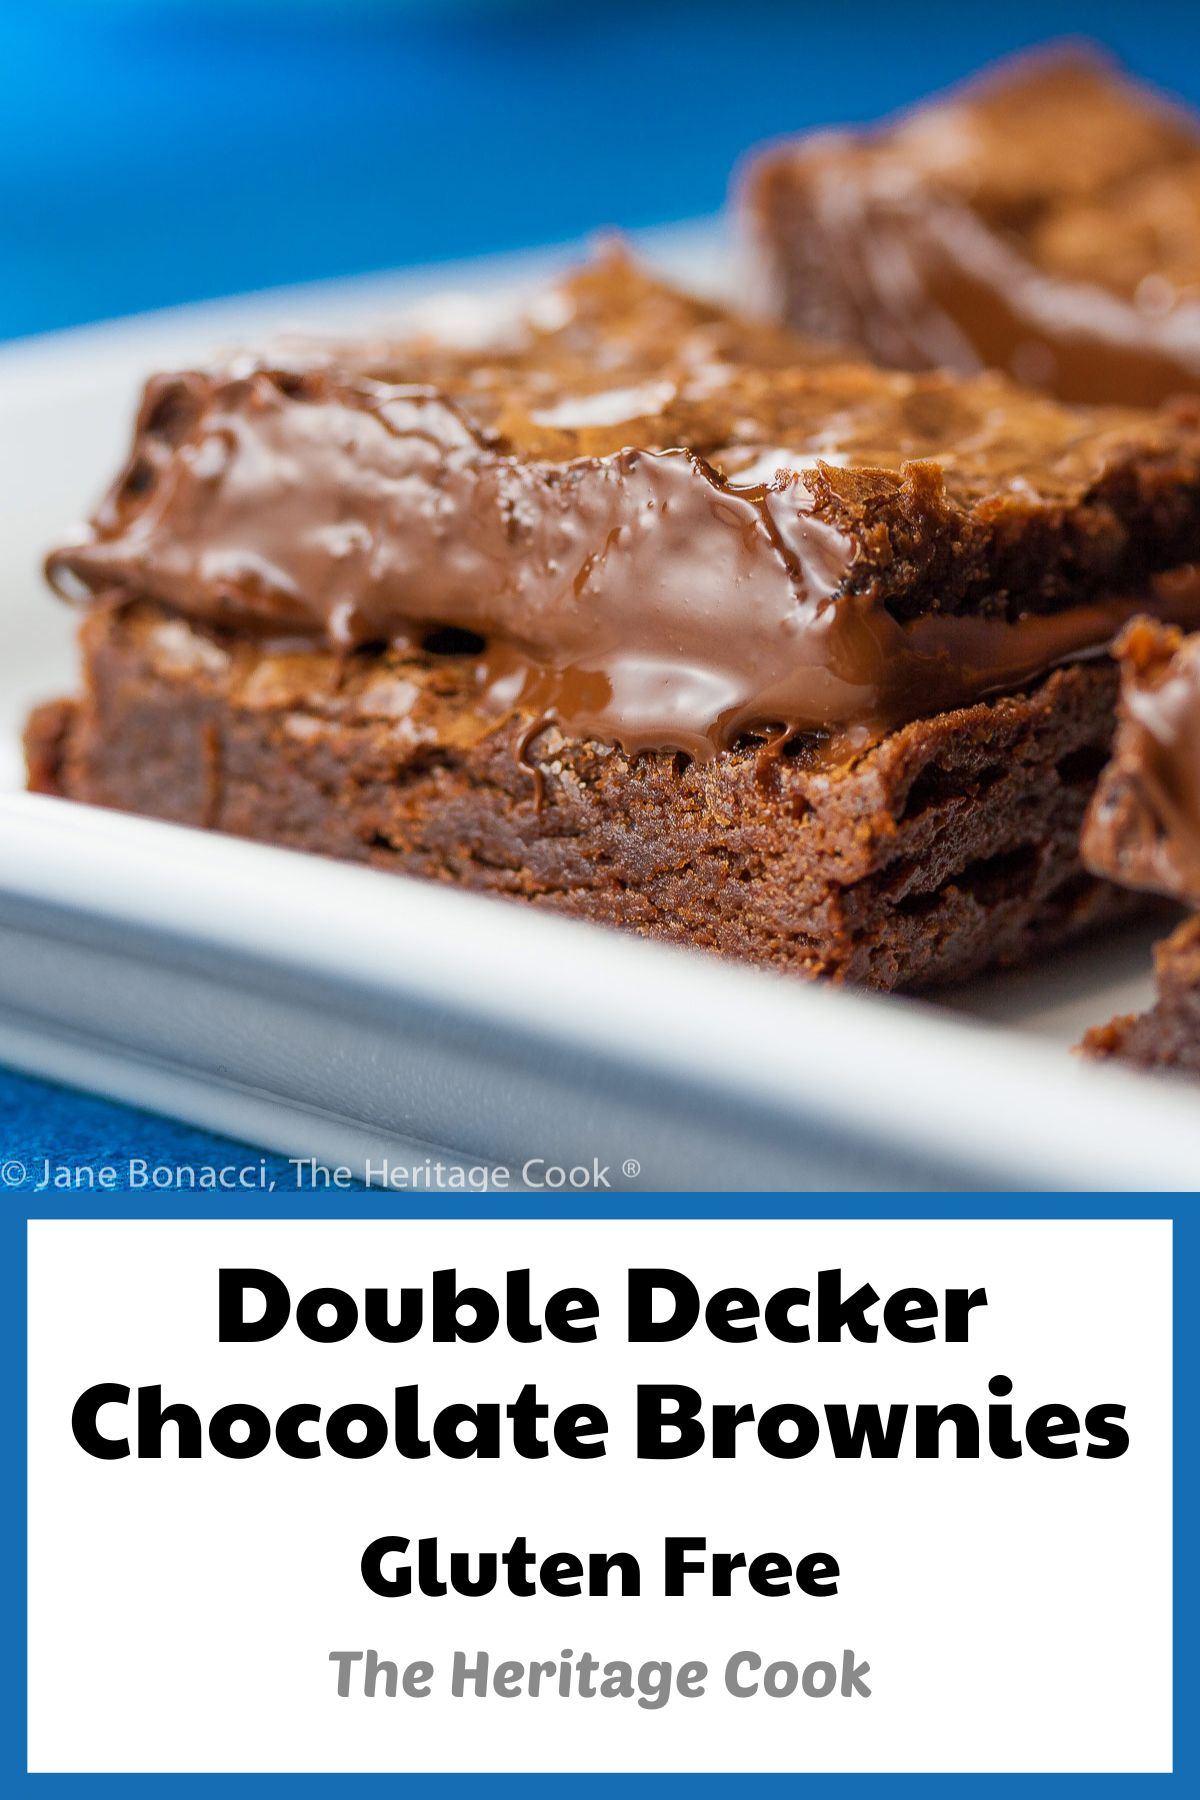
In this case, the skinny brownies were cut into rectangles, dipped in melted chocolate, and stacked, becoming even more luscious and decadent – I dare anyone to try to resist these beauties!
If you want to repeat what I’ve done, use a 9×13-inch pan. If you want thicker brownies, use a 9-inch square pan. With the larger pan you will get more pieces, but stacking them will cut that number in half. Both pans will give you deeply fudgy brownies that everyone will be raving about.
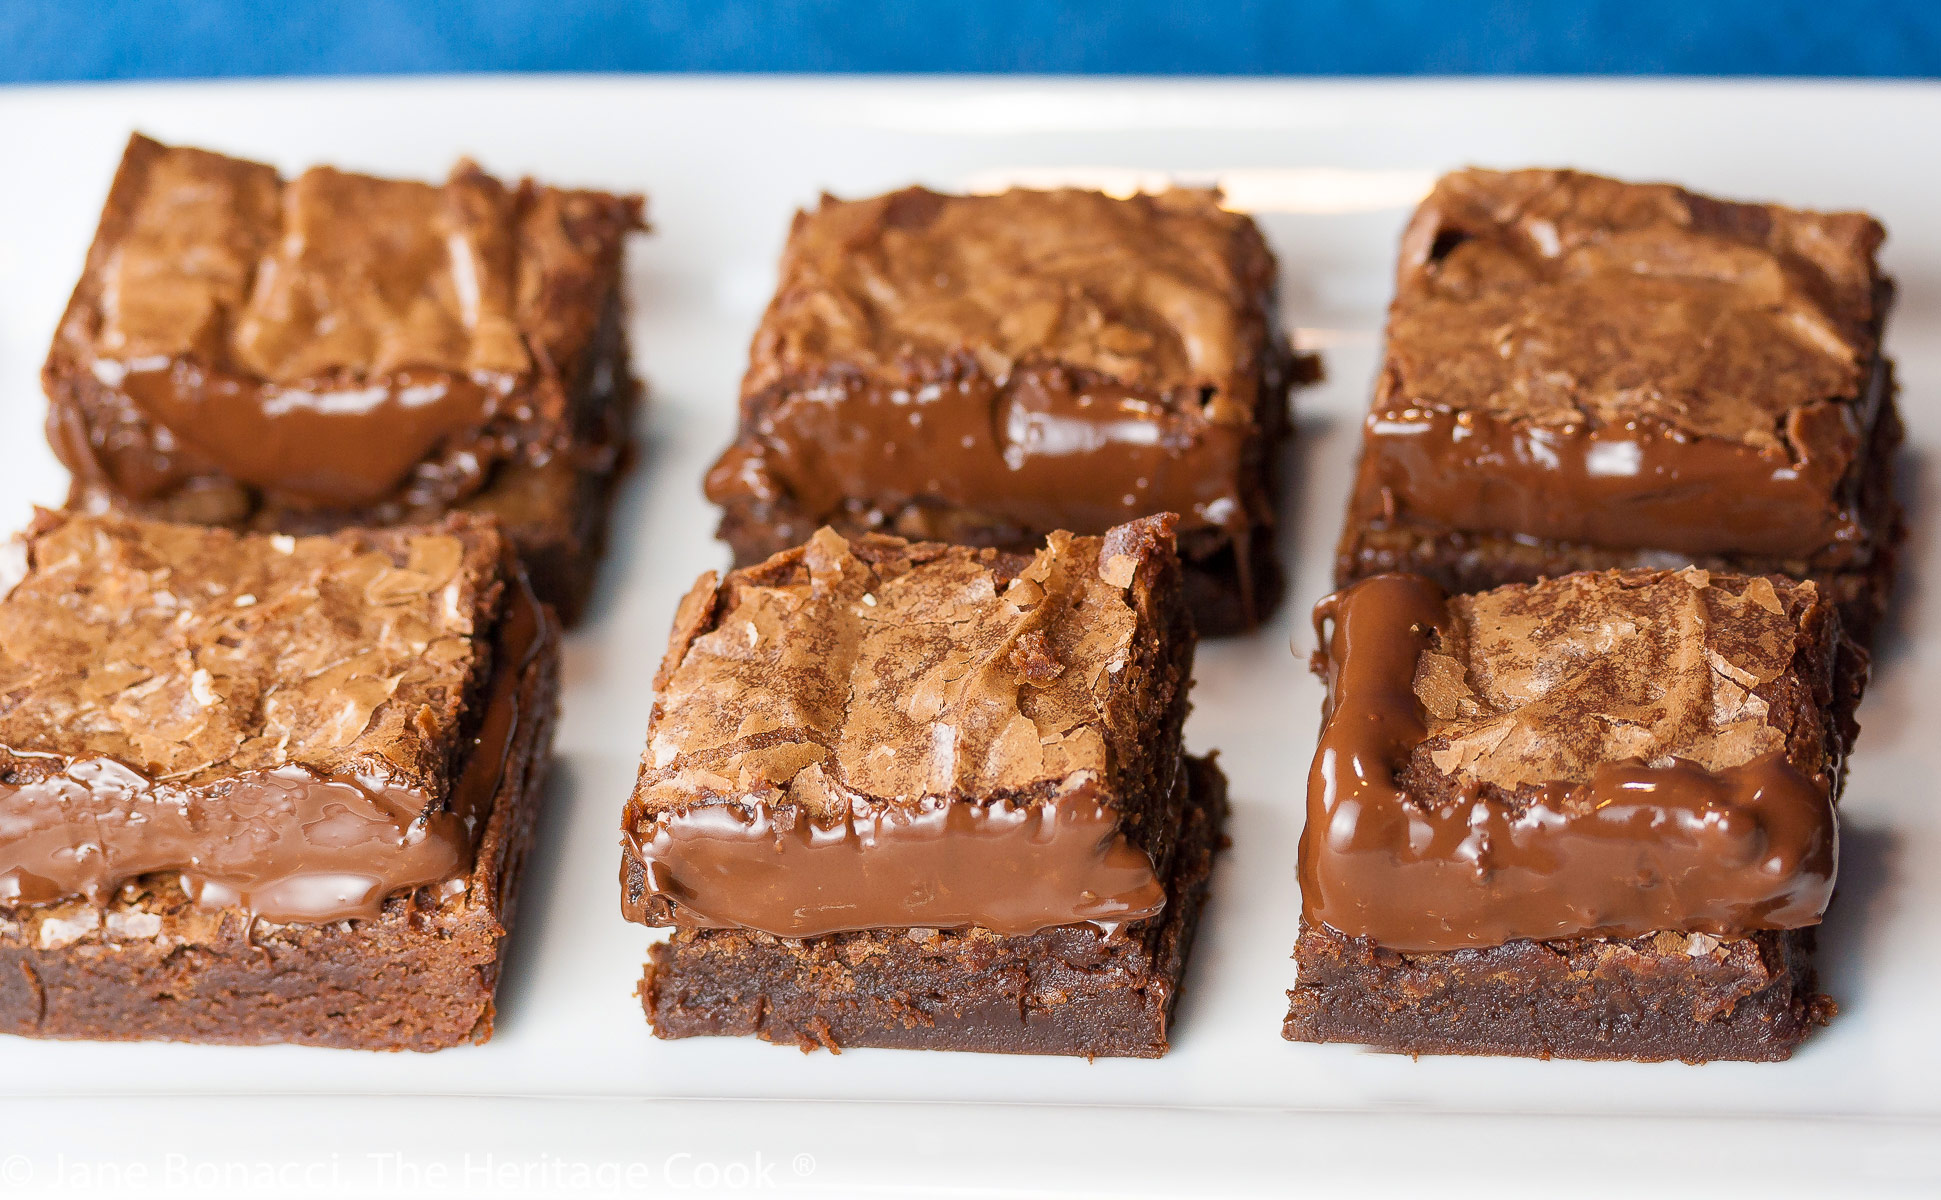
With all the melted unsweetened chocolate, these are intensely flavored. I think they would be even better served with some vanilla ice cream or lightly sweetened whipped cream. It will help cut the chocolate a little and add a touch of lightness you will love!
If you have true chocoholics in your family, these Double Decker Chocolate Brownies are the dessert for them. Kids and adults alike will be clamoring for seconds. Be sure to have lots of hot coffee or milk on hand to cut the sweetness and intense chocolate.
Have a fabulous week and Happy Chocolate Monday!
Did you enjoy this recipe? Let me know in the comments and leave a star rating, I love hearing from you!
Ingredients needed for Double Decker Brownies:
- Butter, unsweetened chocolate, eggs, sugar, brown sugar, salt
- Vanilla, gluten-free flour blend, semisweet chocolate chips
PRO Tip:
You can use a double boiler to melt the chocolate if you want, but I find that my heavy-bottomed pans do a great job of protecting the chocolate and I can skip one step.
How to make Double Decker Brownies:
- Place the butter and chocolate in a saucepan and melt over low heat stirring often until smooth, remove from the heat and cool a little; beat the eggs and sugar together on medium speed until light and fluffy, very slowly (about 2 tbsp at a time) add the melted chocolate mixture to the egg/sugar mixture, mixing until fully incorporated, then beat in the salt and vanilla
- Scrape the sides and bottom of the bowl and add half the flour and beat on low until blended in, then add the remaining flour and mix slowly to combine; cover the bowl with plastic wrap and let rest 20 to 30 minutes to give the flour time to fully absorb the liquids
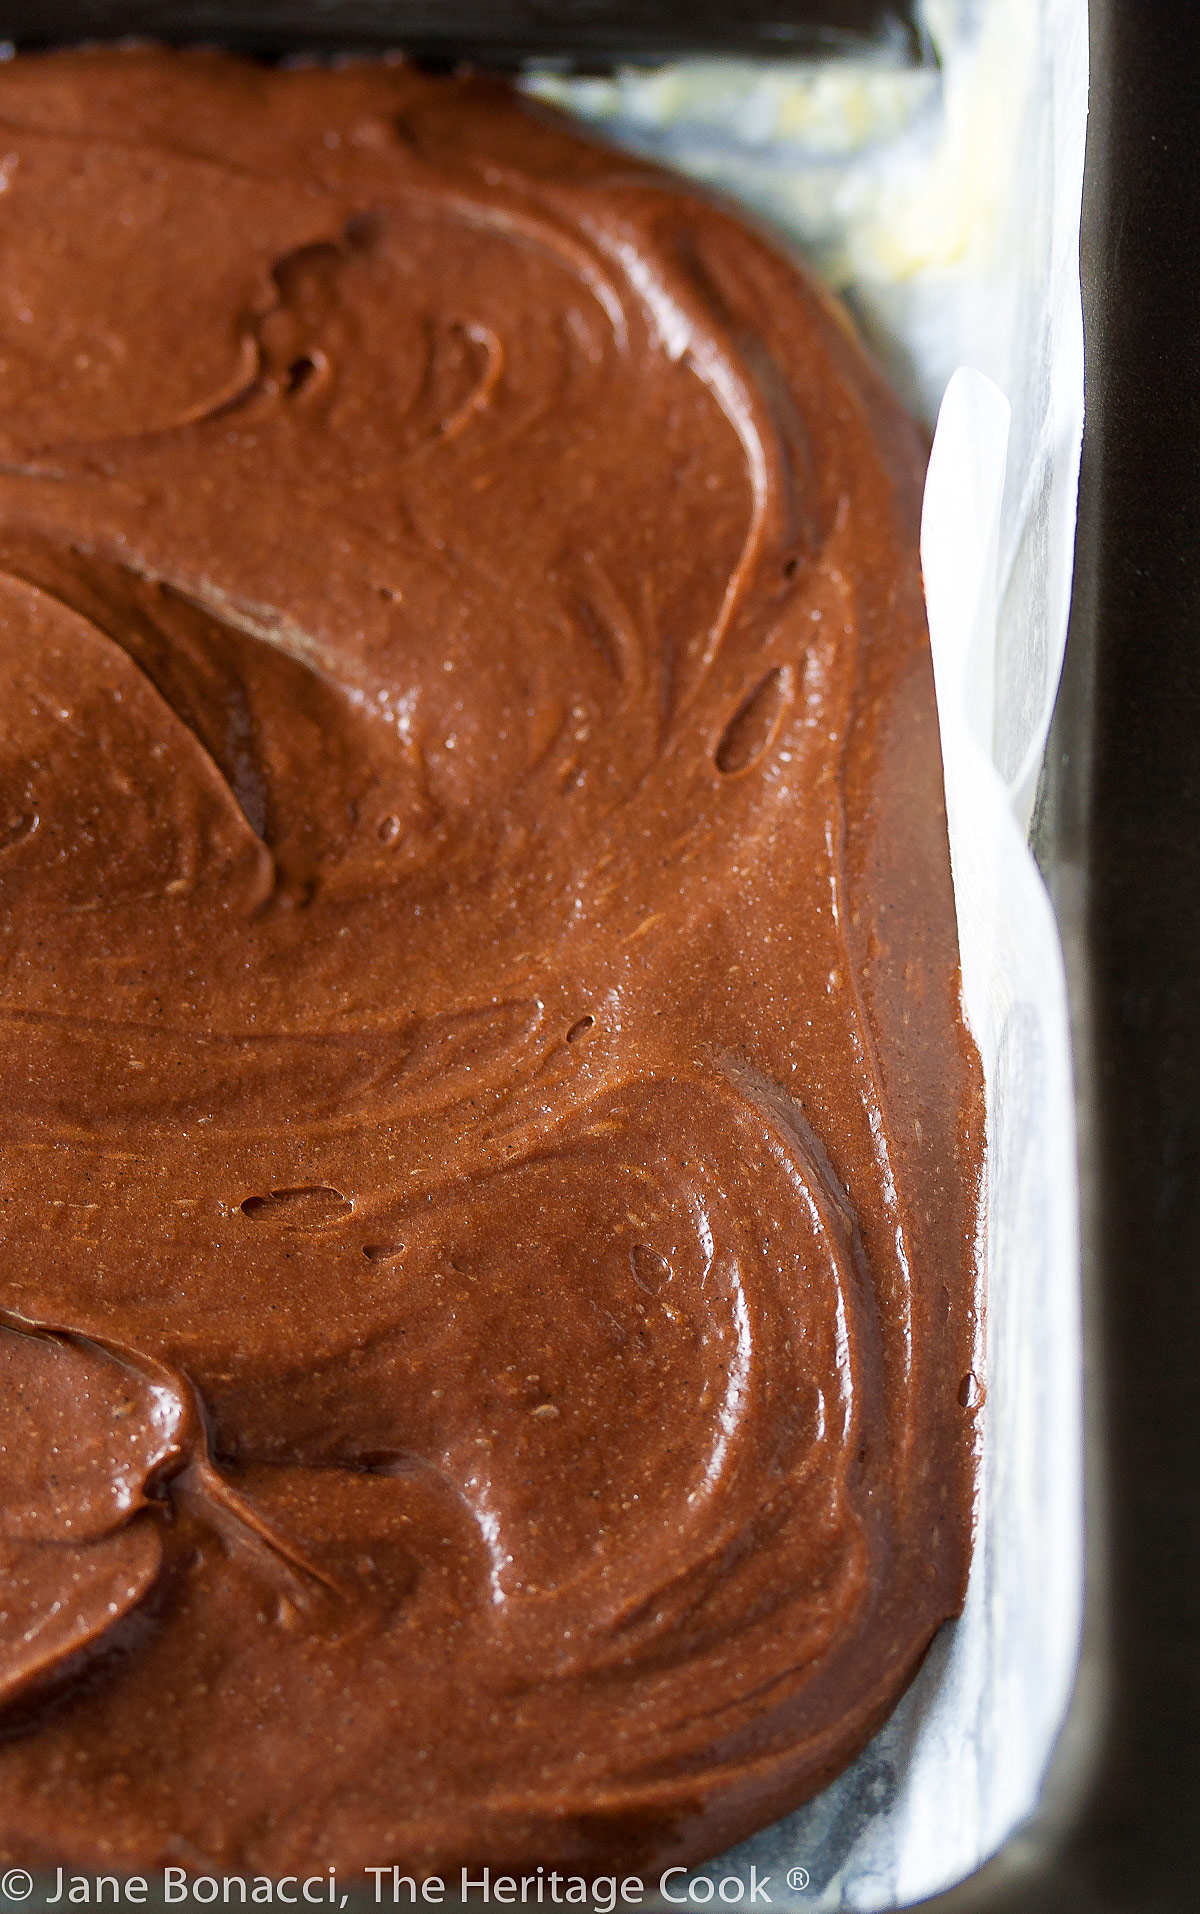
- Beat the batter again for about 15 seconds to blend it again and pour into a buttered and parchment-lined 9×13-inch baking pan, easing it into the corners with a spatula; bake for 25 to 30 minutes until a toothpick inserted in the center comes out with some moist crumbs attached, then transfer the pan to a wire rack to cool thoroughly
- When cool, use the parchment handles to lift the brownies out of the pan and onto a cutting board, and cut into 32 pieces; pair them up, matching the size as closely as possible and place them on a sheet of parchment set next to the stove
- Melt the chocolate chips over low heat, stirring until smooth, then turn off the heat but keep the saucepan on the burner; dip the bottom of a brownie in the melted chocolate and set it on top of another brownie, sandwiching them together, leave them at least 15 minutes before moving or serving them
- Serve at room temperature, on hot days, keep them in the refrigerator until just before serving so the chocolate doesn’t melt; they can be refrigerated, tightly covered, for up to 5 days or freeze them, well wrapped, for up to 2 weeks
PRO Tip:
Using parchment that is longer than the baking pan creates a sling that you can use to lift the brownies out of the pan once they’ve cooled. It also makes clean up a lot easier!
Recommended Tools (affiliate links; no extra cost to you):
- Chef’s knife
- Cutting board
- Kitchen scale
- Saucepan
- Stand mixer or hand mixer
- Spatulas
- 9×13-inch baking pan
- Parchment paper
- Wire cooling rack
- Small saucepan
Gluten-Free Tips:
If you pour the batter straight into the pan without letting it rest, it is very thin. Let it sit for 20 minutes and it becomes thick and rich. Timing is everything in GF baking! I know some bakers who will mix up doughs and batters several days in advance and keep them in the refrigerator, covered, until it is time to bake. I am never that patient, but 20 minutes I can manage, LOL.
You can adjust any baking recipe to gluten-free by using 120 grams per cup of my favorite gluten-free flour blend. If you are using another brand of gluten-free flour, whisk the mix, spoon it lightly into a measuring cup until mounded, level off the top with the back of a knife, and weigh the flour left in the cup. Use that weight as your standard per cup of that specific flour. Do this for each flour blend you use. Commercial blends such as Pamela’s All-Purpose Artisan Blend, Bob’s Red Mill 1-to-1, or King Arthur Measure for Measure are all good choices.
All recommended ingredients are gluten-free as of the writing of this article. Always check to be sure the products haven’t changed and are still safe to consume.
Double Decker Brownies (Gluten-Free)

I know you will love these Double Decker Brownies, fudgy brownies sandwiched with melted chocolate in between. Double the chocolate and twice as fun!
Ingredients
- 1-1/2 sticks (12 tbsp; 170g) butter, cut into pieces
- 3 oz (85g) unsweetened chocolate, chopped
- 3 large eggs (150g)
- 1 cup (198g) granulated sugar
- 1/2 cup (107g) firmly packed light brown sugar
- 1/4 teaspoon kosher salt
- 1-1/2 teaspoons pure vanilla extract
- 1/2 cup plus 2 tbsp (75g) gluten-free flour blend * or all-purpose flour
- 6 oz (1 cup; 170g) semisweet chocolate chips
Instructions
- Make the Brownies: Combine the butter and chocolate in a medium heavy saucepan and melt over low heat, stirring frequently until smooth. Remove from the heat and let cool a little (so you won’t scramble the eggs when you add it in the next step).
- In the bowl of your standing mixer, beat the eggs and both sugars on low speed just until smooth. (For gluten-free, beat the eggs and sugar on medium-high speed until light and fluffy - this will help add lift and structure to the brownies.) With the mixer running, very slowly add the melted chocolate mixture about 2 tbsp at a time (tempering the eggs slowly), mixing until fully incorporated and then beat in the salt and vanilla.
- Turn off the mixer and scrape down the sides of the bowl. Add half of the flour and beat on Low until blended in, then add the second half and again mix slowly to blend. Cover the bowl with plastic wrap and let rest for 20 to 30 minutes. This is especially helpful with gluten-free baking - the flours need more time to fully absorb the liquids.
- Put a rack in the middle of the oven and preheat to 350°F (177°C). Butter a 9-by-13-inch (23cm by 33cm) baking pan. Line the pan with a sheet of parchment long enough to create handles on either end of the pan. This will help you remove the brownies from the pan later. Butter the parchment.
- Beat the batter on medium for about 15 seconds to blend it again. Pour the batter into the prepared pan and smooth until it covers nearly the entire bottom of the pan, easing it toward the corners. It will fill in the corners as it bakes.
- Bake for 25 to 30 minutes, until firm to the touch and a toothpick inserted in the center meets a little resistance and comes out with moist crumbs attached. Transfer the pan to a wire rack to cool thoroughly.
- To Serve: Using the parchment to help, lift the cooled brownies out of the pan and set on a cutting board. Using a long sharp knife, cut the brownies into 32 pieces. Pair them up, matching the size as closely as possible and placing them on a sheet of parchment set next to the stove.
- In a saucepan, melt the chocolate chips over low heat, stirring until smooth. Turn off the heat but keep the saucepan on the burner. Dip the bottom of one of the brownies in the melted chocolate and set it on top of a matching brownie, sandwiching them together. If you use a fork to dip the brownies, you can push them into the chocolate, coating one edge and giving the brownies more coverage. Leave them on the parchment for at least 15 minutes to allow the chocolate to firm up, holding the two pieces together.
- Serve at room temperature. On hot days, keep them in the refrigerator until just before serving so the chocolate doesn’t melt.
- The brownies can be refrigerated, tightly covered, for up to 5 days or they can be frozen, well wrapped, for up to 2 weeks.
Recipe found at www.theheritagecook.com
Notes
If you pour the batter straight into the pan without letting it rest, it is very thin. Let it sit for 20 minutes and it becomes thick and rich. Timing is everything in gluten-free baking! I know some bakers who will mix up doughs and batters several days in advance and keep them in the refrigerator, covered, until it is time to bake. I am never that patient, but 20 minutes I can manage, LOL.
*You can adjust any recipe to gluten-free by using 120 grams per cup of my favorite gluten-free flour blend. If you
are using another brand of gluten-free flour, whisk the mix, spoon it lightly into a measuring cup without a spout until mounded, level off the top with the back of a knife, and weigh the flour left in the cup. Use that weight as your standard per cup of that specific flour. Do this for each flour blend you use. Commercial blends such as Pamela's, Bob's Red Mill 1-to-1, or King Arthur Measure for Measure are all good choices.
All recommended ingredients are gluten-free as of the writing of this article. Always check to be sure the products haven’t changed and are still safe to consume.
Nutrition Information:
Yield:
16Serving Size:
1Amount Per Serving: Calories: 197Total Fat: 6gSaturated Fat: 3gTrans Fat: 0gUnsaturated Fat: 2gCholesterol: 35mgSodium: 37mgCarbohydrates: 33gFiber: 2gSugar: 13gProtein: 4g
The nutritional information for recipes on this site is calculated by online tools and is merely an estimate.
If you enjoyed this recipe, be sure to follow me on social media so you never miss a post:
Create a New Tradition Today!
Welcome! The suggestions here are not intended as dietary advice or as a substitute for consulting a dietician, physician, or other medical professional. Please see the Disclaimers/Privacy Policy page for additional details. Unauthorized use, distribution, and/or duplication of proprietary material from The Heritage Cook without prior approval is prohibited. If you have any questions or would like permission, please contact me. We participate in the Amazon Services LLC Associates Program, an affiliate advertising program designed to provide a means for sites to earn advertising fees by advertising and linking to amazon.com. As an Amazon Associate, I earn a small amount from qualifying purchases without any additional cost to you. This page may contain affiliate links. This post was first shared in Apr 2015. The article was updated in 2023.