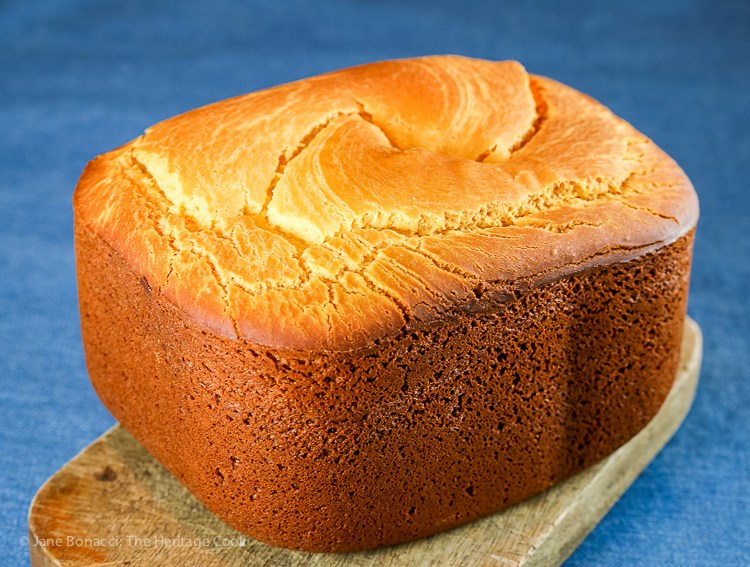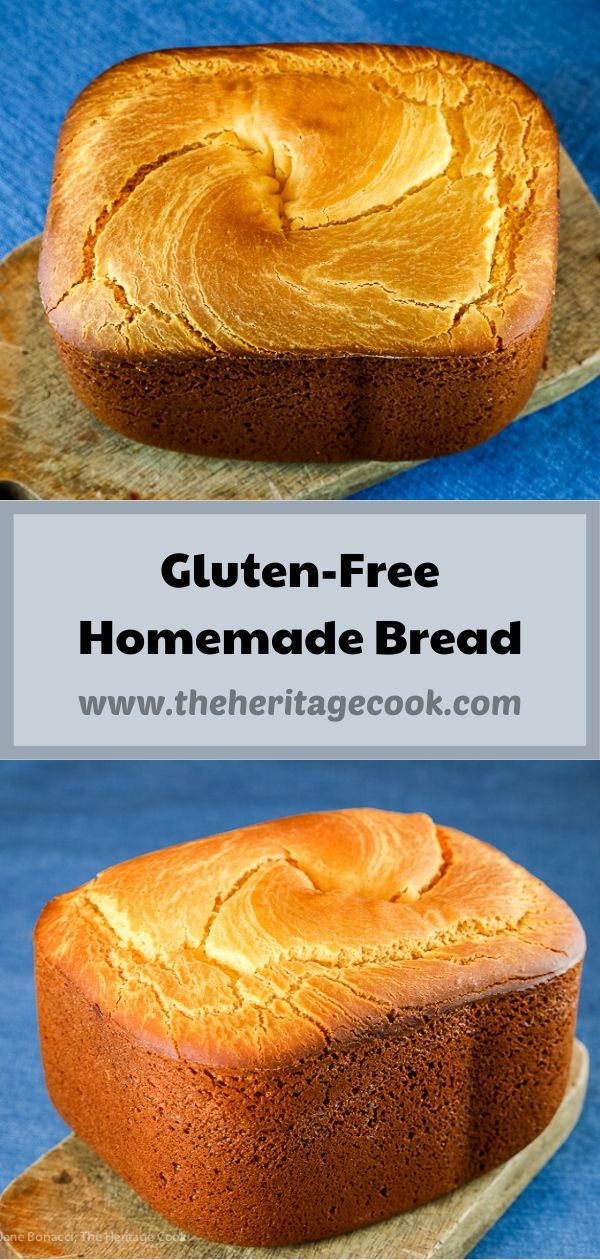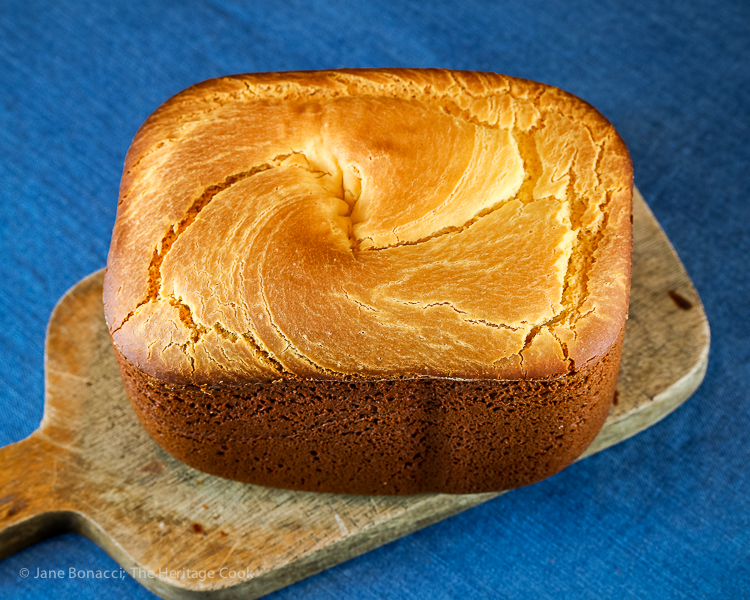
Today I am sharing a recipe for gluten-free bread you are going to love! Easy to make in a bread machine or by using your stand mixer and baking in the oven. Your family is going to be begging you to make it all the time!
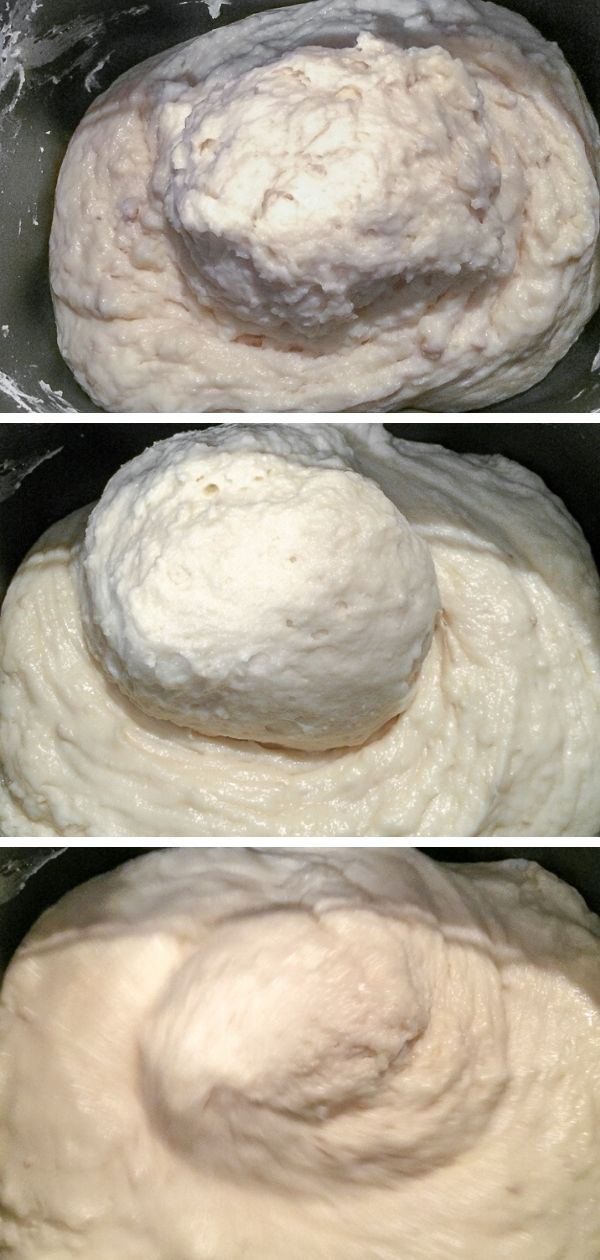
It may take you a couple of tries to get the feel for what you are looking for when the dough is mixing in the bread machine. Every machine and kitchen is different and may require slight adjustments as it is mixing to get it to the right consistency for the perfect final baked loaf.
It will be quite shaggy as it starts the kneading cycle and you can help it with the mixing by pushing the extra flour that collects around the edges and under the dough into the center with a spatula. It takes a little practice, but you’ll be surprised how quickly you will master this task.
After a while, the dough will come together into a smoother mixture. You are looking for it to gather around the beater in the center (in a single beater machine) with some dough still around the outside. Check again to be sure there is no hidden flour anywhere under or around the dough.
Now you can sit back and let the machine do all the work for you. You can keep an eye on the bread through the window, but try not to open the lid until the baking is done. Then use an instant read thermometer to be sure the temperature in the middle is between 206°F and 210°F. If it isn’t, add more bake time. Use the “Bake” setting and check after about 5 minutes. Most machines will get the bread to the temperature range either within the regular time or with a little extra bake time.
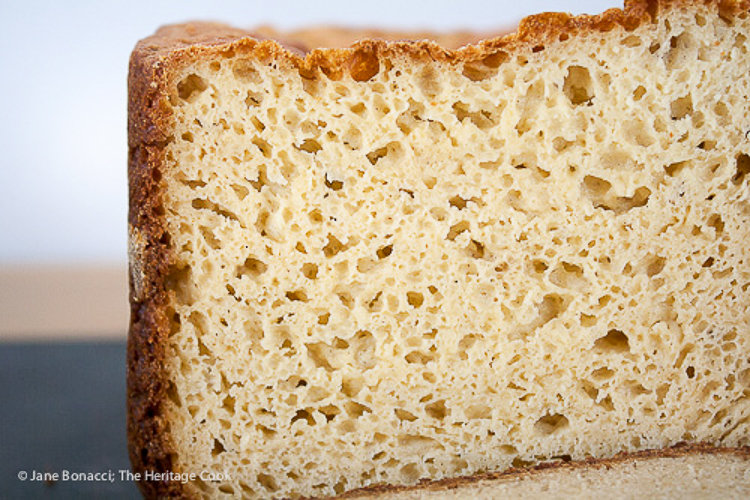
Inside of baked loaf of gluten free bread
I set a timer (like this one from Thermoworks) and then I can wander away and work on something else while the bread rises and cooks. I don’t have to worry that I will miss the end of the baking time – and adding more time if needed.
When we wrote our cookbook, The Gluten-Free Bread Machine Cookbook, Shannon and I repeatedly heard, “I don’t have a bread machine, how do you make the bread in the oven?” I have included directions to make the dough in a stand mixer, then let it rise, and bake in the oven. Now everyone can make our recipes!!
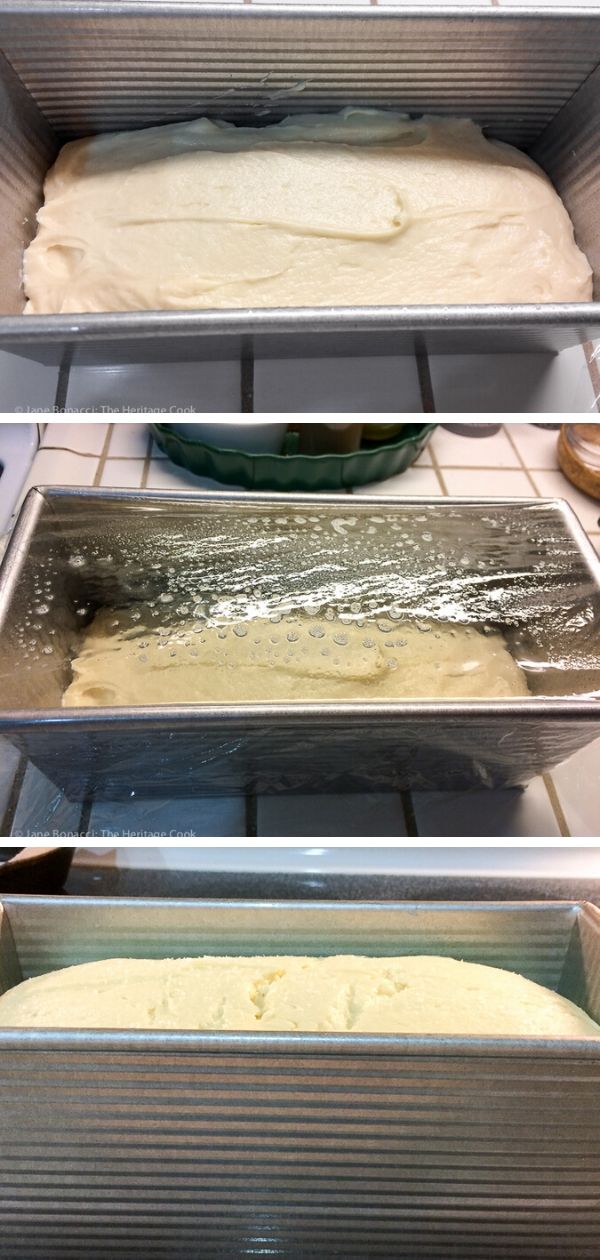
Steps for making the bread in the oven
I hope you love this bread recipe as much as The Artist and I do!
Key Ingredients for Sorghum Sandwich Bread:
- Yeast
- Flour blend (white rice flour, sweet rice flour, tapioca starch, and potato starch)
- Sorghum flour
- Sugar
- Dry milk powder or DariFree (for non-dairy option)
- Xanthan gum, baking powder, and salt
- Eggs
- Olive oil
- Apple cider vinegar
PRO Tip:
A recurring comment on the online reviews is that the yeast flavor in the bread is too strong. You can cut the yeast in half if you want. You will lose a little of the lift but will still get good results. I have cut the yeast to 1 tbsp in this version of the sorghum sandwich bread but you can use 2 tbsp if you want.
Do You Have a Favorite Bread Machine?
My personal favorite machine is the Cuisinart Convection Bread Maker. It is a medium-range price with a strong motor that easily handles the heavy gluten-free doughs. Shannon likes the Oster Bread Maker, a less expensive option that makes great quick breads and sandwich breads.
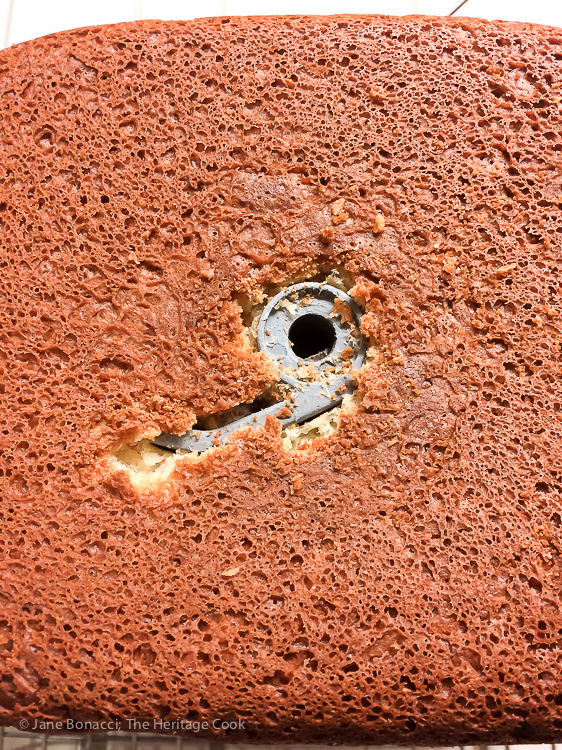
How to remove the paddle after baking
PRO Tip:
Use a pair of long tweezers to help you remove the paddle from the bottom of the loaf. Clear the “arm” first then peel back the crust over the round part of the paddle. When it is cleared, insert one prong of the tweezers inside the center and one on the outside of the paddle and wiggle it until you can remove the paddle from the bread. Be careful, the paddle will be very hot!
How to make Sorghum Sandwich Bread:
- Whisk together the liquid ingredients in a measuring cup and combine the dry ingredients in a bowl; pour the yeast into a small bowl.
- Pour the liquids into the bread pan fitted with the paddle, the scoop the dry ingredients over the top completely covering the liquids. Make a shallow well in the center of the dry ingredients and pour in the yeast.
- Lock the bread pan in the machine and use the gluten-free cycle, 1-1/2 pound loaf, medium crust, and press Start.
- Help the mixing by pushing extra flour around the edges and under the dough into the center a few times while it is kneading using a spatula.
- Bake the bread until it reaches 206°F to 210°F in the center on an instant read thermometer then turn it out onto wire cooling rack. Follow the directions if you are using a stand mixer and the oven.
Kitchen Tools I Use to Make This Recipe (affiliate links):
- Mixing bowls
- Measuring cups
- Bread machine
- Instant read thermometer
- Wire cooling rack
- Loaf pan (9×4″ or 9×5″)
- Heavy duty stand mixer
Gluten-Free Tips:
I use the flour blend included (the light flour blend recipe) as my all-purpose blend for all my baking projects. It is a good general purpose flour blend that you can use for more than just making breads.
Gluten Free Sorghum Sandwich Bread
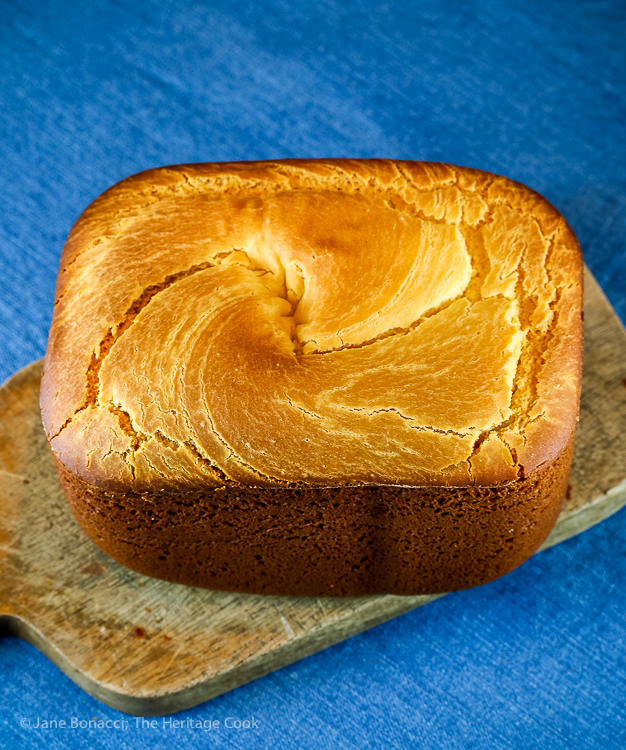
This Sorghum Sandwich Bread is The Artist's favorite and he makes a loaf for us about once a week in the bread machine. It tastes great, is soft, and doesn't need toasting before eating it. If he can make this bread, so can you!
Ingredients
Dry Ingredients
- 14 g (1/2 oz or 1 tbsp) active dry yeast
- 240 g (8.5 oz or 2 cups) Light Flour Blend (recipe below)
- 110 g (3.9 oz or 1 cup) sorghum flour
- 48 g (1.7 oz or 1/4 cup) granulated cane sugar
- 1/4 cup dry milk powder (22 g/0.8 oz) or DariFree (40 g/1.4 oz)
- 2 tsp xanthan gum
- 2 tsp baking powder
- 1 tsp kosher salt
- 1/8 tsp ascorbic acid (optional)
Wet Ingredients
- 3 large eggs, at room temperature, beaten
- 240 ml (1 cup) water, heated to about 80°F (27°C)
- 60 ml (1/4 cup) olive oil
- 2 tsp apple cider vinegar
Instructions
METHOD FOR THE BREAD MACHINE
1 It is very important to make sure all your ingredients are at room temperature. Set the bread pan on the counter and insert the beater paddle(s). Unless otherwise directed by your machine’s manufacturer, add the liquids first, then the dry ingredients, and finally the yeast.
2 Measure the yeast into a small bowl and set aside. In a large mixing bowl, whisk the remaining dry ingredients together.
3 In a 4-cup (1 liter) glass measuring cup, whisk the wet ingredients together and pour into the bread pan. Use a spatula to spread the dry ingredients over the wet ingredients, covering completely. Make a shallow
well in the center and pour in the yeast.
4 Place the bread pan in the machine, settle it in the center, and lock it in place. Close the lid and select:
- Gluten-free cycle
- Loaf size: 1-1/2 pounds/750 g
- Medium crust
- Start
5 About 3 minutes into the mixing process, open the lid and use a spatula to scrape down the sides of the pan, avoiding the paddle. Push any flour that has accumulated around the edges and under the dough into the center. Check again once or twice during kneading, scraping the edges, corners, and under the dough. If the dough looks too wet or too dry, add a little flour blend or tiny amounts of warm water. Once the mix/knead cycle is done, leave the lid closed during the rise and bake cycles.
6 At the end of the bake cycle, lift the lid and check the temperature. When the bread reaches 206°F to 210°F (97°C to 99°C) on an instant-read thermometer inserted in the center, it is done. Remove the pan from the machine and set it on its side on a wire cooling rack. Leave the bread in the pan for a couple of minutes, then turn the pan upside down and slide the loaf onto the wire rack. Carefully remove the paddle if it is embedded in the bottom of the loaf. Let the bread cool upright or on its side for at least 2 hours before slicing.
7 Store the bread in a resealable plastic bag or airtight container on the counter for up to 3 days. For longer storage, cut into even slices, double-wrap tightly in plastic, place in a resealable plastic bag, and freeze for up to 3 months.
METHOD FOR OVEN BAKING
1 Oil a loaf pan (4x9x4-inches or 5x9-inches). Measure out the yeast and set aside.
2 In a bowl, combine all the dry ingredients except the yeast and whisk thoroughly. Add an extra 2 tbsp of the flour blend. Add the yeast and whisk again. Pour into the bowl of your stand mixer.
3 Whisk the eggs with the remaining liquids in a bowl. Pour into the dry ingredients.
4 Mix on medium speed until smooth. Scrape down the sides and bottom of the bowl with a spatula. Beat until satiny and smooth but not shiny. Add a little more flour if needed – stay on the drier side. It will be a stiff dough that "breaks" when you lift the beater – you don't want it to flow as you lift the beater – and it pulls strands from the sides of the bowl as it mixes.
5 Scoop the dough into the oiled pan, cover with a sheet of plastic wrap that's been sprayed with baking spray (without flour in it!), oiled side down. Set aside in a warm, draft-free area for about 1-1/2 hours or until it has risen to just below the edge of the pan.
6 Preheat the oven to 350°F with the racks in the middle-lower part of the oven to allow for the height of the bread pan.
7 Bake 35 to 50 minutes until it reaches 206°F to 210°F in the center on an instant read thermometer. If it is browning too fast, tent loosely with a sheet of foil.
8 Let rest in the pan for about 5 minutes, then remove the loaf from the pan and cool upright on a wire rack at least 2 hours before slicing.
Notes
Recipe from The Gluten-Free Bread Machine Cookbook by Shannon Kinsella and Jane Bonacci
Gluten Free Light Flour Blend
The Light Flour Blend from The Gluten-Free Bread Machine Cookbook by Shannon Kinsella and Jane Bonacci
Ingredients
- 280 g (9.9 oz or 2 cups plus 2 tbsp) sweet rice flour (not white rice flour)
- 280 g (9.9 oz or 2 cups plus 4 3/4 tsp) brown or white rice flour
- 120 g (4.2 oz or 1 cup plus 4 3/4 tsp) tapioca flour/starch
- 120 g (4.2 oz or 1/2 cup plus 3 tbsp plus 2 1/4 tsp) potato starch (not potato flour)
Instructions
1 Whisk the ingredients together in a large food-safe plastic bin. Secure the lid on the container and shake vigorously to distribute all the ingredients evenly.
2 Gluten-free flours tend to settle and sometimes separate while sitting, so always shake the container well before measuring for each baking project.
Notes
From The Gluten-Free Bread Machine Cookbook by Shannon Kinsella and Jane Bonacci
If you love this recipe, be sure to follow me on social media so you never miss a post:
| Facebook | Pinterest | Instagram | Twitter |
Create a New Tradition Today!
Welcome! The suggestions here are not intended as dietary advice or as a substitute for consulting a dietician, physician, or other medical professional. Please see the Disclaimers/Privacy Policy page for additional details. Unauthorized use, distribution, and/or duplication of proprietary material from The Heritage Cook without prior approval is prohibited. If you have any questions or would like permission, please contact me. We participate in the Amazon Services LLC Associates Program, an affiliate advertising program designed to provide a means for sites to earn advertising fees by advertising and linking to amazon.com. This page may contain affiliate links.

