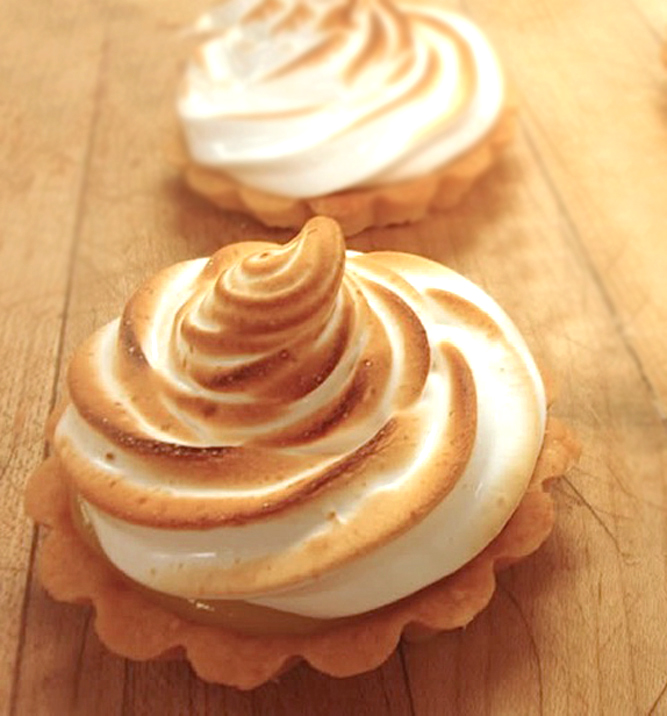
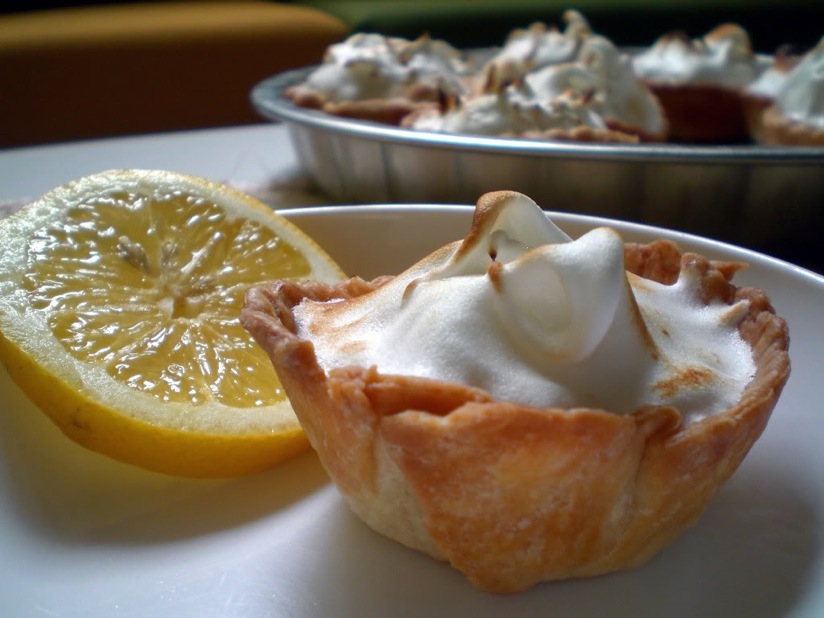
This weekend many people will be enjoying a holiday meal with friends and family. There will be copious amounts of rich foods sure to delight and bring back memories of childhood gatherings. What better way to end the meal than a tangy lemon pie with a sweet, fluffy topping. The yellow filling sparkles under towering white meringue, reminding me of the Easter eggs we searched for earlier in the day. This dessert is perfect for either Easter or Passover and I know you will enjoy it!
Lemons were once considered an exotic fruit until cultivators figured out a way to grow citrus trees indoors, bringing them to the whole world. Lemon flavored custards have been enjoyed since Medieval times and meringue was perfected in the 17th century. But in the early 1800’s a pastry chef from Philadelphia, Elizabeth Coane Goodfellow created what we know today as lemon meringue pie when she put lemon curd in a pie shell and topped it with meringue. A new national favorite was born.
Today’s recipes come from the legendary Sarabeth Levine, a James Beard Award-winning pastry chef from New York City. Her bakery in Manhattan offers an irresistible array of muffins, croissants, cookies, cakes, pies, and other classic desserts. Her three eponymous restaurants present some of the finest pastries in The City and are always packed with discriminating dessert lovers. Her award-winning line of Legendary Spreadable Fruits is sold in thousands of stores in the United States and abroad, including Whole Foods and Williams-Sonoma. Her anxiously awaited cookbook, Sarabeth’s Bakery: From My Hands to Yours came out last year and is heralded as one of the best for home bakers to learn from. It contains many step-by-step photographs which help illustrate the techniques that make Sarabeth stand apart in a city filled with fine bakers. It makes an excellent gift for the experienced or beginning baker in your family.
There are challenges intrinsic to serving slices of a whole pie. It is always a struggle to get the first piece out, the crust can crumble, and the topping sometimes slips off the filling, but making individual tartlets negates those concerns. You have automatic portion control and presentation couldn’t be prettier. Find beautiful plates to set off these fun desserts.
There are three parts to this dessert: the crust, the lemon curd filling, and the meringue topping. The first two can be made ahead and then the tartlets can assembled quickly when you are ready to serve. Unlike pies which are served in the pie plate you baked them in, tarts are served free standing. This requires a strong crust, which you pre-bake and then fill with a cooked filling, in this case lemon curd, made with lemon juice, butter, eggs, and sugar.
Tart dough is much easier to make and not nearly as fussy as piecrusts. Make sure all of your ingredients, the bowl, and beaters are all well chilled. Measure out the flour and place it in the freezer for about 15 minutes before starting. After you’ve made the dough, set it in the refrigerator to rest. This gives the gluten a chance to relax which helps reduce shrinkage and distributes the liquid evenly throughout the dough. Chilling the dough re-hardens the butter making it easier to roll out.
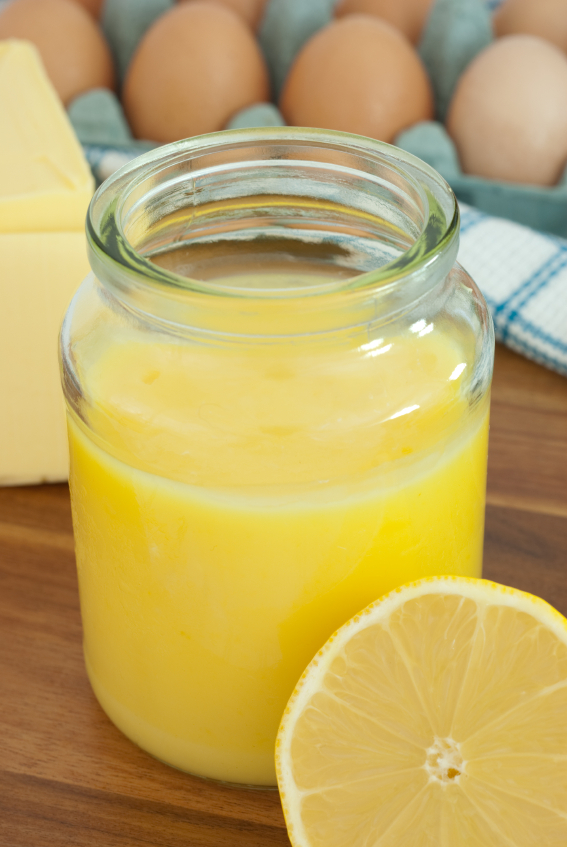
Lemon curd has traditionally been served at afternoon teas as a spread for scones. It is really fun to make but does take some patience. You combine all the ingredients in a saucepan and cook them, stirring constantly over heat. After what feels like forever, suddenly the ingredients thicken into a luscious, smooth, pudding-like consistency. It is a science experiment waiting to happen!
Cold eggs are easier to separate, but warm egg whites whip up higher. The solution is to separate the eggs right out of the refrigerator and set the whites aside at room temperature for 20 to 30 minutes to warm up before whipping them. You will use the yolks in the filling and the whites in the topping. When separating the eggs always use two small bowls. Put the whites in one and yolks in another. Then transfer the whites to the bowl of your mixer. As you separate each egg you can make sure there is no yolk in the whites before adding them to the rest. That way if you break a yolk you won’t ruin the whole batch. Even a tiny speck of yolk can deflate the egg whites, so be very careful with this step. Because the sharp edges of the broken eggshells can easily puncture the yolks, the safest way to separate the eggs is to pour the egg into your hand and let the whites slip through your fingers. Unless you are wearing sharp rings, there is little chance of breaking the yolks.
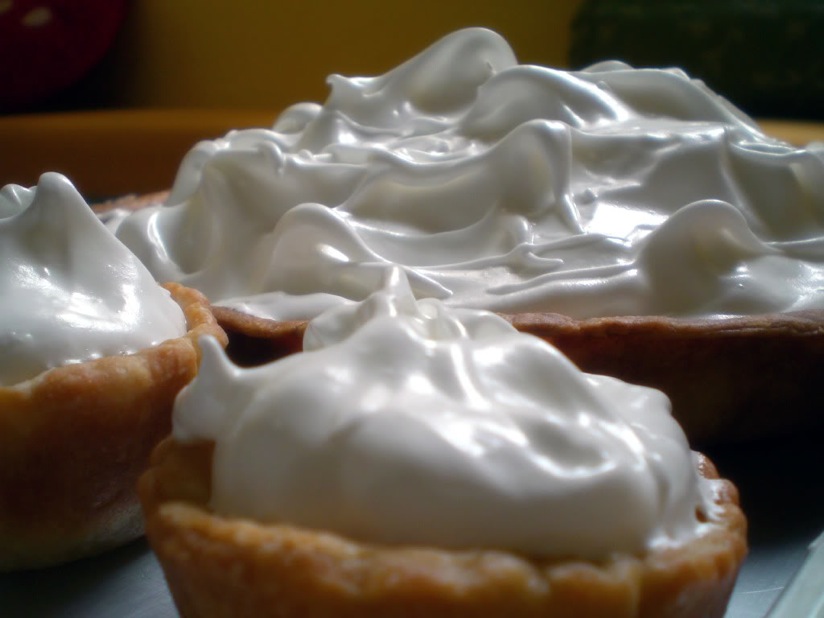
If you have tried to make meringue before and had trouble with it weeping, shrinking, or beading, I’ve got some techniques that will guarantee success every time. Weeping happens when liquid forms between the meringue and filling. Spreading the meringue over a hot filling helps “cook” the egg whites, reducing the amount of liquid in them. Using a Swiss or Italian meringue, because they are already cooked, also reduces the chances of weeping.
Having the meringue shrink away from the edge of the pie or tart can be helped in two ways. First, make sure you spread the meringue all the way to the edges, making sure it touches the crust all the way around which forms a seal. Adding a cornstarch slurry to the whites when you are whipping them stabilizes them and limits shrinkage.
Beading occurs when the meringue “sweats” and small beads of liquid form on the surface. This is because the meringue was over baked. Cook the pie and/or filling and crust first, then you only need to have the meringue in the oven a few minutes to finish. You bake it at a higher temperature for a short time just to dry it out a little. It should not brown until you torch or broil it at the end.
The easiest way to toast the meringue is with a butane torch. They aren’t expensive and if you like creme brulee or desserts with meringue you definitely should have one in your arsenal. You can also use the broiler in your oven, but be aware. The tarts will be quite tall so make sure the racks are low enough so they don’t hit the heat element on the oven’s roof.
As I have said before, don’t let a long, detailed recipe scare you. Long recipes are usually very well written, with plenty of details. The author has taken great pains to give you all the hints and tips along the way to guarantee your success. I have added to Sarabeth’s original recipes, including some extra tips, adjustments, and fail safe techniques to help these turn out perfectly every time.
Have fun with this, get creative with the meringue and make something unique and beautiful. If you want, garnish the plate with wedges of fresh lemons. Lemon meringue is a spectacular dessert that will win you a round of applause when you present it to your guests.
- 12 tbsp (1-1/2 sticks) cool unsalted butter, cut into small cubes
- 6 tbsp superfine sugar (see Note)
- 1 large egg plus 1 large egg yolk, beaten
- 1/2 tsp pure vanilla extract
- 2-1/4 cups unbleached all-purpose flour
- 1/4 tsp fine sea salt
- Beat the butter in the bowl of a heavy-duty stand mixer fitted with the paddle attachment on high speed until smooth, about 1 minute. Add the sugar and beat, occasionally scraping down the bowl (including the beater and middle of the bottom of the bowl), until very light in color and texture, about 3 minutes. Gradually dribble in the eggs and vanilla. Reduce the mixer speed to low and add the flour and salt. Mix just until the dough clumps together and the sides of the bowl are almost clean.
- Gather up the dough and transfer to a lightly floured work surface. Knead a few times until smooth and supple. Divide the dough in half. Shape each portion into a disk, about 1 inch thick, and wrap each disk tightly in plastic wrap. Refrigerate until chilled but not hard, 30 minutes to 1 hour.
- Yield: 2 (9-inch) tarts or 8 (3-3/4 inch) tartlets.
- Make Ahead: The dough can be refrigerated up to 1 day, but let it stand at room temperature for about 30 minutes to warm up before rolling out. The dough can also be double wrapped in plastic and frozen for up to 2 weeks. Defrost in the refrigerator overnight.
- Note: You can purchase superfine sugar, also called Baker’s Sugar, or you can make your own. Place granulated sugar in a food processor and run until very finely ground. Measure as use as directed above.
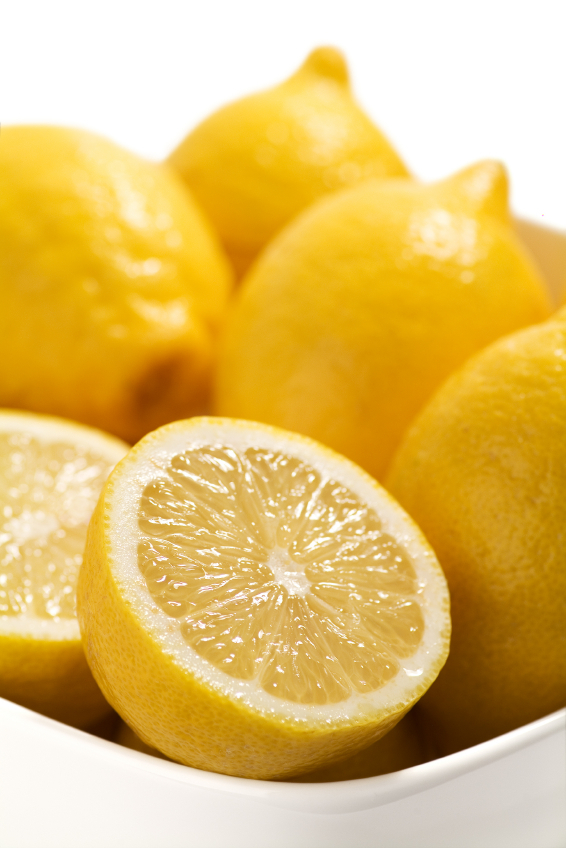
- 4 large lemons
- 10 large egg yolks
- 1 cup plus 2 tbsp granulated sugar
- 8 tbsp (1 stick) unsalted butter, at room temperature, cut into 1/2-inch cubes
- Rinse the lemons under cold water and dry well. Using the small holes on a box grater or a Microplane zester, remove the yellow-colored zest from the lemons, making sure not to remove the bitter white pith. Cut and squeeze the lemons, and pour the juice through a strainer into a bowl. You should have about 2/3 cup juice.
- Place a heatproof medium bowl with a medium-mesh wire sieve near the stove. In a large heatproof bowl, whisk the yolks, sugar, lemon juice, and zest to combine. Place over a saucepan of simmering water. Using a silicone spatula, cook the curd, scraping down the sides of the bowl often, until it is opaque and thick enough to cling to the spatula, about 10 minutes. (A finger drawn through the curd on the spatula will cut a swath, and an instant-read thermometer inserted in the curd will read 185°F.) Don’t worry if you see strings of egg whites forming. They will be removed when you strain the curd. Note: A silicone spatula works better than a metal whisk because the whisk froths the yolks making their thickness difficult to gauge.
- Strain the mixture through the wire sieve into a medium bowl. Using the spatula, stir the mixture to help it flow through the sieve and gently push the curd through the strainer. Don’t force any solids into the bowl. Gradually whisk in the butter, allowing each addition to incorporate before adding more. Press a piece of plastic wrap directly onto the surface of the curd, and pierce a few holes to allow the steam to escape. Cool completely, transfer to a covered container, and refrigerate for up to 3 days.
- Yield: about 2 cups

- 1 recipe Sarabeth’s Sweet Tart Dough
- 1 cup Silky Lemon Curd
- Meringue Stabilizer
- 2 tbsp granulated or superfine sugar
- 1 tbsp cornstarch
- 1/2 cup water
- Meringue
- 5 large egg whites, at room temperature
- 1/8 tsp salt
- 3/4 cup superfine sugar (see Note)
- 1/4 tsp cream of tartar
- 1/2 tsp vanilla extract
- Position a rack in the bottom third of the oven and preheat to 350°F.
- Prepare the pastry crusts: Remove the dough from the refrigerator and let sit at room temperature 30 minutes. Lightly flour a work surface. Unwrap the dough and rap the entire circumference around its edge on the work surface (this helps avoid cracking during rolling). Place the dough on the surface and sprinkle the top with flour. Using a rolling pin, gently tap the dough several times, first horizontally and then vertically, to soften the dough slightly.
- Starting at the center of the disk, roll the dough away from you. Give it a quarter turn, and again roll out from the center. Keep rolling, turning the dough a quarter turn after each roll, and it will eventually widen into a circle. Be sure the dough isn’t sticking to the work surface. If necessary, run a long metal spatula under the dough to free it and scatter more flour underneath. Once the dough is 8 or 9 inches in diameter, you can stop turning it after each roll and just roll it to an even 1/8 inch thickness.
- Use a 6-inch diameter saucer or other round object as a guide and cut out 8 circles from the dough. Transfer a round to one of the tart pans and gently ease it into the pan, letting the excess hang over the edge. Press the dough firmly against the sides of the pan, being sure to form a distinct right angle where the sides meet the bottom. Run the meaty part of your palm around the circumference of the pan to press and remove excess dough. Using your fingers, press the dough into the grooves around the sides of each pan, being careful not to press too hard or the dough will be too thin and will burn when baking. You want fairly thick sides so they will stand up when removed from the pan. Run your fingers around the sides again, letting the dough peek about 1/16-inch above the rim of the pan. This final adjustment makes the dough stand a smidge taller, and will compensate for the shrinkage that occurs when the pastry is baked. Pierce the bottom only of each tartlet in a uniform pattern with the tines of a fork. Freeze for 15 minutes. This helps the dough keep its shape during baking.
- Make Ahead: The dough-lined pans can be wrapped tightly in plastic and frozen overnight. Do not thaw the dough, but add a few more minutes for baking.
- Place the tartlets on a baking sheet. (This helps crisp the bottom crust.) Line each pan with a circle of parchment paper and fill each with pie weights or dried beans (make sure the entire bottom is covered, all the way to the sides to support them while baking). Bake until the pastry is set and dry but not beginning to brown, about 15 minutes. Remove from the oven, and remove the weights and parchment paper. Return tartlets to the oven and continue baking until shells are golden brown, about 10 minutes more. If the pastry puffs up, press it down gently with your fingers. Keep the oven on. Transfer shells to a wire cooling rack and let cool completely. Remove the tartlets from the pans. You can leave them on the metal bottom rings from the pans or remove them by sliding a long sharp knife between the ring and the bottom crust. Carefully place them on a parchment-lined baking sheet.
- To make the meringue stabilizer: In a small saucepan, stir together the sugar, cornstarch, and water until the cornstarch dissolves. Stir constantly over medium-high heat for 2 to 3 minutes until the mixture bubbles up into a boil; it will immediately start to thicken and look almost clear. Quickly remove the pan from the heat and set it aside.
- To make the meringue: Choose a saucepan that will snugly hold the bowl of a heavy-duty stand mixer. Add about 1 inch of water to the saucepan (the bottom of the bowl should not touch the water). Bring to a boil over high heat, and then reduce the heat so the water is at a simmer. Whisk the egg whites, salt, and sugar together in the bowl of the mixer with a balloon whisk until the sugar dissolves. Place the bowl over the simmering water and stir constantly with a silicone spatula, frequently scraping down the sides of the bowl, until the mixture is hot and opaque (an instant-read thermometer will read 160°F.), about 5 minutes. Keep checking the temperature, being careful not to overcook the egg mixture.
- Attach the bowl to the mixer and fit with the whisk attachment. Whip with the mixer on high speed until the whites look thick and foamy. Add the cream of tartar and continue beating until you begin to see beater tracks on the surface. Turn off the mixer, add the vanilla, turn the mixer back on and start beating in spoonfuls of the cooked cornstarch mixture (the stabilizer), beating until the whites are cool (place your hand on the bottom of the bowl to judge the temperature) and formed stiff, shiny peaks, 5 to 7 minutes. Transfer the meringue to a large pastry bag fitted with a 5/16-inch diameter open-star tip, such as Ateco #823.
- Rewarm the lemon curd over very low heat just until it is almost hot to the touch. It must be warm enough to cook the surface of the meringue topping. Spoon about 2 tbsp of the warmed curd into each cooled shell, smoothing it out with an off-set spatula. Pipe a large dollop of meringue over the curd, making sure it touches the edge of the pastry. Pipe tall swirls of meringue on top of base of meringue and bake at 350°F until tinged golden brown, about 8 to 12 minutes. Let cool on a wire rack and serve at room temperature. Refrigerate leftovers.
- Yield: 8 tartlets.
- You can purchase superfine sugar, also called Baker’s Sugar, or you can make your own. Place granulated sugar in a food processor and run until very finely ground. Measure as use as directed above.
Thank You!




Susan
These look just perfect! I linked back to your post with my Lemon Curd Tart with Fresh Strawberries: http://www.createamazingmeals.com/2013/08/lemon-curd-tart-with-fresh-strawberries.html
Your blog is just lovely & I look forward to meeting you in Seattle!
Jane Bonacci, The Heritage Cook
Thank you SO much Susan! I’m tickled that you linked to my post and I can’t wait to meet you in Seattle at #IFBC!!!