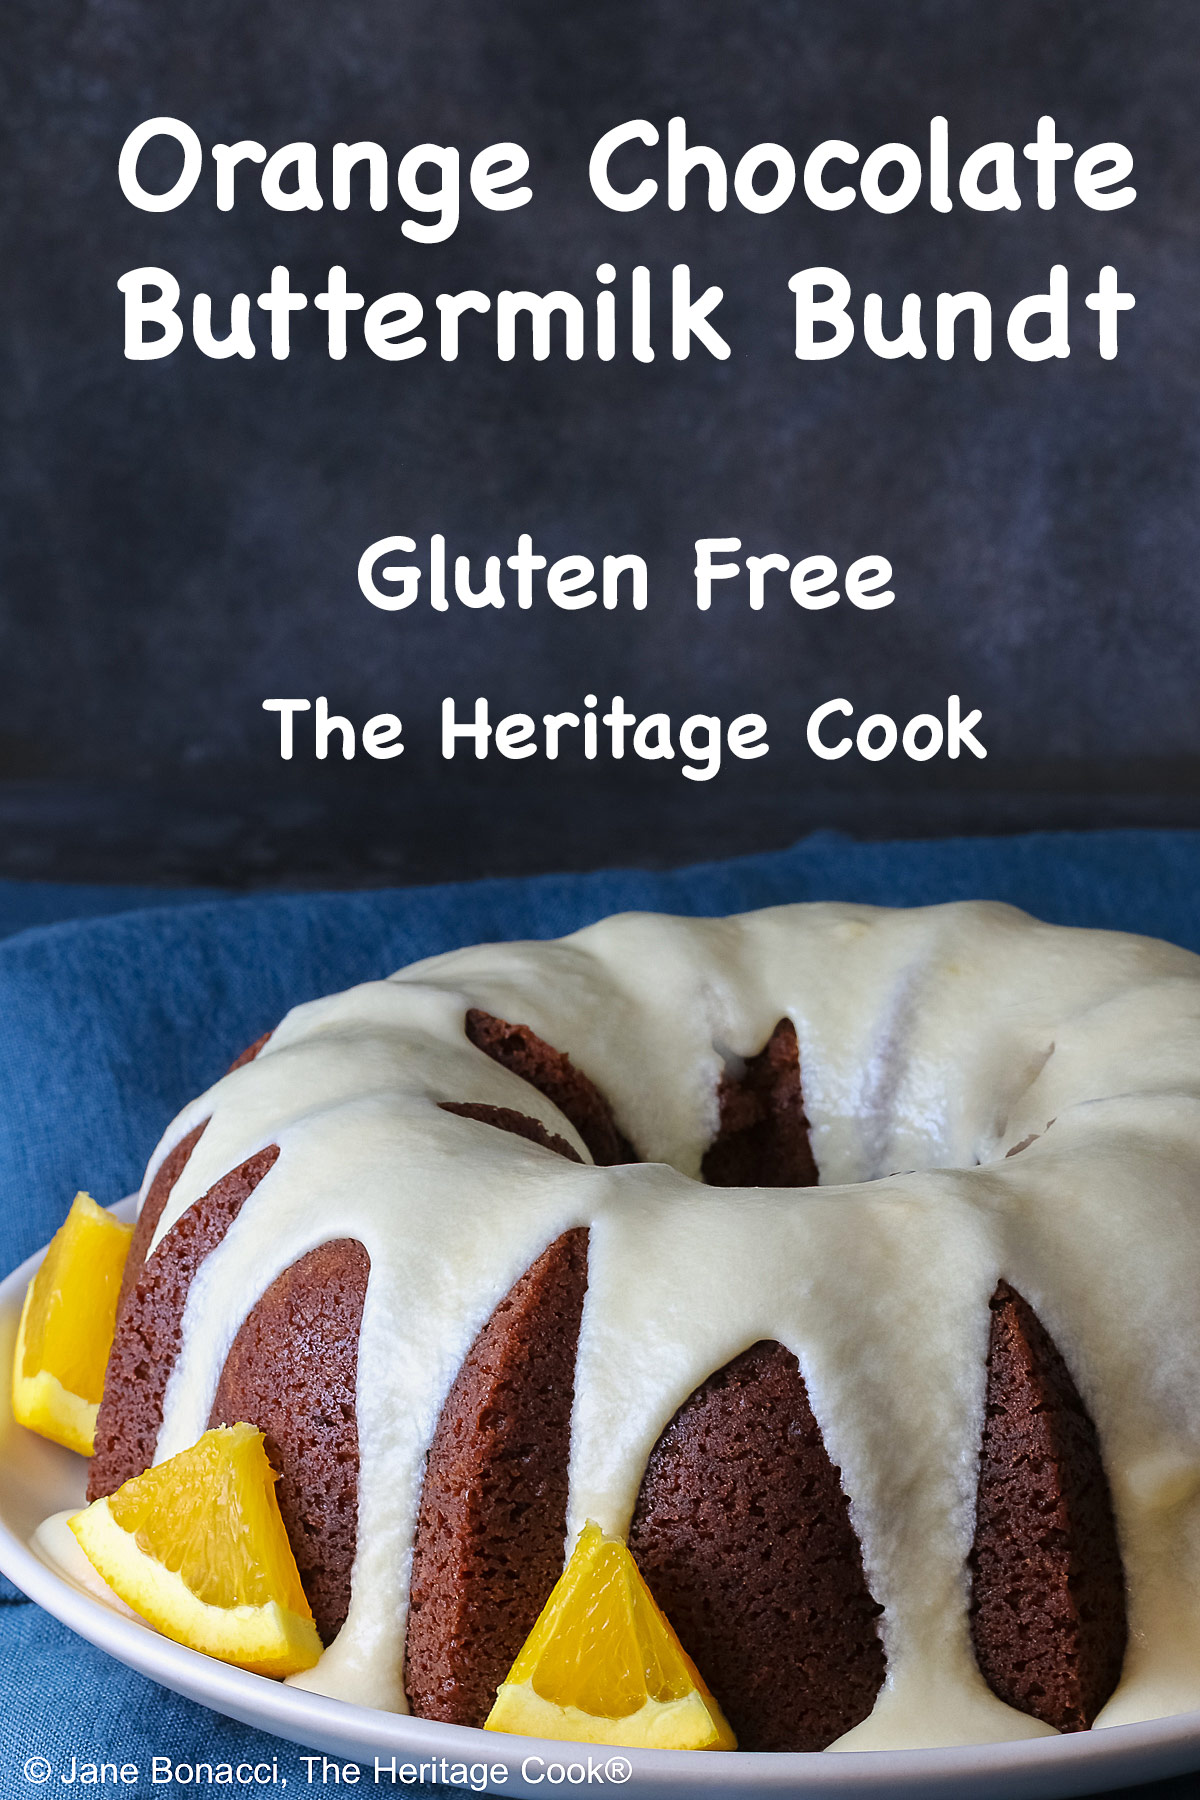
 The combination of chocolate and orange is truly heavenly. They complement each other beautifully and create memorable baked goods. Today’s Orange Chocolate Buttermilk Bundt Cake is a luscious indulgence you shouldn’t miss! It is perfect for casual get-togethers, birthday parties, dinner parties, and potluck suppers – just about any gathering you can think of.
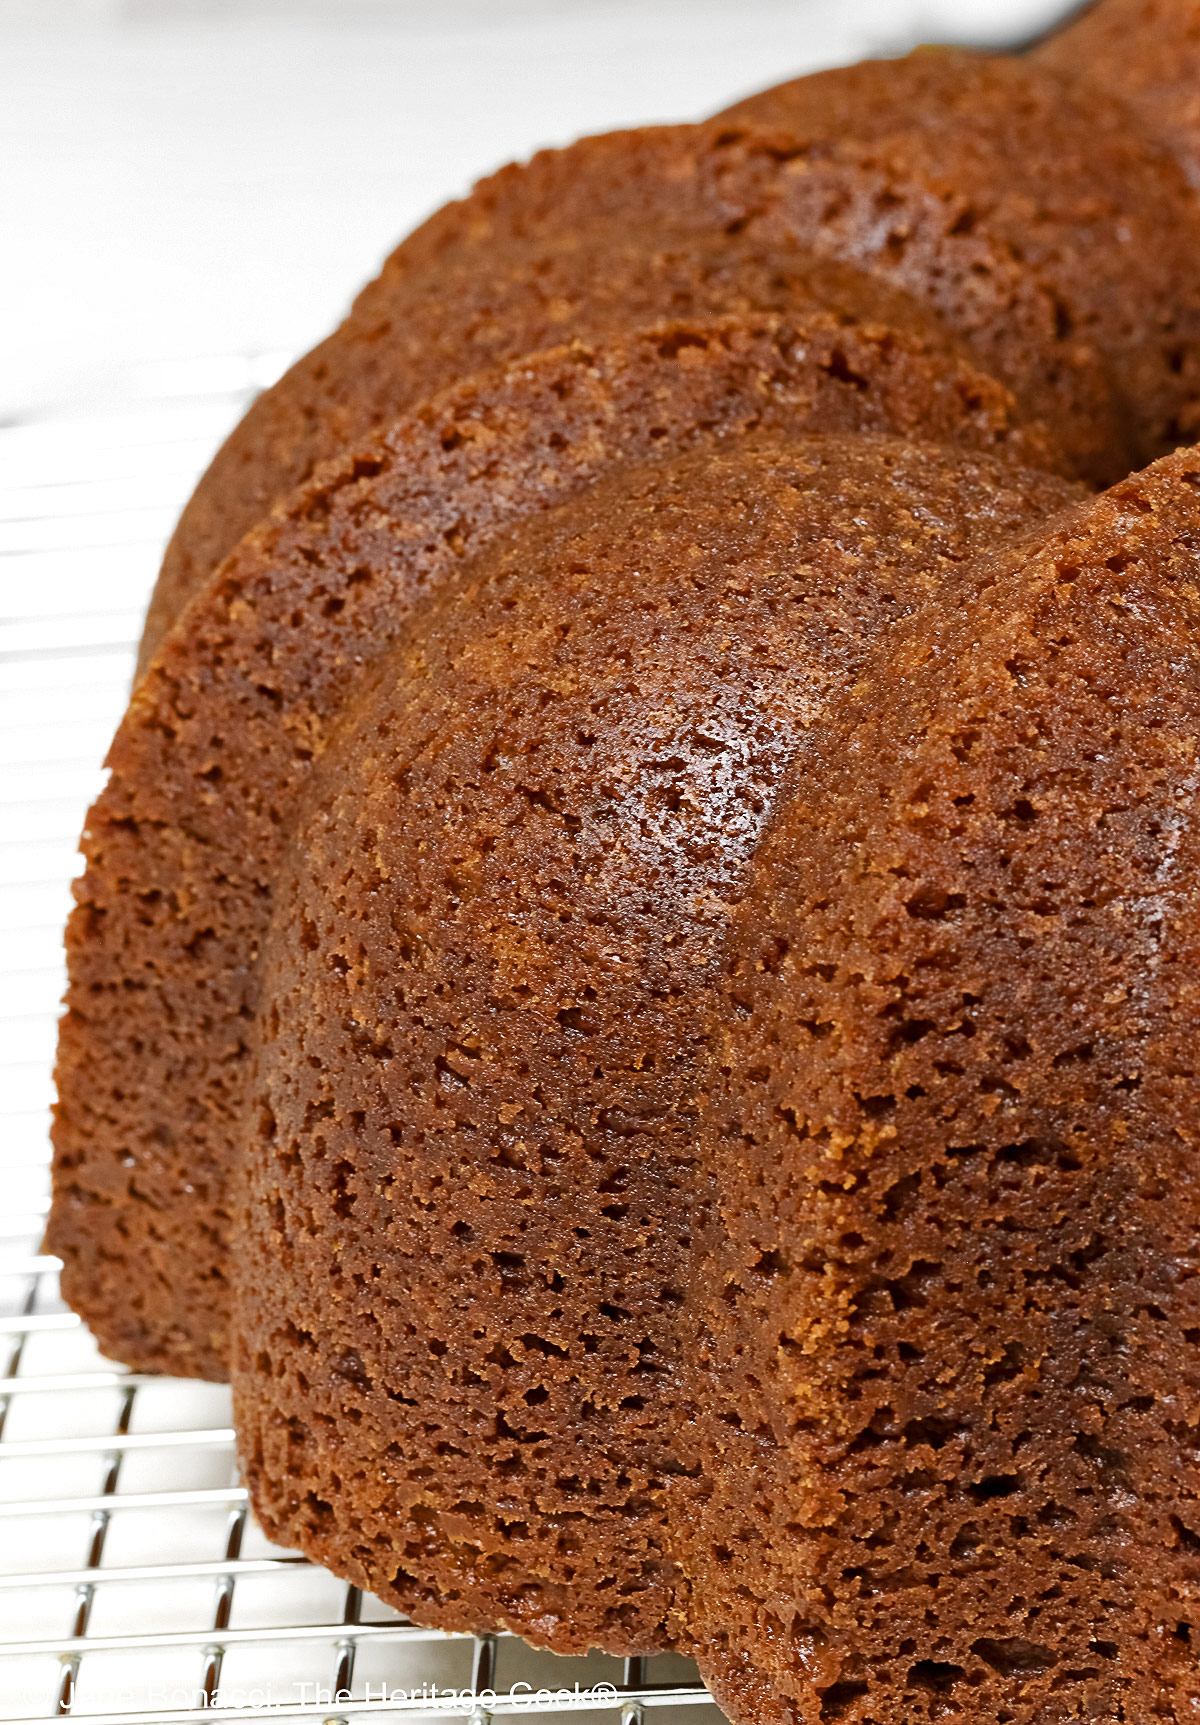
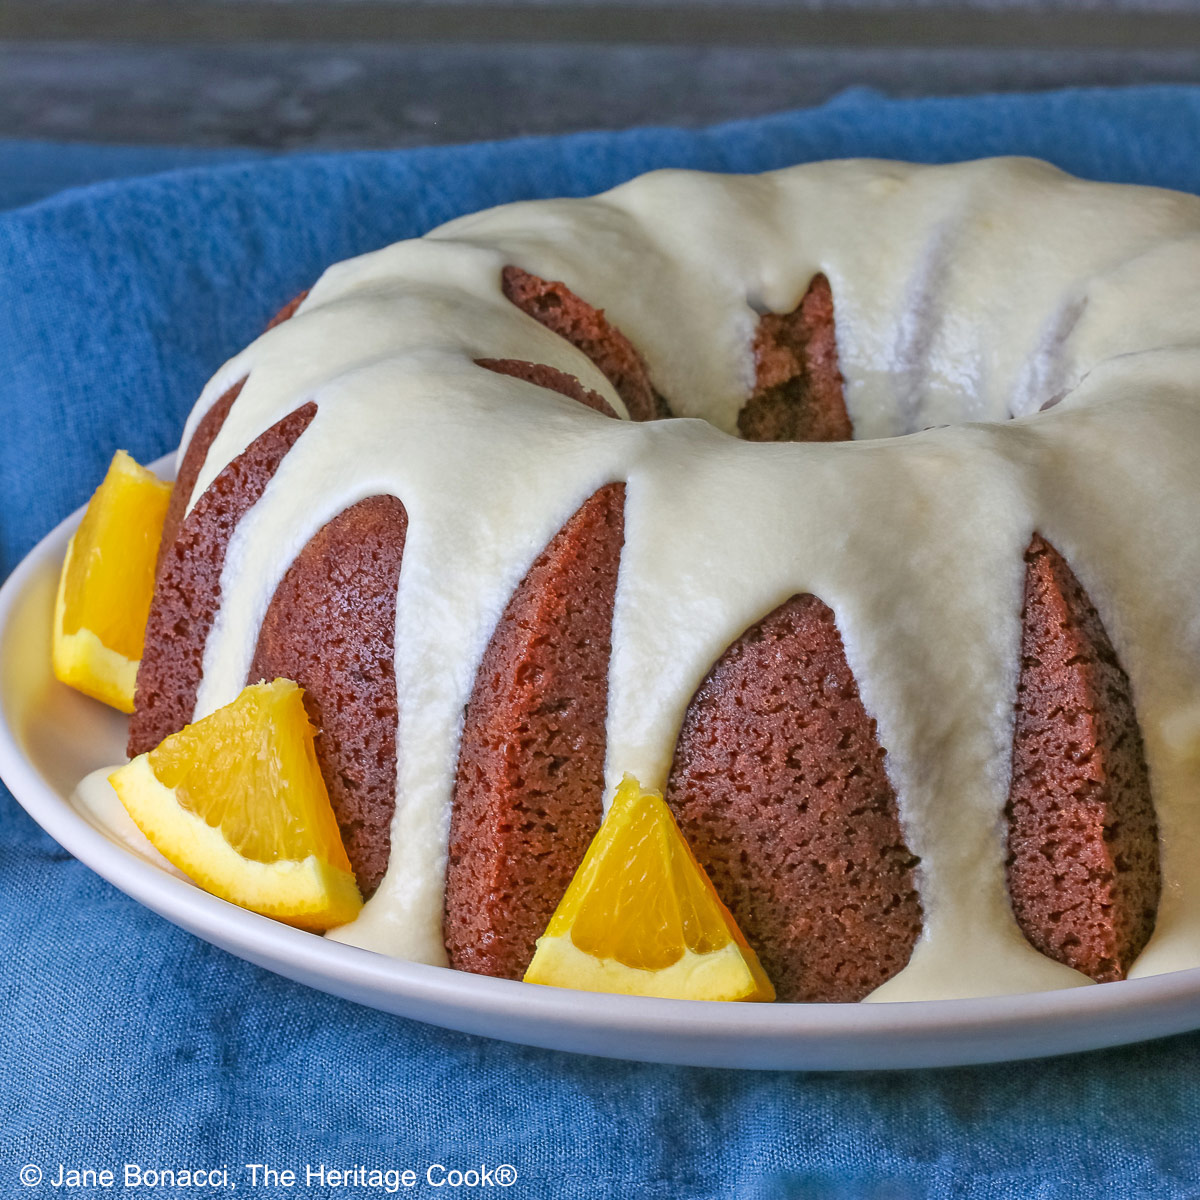
Bundt cakes are automatically decorative because of the design of the pan they are baked in. This makes it easy to make a cake look spectacular.
My love of orange and chocolate together began when I was a child and received a chocolate orange in my Christmas stocking. I hadn’t had one before but I loved chocolate and was excited to discover it in the toe of the stocking. My first bite was a revelation – I loved it! And I’ve been enchanted with it ever since.
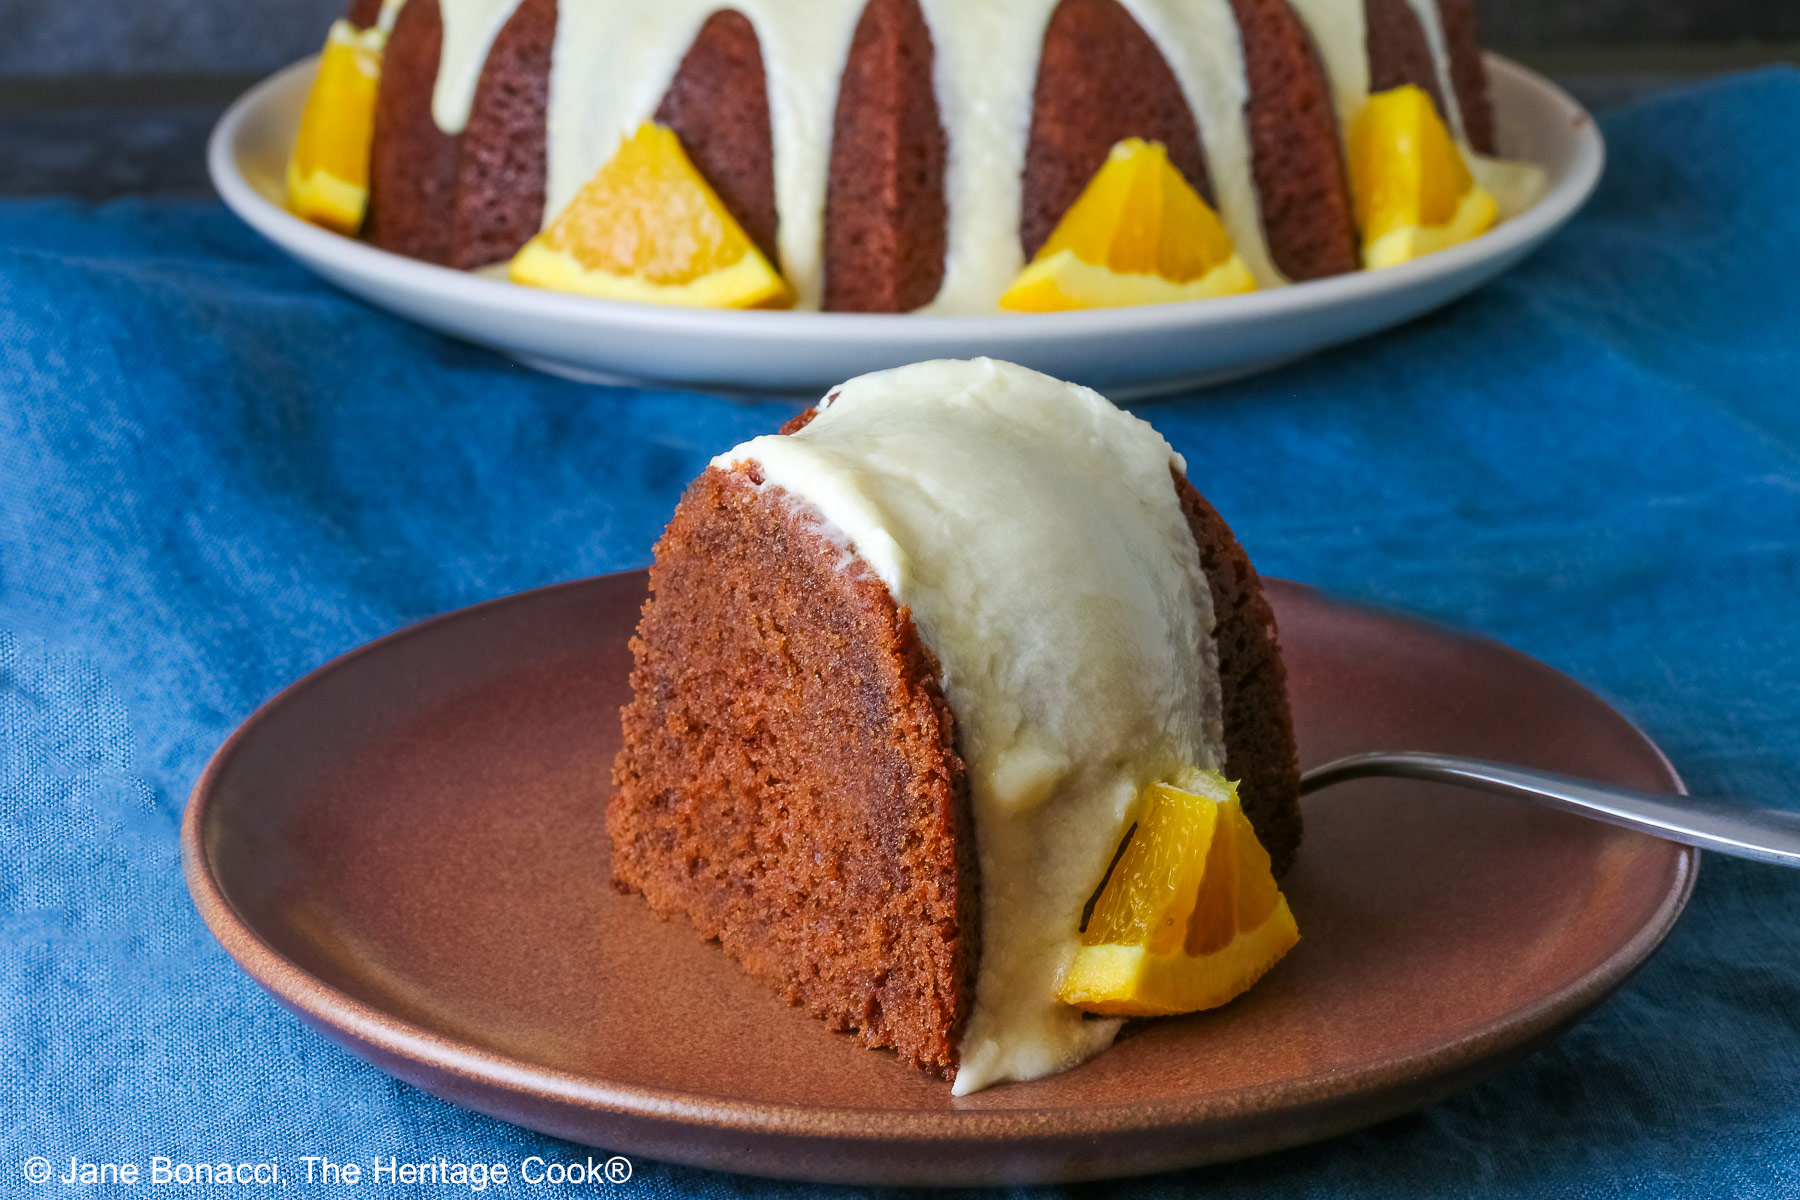
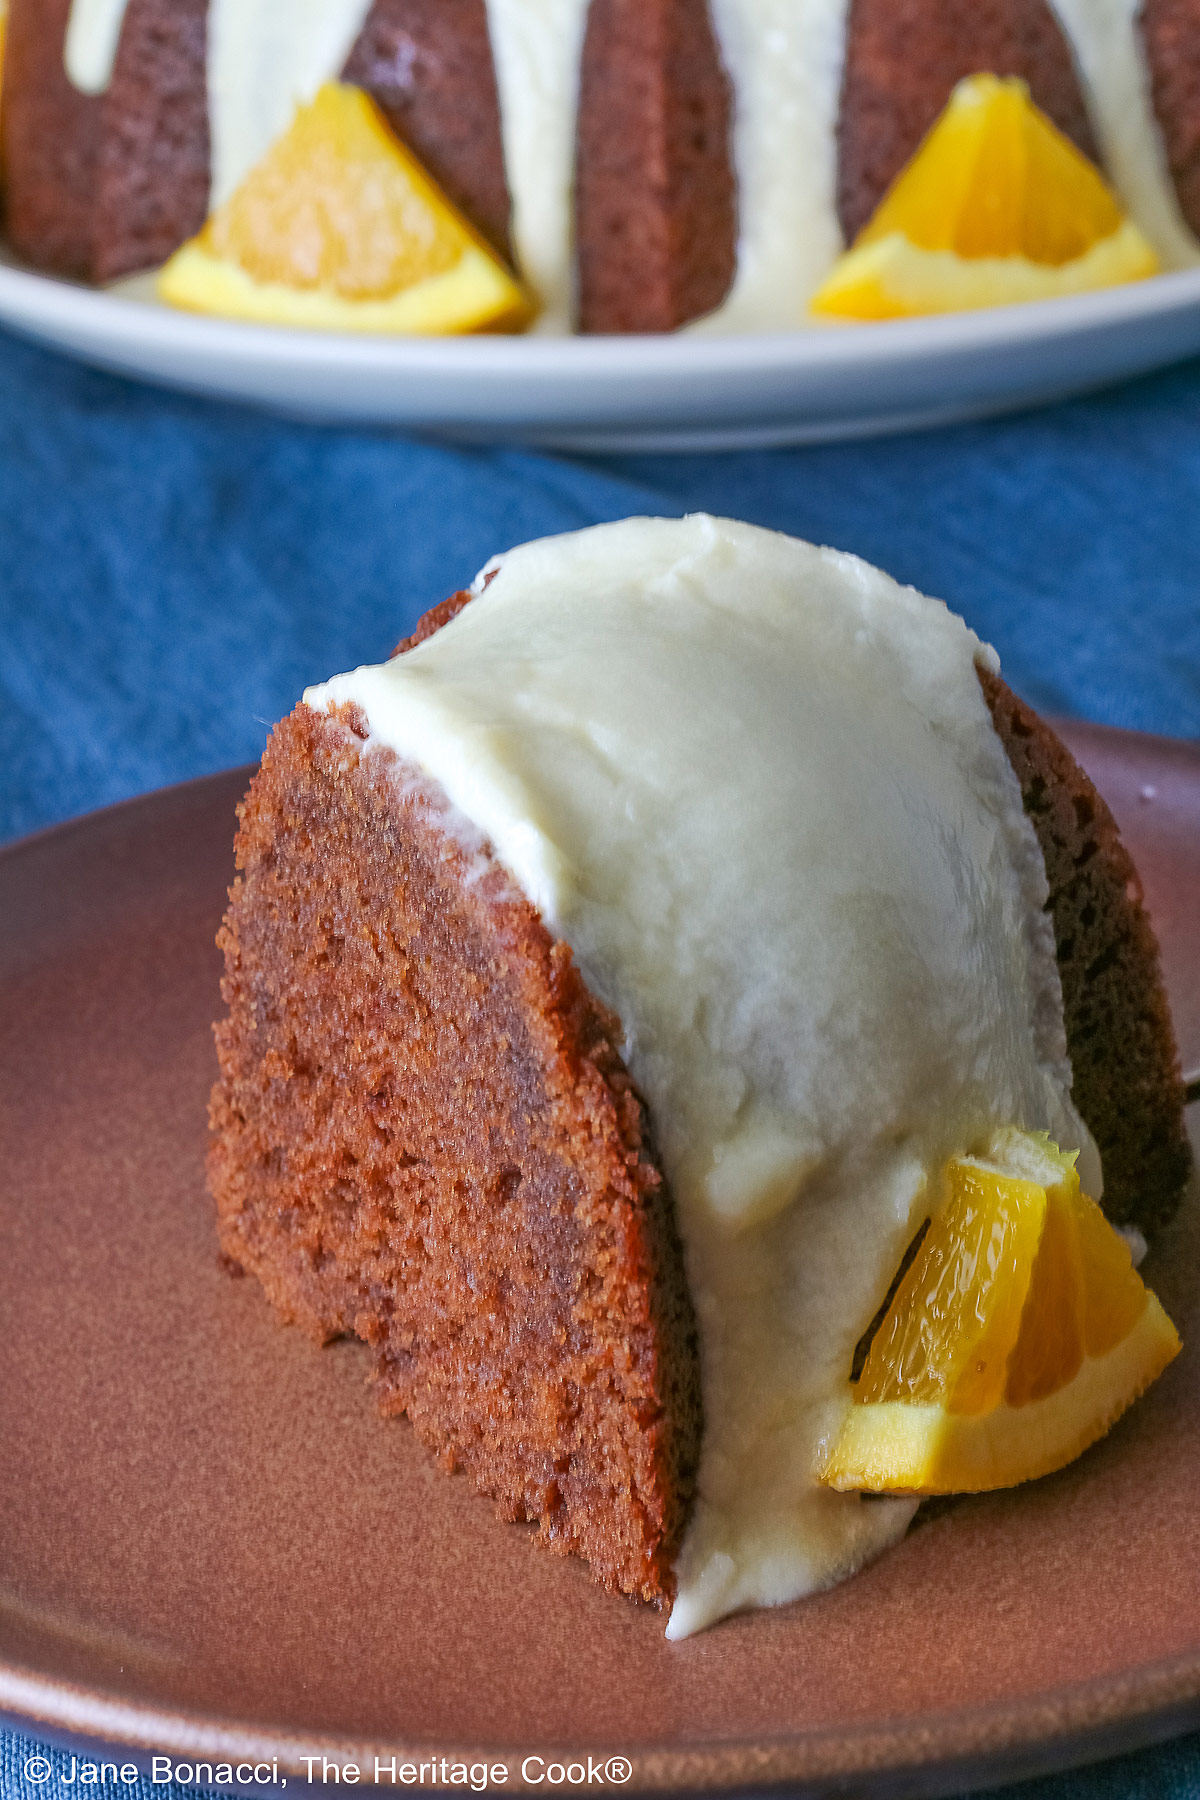
The cake is rich and luxurious, balanced with chocolate and orange flavors. The batter is thick so it is even more important to completely scrape the sides and bottom of the bowl as well as the beater blade while beating. You don’t want any of the ingredients hiding and not getting mixed in.
The buttermilk in the batter helps give you a tender cake, even with a heavy batter like this one. Be sure to turn the bundt pan as you pour in the batter so that it is evenly distributed. I run the spatula or a knife through the batter to release hidden air bubbles too.
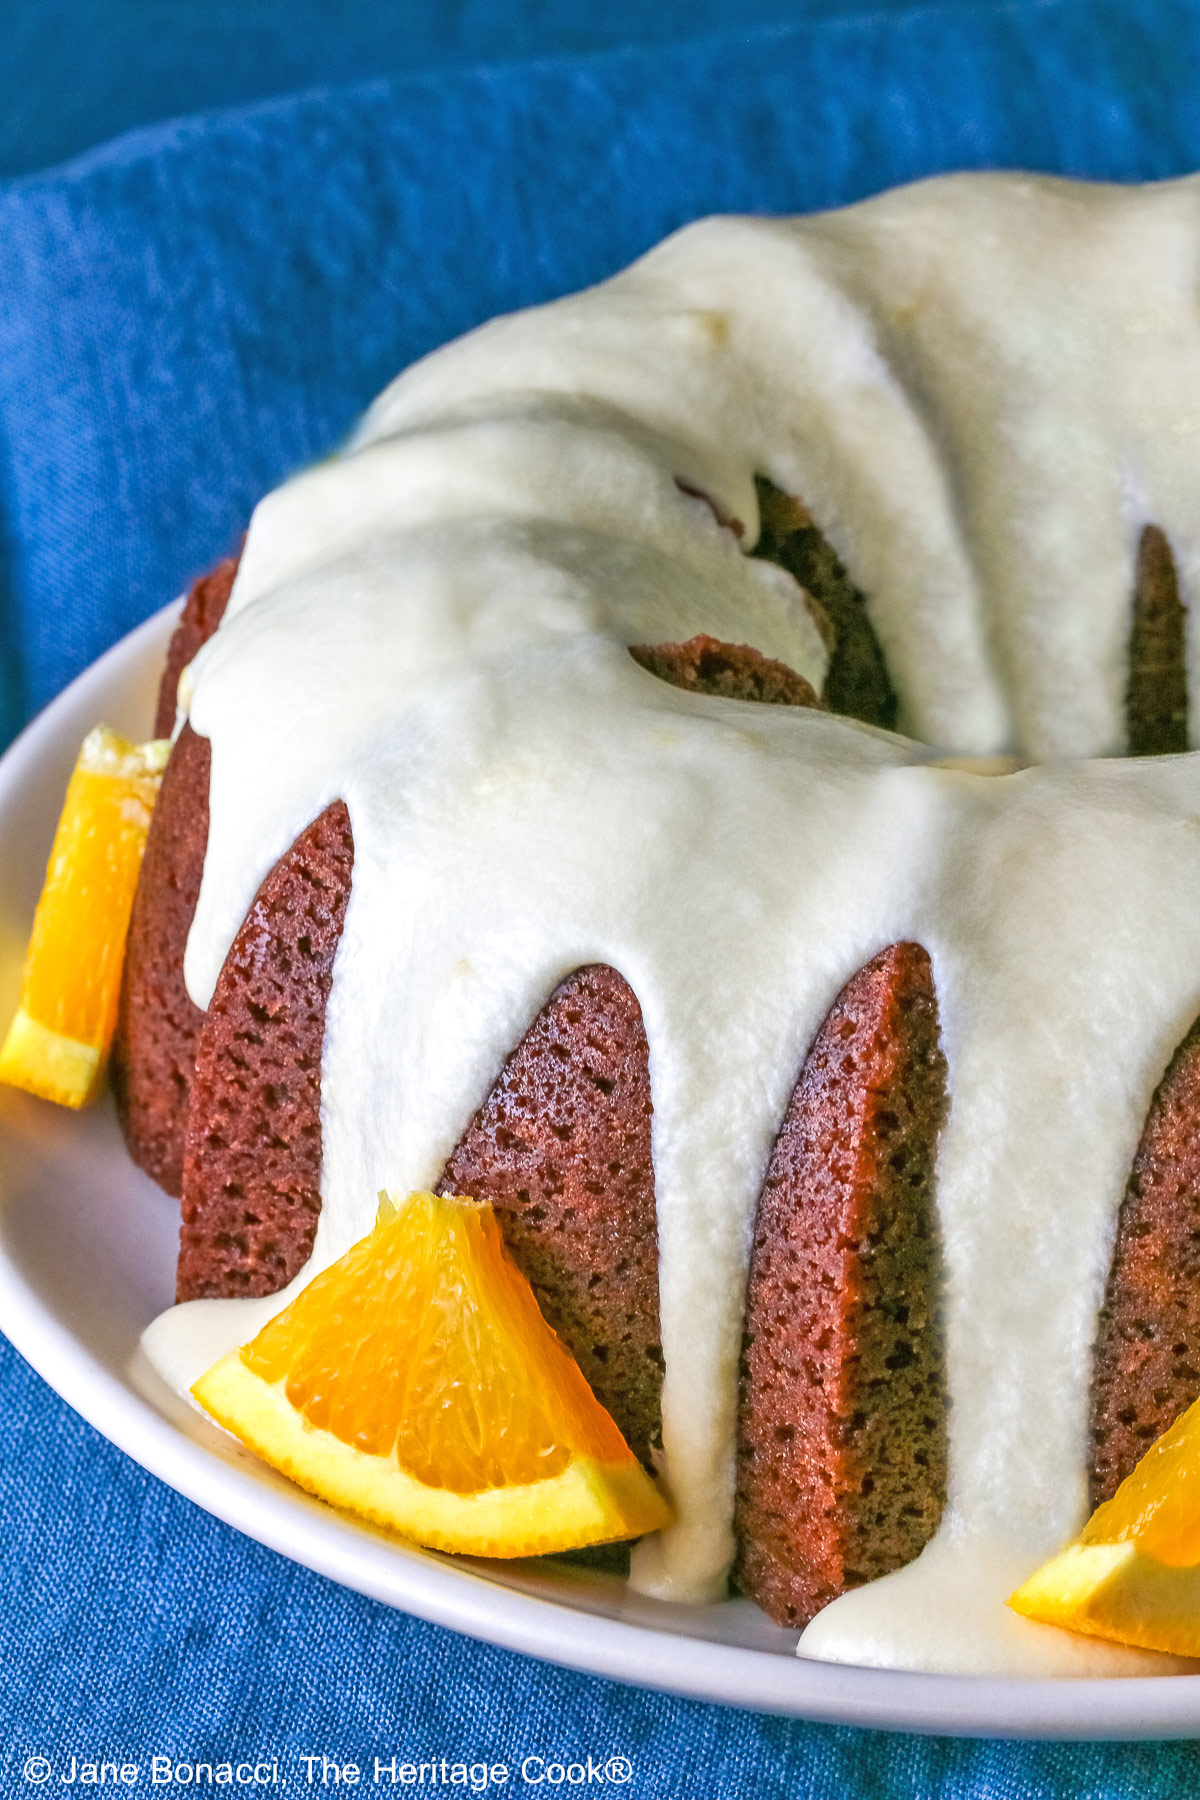
The glaze on top of the cake has a lovely bright orange flavor, enhancing the orange in the chocolate cake and providing a beautiful sweet accent to every bite. The buttermilk helps cut back on some of the sweetness creating a beautifully balanced glaze where the orange shines.
Bundt cakes are wonderful and fun to make. The only thing you need to be really careful with is buttering the pan thoroughly. I thought mine was fully coated but a portion on the top stuck. Luckily I was able to patch it back in place and the glaze helps cover it too.
There are many really fun designs in bundt pans these days and it is nice to have a couple or more to choose from. Make sure one of them can hold 12-cups of batter for the larger recipes. This recipe filled about 2/3 of my largest pan.
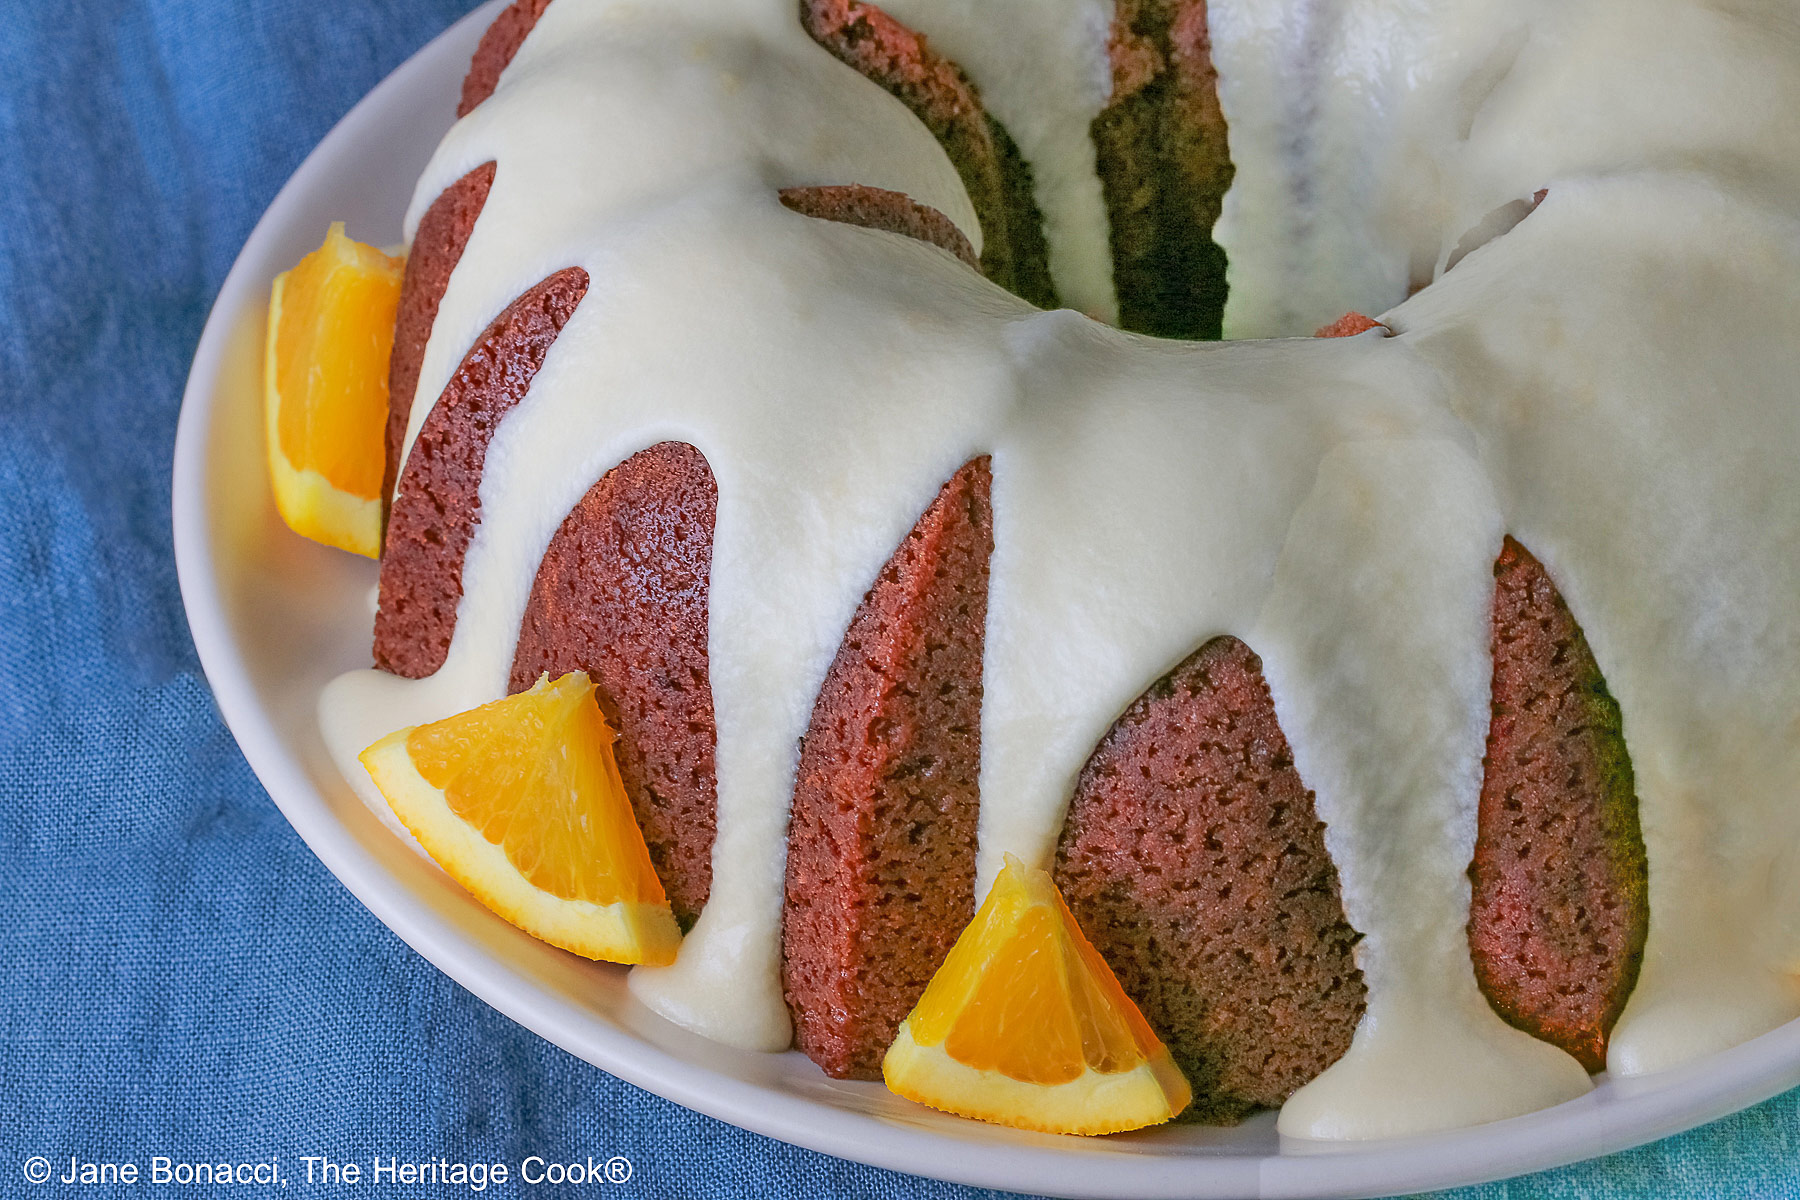
Another benefit of some bundt pans is cutting even slices. Some of the designs are perfect for portioning the cake. I love when that happens!
Remember that the timing in recipes is only a guideline, not etched in stone. My oven has been running hot lately so when I started smelling the cake I knew it was close to being done. I checked it and sure enough it was done about 8 minutes ahead of schedule. Always pay attention to the aroma of what you are baking as well as the timing and make adjustments as needed.
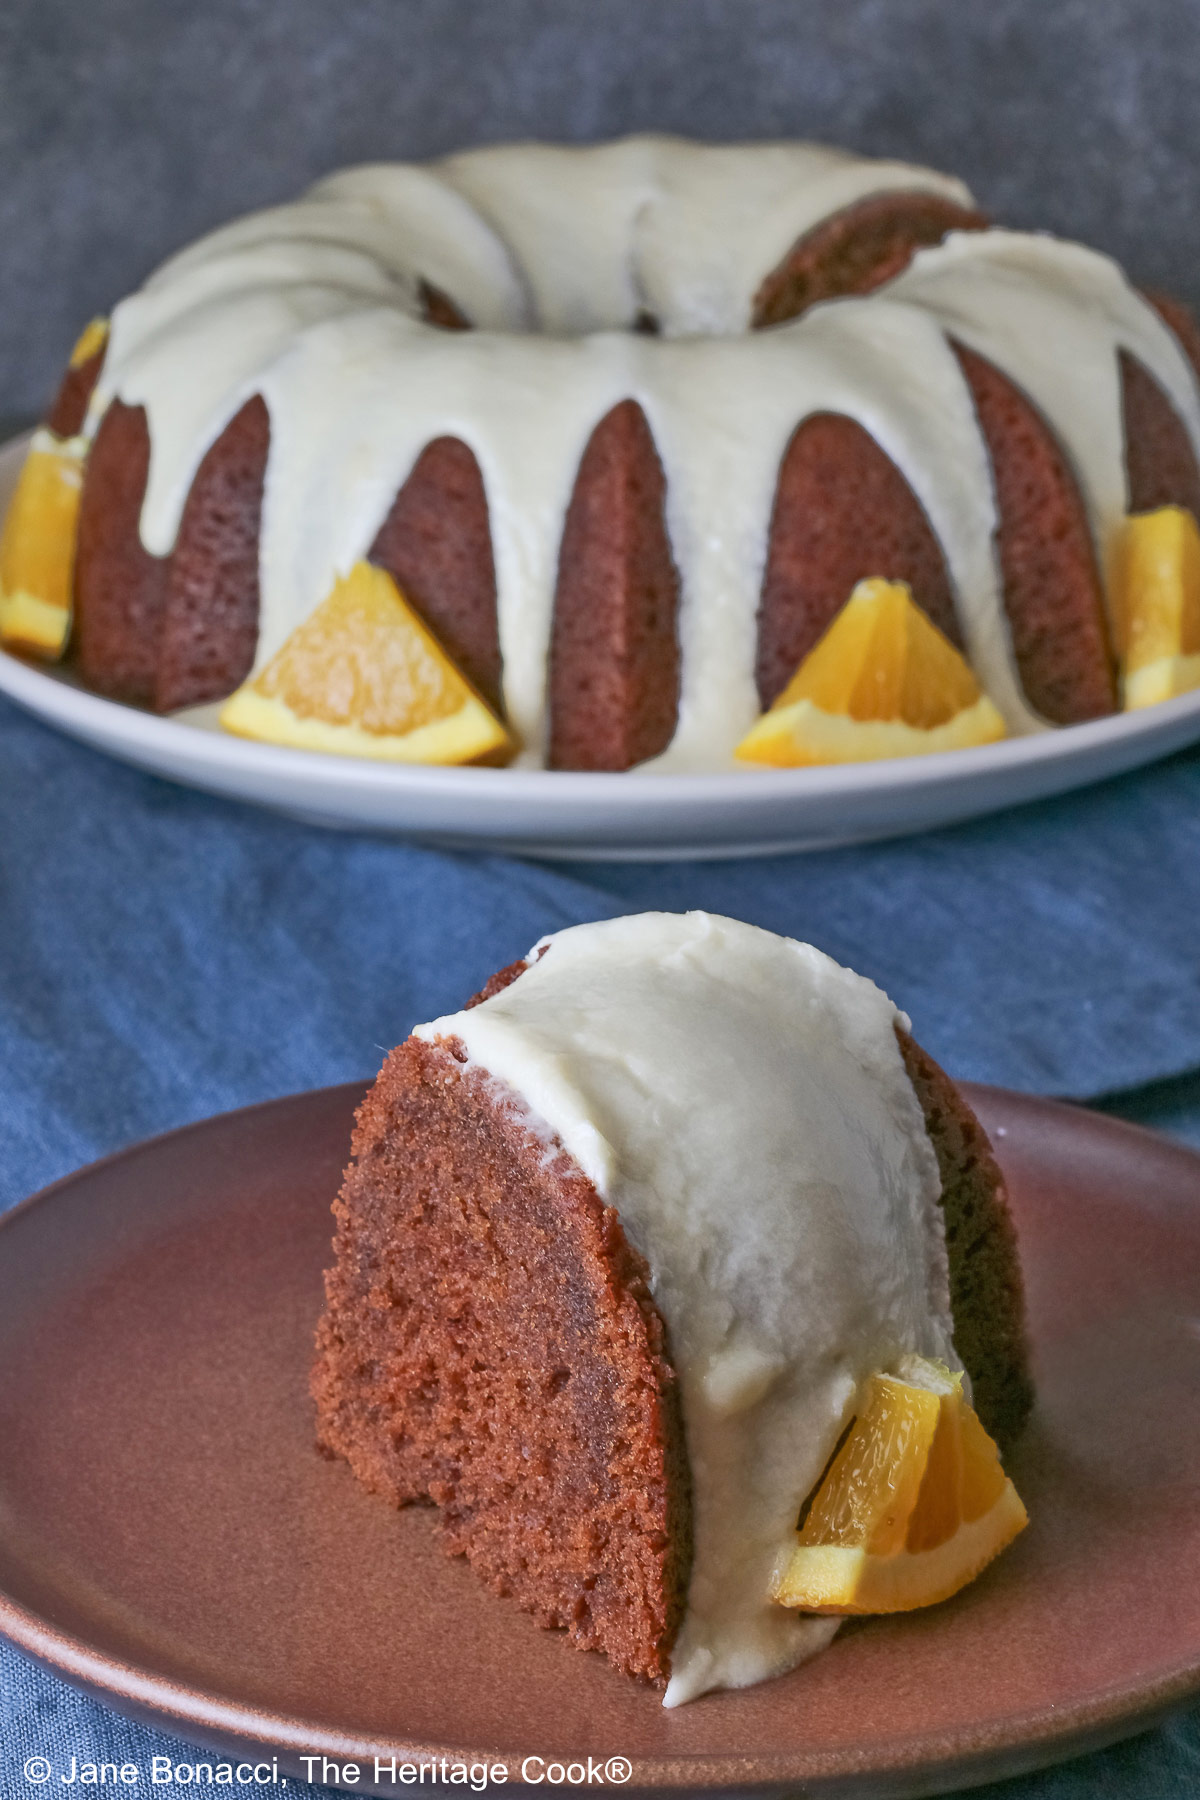
If you love the combination of chocolate and orange, this Orange Chocolate Buttermilk Bundt Cake is the perfect sweet treat for you. It is a beautiful way to end a meal, treat yourself with a cup of coffee or tea, or share with the kids after school with a glass of milk. No matter how you serve it, enjoy every bite!
I hope you have had a fun Chocolate Monday here at The Heritage Cook. Enjoy this recipe and I will see you back here on Friday for another favorite savory delight!
If you try this recipe, let me know! Please leave a star rating in the recipe card, comment below, and don’t forget to snap a pic and tag it @theheritagecook on Instagram! Seeing your creations makes my day and I love hearing from you!
Ingredients needed for Orange Chocolate Buttermilk Bundt Cake:
- Cake: flour, cocoa powder, baking powder, baking soda, salt, orange zest, sugar, butter, eggs, oil, vanilla, orange oil, buttermilk
- Glaze: butter, confectioners’ sugar, heavy cream, orange zest, fresh orange juice, vanilla
PRO Tip:
Be sure there is plenty of room for the cake to fully rise and expand in your bundt pan. The batter shouldn’t fill more than about 2/3 of the capacity. If it is higher than that, either switch to a larger bundt pan or bake a separate little cake on the side. If you do sue a small container, remember it will bake much more quickly than the big cake – watch it carefully!
How to make Orange Chocolate Buttermilk Bundt Cake:
- Butter your bundt pan thoroughly. Whisk together the flour, cocoa powder, baking powder, baking soda, and salt; set aside.
- Cream the butter, sugar, and orange zest for 2 to 3 minutes then beat in the eggs, one at a time, followed by the oil and vanilla. Scrape the bowl and slowly add the buttermilk with the mixer on low speed.
- Add the dry ingredients half at a time, mixing between additions. Beat until creamy. Pour into the buttered bundt pan, smoothing the top. Bake at 350°F (180°C) for 45 to 60 minutes until it is pulling away from the sides of the pan and a toothpick inserted in the center comes out with a few moist crumbs on it.
- Cool the cake in the pan on a wire rack for 15 to 20 minutes before inverting it onto the wire rack. Let cool completely then transfer to a serving plate.
- Make the glaze by putting all the ingredients into the bowl of your stand mixer or large bowl is using a hand mixer. Using the whisk attachment mix well until smooth and creamy. Adjust the thickness with more powdered sugar or orange juice as needed.
- Drizzle the glaze over the cake, filling in any obvious gaps. Let the glaze set before slicing and serving.
PRO Tip:
If you want a bolder orange flavor you can add a little orange oil or orange extract. I use LorAnn Oil products (you can buy them online). Their oils are remarkable and just a few drops flavor an entire cake. They are designed to be used in candy making so they are very concentrated. I use an eye dropper lid to control how much I use. Check the oils out!
Recommended Tools (affiliate links; no extra cost to you):
Gluten-Free Tips:
* You can adjust any baking recipe to gluten-free by using 120 grams per cup of my favorite gluten-free flour blend. If you are using another brand of flour or regular flour, whisk it, spoon it lightly into a measuring cup until mounded, level off the top with a knife, and weigh the flour left in the cup. Use that weight as your standard per cup of that specific flour. Do this for each flour blend you use. Commercial gluten-free blends such as Pamela’s All-Purpose Artisan Blend, Bob’s Red Mill 1-to-1, or King Arthur Measure for Measure are all good gluten-free choices.
** My preferred brand of kosher salt is from Diamond Crystal. If you use Morton’s, another brand, or table salt, you will not need as much because they are saltier.
You will get the best and most consistent results by using a digital kitchen scale and weighing your ingredients, especially when you are baking. And use grams, they are much more accurate than pounds and ounces.
All recommended ingredients are gluten-free as of the writing of this article. Always check to be sure the products haven’t changed and are still safe to consume.
Orange Chocolate Buttermilk Bundt Cake (GF)

If you love the combination of chocolate and orange, this Orange Chocolate Buttermilk Bundt Cake is the perfect sweet treat for you. It is a beautiful way to end a meal, treat yourself with a cup of coffee or tea, or share with the kids after school with a glass of milk. No matter how you serve it, enjoy every bite!
Ingredients
Bundt Cake
- 2-1/2 cups (300g*) gluten-free all-purpose flour* or regular all-purpose flour like Gold Medal
- 1/2 cup (42g) unsweetened cocoa powder (Not dark or Dutch-process!)
- 1 tsp baking powder
- 1/2 tsp baking soda
- 1/2 tsp kosher salt**
- 1/2 cup (1 stick; 113g) butter, at room temperature
- 2 cups (396g) granulated sugar
- Zest from 2 oranges
- 4 large eggs (200g)
- 1/2 cup (99g) canola or vegetable oil
- 2 tsp vanilla extract
- A few drops of orange oil, optional
- 1 cup (227g) buttermilk
Orange Glaze
- 1 tbsp butter, softened
- 1-1/2 cups (170g) confectioners’ sugar, or more if needed
- 2 tbsp buttermilk
- 1 tbsp orange zest from about 1 orange
- 2 to 3 tbsp freshly squeezed orange juice, as needed
- 1/4 tsp vanilla
Instructions
1. Preheat oven to 350°F (180°C). Coat the inside of a bundt pan with nonstick spray or butter making sure every nook and crevice is coated thoroughly. Set aside.
2. Make the Cake: In a medium bowl, whisk together the flour, cocoa powder, baking powder, baking soda, and salt. Set aside.
3. Cream the butter, sugar, and orange zest with your electric mixer for 2 to 3 minutes until completely blended together and it cleans the side of the bowl. Beat in the eggs, one at a time, followed by the oil and vanilla extract. Slowly mix in the buttermilk.
4. Add in the dry ingredients, half at a time, and slowly and carefully, with the mixer on low-speed, beat until fully blended and creamy. Scrape the bowl and beater thoroughly, being sure there are no unincorporated ingredients. Mix again to be sure everything is blended.
5. Bake the Cake: Pour the batter into your prepared bundt pan and bake until a toothpick comes out with a few moist crumbs, 45 to 60 minutes. Cake will pull away from the sides of the pan and should spring back when gently pressed on top.
6. Let the cake cool in the pan for about 15 to 20 minutes before carefully inverting it onto the cooling rack. Allow it to cool completely before transferring to a serving plate and glazing. Feel the inside of the hollow center to know when it is cooled enough.
7. Make the Orange Glaze: Add all the glaze ingredients to the bowl of a stand mixer or large bowl if using a hand mixer. Using the whisk attachment, mix until well combined, smooth, and creamy.
8. Drizzle the glaze over the top of the cake, letting it slowly pour down the outside of the cake to get the pretty drips, and go back to fill in any obvious gaps. Let the glaze set before slicing and serving.
Recipe found at www.theheritagecook.com
Notes
* You can adjust any recipe to gluten-free by using 120 grams per cup of my favorite gluten-free flour blend. If you are using another brand of gluten-free flour, whisk the mix, spoon it lightly into a measuring cup without a spout until mounded, level off the top with the back of a knife, and weigh the flour left in the cup. Use that weight as your standard per cup of that specific flour. Do this for each flour blend you use. Commercial blends such as Pamela's, Bob's Red Mill 1-to-1, or King Arthur Measure for Measure are all good gluten-free choices.
** My preferred brand of kosher salt is from Diamond Crystal. If you use Morton’s or another brand you will likely not need as much because they are saltier.
You will get the best and most consistent results by using a digital kitchen scale and weighing your ingredients, especially when you are baking. And use grams, they are much more accurate than pounds and ounces.
All recommended ingredients are gluten-free as of the writing of this article. Always check to be sure the products haven’t changed and are still safe to consume.
Nutrition Information:
Yield:
10Serving Size:
1Amount Per Serving: Calories: 528Total Fat: 27gSaturated Fat: 9gUnsaturated Fat: 18gCholesterol: 106mgSodium: 421mgCarbohydrates: 65gFiber: 3gSugar: 56gProtein: 6g
The nutritional information for recipes on this site is calculated by online tools and is merely an estimate. If you need nutritional calculations for medical reasons, please use a source that you trust.
If you enjoyed this recipe, be sure to follow me on social media so you never miss a post:
Create a New Tradition Today!
Welcome! The suggestions here are not intended as dietary advice or as a substitute for consulting a dietician, physician, or other medical professional. Please see the Disclaimers/Privacy Policy page for additional details. Unauthorized use, distribution, and/or duplication of proprietary material from The Heritage Cook without prior approval is prohibited. If you have any questions or would like permission, please contact me. We participate in the Amazon Services LLC Associates Program, an affiliate advertising program designed to provide a means for sites to earn advertising fees by advertising and linking to amazon.com. As an Amazon Associate, I earn a small amount from qualifying purchases without any additional cost to you. This page may contain affiliate links. The author makes no claims regarding the presence of food allergens and disclaims all liability in connection with the use of this site.


BBC
Made with King Arthur AP flour, bloomed the chocolate with a tad of espresso; added Greek yogurt and decreased the amt of buttermilk! This is the most heavenly cake!!!!
Jane Bonacci
So glad you enjoyed it – we did too! Love your creative changes, sounds wonderful!