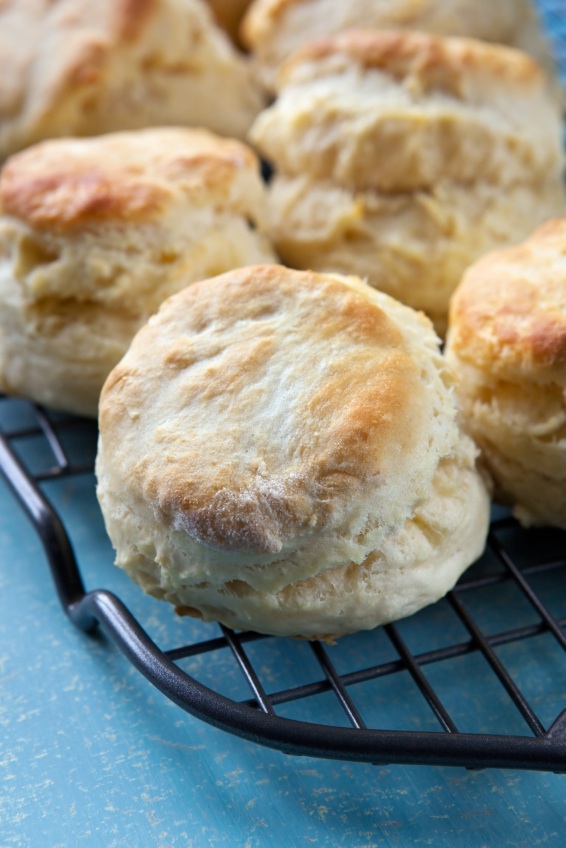
I have received multiple requests for a great biscuit recipe – one where you take a bite and everything else in the world melts away except for the immediacy of what you are eating. I don’t know about you, but I have struggled for years to make biscuits. Mine usually came out hard as hockey pucks, barely an inch thick, and crumbly. I am a good cook and baker, but no matter how hard I tried, I just couldn’t get my biscuits to come out right. Then I went to the IACP conference in Portland, Oregon, this spring and learned what I had been doing wrong all these years. I hadn’t been using the right recipe! I watched a demonstration and became a believer – I CAN make great biscuits!
The recipe that brings consistently perfect results is from Shirley Corriher. I’ve written before how much I adore Shirley – as does anyone who has ever met her. But it bears repeating … Shirley is a genius in the kitchen! She has a B.A. in biochemistry from Vanderbilt University where she was a research biochemist in the medicals school. She merged her love of science with her passion for food and now teaches us all why things happen, explains baking failures, and shows us how to guarantee consistently perfect results. If you have watched Alton Brown’s Good Eats program on the Food Network, you will probably recognize her as the “Mad Scientist”. If you’ve ever wondered why you need a specific ingredient in a recipe, Shirley is the one to ask!
If you love to bake, you need to have her book, “Bakewise: The Hows and Whys of Successful Baking” in your library. Full of recipes that are failsafe, it is the first place I go to find out why something went wrong or to discover how to change a recipe to get a specific desired result. For example, I can take a recipe for chewy cookies and thanks to Shirley’s guidance, alter it to create crispy cookies. That is miraculous!
In addition to Bakewise, Shirley also authored Cookwise, a bestseller and winner of a James Beard Award for excellence. (A Beard award is the equivalent of a Nobel prize or Academy award for the food industry.) It is a chef’s bible, containing the answers to all our kitchen questions. I advise everyone to keep it right next to the stove! She also has a DVD that is a great way to see her in action. She is absolutely delightful and you’ll fall in love with her too!
Biscuits are notoriously finicky, but if you understand a few things about the ingredients, you will have great success! The best flour for biscuits is bleached soft-winter wheat which has a lower percentage of gluten. While this style is prevalent in the American South, it can sometimes be challenging to find in the rest of the country and world. Southern bakers are very picky about their flours and tend to prefer self-rising. Self-rising flour, as the name implies, has baking powder and salt added for leavening. You can also make your own following the ratios given under “Jane’s Tips and Hints.”
Biscuits are traditionally made with lard or more recently, vegetable shortening. There is a good reason for this. They produce the lightest biscuits. Butter yields a heavier dough but has terrific flavor. Many bakers swear by a combination of the two, getting both flavor and lightness.
Baking biscuits in a round cake pan (with straight sides) with sides touching, gives the biscuits support so they can rise straight up instead of flattening out. And because they are touching and only the tops are exposed to the heat of the oven, they come out moister as well. A lot of recipes tell you to roll out the dough and cut the biscuits with a cutter or glass dipped in flour. If you have a heavier dough, this works, but with a tender dough, all that will happen is you wind up adding too much flour and weighting your biscuits down. Using Shirley’s “wet dough” method will give you the results you’re looking for.
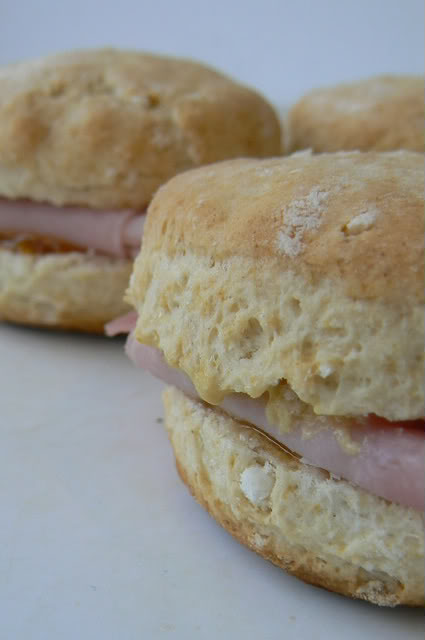
If you want to make a savory biscuit, you can use one of the variations listed below the recipe. You can serve these biscuits fresh from the oven with some jam or honey butter, or you can feature them on a buffet table stuffed with sliced ham. Either way I know they will become a family favorite and one of your most requested baked items!
Jane’s Tips and Hints:
If self-rising flour is not available, make your own by combining 1 cup All-Purpose flour, 1/4 tsp salt, and 1-1/2 tsp baking powder. Sift it at least 3 times to smoothly blend the ingredients and separate out any lumps in the flour.
Kitchen Skill: Using a Pastry Cutter
Why: To incorporate a solid fat (lard, shortening, or butter) into dry ingredients
How: Add half of the fat to your dry ingredients and using a rocking motion, “cut” the fat into the flour. By cutting the solid fat into small pieces, they can be coated with the dry ingredients, helping them stay separated and evenly distributed. Use a knife or your fingers to clean off the pastry cutter as needed. When the pieces are the size of small peas, add the remaining fat and cut that in to the size of large peas. This double method of cutting in the fat gives you the best distribution. Some of it gets cut minutely and the remaining stays large enough to create pockets when the fat melts, releasing steam, which helps raise the dough to create a light and flaky pastry.

- 1-1/2 cups + 1 cup self-rising flour (see Tips & Hints to make your own)
- 1/8 tsp baking soda
- 1/2 tsp salt
- 1 tbsp sugar
- 3 tbsp shortening
- 7/8 cup buttermilk (1 cup less 2 tbsp)
- 2 to 3 tbsp butter, melted
- Set rack in top third of oven and preheat to 450°F. Spray an 8-inch round cake pan with nonstick spray. Place 1 cup of the flour in a pie pan. Set aside.
- Combine remaining 1-1/2 cups flour, the soda, salt, and sugar. With your fingers or a pastry cutter, work the shortening into the flour mixture until there are no shortening lumps larger than a small pea.
- Stir in the buttermilk with a wooden spoon and let the dough stand 2 or 3 minutes. It will be very wet. This dough is so wet that you cannot shape it in the usual manner. A spring-loaded ice cream scoop dipped in flour is the easiest way to portion out the dough and transfer it to the plate of flour, but you can also use a spoon.
- Flour your hands well. Dip a spoon or ice cream scoop into flour and scoop a biscuit-sized lump of wet dough into the flour, then sprinkle some flour on top. With your hands, shape the biscuit into a soft round, very gently tossing it back and forth between your hands, shaking off any excess flour. The dough is so soft that it will not hold its shape. As you shape each biscuit, place it into prepared cake pan, pushing the biscuits tightly against each other so that they will rise up rather than spread out. Start at the outside edge of the pan and work your way into the center. Continue shaping the biscuits, using all the dough.
- Brush the biscuits with the melted butter and place in preheated oven. Increase the oven temperature to 475°F and bake 15 to 18 minutes, until lightly browned. Cool a minute or two in the pan before turning out to cool completely.
- Yield: 12 to 18 biscuits
- VARIATIONS
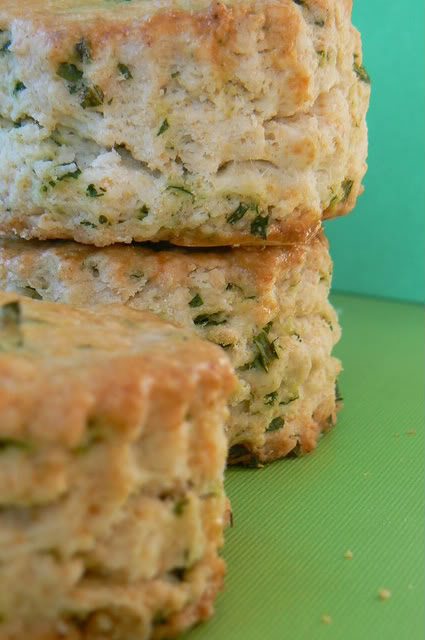
- Herbed Buttermilk Biscuits: Stir 2 to 4 tbsp minced fresh herbs such as dill, chives, or parsley into the dough just before adding the buttermilk. Shape and bake as directed above.
- Cheddar-Garlic Biscuits: Combine 1 cup finely grated and then minced Cheddar cheese with about 3 tbsp of flour, tossing to coat the cheese with the flour (this helps suspend the cheese in the batter). Prepare dough as directed above, stirring the cheese into the barely mixed dough and form the biscuits. If desired, brush the tops with melted butter and sprinkle with a little garlic salt. Bake as usual.
Thank You!


