Today I am going to share with you some of my most secret tips to producing a fabulous Thanksgiving meal. I have been cooking this holiday meal for many years and made just about every mistake in the book. Fortunately I have learned from them and these days it turns out just about right every time. I have learned to roll with the mistakes and laugh them off. It certainly takes a lot of pressure off when you expect things to not be perfect!
It doesn’t matter if I am having another couple over for dinner, throwing a summer barbecue, or hosting a major holiday dinner, I have a method that I use every time. I plan my menu, figure out what I will need to buy, go through the recipes, find out what can be done ahead and set my dinner table. It may seem to be overkill, but it works every time and I can relax and enjoy my guests when they arrive. After many years of making Thanksgiving dinners, I’ve learned some very valuable lessons and am happy to share them with you:
Thanksgiving Hints
Dry brine your turkey with a seasoned salt for 2 to 3 days before roasting.
Go through each recipe and figure out what equipment you need to complete each. Are your knives sharp? Are all your appliances in working order? Does anything need to be replaced or repaired? Make notes on the recipes – what you need for each, which ingredients will be added at the same time (so you can put them all in the same bowl when prepping), what can be prepped ahead, and what will need to be done at the last minute.
Write out a cooking schedule and timetable. Make sure you have time and oven-space to make everything you want to. Note which recipes share the same ingredients and prep enough for all the recipes at the same time. You will save yourself a lot of work and clean up. Store each ingredient (carrots, celery, onions, etc.) in separate covered containers in the refrigerator.
Print out copies of all your recipes. Many people put them in a binder to keep them organized, but I like to tape them up on my kitchen cupboards. They are out of the way, at eye level, and I don’t lose the recipes. Start gathering your ingredients and stage them in groupings as they will be used. I also put up a copy of my to-do list and check things off as they are finished.
Contrary to popular opinion, I do not make all the food on Thanksgiving myself. When you are planning what to make, don’t overwhelm yourself. If you live near a great gourmet grocery store that sells prepared foods (like Whole Foods) take advantage of the things they make really well. Limit the number of dishes so that you can relax and enjoy your party!
Wash all your vegetables and fresh herbs when you bring them home, then they are ready whenever you need them! Wrap in paper towels and then in plastic bags in the refrigerator. Herbs can be placed into a jar with a little water in it and covered loosely with a plastic bag. Set it in the refrigerator or keep it on the counter.
If you like cornbread in your stuffing or dressing (stuffing goes inside the turkey, dressing is cooked alongside), bake it a day or two ahead. Cut it into small cubes along with regular bread if you are using it (I like a combination of the two). The bread for stuffing is better if it is dried out! Store them in paper bags at room temperature the night before. If you are making your stuffing from scratch, cut up and toast the bread cubes a day ahead. Cool and store, tightly covered, at room temperature.
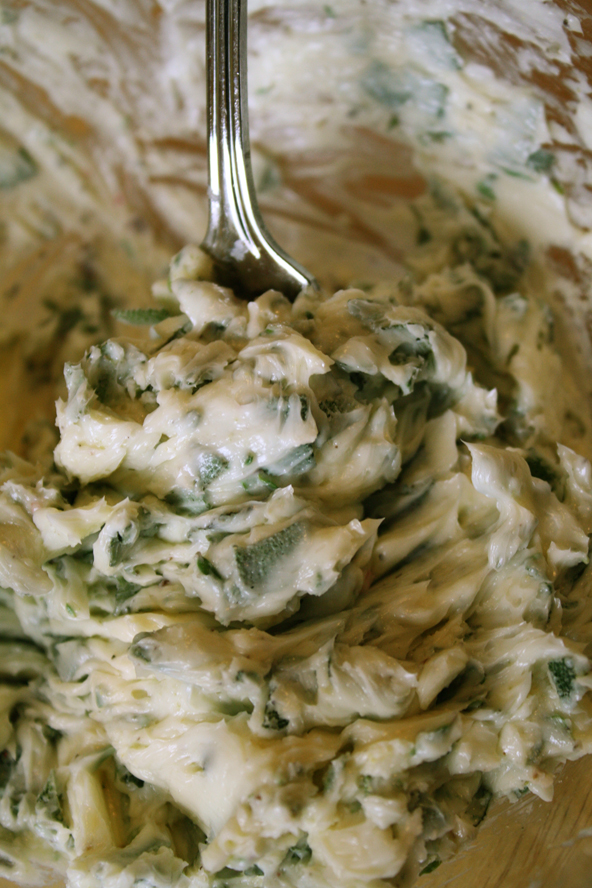
Fresh Sage Compound Butter
Make a seasoned, compound butter to insert between the skin and breast meat of the turkey. This seasons, flavors and helps keep breast meat moist.
If you don’t have a large roasting pan and are planning on using one made of disposable foil, buy 2 or 3 and double or triple layer them. You will need the strength to support a large turkey. It is better to be safe than sorry.
I know you’ve heard it before, but it bears repeating … Bacteria grows at room temperature and no amount of cooking can guarantee you will kill it all. The last thing you want is anyone to get sick at your dinner. If you are running short of time, you can thaw it in a bath of COLD water, in its original packaging. Change the water every 30 minutes to make sure it stays cold and clean. Allow about 30 minutes per pound.
If you don’t already have one, buy a digital instant thermometer. It will tell you exactly when the turkey is ready so there is no guesswork! And make sure you have a roasting pan that is big enough to roast the turkey in but not so big that it won’t fit in your oven!
Roast the cut up turkey or chicken parts to make the base for your stock, use the drippings for your gravy roux and flavoring for the stuffing. If you make your stock and gravy base ahead of time the way I do, the hardest part of your gravy is already done and you have the most amazingly flavorful liquid to make your dressing with. Then, if you have any leftover, you have the base for your turkey soup already made.
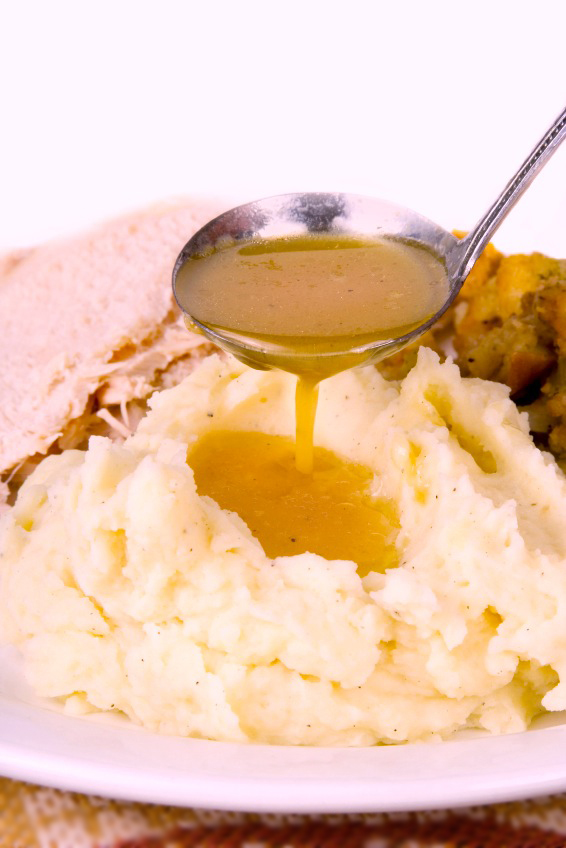
Never worry about lumpy gravy, because there is a way to fix it. Yes, you can have perfectly smooth gravy. The trick is to strain the gravy through a medium-weave sieve, stirring it until the liquid has gone through and the lumps remain behind. Voila! Perfect gravy! And there is another trick that I keep up my sleeve – just in case something goes wrong – it is called Savory Choice Liquid Broth Concentrate. It comes in a variety of flavors including Turkey. Add this to your gravy if you want more turkey flavor.
Bake the sweet potatoes a day ahead, whip and place them in a casserole dish. Cover and refrigerate until ready to reheat. If some of your family or guests insist on having a marshmallow topping, you can cover half the casserole with them and the other half with the streusel.
Because the cranberry sauce is such a stunning presentation on the table, consider using glass or crystal bowls. I usually split it into two bowls, one for each end of the table. Make the cranberry sauce, place in its serving bowl, cover tightly with plastic touching the surface and store in the refrigerator until a few hours ahead of dinner.
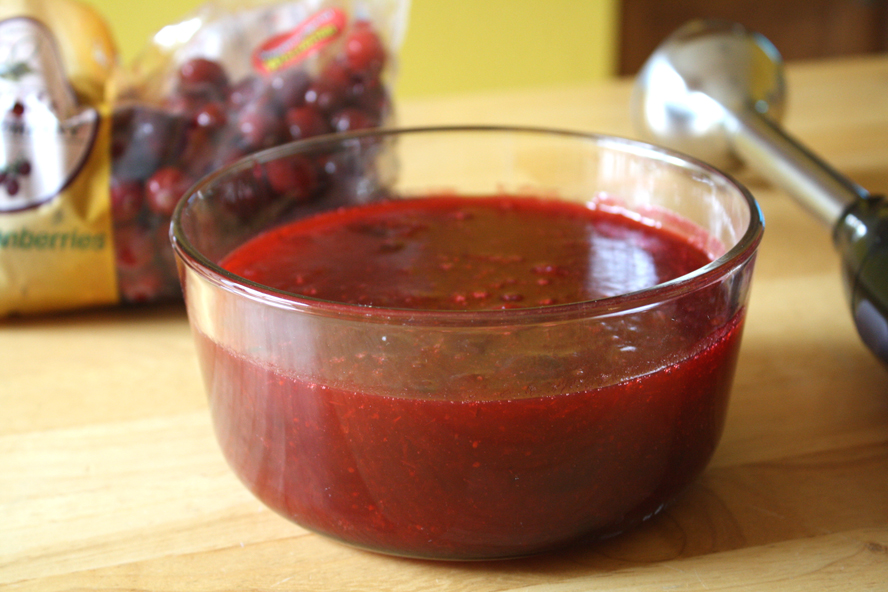
Cranberry Sauce and Immersion Blender
Make your pies and desserts the day before. Make sure you cook the pies all the way through because they will be sitting for a day before serving. I always bake my pies on the second to lowest level in the oven to help the crust.
Make the dough for your rolls the day before, do the first rise, form the rolls in their baking pan and set it, covered, in the refrigerator for a slow overnight rise. Bring them out of the refrigerator about 45 minutes before baking. Bake them in the morning and reheat just before serving.
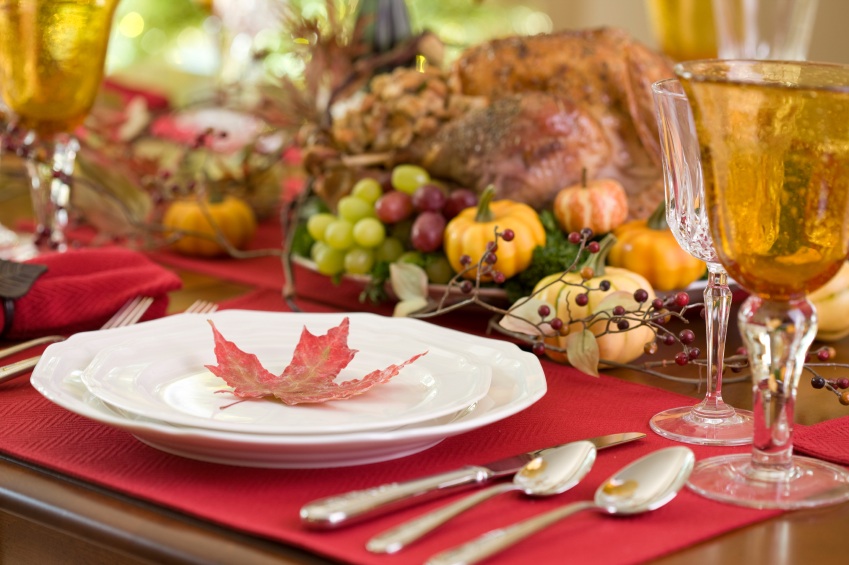
Set out all of your serving dishes, plates, glasses and silverware. Iron your linens and make your centerpiece. Label each of your serving dishes with what will go in them and place the serving utensil in the container so you know you have what you need to serve everything.
You are going to be spending a great deal of time, money and effort on the main meal, that you don’t want people filling up on appetizers. Plan on simple items that can be served at room temperature. Your oven will be in full swing during the party! A simple platter of fresh vegetables with dips, and some cured Italian meats and cheeses with crackers is perfect.
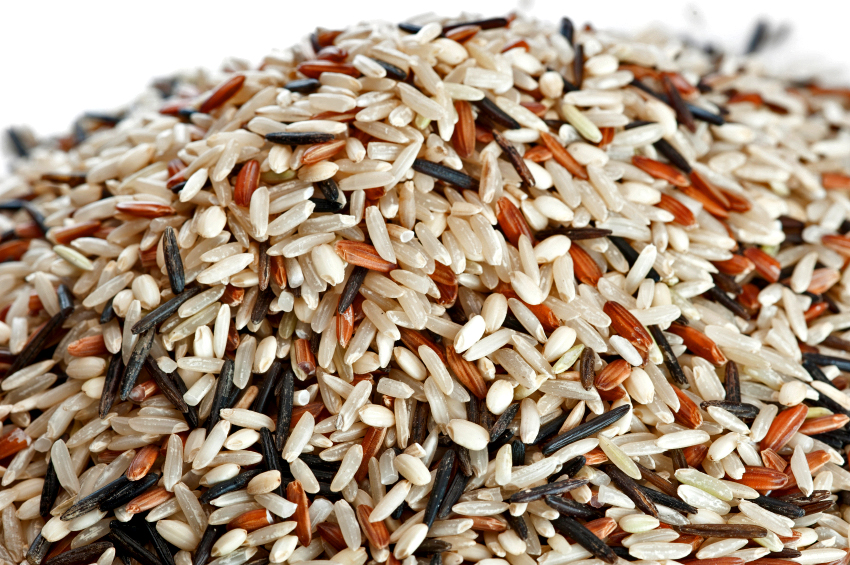
White, Brown and Wild Rice Mix
Set up your bar area (even if you aren’t serving liquor) somewhere separate from the kitchen. Have a cooler full of ice for drinks (leave it in the bags) and for cooling sodas, waters, etc. Assign one of your guests the job of making sure everyone has something to drink – it’s one less thing you have to worry about!
You can make and whip your mashed potatoes an hour or two ahead. Leave them in the mixer bowl, set a dinner plate on the top to capture the heat. You can reheat them as needed. If they stiffen up, add a little more warm milk and rewhip with the mixer.
While you have the mixer out, whip the cream for your desserts. It is SO much better for you and better tasting than anything you buy premade. Add a splash of vanilla and a little powdered sugar (to taste) about halfway through the whipping. Cover and place it in the refrigerator. Lightly rewhip just before serving.
Turkey Tips
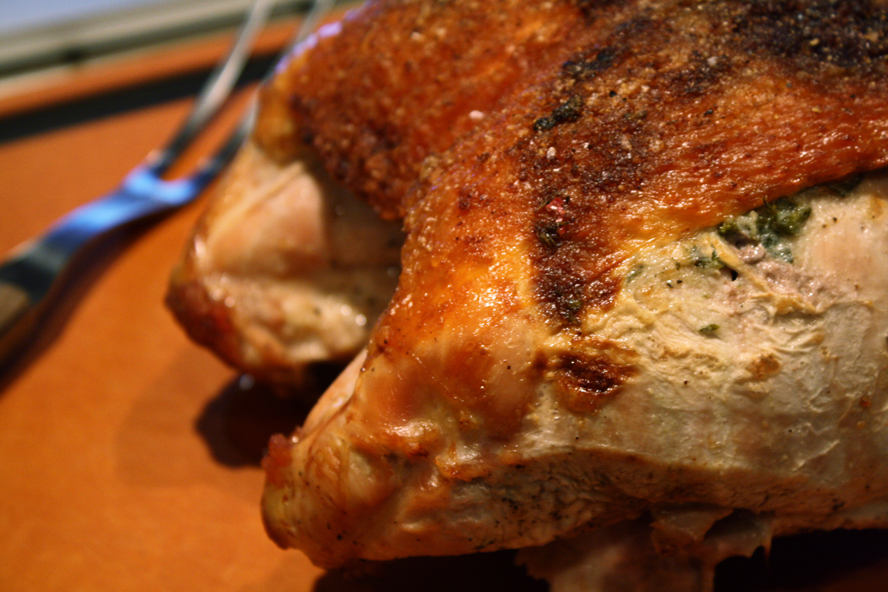
Let the turkey stand at room temperature for 2 to 3 hours before roasting to warm up slightly. It will cook more evenly and this helps dry it out for crispier skin.
Roast in a shallow pan so the heat can easily reach as much of the turkey as possible. If you are using a deeper pan, use a V-rack to elevate the bird. Make sure the oven racks are set low enough to allow clearance. Add some stock to the pan, which will help create more drippings for the gravy.
If your oven has a convection setting, do not use it with a wet-brined turkey – use the traditional roasting setting.
Use an instant-read thermometer to be sure the turkey is done correctly. Pull it out of the oven when the thigh reaches 160°F. Transfer it to a cutting board and tent it with foil. Let it rest for 15 to 25 minutes before carving. This resting period allows the juices to be reabsorbed by the meat and the bird to finish cooking all the way to the bone. The temperature will continue to rise about another 10 degrees.
To carve, start by removing the wings and set aside. Then pull back on the leg and thigh until the joint is revealed and cut through it. Once both legs and thighs have been removed, make one long cut down either side of the center breastbone. Carefully pull back one side of the breast and using your knife, separate it from the breastbone and ribs. Repeat on the other side. The boneless breast pieces are now simple to slice perfectly and the carcass is ready to make soup with!
How to Set the Perfect Holiday Table
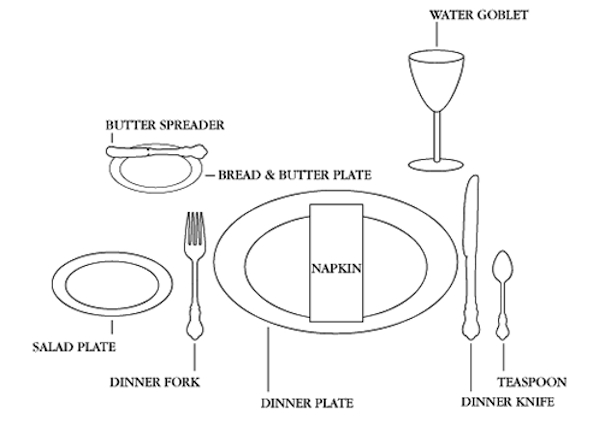
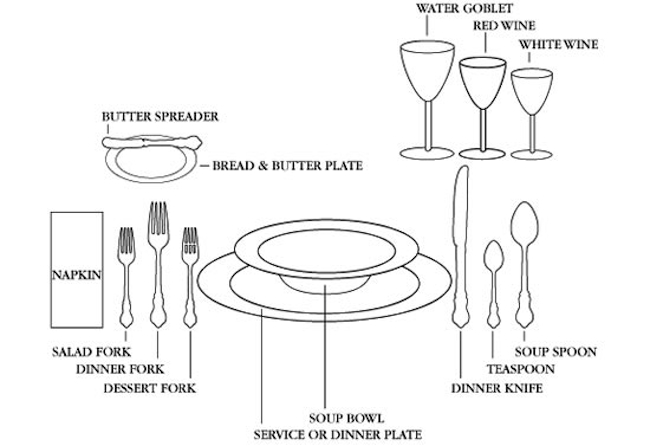
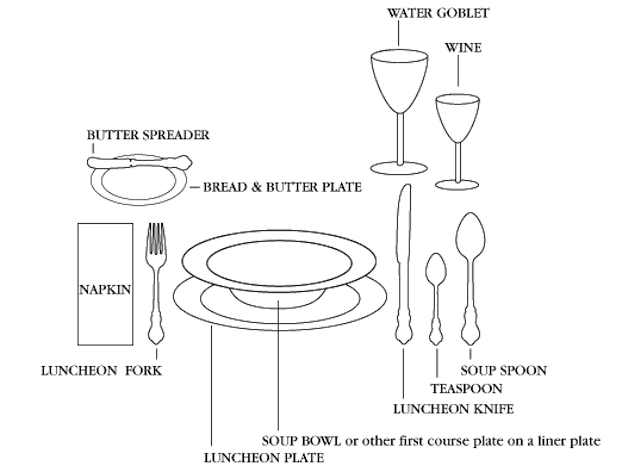
I was very fortunate my parents made sure that along with good table manners, they taught me how to set a proper table. I am always amazed at how few people know how to do it correctly. With the holidays coming up when family dinners and dinner parties abound, I thought I would share these diagrams with you. Now, no matter what the occasion, you will have a perfectly set table!
The basic concept is really simple; you work from the outside toward the plate. So, if you are serving a salad and then a main course, you would place the salad fork outside of the dinner fork on the left side of the plate. The forks are never placed on top of the napkin, to make it easier for your guests to access their napkin. And on the right side of the plate you place the knives and spoons with the knife always closest to the plate, blade facing the plate.
Glassware follows the same principle. It is considered that people will reach for their wine glass more often than their water therefore the wine glass is placed to the right of the water goblet. If you have ever seen silverware set above the plates, it is there for after dinner items. Sometimes I like the look and will place a fork and spoon there for dessert and coffee. Once you understand the basic concept that you use your utensils from the outside in, setting the table becomes easy and just takes a little practice to get comfortable with.
Family Dinner Table Setting
Formal Dinner Table Setting
Luncheon Table Setting
Diagrams available at: http://www.replacements.com/piecetype/formal.htm
Enjoy the lead-in to your holiday. If there is anything I can help with, just let me know. Do the best you can, relax and enjoy your company and everyone will have a wonderful time!
Happy Thanksgiving!
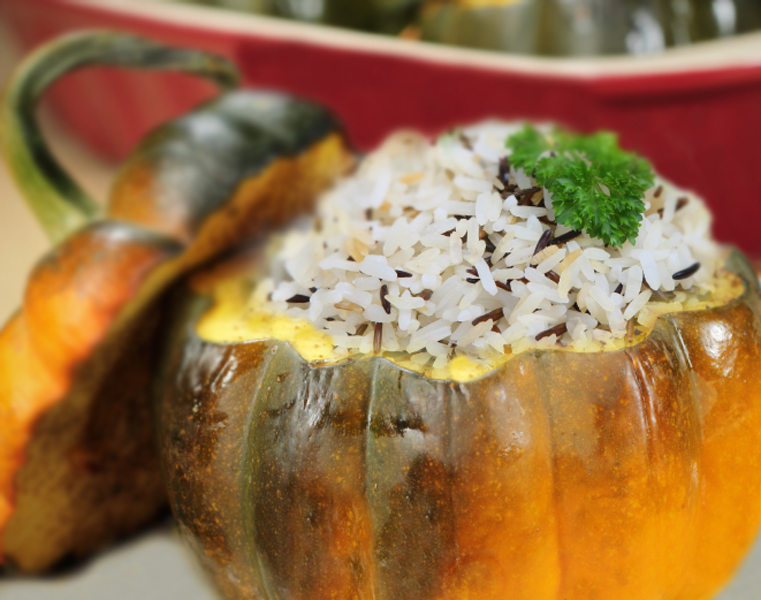

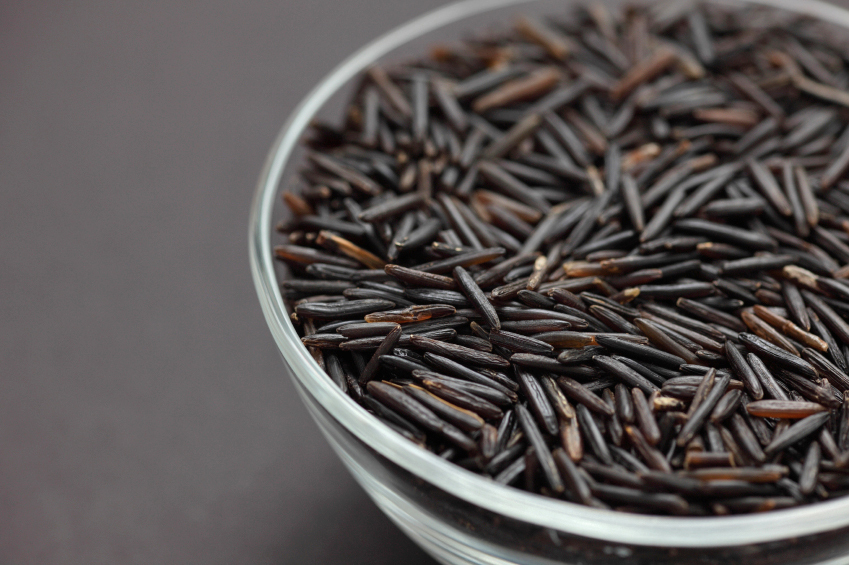
- 1/2 cup wild rice, rinsed well (or use a wild rice mix and cook according to package directions)
- 3 to 4 cups water
- 4 mini pumpkins
- 1 tsp freshly grated orange zest
- Juice of one orange
- 2 tsp honey
- Salt to taste
- Pepper to taste
- 1/4 cup dried cranberries
- 2 tbsp chopped pecans
- 1 tsp fresh mint, chopped
- Preheat oven to 375°F.
- In a small saucepan, add the wild rice and fill with enough water to cover and allow room to boil like cooking pasta. Bring to a boil and then simmer for approximately 30 to 40 minutes. The rice is done when it starts to "pop" the grain. Don’t over cook.
- While rice cooks, cut the top off the pumpkins. Using a large spoon, scoop out the seeds and strings. Place the pumpkins upside down in a pan with 1/3 inch of water. Bake for 15 minutes. Carefully turn the pumpkins upright and return to oven until flesh is tender when pierced with a fork, about 5 to 10 more minutes.
- When rice is cooked, pour into a colander and rinse with cold water. Place the rice in a medium size bowl.
- Zest and then juice the orange and add the honey to the juice, mixing together. Pour over the rice. Add salt and pepper, and stir well. Stir in the cranberries, pecans, orange zest and mint. Adjust seasonings if needed. Stuff the rice into each of the pumpkins and serve.
Thank You!



LolaLily
Your blog is lovely and well illustrated. Having the right dinnerware and tableware is so important for all big celebrations, whatever the time of year – I agree with your sentiments on that, tanks for sharing.
Jane Bonacci, The Heritage Cook
Thank you Lola! Welcome to The Heritage Cook Family!