Every time I step into the kitchen to bake, I thank my grandmother for teaching me when I was a little girl not to be afraid of baking. I remember Mimi holding my tiny hand in her large, rough one, showing me how to measure ingredients correctly. Because of her tutelage I grew up fearless in the kitchen. There is nothing I won’t try. I may fail miserably and have to make challenging recipes again and again before getting them right, but I always know that I have the skills to be successful. And the beautiful thing is that everyone, even you can be just as fearless and successful. All it takes is a little discipline and focus.
When someone tells me that they cannot bake or refuse to measure ingredients, I get frustrated. It is such a simple thing and when you can turn out beautiful pies, cakes, cookies, and other decadent desserts time after time, winning rave reviews, I don’t understand some people’s reluctance to slow down just a bit to measure accurately. It certainly isn’t rocket science!
It is no secret there are tricks to successful baking. But they aren’t complicated or difficult. The first is to have the proper equipment. When you have the correct measuring spoons and cups, being accurate is easy. There are lots of different styles of measuring spoons, but the ones that are fairly deep and round are the easiest to work with. Dry measuring cups have straight sides and flat tops which make is a cinch to get a consistent measure. The handle of my silicone spatula provides the perfect flat surface to scrape off the excess flour or sugar. The new angled liquid measuring cups make it nearly impossible to flub a liquid measure. And the best part is they aren’t expensive to buy!
I bought two very large clear glass containers, big enough to hold the 5-pound bags of flour and sugar regularly sold in stores. By having them easily accessible, it saves me time when I am ready to bake. When I buy flour, I immediately put it in the freezer and leave it overnight or up to a couple of days. This guarantees that any little critters that may have sneaked into the flour are killed. I haven’t seen a bug since I started doing this. After the flour has been in the freezer it is safe to store in the cupboard for an extended amount of time. Transferring the flour to a large container aerates it and makes it easy to do the scoop and sweep method many books call for. All this means is that you stir the flour a bit to lighten it, scoop a heaping cup of flour, and using a straight edge sweep off the excess.
When you are looking for baking pans, you want heavy-duty construction that won’t buckle in the heat. Cheap, thin pans absorb heat unevenly and result in inconsistent baking. Spending a few extra dollars will reward you with many, many years of great desserts! And don’t buy dark surfaced ones – they absorb too much heat, causing your cakes and other baked goods to brown too quickly. You want a light finish and I personally prefer a nonstick surface. It just makes it so much easier to get everything to come out cleanly, without any hassle or breakage. Just make sure that you never use any metal utensils with any of your nonstick equipment – no matter what the paperwork says! Get a variety of plastic, silicone, and wooden utensils that work on any surface. That way you’ll never reach for the wrong one! I have a large container filled with all kinds of tools and 95% of them are safe for nonstick surfaces.
When a recipe calls for a pan to be greased and floured, you spread butter with either a folded paper towel or pastry brush, making sure to get in all the crevices and corners. Then sprinkle the pan with a couple of teaspoons of all-purpose flour and shake it around until the entire surface is evenly coated. Tap out the excess flour. And for professional-looking cakes, I always line the bottom of the pan with parchment paper. This helps the cakes release easily and gives you an incredibly smooth bottom. Just don’t forget to remove the parchment before frosting!
Before preheating the oven, make sure the racks are in the position you want them. Usually that is in the center of the oven. But if your recipe tells you to place them specifically, follow those directions. There is a darn good reason they took the time to write that down! Fully preheating the oven also gives you the best results. The presence of liquid and the heat of the oven activate double-acting baking powder. If the oven isn’t hot enough, the structure won’t be strong enough to support the weight of the batter and you will have heavy cakes. Giving the oven an extra 15 minutes to fully warm up will make a huge difference. Don’t forget that the recipes were written very carefully and if you don’t follow the directions, you are altering the science of baking. And while we’re talking about temperatures, you should have an oven thermometer available and occasionally check the accuracy of your oven. My oven tends to run cool and I know that I have to add about 2 to 5 minutes to the baking time to compensate for it.
For a majority of recipes, you are told to cream the butter and sugar together. Make sure you beat this fully. With today’s heavy-duty stand mixers, this is easy because you can turn it on and walk away. While the mixer is running I measure and sift my dry ingredients together into a large bowl. Instead of the old-fashioned sifters with the crank handles that I grew up using, today I use a strainer or sieve. I have a set of wire mesh baskets that are perfect for this. Place it in the large bowl, measure in the flour and other dry ingredients, then tap the basket with your hand to sift the ingredients into the bowl. Flours today have anti-caking agents added so they aren’t nearly as lumpy as they used to be, but sifting is still a good idea because it helps evenly distribute the baking soda and powder throughout the flour. By the way, even though you would think that sugar is a dry ingredient, because it melts, it is considered part of the wet ingredients.
When you add the dry ingredients to the creamed butter and sugar, recipes often call for alternating it with wet ingredients, usually beginning and ending with dry. The reason for this is to allow the batter to be evenly blended and the final addition of dry ingredients helps absorb any excess moisture in the bowl. Always use a rubber spatula to scrape the sides and bottom of the bowl. If you are using a stand mixer, stop the motor, release the beater blade, take the bowl off the stand, and fully scrape the blade and the bowl. Pay extra attention to the bottom of the bowl where errant dry ingredients like to hide!
And here is a good one if you’ve always wondered how professional bakeries get those absolutely perfectly frosted cakes. The trick is called a crumb coat. Quite simply, this is a thin layer of frosting used to “capture” any stray crumbs on the cake. You fill the cake as usual, thickly adding the filling between layers and assemble the cake. Very lightly coat the entire cake with just a little of the icing. Set the cake in the refrigerator for about 30 minutes for this to firm up. Then bring it out and finish frosting it. You won’t have any crumbs making it lumpy or showing through! A revolving cake decorating stand makes evenly frosting cakes a snap.
One last tip before we get to baking today’s amazing cake. Always read the recipe through completely before starting. My mom told me to read it through twice, and if you are new to baking, this is good advice. Collect all your ingredients (mise en place) and equipment. Preheat your oven and butter your pans if needed. Look for ingredients that are going to be added at the same time. You can put these all into the same measuring cup to make it easier. One recipe I make calls for adding oil, vanilla, and eggs at the same time. I measure out the oil (in a wet measuring cup), add the vanilla and break the eggs into the same cup. I only have one thing to wash – or rather my husband does. There is a rule in my house … whoever cooks, the other one cleans. We share the work and everyone wins! But if I can make it a little easier on him, I will. And clean up as you go along. If you have a few minutes between steps, wash dishes, wipe down the counters, and put away ingredients. It makes the final clean up so much easier.
So, do you feel more confident about baking now? Are you nearing fearless status? The more you do it, the more comfortable you will be. And when everyone is ooh’ing and ahh’ing at your dessert prowess, you’ll be happy you learned how to bake!!
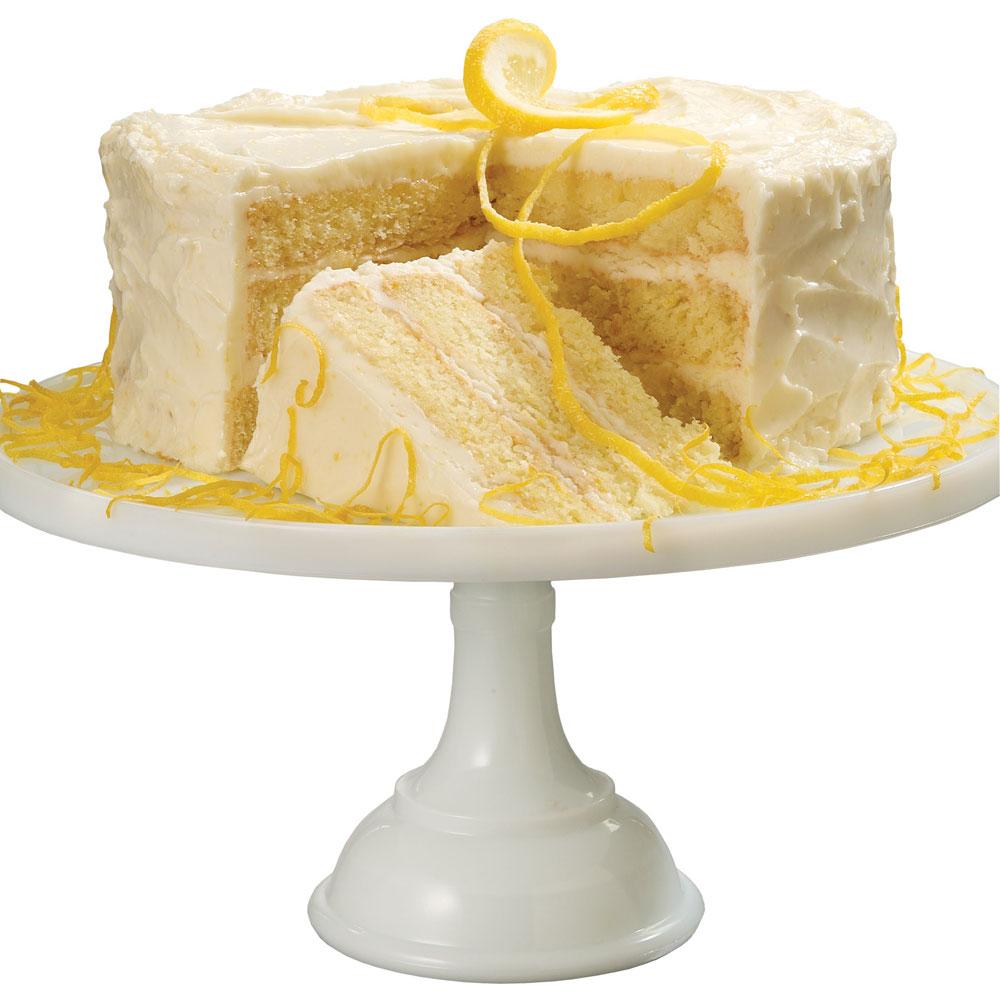
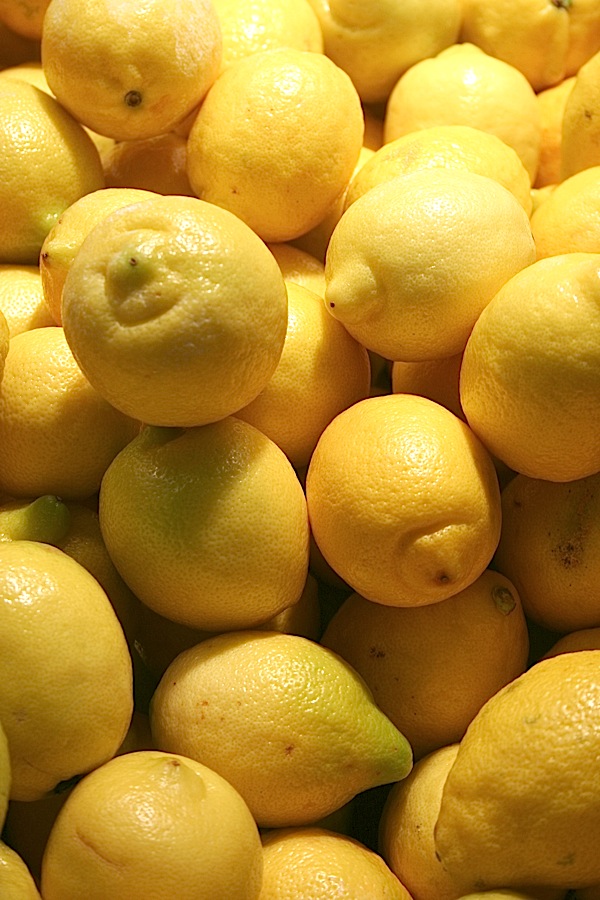
Here is a recipe to use all those glorious lemons that are on the trees and in the stores right now! From the famous neighborhood Magnolia Bakery in New York City, said to have started the current cupcake craze, this towering lemony cake will be the dessert your friends beg you to make for them. Featured in Sex and the City, The Devil Wears Prada, and Spin City, Magnolia is known for its hand crafted classic American desserts. Baked goods that are nearly impossible to find these days – the kinds of things our grandmothers used to bake for us, and which bring back memories of kitchens filled with the aromas of scratch baking.
Jane’s Tips and Hints:
Having the butter and eggs at room temperature make it much easier to make batters smooth and creamy. The eggs will beat up higher and fuller. Remove both the butter and eggs at least an hour before starting to bake, leaving them on the kitchen counter to warm up.


- Lemon Curd Filling
- 12 egg yolks, at room temperature
- 3 tbsp grated lemon zest
- 1 cup freshly squeezed lemon juice
- 1/2 tsp lemon extract (not oil)
- 1-1/2 cups granulated sugar
- 1 cup (2 sticks) unsalted butter, cut into small pieces
- Cake
- 1 cup (2 sticks) unsalted butter, softened
- 2 cups granulated sugar
- 4 large eggs, at room temperature
- 1-1/2 cups self-rising flour
- 1-1/4 cups unbleached all-purpose flour
- 3/4 cup whole milk
- 1/4 cup freshly squeezed lemon juice
- 2 tsp grated lemon zest
- Lemon Buttercream Icing
- 1 cup (2 sticks) unsalted butter, very soft
- 8 cups confectioner’s sugar
- 1/2 cup freshly squeezed lemon juice
- 1 tsp grated lemon zest
- To Make the Lemon Curd: In a medium saucepan, whisk together the egg yolks, zest, lemon juice, extract, and sugar, until thoroughly combined. Using a wooden spoon, stir constantly over medium heat. Cook about 20 minutes until thick and bubbly.
- Remove from the heat and add the butter, one piece at a time, stirring to incorporate. Place in the refrigerator overnight until firm.
- To Make the Cake: Preheat oven to 350°F. Grease and lightly flour 3 (9x2-inch) round cake pans, then line the bottoms with waxed paper or parchment circles.
- In a large bowl, combine the flours; set aside. In a large measuring cup, combine the milk, lemon juice and zest, whisking until smooth. Set aside.
- In a large bowl, on medium speed, beat the butter until smooth. Add the sugar gradually and beat until fluffy, about 3 minutes. Add the eggs, one at a time, waiting until each one is completely incorporated before adding the next one. Add the flour blend in 4 parts, alternating with the milk mixture, beating well after each addition before adding the next. Scrape the bowl and beaters, making sure there are no unincorporated ingredients in the bottom of the bowl.
- Divide the batter equally between the prepared cake pans, smoothing the tops. Bake for 20 to 25 minutes, spinning and reversing pans halfway through, or until a cake tester inserted into the center of cake comes out clean. Let cakes cool in pans for 10 minutes. Remove from pans and cool completely on a wire rack.
- When the cake has thoroughly cooled, spread the icing or curd evenly between layers and over top of cake using an off-set spatula.
- To Make the Lemon Buttercream Frosting: Place the butter in a large mixing bowl. Add 4 cups of the sugar, the juice, and the zest. Beat until smooth and creamy. Gradually add the remaining sugar, 1 cup at a time, until icing is thick enough to be of good spreading consistency. If desired, add a few drops of yellow food coloring and mix thoroughly.
- Use and store at room temperature.
- Yield: 1 three-layer 9-inch cake; 3-1/2 cups curd; enough icing for a 2 or 3-layer cake.
Thank You!


Harriet
Hi Jane,
I am wondering if you can help me… I am new to baking so this may seem a silly question. I am going to attempt this lemon cake tomorrow. Many of your ingredient measurements are in cups. How many grams is this or do you know how I can find out?
Thank you.
Jane Bonacci, The Heritage Cook
Hi Harriet! There are no silly questions and yours is quite interesting. Liquid measure is simple – 1 cup = 8 oz.
Each dry ingredient weighs differently so it is a bit complicated. For the flour conversions use this link: http://www.traditionaloven.com/conversions_of_measures/flour_volume_weight.html
For the other ingredients you can use the conversion calculator on this site: http://www.dianasdesserts.com/index.cfm/fuseaction/tools.measures/Measures.cfm
If you have other questions, please make sure to let me know! My email is heritagecook (at) comcast (dot) net.
Joann J.
Hi Jane. I have a question. I have the Magnolia cookbook and have made this lemon cake several times. The first couple times it came out great, but since then I’m having a hard time with the layers rising well. I just bought th self-rising flour so it’s fresh. I followed the tips in the front of the book about making cakes. I just baked one for a wedding reception in 2 days and it didn’t rise very high at all …only about 3/4″ high. Please help. I’m not a novice baker, but am very confused. What can I do?? I have a small baking business from my home but need to know that recipes will work consistently for me. I would love any input you could give. At this point I’m wondering if I should make the recipe again and just add a fourth layer to the cake I baked just so it looks higher.
Jane Bonacci, The Heritage Cook
Hi Joann,
I am sending you an email. There are so many variables that it may be complicated to figure out what is going on, but let’s give it a shot!
Megan
I’ve never made or eaten lemon curd (to my knowledge). It tasted good, but I was frustrated with it when putting it in the cake because of the loose consistency of it. The layers were slip-sliding all over the place. Also, FYI, the amount of batter makes thin layers. It’s a good thing, but when you’re spooning batter into three pans, it doesn’t look like enough. Also, my cake seemed dense and a bit dry. I might use a different cake recipe next time, but the curd and frosting tasted good! Oh, also, cut the curd recipe in half! Trust me! I have a ton of extra lemon curd that I don’t know what to do with! It all tasted good in the end though! Thanks!
Jane Bonacci, The Heritage Cook
This is great feedback Megan. Thanks. I know you are a great baker, but here are a few questions for you … Did you thoroughly chill the curd overnight to firm up before using? Did you use self-rising flour in the cake? Were the cake layers fully cooled before you started to assemble the cake?
One thing that I love to use the extra lemon curd for is a lemon tart. Use a pate sucre recipe, prebake the crust and fill with the curd. It is also traditionally used as a spread with scones for British tea. I hope this helps!
Megan
Yes, the curd chilled 24 hours. Yes, I had and used self-rising flour. Yes, the layers were fully cooled after I got back from yoga 🙂
Good ideas for the extra curd. I’ll have to try that this weekend. Again, thanks for the great recipe, I enjoyed trying it. I’ve never made a 3-layer cake, let alone a cake with so much lemon! It got rave reviews at my book club, which is where I shared it for the birthday girl.
Megan
This recipe looks amazing! I found this site/recipe while looking for a lemon cake recipe that uses a buttercream frosting for a friend’s birthday this week. She wanted lemon and I enjoy decorating, so I’m excited to try this. I love your baking tips throughout. I also love that this recipe is for 9in pans and not 8in (it seems a lot of recipes are for 8in and I only have 9in!). I’ve never made a curd before; is it runny? should I make a buttercream dam around the edge of the layers before adding the curd so it doesn’t ooze out? Also, is the lemon buttercream a similar consistency to a regular buttercream? Thanks for your recipe!
Jane Bonacci, The Heritage Cook
Hi Megan – Welcome to The Heritage Cook! I am so happy that you will make this cake. It is sure to make your friend very happy – it is full of lemon flavor. The thickness of the curd is determined by how long it cooks and how cool it is when you are working with it. From a decorating perspective, the buttercream “dam” is a very good idea. It will make the final presentation much prettier. Make sure you use fresh lemons and not the bottled juice!! Come back and let us know how it turns out!
Charlotte
Hi, this looks like a great recipe – I’d like to make it for my Grandmother’s 95th birthday but I’ve only ever made cakes the day before they’re eaten and I can’t this time. Can anyone advise me how long this will keep or what stages I could make it in? Her party is on the Sunday and my last day off is the previous Wednesday. I work from 11-9pm on the other days. Thank you!
Jane Bonacci, The Heritage Cook
Hi Charlotte – how wonderful that you have such a wonderful celebration to look forward to. Give your grandmother our congratulations!
You can bake the layers on Wed and once completely cool, lay them on a baking sheet and freeze until solid (laying them on the baking sheet makes sure they stay flat while freezing – but don’t stack until frozen!) Wrap tightly in several layers of plastic wrap and keep in the freezer.
On Sunday whip up the frosting, and frost the cake. You can frost the layers while still frozen if you want – the cake will thaw during the day.
I hope this helps Charlotte. Enjoy your party!
Charlotte
Thank you! Can all cakes be made in advance and frozen or just certain types?
Jane Bonacci, The Heritage Cook
Pretty much any cake can be made ahead, but some store or freeze better than others. Let me know if you are looking for something in particular and I’ll be happy to help!
Lana @ Never Enough Thyme
Great baking tips! Baking can be intimidating for new cooks so your tips would be especially helpful for giving them confidence. They’re a good review for us “veterans” as well. And the cake – fabulous!!
Jane Bonacci, The Heritage Cook
I hope new baker’s will feel confident enough to get in the kitchen. That’s how we all learned and one thing for sure with baking, practice makes perfect, or near perfect, LOL! What tips would you share Lana?
Shelby
This is an amazing cake! I love seeing the lemon recipes come out. It means we are getting closer to spring!
Jane Bonacci, The Heritage Cook
Hi Shelby!
Lemon and asparagus are my signs that spring is about to arrive and I love both of them. I’m glad you enjoyed today’s post. If you make this beautiful cake, you’ll have to let us know how it turns out!!
Lawyer Loves Lunch
I’m convinced I’d eat this delicious lemon curd right away and would never get to the cake making part. I should test this theory of mine! 🙂
Jane Bonacci, The Heritage Cook
I’m totally with you on that – hand me a spoon, LOL! That’s why I put the note in that you can use the buttercream icing for the filling too. I have a great biscuit recipe that would be fantastic with the curd. I usually serve it as part of strawberry shortcake, but the curd would be amazing too! https://theheritagecook.com/?p=323.
France
What an incredibly helpful article. I have only just started baking in the last few years even though I had a grandmother like yours that took me by the hand. Now I try to follow the directions to a T but I never understood why. Now it all makes sense. Great recipe too!
Jane Bonacci, The Heritage Cook
You are the kind of person I hoped would discover my blog. I love to share my experiences, and help beginners gain confidence in the kitchen. Thank you so much for commenting – you just made my day!! Let me know if I can help you with any other questions you may have.
The Food Hound
You are my HERO! I love anything lemon, and this has LEMON CURD to boot!! This is a must-make! Maybe for my birthday?? I’ve heard good things about this Magnolia Bakery!
Jane Bonacci, The Heritage Cook
I love anything made with lemon too and I dream of piles lemon cakes with lemon curd, LOL! Your birthday would definitely be a happy one if you have this beautiful cake to help you celebrate. I wish Magnolia Bakery would open a West Coast shop, I would be in there every day!