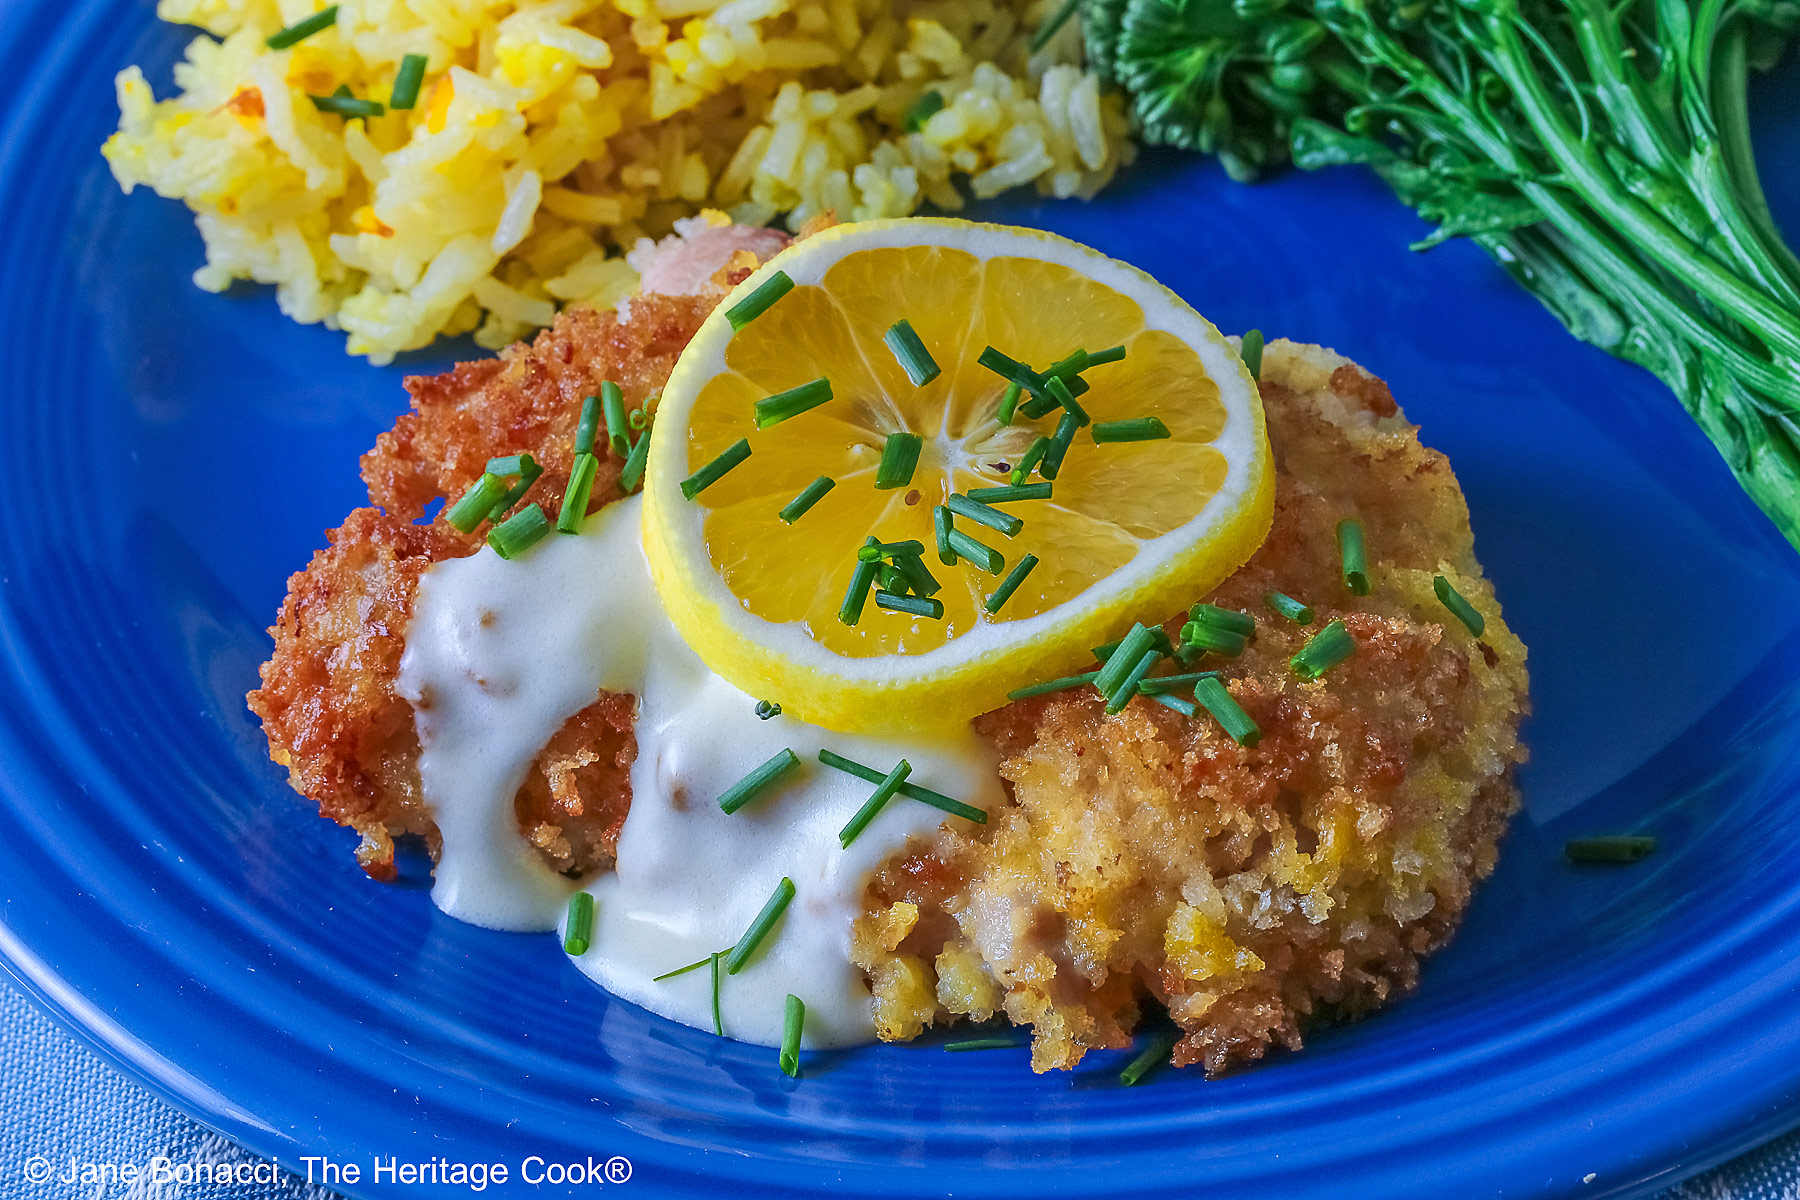
 Who wants a new, delicious, and fast chicken recipe? Today’s Lemon Pecorino Chicken is breaded in seasoned panko breadcrumbs and ready in about 30 minutes! It has a lovely garlic, cream, lemon, and butter sauce that sends these over the top. One bite and your whole family will swoon!
I am always looking for fun ways to change up chicken dinners. Something that is bright and flavorful without too much work. The Artist is always thrilled when something new comes to the table!
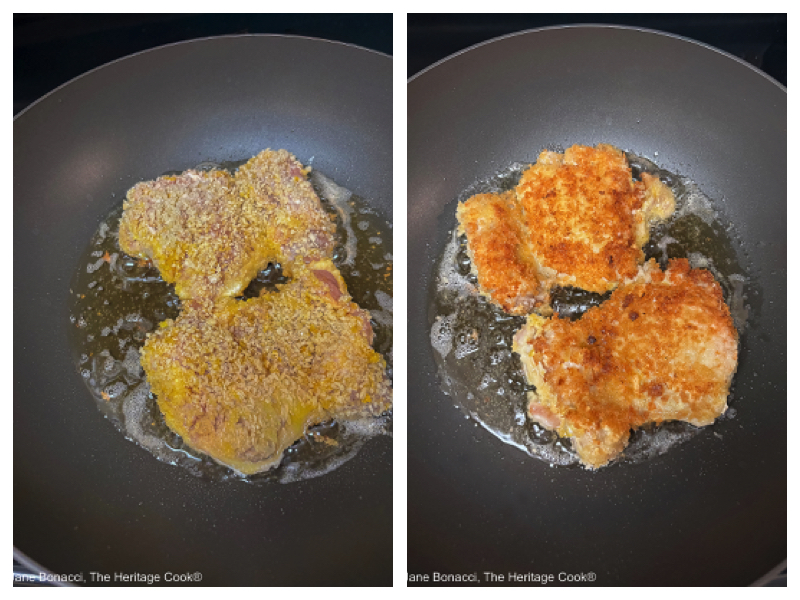
Left: breaded thighs in the hot oil and Right: fried to a golden brown crunchy goodness!
This crunchy, amazing chicken dinner is just what I love – a change of pace from the norm and something fun to make! I could eat this all the time, especially since it is so fast – it only takes about 30 minutes!
Have you ever heard of a breading station? It is simply the line up of three bowls or pie plates that often hold the flour, eggs, and topping choice when you will be breading fried or baked foods. It creates three layers for the crispiest covering of your favorite foods.
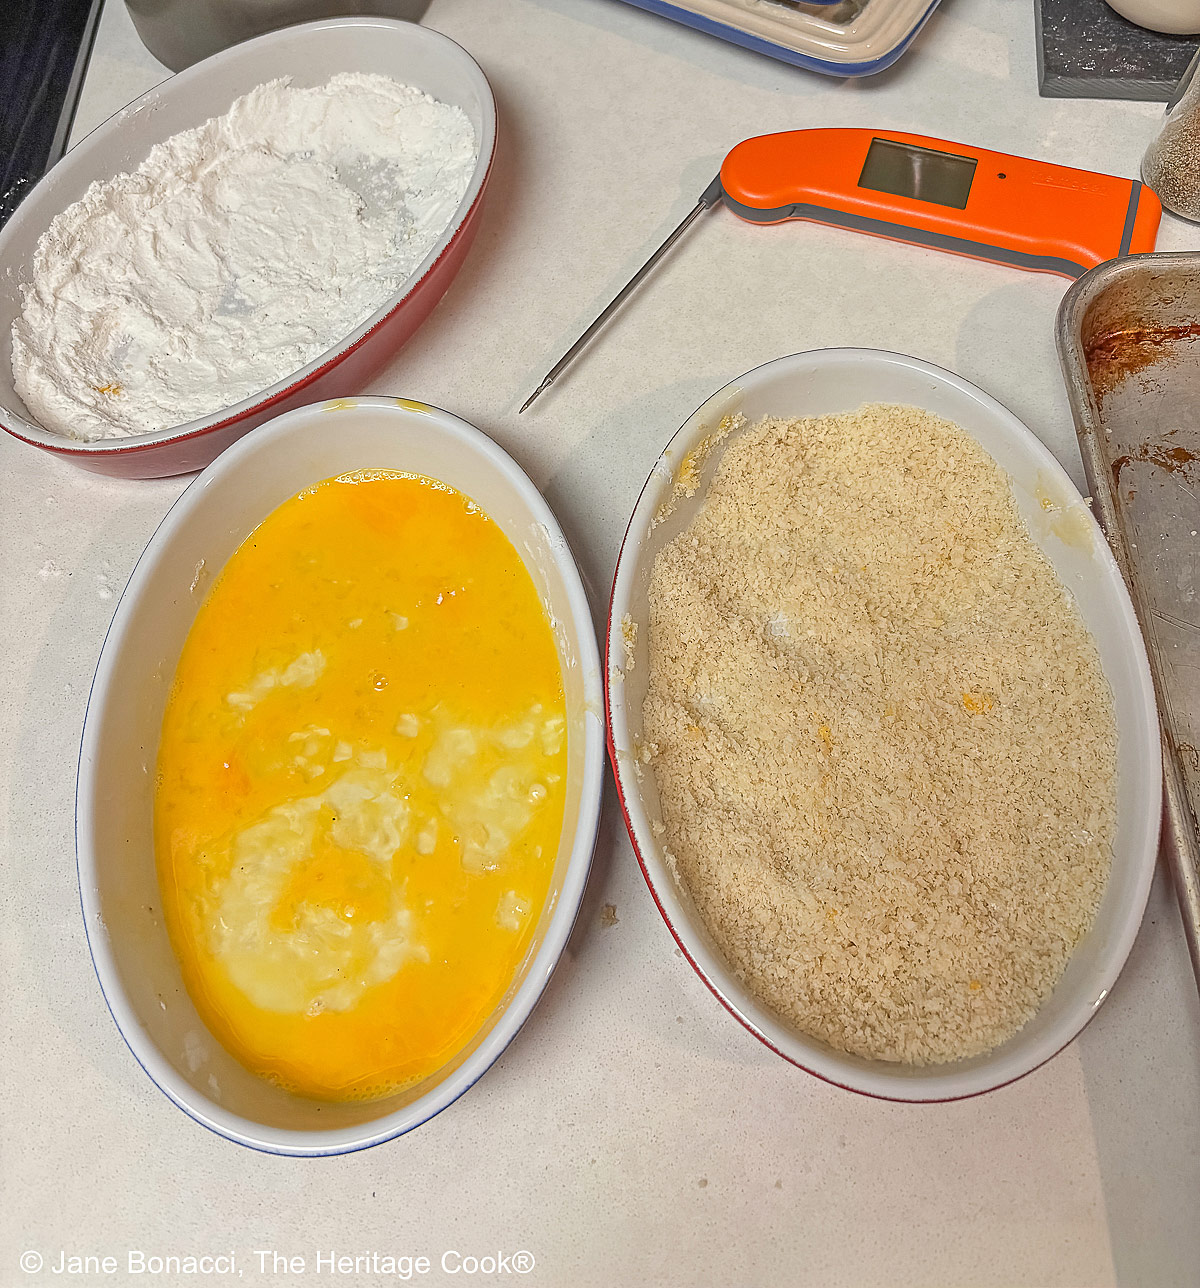
My breading station with dishes of flour, beaten eggs, and seasoned panko breadcrumbs plus an instant read thermometer from Thermoworks
Feel free to season the dredging flour any way you like. At a minimum you want to use salt and pepper. You can add some red pepper powder like cayenne for a touch of heat. If you like smokiness with a little less heat, use chipotle powder, and for no heat but smoke use smoked paprika. You can also add herbs you love, they will enhance the chicken with every bite. Thyme would be particularly good!
Have you used panko before? It is Japanese breadcrumbs, very crunchy and absolutely perfect for breading meats. Once you try it you will be spoiled and will look for other ways to use it in your cooking. One bite and you will be a convert! If you can’t find panko you can use breadcrumbs.
To flavor the panko crumbs, the combination of Pecorino Romano cheese and lemon zest is amazing. A little nutty, salty, bright, and utterly craveable, this is a winning combination. An unbelievably delightful crunch in every single bite!
When you are zesting the lemon or any other citrus, you should be using a rasp-style grater like the ones from Microplane. You will get the lightest zest possible, bursting with the oils for aroma and flavor. You can also use it for the cheese! It is super easy to use and one of my favorite kitchen tools. A true work horse!
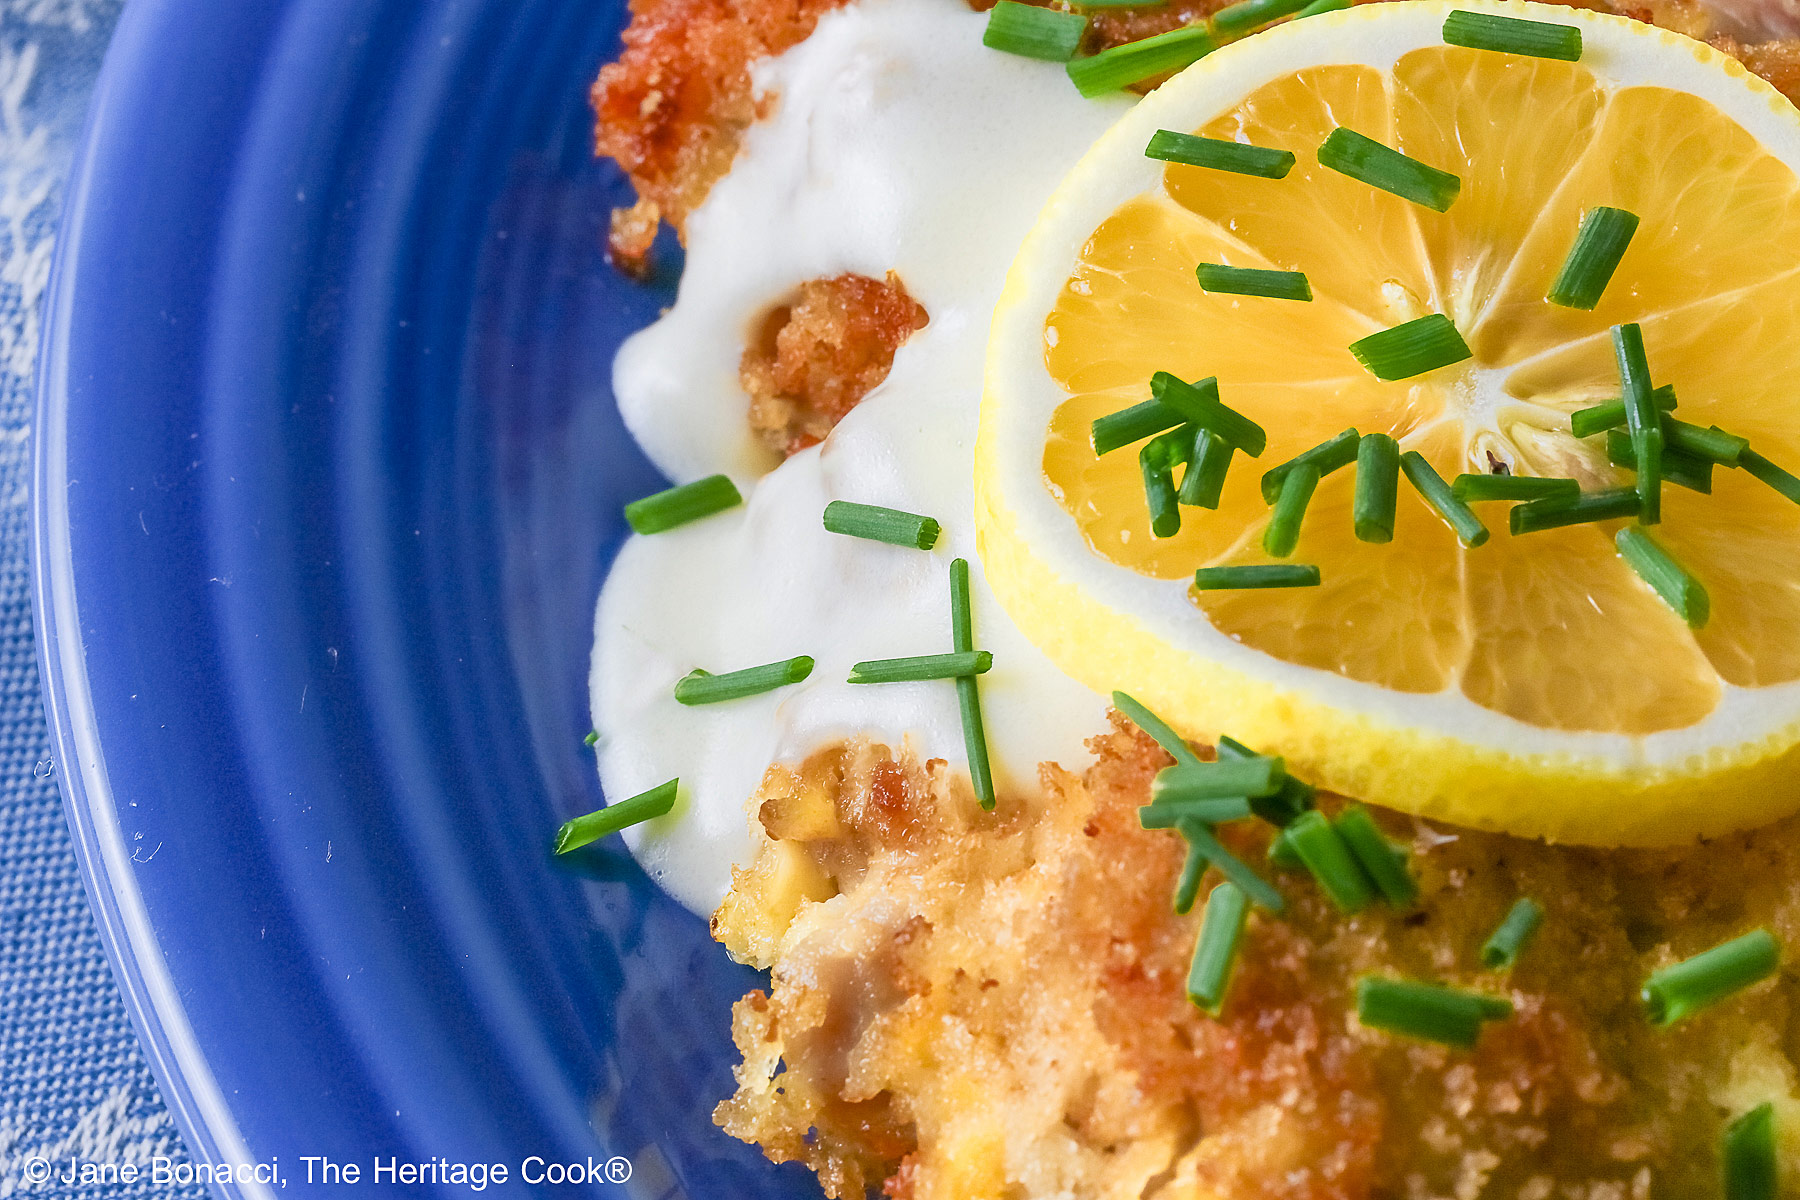
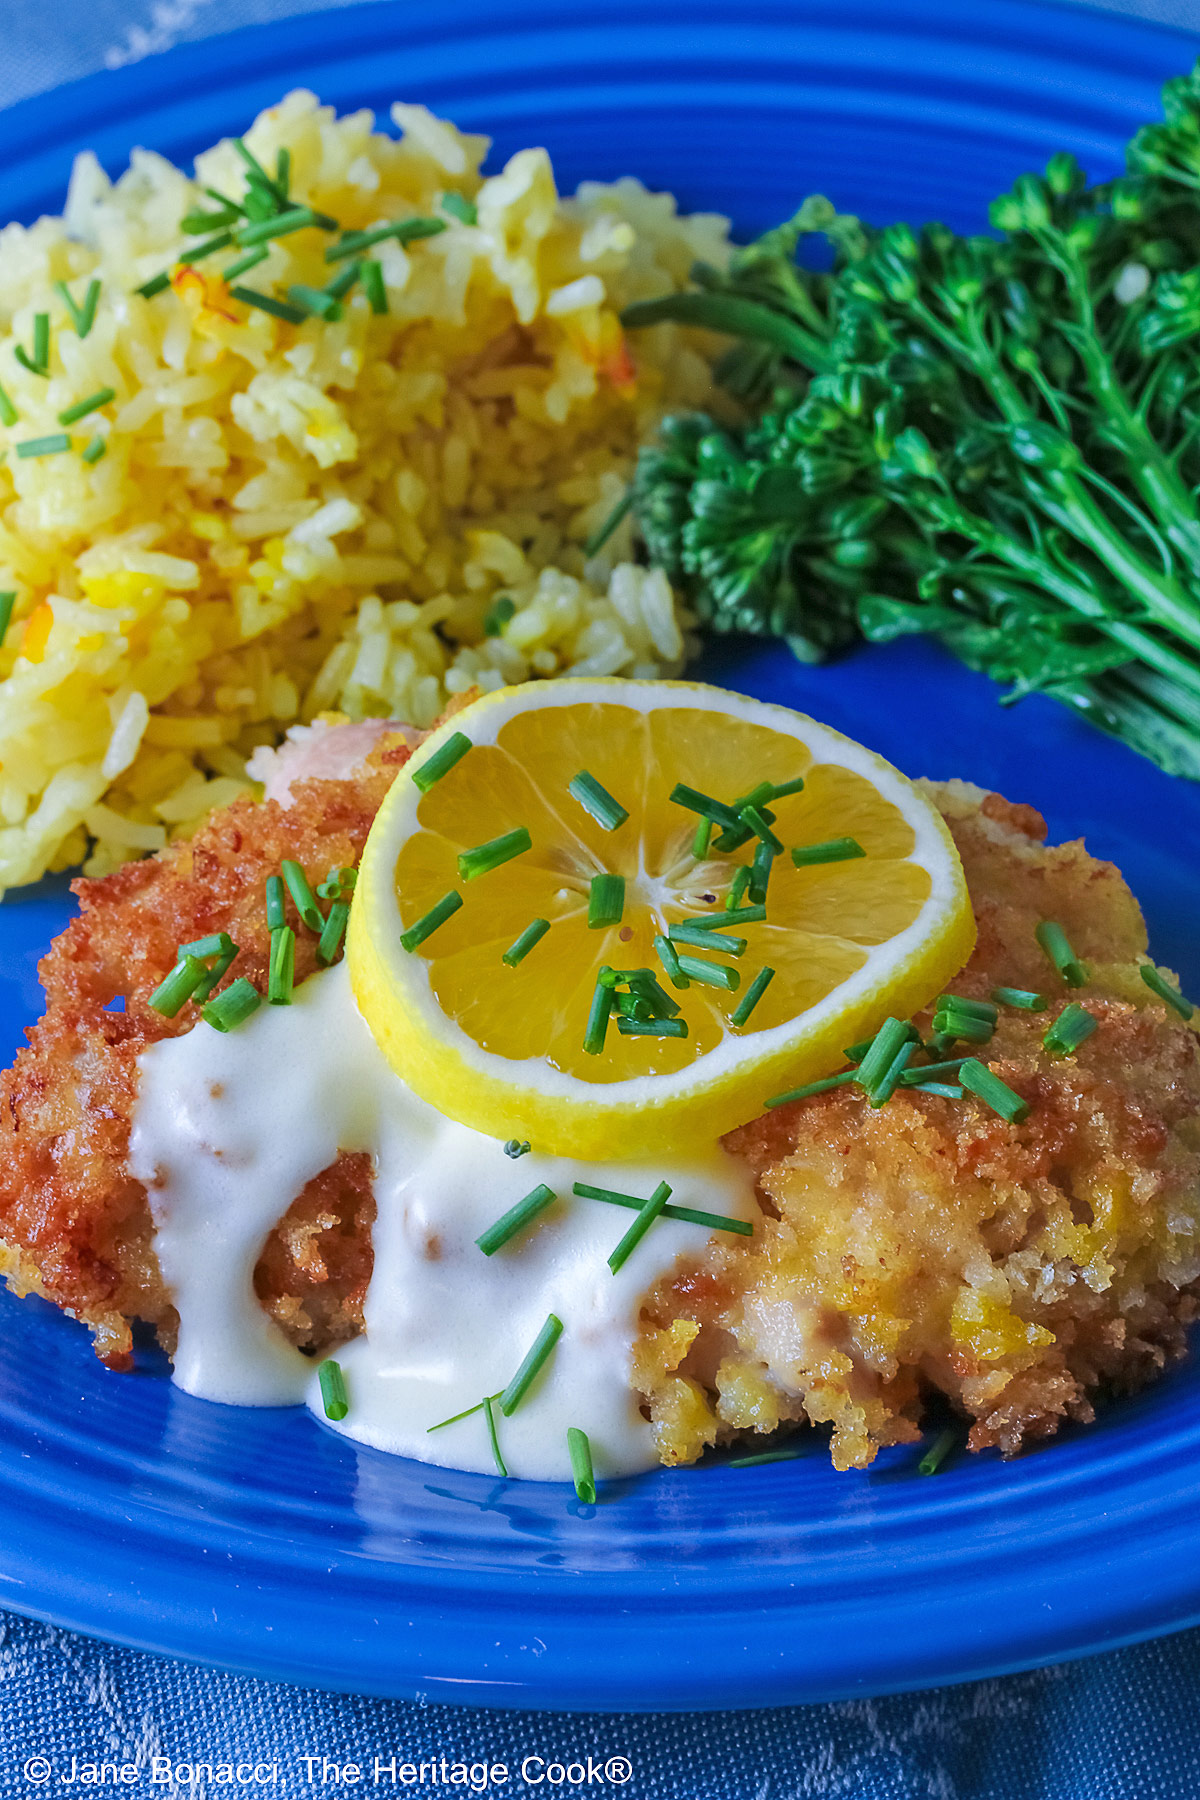
The sauce also adds tremendous flavor. With garlic, chicken broth, cream, butter, and fresh lemon juice, you have a stunning way to finish the dish. You just want to be careful not to completely cover the chicken so it maintains its crunch!
Your littles will love this chicken! You can leave off the sauce for them if you want, but if they take a taste, they may really enjoy it too, it is so creamy and delicious. If you want, you can use chicken tenders in place of the thighs and turn this into finger food. Tenders may take a little longer to cook through – use your instant read thermometer to be sure it is at the correct temperature!
I love the freshness of this chicken, the lemon zest in the bread coating and freshly squeezed lemon juice in the sauce gives you brightness in every luscious bite.
I really hope you give this Lemon Pecorino Chicken a try – it is an exceptionally delicious meal any time of the year. It is on repeat in our home and we look forward to it each time I make it.
If you try this recipe, let me know! Please leave a star rating in the recipe card, comment below, and don’t forget to snap a pic and tag it @theheritagecook on Instagram! Seeing your creations makes my day and I love hearing from you!
Ingredients needed for Lemon Pecorino Chicken:
- Chicken: boneless chicken thighs, GF flour, eggs, panko breadcrumbs, lemon zest, Pecorino Romano cheese or Parmesan, oil, butter
- Sauce: olive oil, garlic, cornstarch, chicken broth, heavy cream, lemon juice, butter
- Garnishes: lemon slices, chives, cooked rice
PRO Tip:
When you need the finest zest in the world or shaved cheese, reach for a rasp-style grater like those from Microplane. They are work horses in my kitchen!
PRO Tip: Pecorino vs Pecorino Romano
Pecorino is a general term for hard sheep cheeses and Pecorino Romano is a specific cheese that is salty, sharp, and firm with longer aging and processing. Often made in Sardinia, Italy these days, it is ideal for grating and giving a lot of character to the panko breadcrumbs in this recipe. If you have children who wouldn’t like the pungency, you can substitute Parmesan if you prefer.
How to make Lemon Pecorino Chicken:
- Prep the Chicken: Flatten pieces to an even thickness if needed. Boneless thighs are fairly flat if you spread them out.
- Set up 3 shallow dishes next to the stove, the first with seasoned flour, the second with beaten eggs, and the third with the panko mixed with the cheese and lemon zest. Set a baking sheet next to the stove. Season the chicken lightly with salt and pepper on both sides.
- Bread the Chicken: Coat each piece of chicken in the flour, then dip in the egg on both sides, and finally place in the panko, pressing so the breading sticks to the chicken. When coated, place them on the baking sheet pan and set aside for 3 to 5 minutes to help the crumbs adhere better.
- Line an ovenproof platter or baking sheet with paper towels and set next to the stove.
- Fry the Chicken: Heat the oil in a large nonstick skillet or enameled Dutch oven over medium heat. To check the heat of the oil, drop on a piece of panko breading – it should sizzle immediately.
- When the oil it hot add the chicken, don’t crowd the pan, leave space between each piece. Work in batches if needed. Fry 3 to 5 minutes until golden brown and fully cooked through to about 163°F (73°C). Transfer to the paper towel-lined plate to drain.
- Prepare the Sauce: While the chicken is frying, make the sauce. Whisk together the cornstarch and chicken broth until smooth. In a separate saucepan, heat the oil and sauté the garlic until fragrant, about 30 seconds.
- Whisk the cornstarch mixture into the oil and garlic, then slowly pour in the cream, whisking constantly. Bring to a low boil then simmer 1 to 2 minutes until thickened, whisking constantly. Remove from the heat and pour in the lemon juice and butter, whisking until the butter is melted and the sauce is smooth and silky. Season to taste with salt and pepper.
- To Serve: Drizzle some of the sauce lightly over the tops of the crispy fried chicken and around the edge if desired, garnish with lemon slices and chives, and serve immediately. If you make this ahead, keep the chicken warm in a low oven (about 200°F; 93°C). This gives you time to get the sauce made and the rest of the meal pulled together so everything is hot when you serve.
PRO Tip:
If you can’t find Pecorino Romano you can substitute Parmesan in its place. The flavor won’t be as dynamic but it will be delicious. Try to get freshly grated or grate it yourself – I recommend you do not use the can of cheese, it isn’t even close to the original and rather dull by comparison.
PRO Tip:
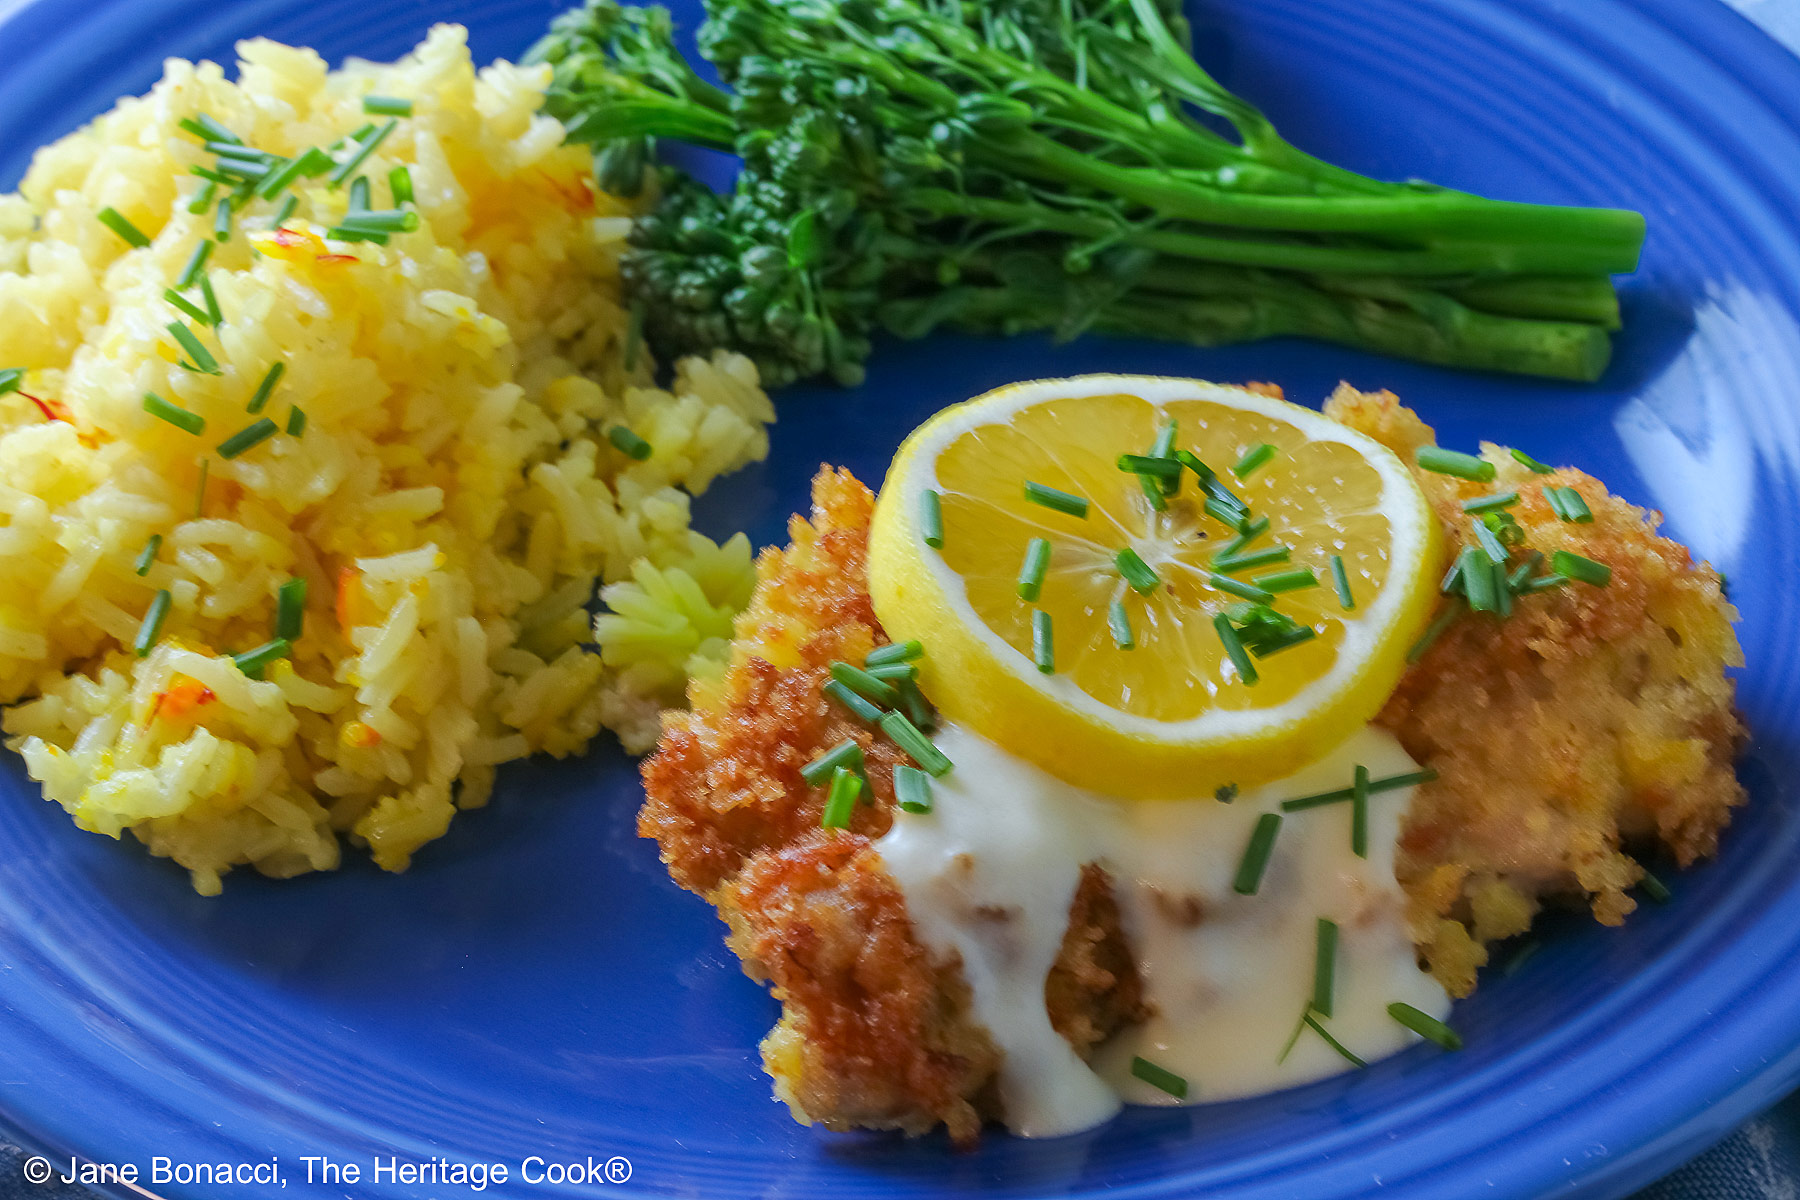
This chicken is good served with rice made with chicken broth instead of water. Add saffron and a little turmeric if you like a yellow rice with a lovely aroma. Add a green vegetable or salad for a complete meal.
Recommended Tools (affiliate links; no extra cost to you):
- Grater/zester
- Citrus reamer
- Chef’s knife
- Au gratin dishes or pie plates
- Large nonstick skillet or Dutch oven
- Instant read thermometer
- Nonstick saucepan
Gluten-Free Tips:
* You can adjust any baking recipe to gluten-free by using 120 grams per cup of my favorite gluten-free flour blend. If you are using another brand of flour or regular flour, whisk it, spoon it lightly into a measuring cup until mounded, level off the top with a knife, and weigh the flour left in the cup. Use that weight as your standard per cup of that specific flour. Do this for each flour blend you use. Commercial gluten-free blends such as Pamela’s All-Purpose Artisan Blend, Bob’s Red Mill 1-to-1, or King Arthur Measure for Measure are all good gluten-free choices.
** My preferred brand of kosher salt is from Diamond Crystal. If you use Morton’s or another brand you will likely not need as much because they are saltier.
All recommended ingredients are gluten-free as of the writing of this article. Always check to be sure the products haven’t changed and are still safe to consume.
Lemon Pecorino Chicken (GF)

Who wants a new, delicious, and fast chicken recipe? Today’s Lemon Pecorino Chicken is breaded in seasoned panko breadcrumbs and ready in about 30 minutes! It has a lovely garlic, cream, lemon, and butter sauce that sends these over the top. One bite and your whole family will swoon!
Ingredients
Chicken
- 8 boneless, skinless chicken thighs or tenderloins, patted dry
- 1/2 cup (60g*) gluten-free all-purpose flour* seasoned with salt and pepper, see note below
- 3 large cold eggs, beaten
- 1 cup (50g) gluten-free panko breadcrumbs; Ian’s brand makes a good GF panko
- Zest from 1 or 2 lemons; yellow part only
- 1/4 cup (25g) grated Pecorino Romano cheese, preferred, or Parmesan
- 1/2 cup (99g) vegetable oil
Sauce
- 1 tbsp olive oil
- 1 minced garlic clove
- 2 tsp gluten-free cornstarch or arrowroot
- 1/2 cup (114g) chicken broth
- 1/2 cup (113g) heavy cream
- 2 tbsp freshly squeezed lemon juice (use zested lemon from above)
- 1 tbsp butter
- Salt and pepper, to taste
Garnishes
- 8 lemon slices, or 4 slices halved
- Finely chopped chives or parsley
- Rice cooked with chicken broth instead of water & saffron if desired
- Green vegetable of your choice or salad
Instructions
1. Prep the Chicken: I prefer chicken thighs because they are much more forgiving and juicier. If you are using a thicker piece of chicken, like tenders or breasts, flatten the pieces using a meat mallet to get them to an even thinner thickness. Boneless thighs are fairly flat already when spread out.
2. Set up three shallow dishes (like au gratins or pie plates) with seasoned flour in the first one, beaten eggs in the second, and panko mixed with the lemon zest and Pecorino in the third. Sprinkle the chicken lightly with salt and pepper on both sides.
3. Coat each piece of chicken in the seasoned flour, shaking off the excess, dip both sides in the egg, letting the extra drip off, and then coat with the panko mixture, pressing to be sure it sticks and covers completely. When coated, carefully set each piece on a baking sheet to help the crumbs adhere better. Set aside for about 5 minutes.
4. Line a plate or baking sheet with paper towels; set next to the stove.
5. Fry the Chicken: After the chicken has rested, heat the oil in a large nonstick skillet or enameled Dutch oven over medium heat to about 375°F (191°C).
6. When the oil is hot, it should be close to 375°F (191°C) when you begin and you want to hold it at about 350°F (180°C) while cooking. Drop a pinch of panko in and be sure it sizzles and browns to know when the oil is hot enough. Add the chicken to the pan; don’t crowd it, leave room between each piece so they brown evenly. Work in batches if needed. Fry the chicken 3 to 6 minutes per side until golden brown and fully cooked through, 163°F to 165°F (73° to 74°C) on an instant read thermometer.
7. Drain on paper towels then transfer to a wire rack to keep it crunchy. If you place the wire rack inside of a sheet pan with sides, you can hold the chicken in a 200°F (93°C) oven while you make the sauce.
8. Prepare the Sauce: While the chicken is frying, make the sauce. In a small bowl, whisk together the cornstarch and chicken broth until smooth. Set aside. In a nonstick saucepan, heat the olive oil over medium heat and sauté the garlic until fragrant, about 30 seconds, stirring often.
9. Pour in the cream, whisking to combine. Then whisk in the cornstarch/chicken broth mixture. Bring to a low boil to activate the cornstarch and then simmer until thickened, whisking constantly. It should happen quickly once it is boiling.
10. Remove the pan from the heat, add the lemon juice and butter, whisking until the butter is melted and the sauce is smooth and silky. Add salt and pepper to taste (use white pepper if you want to keep the sauce pure white). Keep warm on low heat if needed, stirring often.
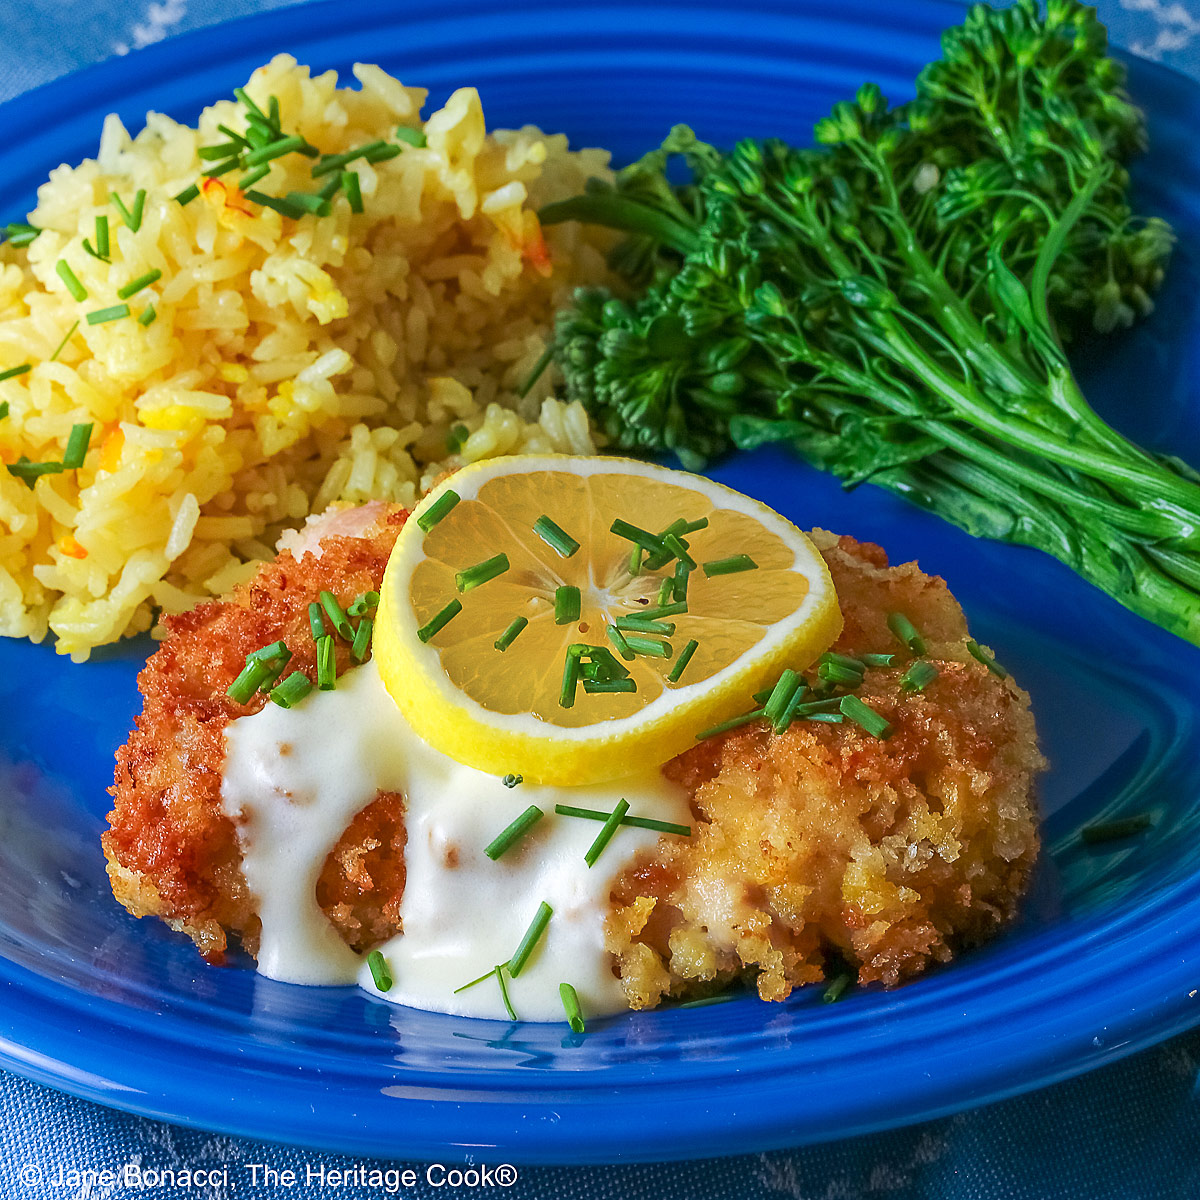
11. To Serve: Drizzle the sauce around and lightly over the tops of the crispy fried chicken pieces, garnish with lemon slices and chives or parsley, and serve immediately. I served mine with sides of saffron rice and broccolini.
12. Store leftovers up to 3 days in airtight containers in the refrigerator, keeping the chicken and sauce separate. Reheat the chicken in the oven at 350°F (180°C) for 10 to 15 minutes to crisp it up again. Reheat the sauce in a small saucepan, stirring constantly so it doesn’t stick. Serve over and around the chicken to maintain the crunchy crust.
Recipe found at www.theheritagecook.com
Notes
* You can adjust any recipe to gluten-free by using 120 grams per cup of my favorite gluten-free flour blend. If you are using another brand of gluten-free flour, whisk the mix, spoon it lightly into a measuring cup without a spout until mounded, level off the top with the back of a knife, and weigh the flour left in the cup. Use that weight as your standard per cup of that specific flour. Do this for each flour blend you use. Commercial blends such as Pamela's, Bob's Red Mill 1-to-1, or King Arthur Measure for Measure are all good gluten-free choices.
Feel free to season the dredging flour any way you like. At a minimum you want to use salt and pepper. You can add some red pepper powder like cayenne for a touch of heat. If you like heat and smokiness, use chipotle powder. You can also add herbs you love, they will enhance the chicken with every bite. Thyme would be particularly good!
If the chicken is getting really brown when you are frying it and the chicken isn’t done, remove from the pan, place on the paper towel-lined plate and microwave for 30 seconds. Check the temperature again – it should be perfectly done.
This chicken is good served with rice made with chicken broth instead of water. Add saffron if you like a yellow rice with a lovely aroma and flavor. Add a green vegetable or salad for a complete meal.
** My preferred brand of kosher salt is from Diamond Crystal. If you use Morton’s or another brand you will likely not need as much because they are saltier.
All recommended ingredients are gluten-free as of the writing of this article. Always check to be sure the products haven’t changed and are still safe to consume.
Adapted from a recipe on Recipes by Silvia
Nutrition Information:
Yield:
8Serving Size:
1Amount Per Serving: Calories: 632Total Fat: 39gSaturated Fat: 11gUnsaturated Fat: 28gCholesterol: 237mgSodium: 5069mgCarbohydrates: 36gFiber: 5gSugar: 5gProtein: 38g
The nutritional information for recipes on this site is calculated by online tools and is merely an estimate. If you need nutritional calculations for medical reasons, please use a source that you trust.
If you enjoyed this recipe, be sure to follow me on social media so you never miss a post:

Create a New Tradition Today!
Welcome! The suggestions here are not intended as dietary advice or as a substitute for consulting a dietician, physician, or other medical professional. Please see the Disclaimers/Privacy Policy page for additional details. Unauthorized use, distribution, and/or duplication of proprietary material from The Heritage Cook without prior approval is prohibited. If you have any questions or would like permission, please contact me. We participate in the Amazon Services LLC Associates Program, an affiliate advertising program designed to provide a means for sites to earn advertising fees by advertising and linking to amazon.com. As an Amazon Associate, I earn a small amount from qualifying purchases without any additional cost to you. This page may contain affiliate links. The author makes no claims regarding the presence of food allergens and disclaims all liability in connection with the use of this site.