Today is Pie Day around the webosphere. Last year a few of my blogging friends were having a Twitter chat and someone suggested that they all make pies and post them on their blogs on the same day. They had so much fun that they made it an annual event and opened it to anyone who wanted to participate!
Yep, today we are celebrating that much-maligned dessert that everyone wishes they knew how to make, but most are afraid to make. But it really isn’t that hard! Trust me. I have been making pies since I was a teenager and while you do improve with practice, anyone can make a decent pie right out of the gate and I am here to help you!
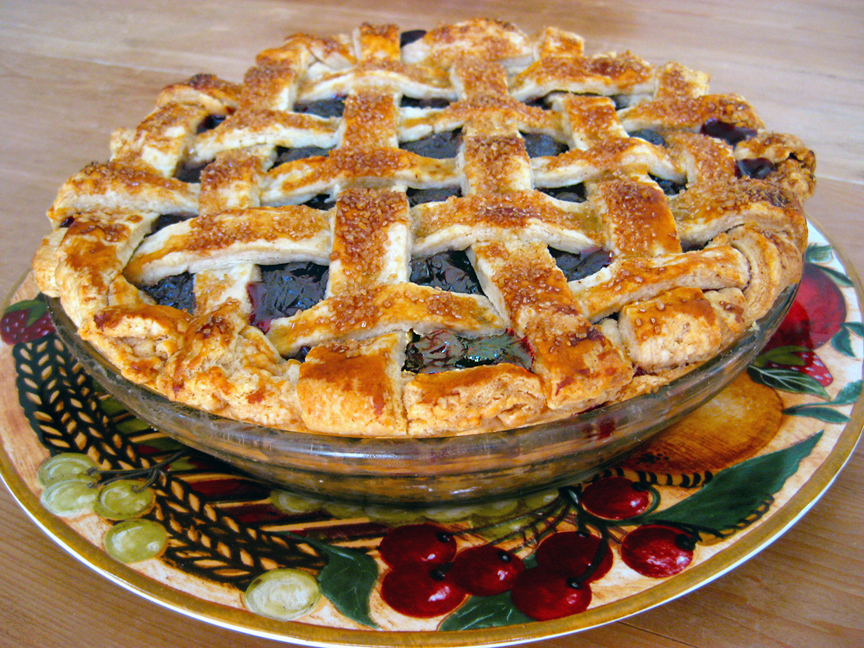
The pie I make most often, besides the traditional Thanksgiving favorites, is cherry pie. My brothers love it and ask for it every time they come to dinner. Made with jarred sour cherries, this treat can be baked any time of the year. My favorite brand is Zergut. I like adding macerated cranberries (especially during the holidays) but you can leave them out for a pure cherry flavor.
The scariest part of a pie is the crust. If you have a food processor, you can make pie dough easily. If you don’t, it takes a bit more work but is still easy. Remember three primary points:
1. Chill all of your ingredients ahead of time
2. Leave large pieces of butter visible for greater flakiness
3. Gluten doesn’t start to form until you add the liquid. Once you do, don’t over handle the dough for a tender crust
That’s it! There are more things you can do to improve your crusts, but these are the basics.
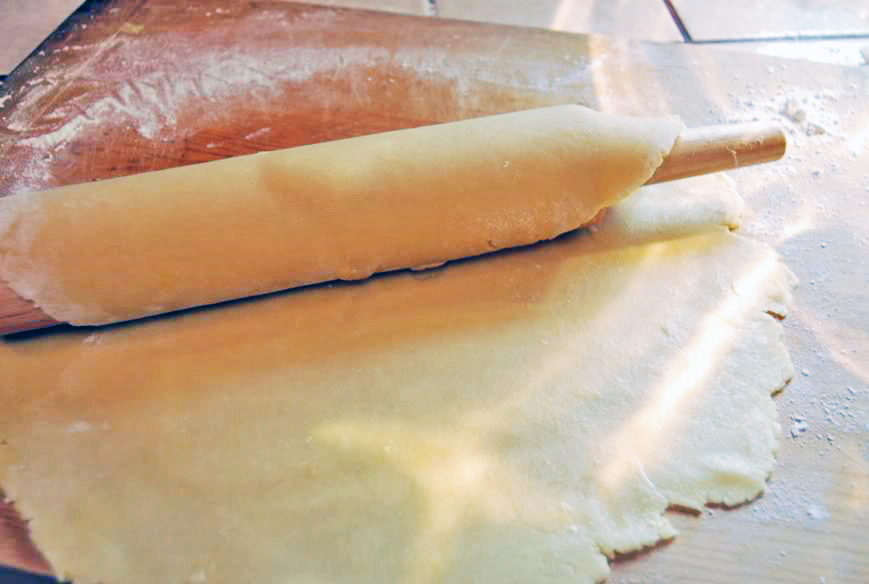
Rolling the dough onto the pin before transferring it to the pie pan
There will always be a debate over the virtues of a vegetable shortening crust vs. an all-butter crust. I always prefer a butter crust for the flavor it adds. The shortening really helps give you a flaky crust, but it tends to be rather boring tasting. If you add a touch of vinegar to your crust it will help add flakiness without leaving any flavor! That’s how I get around the shortening. But, when I am baking for competition, I often make a 50/50 crust; half butter and half shortening. It gives you the best of both ingredients. Make the version that you like best.
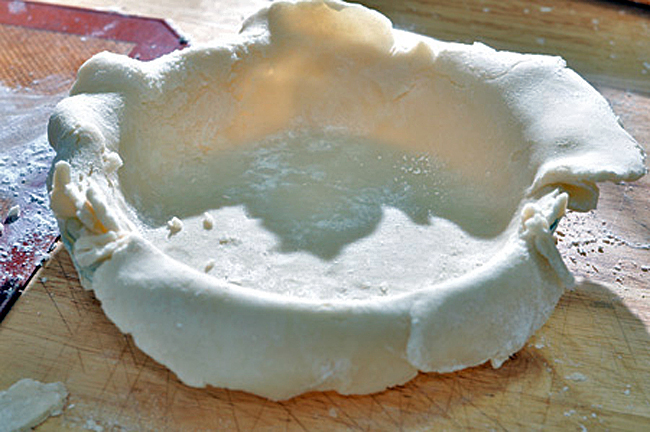
Bottom crust set into pie plate
Over the years I have mastered the fine art of pie dough and here are a few extra tips so you will get great results too. Follow a good recipe (I have included mine or use your favorite), don’t overwork the dough after the liquid has been added, use enough liquid to moisten all the little dry bits, let it rest in the refrigerator for a bit before you roll it out, use plenty of flour and brush off the excess before transferring it to the pie plate.
The second half is of course the filling. I fought for years with fillings that were gluey, didn’t thicken or were really cloudy. When I decided to compete in our local county fair, I decided to do some heavy-duty investigation into what makes a great pie filling and why it can fail so miserably. Whenever you are making a filling that includes fruit juices, thicken the juices first and then add the fruit, transfer to a pie crust and bake. Such a simple concept, but one I hadn’t considered before. And I swear it works every time!
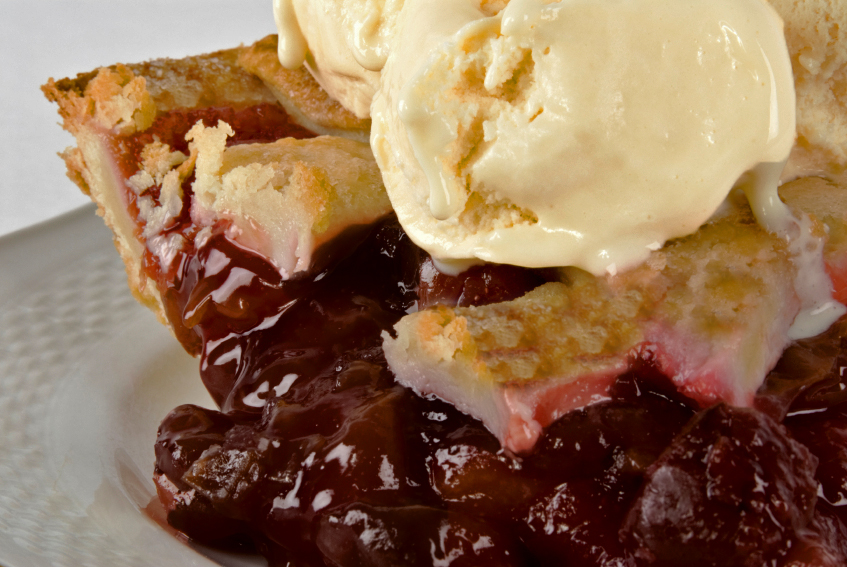
Cherry Pie a la Mode
It is customary to serve cherry pie a la mode, with a scoop of vanilla ice cream on the side. You can leave this off, but if you make the ice cream from scratch, you swoon with every bite. I like to warm the pie before adding the ice cream so that it melts and becomes a sauce.
Thanks to the collection of baking fanatics who came up with the fantastic idea for Pie Day. I urge you to get brave and give it a go. You can make a wonderful pie too!
Kitchen Skill: How to Weave a Lattice Crust
On the back of a sheet of parchment paper, set your pie plate upside down and draw a circle around the outside. Flip the paper over and you can use this as a guide to know how large to make your lattice.
It is almost impossible to explain how to weave a lattice crust, the website Simply Recipes has beautiful photographs demonstrating each step. Bring up that page and follow along as you weave your strips. Just remember the concept of over/under and think of a basket!
Roll out your top crust and cut it into 1/2-inch to 3/4-inch strips. Arrange about 5 to 7 strips (or as many as you need) parallel to one another over the circle on the parchment, setting the longest ones in the middle and working your way out to the edges. You are going to weave half the top at a time.
Fold every other strip back on itself and lay one new strip perpendicular against the folded edges. Unfold the strips so they cover the new piece. Now take the strips that are running underneath the perpendicular strip and fold them back on themselves. Set another perpendicular strip across the parallel ones and unfold the folded ones. Keep repeating this until one side is done, then spin the paper and repeat on the other side.
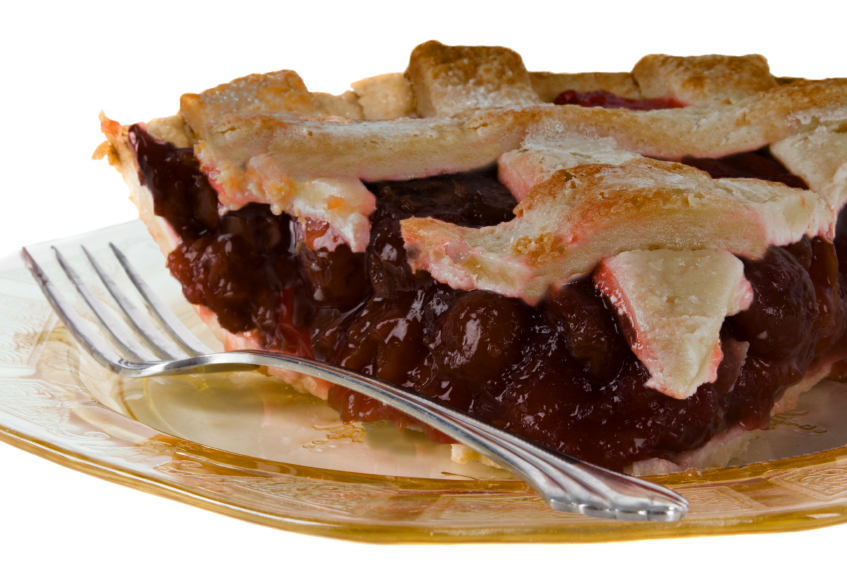
Once it is woven you can even out the spaces between the strips and check for mistakes. It is much easier to do this on the parchment than on the pie. Press the strips together at the intersections and flip the entire woven piece onto the top of your filled pie. Trim the excess, flute the edges, and brush the top with the egg wash. This helps give your crust a golden brown color as it bakes and holds on coarse sugar if you want to add a sweet crunch!

- Egg Wash and Crust
- 1 large egg
- 2 tbsp milk
- 1 (9-inch) double crust pie dough recipe, chilled (recipe below)
- Filling
- Light or dark rum, optional
- 2 cups dried cranberries (leave out if you prefer)
- 3 (24-oz) jars sour cherries in juice (NOT pie filling), well drained, juices reserved
- 1 cup sugar
- 4 tbsp cornstarch
- 1 tbsp all-purpose flour
- Pinch of salt
- 1/2 tsp vanilla
- 1 to 2 tsp fresh lemon juice, to taste
- Demerara sugar or other coarse sugar, optional
- Move oven rack to the lowest level and place a baking sheet lined with foil on it. Preheat oven to 400°F. Make your pie dough (follow recipe below) and chill in the refrigerator while you make the filling.
- Make the Egg Wash: In a small bowl, beat egg and milk together until smooth to make an egg wash. Set aside.
- Prepare the Crust: Roll out chilled dough and line a pie plate with bottom crust, leaving a 1-inch overhang of dough. Cut the strips for the lattice topping, or roll out second crust. Brush bottom of crust lightly with some of the egg wash. Set aside and leave to rest for 30 minutes while you make the filling.
- To plump the cranberries, place them in a small saucepan. Cover with dark or light rum (or plain water) and bring to a simmer. Don’t worry the rum flavor will dissipate during baking. Take off the heat and allow them to steep in the hot liquid for 15 minutes. Drain. Set aside.
- In a strainer set above a large bowl, drain the cherries, reserving the juice.
- Make the Filling: Place 1 cup of the cherry juice in a medium nonstick saucepan (remaining juice may be used for another use). Add the sugar, cornstarch, flour, salt, vanilla, and lemon juice. Stir well to dissolve sugars and cornstarch. Stirring constantly, bring to a simmer over medium heat. When thick enough to coat the back of a spoon, remove from the heat.
- Add drained cherries and cranberries. Toss to combine. Allow filling to cool slightly then very gently pour into pie shell, slightly mounding the fruit in the center. You don’t have to use it all. If you overfill the crust it will bubble out and leave a huge mess, making the pie difficult to cut and serve. If you have extra filling, make a mini pie with some leftover pie dough or use over ice cream.
- Working quickly, brush the overhanging dough of the bottom crust with water. Assemble the lattice strips or second crust over the filling. Trim the ends of the strips and press to seal with the bottom crust. Roll the dough under and flute as desired. Brush the top with the egg wash. Sprinkle with the Demerara sugar. If using a full upper crust, snip 4 to 6 small holes to vent the steam. Decorate with extra pastry pieces if desired.
- Place the pie on the hot baking sheet, on the lowest rack in the preheated 400°F oven. Bake for 20 minutes, then decrease the oven to 350°F, move the pie to the center rack, spinning the baking sheet and continue baking for 40 minutes to 1 hour, or until the crust is golden brown and the filling is bubbling. It is best if it is bubbling all the way to the center. If the top crust browns before the bottom crust, gently tent the top of the pie with tin foil and continue baking, checking often.
- Remove the pie from the oven and place on a wire rack to cool. Don’t cut until it has rested at least 1 hour, allowing the fruit to reabsorb the juices and the filling to thicken again.
- This pie is best served at room temperature 2 to 3 hours after it is baked. It keeps well, covered, in the refrigerator, for 2 to 3 days.
- Yield: 1 (9 or 10-inch) pie

- 4-1/2 cups sifted, all-purpose flour
- 2 tsp salt
- 2 tsp sugar
- 12 oz (3 sticks) cold, unsalted butter, cut into pieces (or 70% butter to 30% leaf lard or all vegetable shortening (8.5 oz to 3.5 oz)
- 1/2 cup water with ice cubes added (strain out ice just before using)
- 1 tsp vanilla extract (for fruit pies) or almond extract (for nut pies)
- 2 tsp red wine vinegar
- To use a Mixer: Mix the flour, salt, and sugar in a mixer fitted with a paddle attachment for 1 minute. Add the butter and mix just until you have a crumbly, sandy mixture. You should still be able to see large sized pieces of butter. You can also use a food processor with the steel blade. It will only take a few pulses.
- Mix the water, extract, and vinegar together. With the mixer running at medium speed, drizzle in the water/vinegar mixture and mix just until a ball forms. You should still see medium bits of butter. (Note: Some days I have to add more water to make the dough come together).
- Divide dough in half, form into flat disks, and wrap with plastic wrap. Refrigerate at least 30 minutes. (Dough may be frozen and used later, let thaw in refrigerator overnight before rolling out.) Allow dough to warm up a few minutes before rolling.
- To use a Food Processor: Mix dry ingredients in food processor. Add all of shortening or lard and half of butter. Pulse until fine. Add remaining butter and pulse 3 times. Add water all at once and process only until incorporated. There should still be large pieces of butter scattered throughout the dough. Roll in plastic and rest 30 minutes in the refrigerator. Remove from the refrigerator and let warm up 10 minutes before rolling out on a well-floured board.
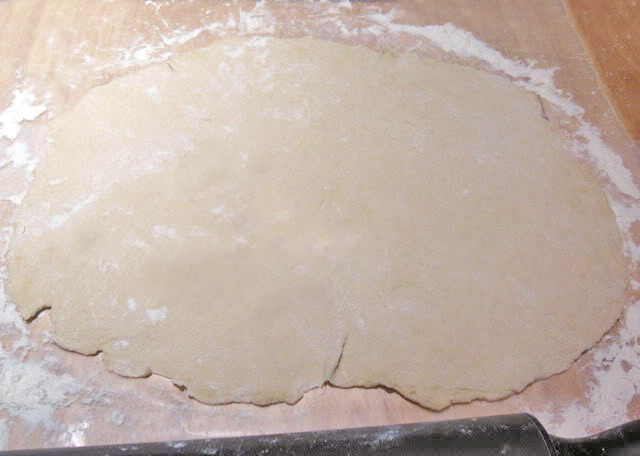
- Sprinkle a little flour on top of the dough and rub some flour on your rolling pin. Start rolling outward from the center in quick, light strokes. Don’t worry if the edges split a bit, concentrate on getting a good circle going from the center. Lift up and rotate dough 1/4-turn every minute or so to help ensure even rolling and to avoid sticking. The dough should feel smooth and soft. If it gets sticky, sprinkle on a little more flour, but don’t use too much. If the dough gets warm or limp, put it back in the refrigerator for 15 minutes to firm the butter up. Keep rolling until the circle is at least 2-inches larger than your pan – about 15-inches for a 9-inch pie pan.
- Very gently roll the dough loosely onto your rolling pin and unroll into pie plate, easing it into the pan until it fits snugly against all surfaces, but Do Not stretch it to fit!
- To Make a Single Crust Pie: Place crust gently in pan, trim to 1/2-inch beyond edge of pie pan and flute edges. Chill crust 20 minutes before filling.
- To Make a Double Crust Pie: Place bottom crust gently in pan, Do Not trim edges, pour filling into pie shell. Roll out top crust and ease over filling, pressing top and bottom crusts together at the edges. Trim to 1/2-inch beyond the edge of pie pan and flute. With the tips of sharp scissors or a knife, cut 4 to 5 vents in top of crust.
- Yield: 2 (9-inch) pie crusts or 1 (9-inch) double crust pie
- To Make a Lattice-Top Pie: Place bottom crust gently in pan, Do Not trim edges, pour filling into pie shell. Roll out top crust and cut into 3/4-inch strips. Place a sheet of parchment paper on a work surface and weave the strips into a traditional lattice pattern. Flip it on top of the filled pie, press the ends of the strips together with the edges of the bottom crust, trim excess and flute edges.
Thank You!




Jamie
This is a gorgeous pie! Absolutely perfect! I love cherry pie, love it, and make one occasionally but my filling never looks this perfect. I have to try your recipe if it turns out a pie like this! Happy Pie Day and thanks for inspiring!
Jane Bonacci, The Heritage Cook
Hi Jamie – thank you! You want the filling to appear thicker than you need when you add the cherries and put it in the pie shell. The fruit will give off more liquid, thinning it out a bit. I hope you love yours as much as I do mine!!
April @ Angel's Homestead
Yum! Your pie almost looks to pretty to eat… almost. : )
Jane Bonacci, The Heritage Cook
April – I would hate it if you didn’t dive in and join me 🙂
Brian @ A Thought For Food
Ok… you’ve got me hooked. First off, I love the filling here. I need to get my hands on some sour cherries now.
I’m loving these tips that you provided. Definitely bookmarking this one!
Jane Bonacci, The Heritage Cook
I hope you like your results Brian, but I’m sure you will. You are a great baker and I would eat anything you made with pure delight!!