Today is the one-year anniversary of The Heritage Cook.com. This year has been an amazing experience, full of discoveries, developing new friendships, technical trials, challenges and triumphs. I began this adventure after attending the International Association of Culinary Professionals (IACP) conference last spring. I came away from there excited about all the possibilities in the culinary field, and within a couple of weeks The Heritage Cook was born.
Thank you to my family, friends, fans, and all the members of The Heritage Cook Family! Your support means the world to me and I appreciate every time you stop by the blog, hit a “Like” on Facebook, leave a comment, re-tweet, or share my site with your friends. I would be nowhere without each of you.
The Heritage Cook came about because the next generation of my family grew up on the East Coast and I wasn’t able to pass along the lessons I had learned from my grandmother and mother. I realized that there were other people out there with similar situations, those who didn’t have the joy of standing next to their grandmother at the stove, watching her every move, people who might want to share my recipes and kitchen hints. I hoped that my passion, memories, and experience in the kitchen would translate and help others become as passionate as I am about cooking and baking.
If you have thought of starting a blog but were concerned you wouldn’t be able to handle the technical aspect, don’t wait any longer! WordPress made it nearly painless and I found a theme (template) that I liked quickly. I had years of reading other people’s blogs to know the look and feel I wanted. With no experience in programming I was able to set it up in a matter of minutes. You can do the same.
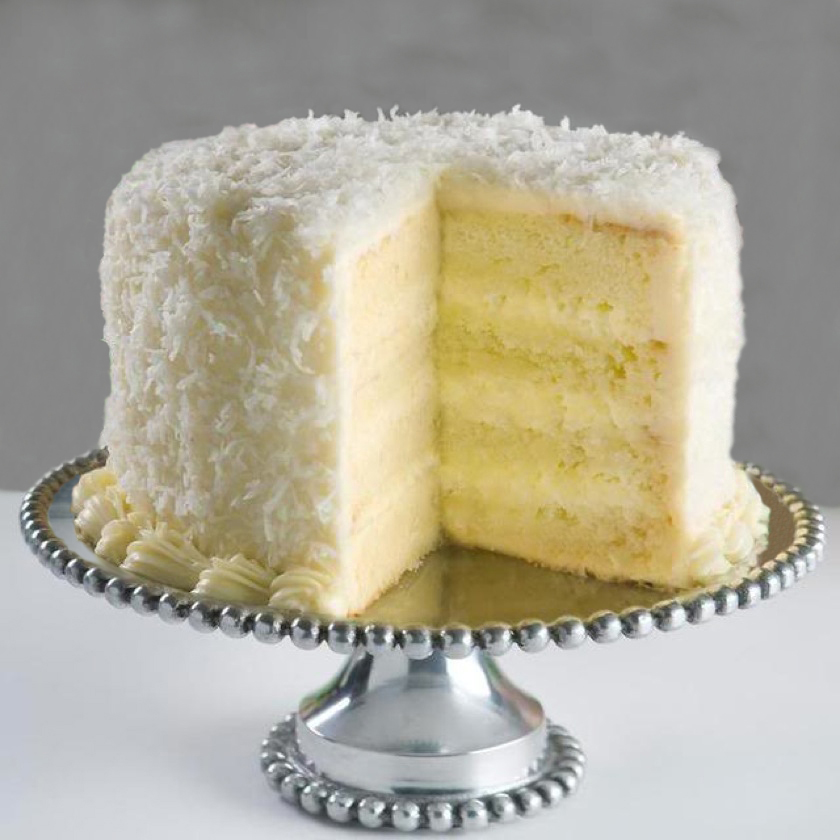
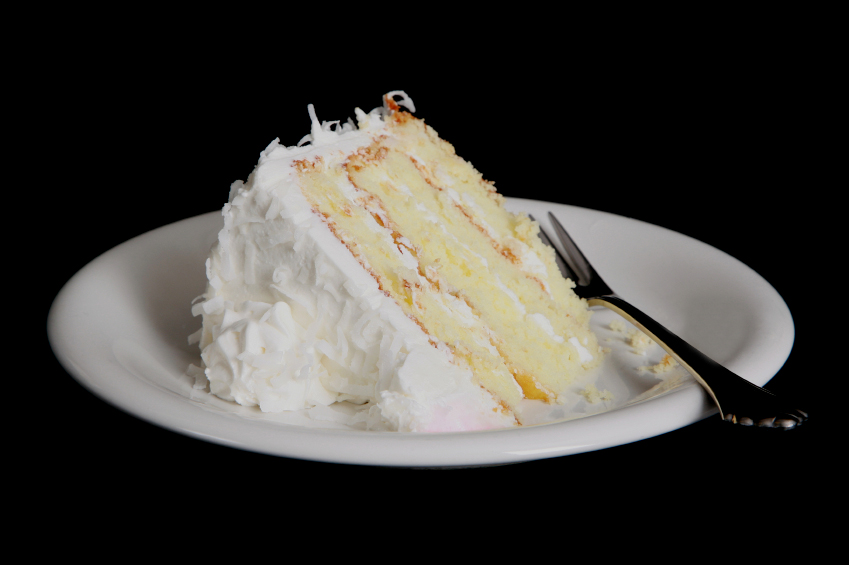
In a special edition of The Heritage Cook I want to share a recipe from one of this country’s preeminent cookbook authors and food writers, Nancie McDermott. Helping her grandmother in the kitchen started her passion for cooking and being from North Carolina gave her an amazing legacy of fabulous cooks to learn from. Two of her cookbooks are dedicated to Southern desserts, Southern Pies: A Gracious Plenty of Recipes, from Lemon Chess to Chocolate and Southern Cakes: Sweet and Irresistible Recipes for Everyday Celebrations. Today’s recipe is from Southern Cakes and is Nancie’s amazing old-fashioned coconut cake. It is the cover shot for the cookbook and always makes me stop in my tracks when I see it. It is amazing how inspiring a photograph can be, and this one has been calling my name for over 6 months. Today is the perfect day to share it with you!
As incredible as it may seem, there are some people that don’t care for coconut. Their primary complaint is the texture; they don’t like the chewiness. If you are baking for people like this, one way to get around that is to finely grind the coconut in a food processor. Pulse it until you reach the right consistency for your taste. Pulsing lets the bigger pieces fall to the bottom, making sure your ingredients get chopped more evenly.
Now if you’re like me and cannot get enough of the flavor of coconut, you can use canned unsweetened coconut milk in place of regular milk in the recipe. And if you’re totally nuts about it, you can even add a couple drops of coconut extract or oil. Just be careful and don’t go overboard. Even you can get too much of a good thing! For a showstopper cake, you can double the recipe and make a three or four layer cake. Make sure you double the frosting too, you wouldn’t want to run short of that, LOL.
If you want to cut back on the sweetness of the cake without losing any of the flavor, you can substitute unsweetened coconut. I usually like this better in my recipes. I think it helps balance the sweet and savory a little more. It is the only type of coconut I use in my macaroon cookies and what I use when a recipe doesn’t designate a specific kind. Try making the same recipe twice, once with sweetened coconut and the second with unsweetened, and see which you prefer.
So as I sit back and reflect on the past year, pop a bottle of champagne or sparkling cider and have a glass with me. Thank you everyone for an amazing year!


- Cake
- 3 cups all-purpose flour
- 2 tsp baking powder
- 1/2 tsp salt
- 1 tsp vanilla extract
- 1 cup milk (or unsweetened coconut milk, if desired)
- 1 cup (2 sticks) butter, softened
- 2 cups sugar
- 4 eggs
- Frosting
- 1 cup granulated sugar
- 1/4 cup light corn syrup
- 1/4 cup water
- 2 egg whites
- 1/4 tsp salt
- 1/4 tsp cream of tartar
- 1 tsp vanilla extract
- About 3 cups sweetened shredded coconut
- To Make the Cake: Preheat the oven to 350°F. Grease and flour 2 (9-inch) round cake pans. In a medium bowl combine the flour, baking powder, and salt. Whisk together well. Set aside. In a measuring cup, stir the vanilla into the milk.
- In a large bowl beat the softened butter on medium speed until creamy. Add the sugar and continue beating, scraping down the sides and bottom of bowl twice, until the mixture is light and evenly combined. Add the eggs, one at a time, beating well between each addition, until the mixture is thick and smooth.
- Add 1/3 of the flour mixture and beat on low speed until completely incorporated. Add 1/2 the milk/vanilla, beating well. Beat in another 1/3 of the flour mixture, then the remaining milk, and finally the remaining flour, beating well each time until the batter is very thick and smooth.
- Quickly scrape the batter into the prepared cake pans, dividing it evenly, and place them in the oven. Bake for 25 to 30 minutes, until the cakes are golden brown, spring back when touched lightly in the center, and begin to pull away from the sides of the pans.
- Place the pans on wire racks and cool for 10 minutes. Remove the cakes from the pans and place back on the racks, right side up, to finish cooling completely. Once cool you have the option of splitting each layer in half to create 4 thinner layers.
- To Make the Frosting: Bring about 3 inches of water to an active simmer (bubbles breaking the surface regularly) in a medium saucepan. Meanwhile, in a heat-proof bowl that fits snugly into the saucepan, combine everything except the vanilla. Beat with a mixer at low speed for 1 minute, until the mixture is pale yellow and very foamy.
- Place the bowl over the simmering water and beat at high speed for 7 to 14 minutes or more, until the frosting becomes white, thick, and shiny, and triples in volume. Continue beating until the frosting forms firm peaks and loses some of its shine. Remove the bowl from the heat, add the vanilla, and continue beating for 2 minutes more.
- To Frost the Cake: Place one cake layer, top-side down, on a cake stand or serving plate. Cover it generously with frosting and sprinkle with some of the coconut. Place the second layer on top of the first, top-side up. First frost the sides to help keep the cake steady, and then spread frosting generously over the top, completely covering the cake.
- Place the cake stand or serving plate on a baking sheet to catch any loose coconut as you sprinkle it onto the cake. Once the top is covered, gently pat coconut handfuls of coconut onto the sides. Make sure there are no bare spots.
- Transfer any unused coconut to a jar or resealable plastic bag and store it in the freezer.
- Yield: 8 to 10 servings; enough frosting for any layer cake, 2 (9x13-inch) cakes, or 3 to 4 dozen cupcakes
Thank You!


Maya@Foodiva's Kitchen
Jane, happy belated anniversary! I’ve wanted to wish you that for a while now but you were my SRC partner for June and I didn’t want to bust the secret as I so wanted to make this cake…LOL. Thank you for the inspiration, your cake looks stunning but no way was I going to compete with this 4-layered beauty. Hence my messy-looking cakelets!
Jane Bonacci, The Heritage Cook
Maya, you are so cute! Thank you, I understand about being afraid of ruining the surprise … I was the same with my SRC Buddy :o) I LOVE what you did with my recipe – so clever and beautiful!
Muffin Tin
Coconut cake is a Southern classic. Yours looks beautiful!
Jane Bonacci, The Heritage Cook
Thanks Muffin Tin! I love coconut!!
Suzanne
Congratulations on your 1st Anniversary! Wow, does time fly or what? I’ve made many of your recipes and will be making many, many more. ALL absolutely delicious and all crowd-pleasers. This cake is going on the shopping list right now!
Jane Bonacci, The Heritage Cook
Thank you Suzanne! I am thrilled to hear that you have been enjoying my recipes. That warms my heart :o) I hope you love this cake as much as I do!
Carolyn
Happy Blogoversary! It’s a gorgeous cake and I am definitely one who loves coconut so bring it on!
Jane Bonacci, The Heritage Cook
Thank you Carolyn! I’m with you – I dream about coconut, LOL!
Barbara @ Barbara Bakes
Happy Anniversary! Your blog is so great. I was surprised it was just one year old. The cake looks fabulous. I love coconut but have some kids that don’t like it much, so I’ll have to try the food processor tip.
Jane Bonacci, The Heritage Cook
Hi Barbara, Thanks so much! The bulk of the coconut itself is on the outside of the frosting, so you can tell right away if you kids don’t like the flavor or the texture. I hope the food processor trick works!!
Jeanette
Congratulations and Happy Blog Birthday! You have a fabulous blog and I always look forward to seeing what you’re coming up with.
Jane Bonacci, The Heritage Cook
Thank you Jeanette! I always look forward to your intriguing posts too!
Feast on the Cheap
Happy one-year anniversary! And that cake looks like the perfect way to celebrate…
Katrina
Happy 1 year! You are a seasoned pro with a great blog/and photos.
Michelle
Congratulations! I would never have guessed you had only been blogging for one year! You have such a great blog!
Jane Bonacci, The Heritage Cook
Thank you Michelle, Katrina, and Feast! It has been a pleasure, privilege, and honor to meet all of you this year! You each have wonderful blogs of your own, well written, beautifully laid out, and always entertaining!! Thank you for your support, clicks, comments, and thumbs-up. I appreciate each and every one!
Have a great weekend!