Photo Credit: © Andrew Scrivani
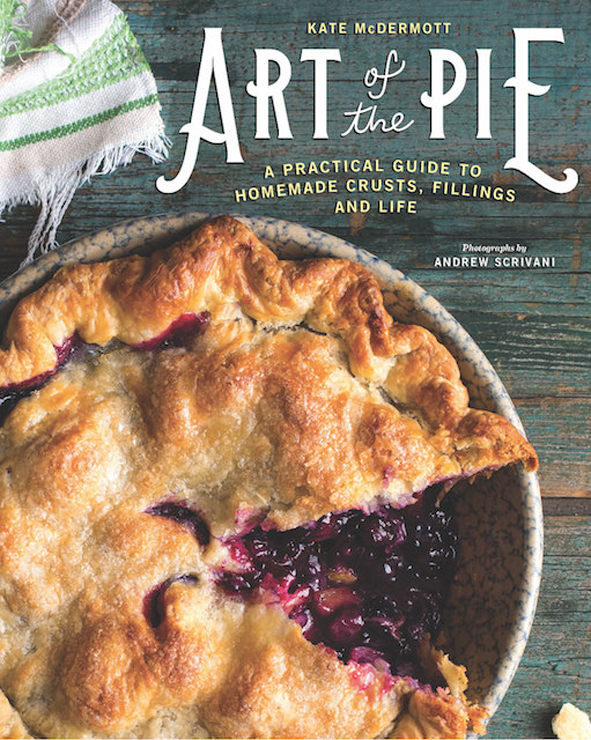
This is a really exciting week for my friend Kate McDermott – her cookbook Art of the Pie, A Practical Guide to Homemade Crusts, Fillings, and Life (Countryman Press, a division of W. W. Norton & Company) officially launched yesterday! Filled with the most amazing pies, both sweet and savory, as well as Kate’s unique and charming stories and perspective on life, this is one book everyone needs in their culinary library. It is so much fun to see your friends triumph!
Today’s recipe, Kate’s Pumpkin Pie, is from her cookbook and we are incredibly lucky to have her share it with us! Just in time for all your holiday baking, this year you can bring the quintessential pumpkin pie to all your family gatherings. You can expect rounds of applause as everyone devours your stunning pies! And can you believe these gorgeous photos? They are the work of the extraordinary Andrew Scrivani, the man behind the camera who captured Kate’s beautiful creations for the book.
Kate has been teaching for years, helping thousands gain wisdom and confidence in making pie from scratch in her adorable and welcoming Pie Cottage in Port Angeles, Washington. Watching her imparting her wisdom to her classes always brings a tear to my eyes because it is like reliving my grandmother teaching me – the same sensibilities, common sense approach, and joy of taking simple ingredients and transforming them into something the world craves and adores.
Kate also shares her stories, daily activities, and recipes on her newsletter. If you subscribe to her newsletter you will get advanced alerts of upcoming classes taught around the country in addition at her home, the adorable Pie Cottage. She also teaches Pie Camps that are much more in-depth and will send you home with confidence in all your pie baking skills and you can teach others, carrying Kate’s message on, sharing her love of life and pie!
You can purchase signed copies of Art of the Pie from Kate’s local bookstore, Port Book and News. I hope you give Kate’s Pumpkin Pie a try, it is perfect for the entire holiday season!
I am delighted to present, Kate McDermott!
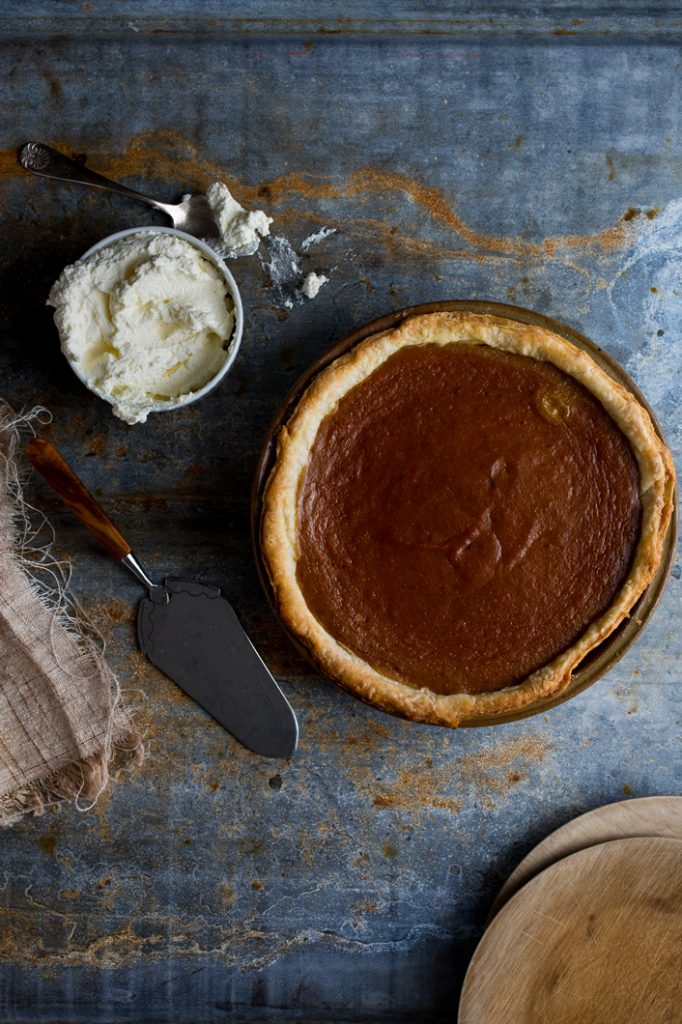
Photo Credit: © Andrew Scrivani
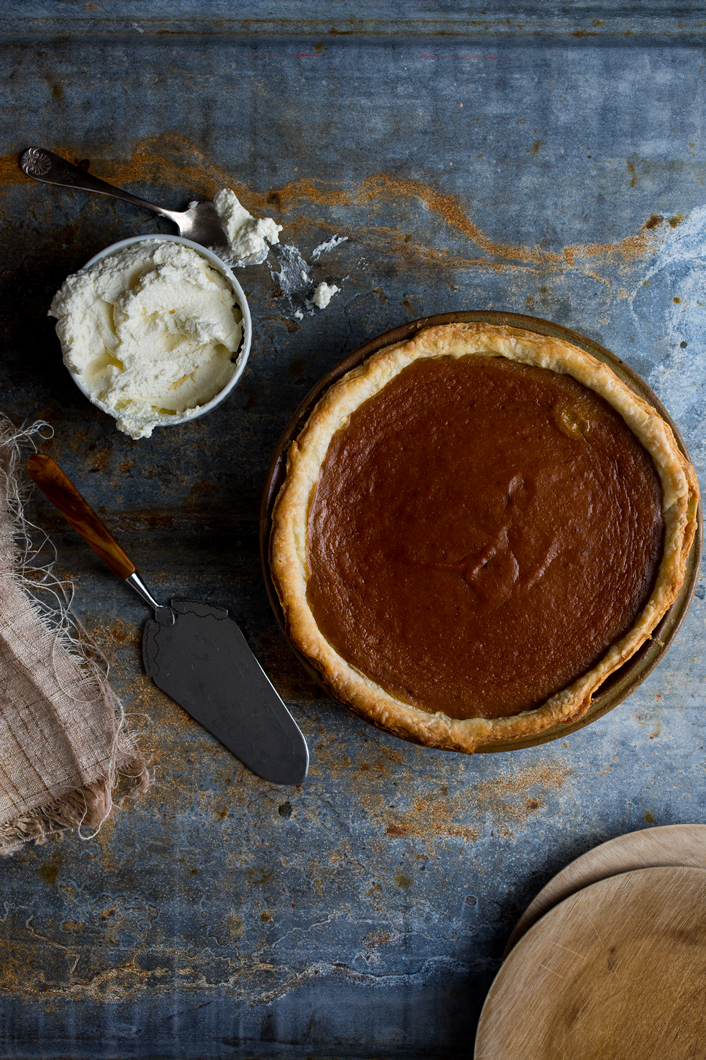
The words “pumpkin” and “pie” when placed together are pretty much synonymous with Thanksgiving, home, and family. Pumpkin pie was one of the pies my grandma made for our family every year and the aroma of it baking always brings her to my mind. She used canned pumpkin and I’m not talking about pumpkin puree that she canned herself. Nope, my grandma firmly believed that canned pumpkin from the supermarket was just fine for pie.
Back in the 90’s when I had a large garden that fed my family, I decided to grow some sugar pie pumpkins with other winter squash to see if I might get better results than the can. I was sorely disappointed when my finished puree turned out kinda … well, stringy. Canned pumpkin puree is a mix of different winter squashes that include butternut, Hubbard, and pumpkin and is smoother and sweeter. Grandma was right.
Libby’s, the brand that produces about 85% of the country’s canned “pumpkin” filling, has actually developed a certain variety of squash that they grow, package, and distribute to supermarkets across the country. Squash pie … I mean pumpkin pie for all!
Bakers tip: Fall is a great time to buy fresh spices to be ready for all your holiday baking and that first pumpkin pie of the season.
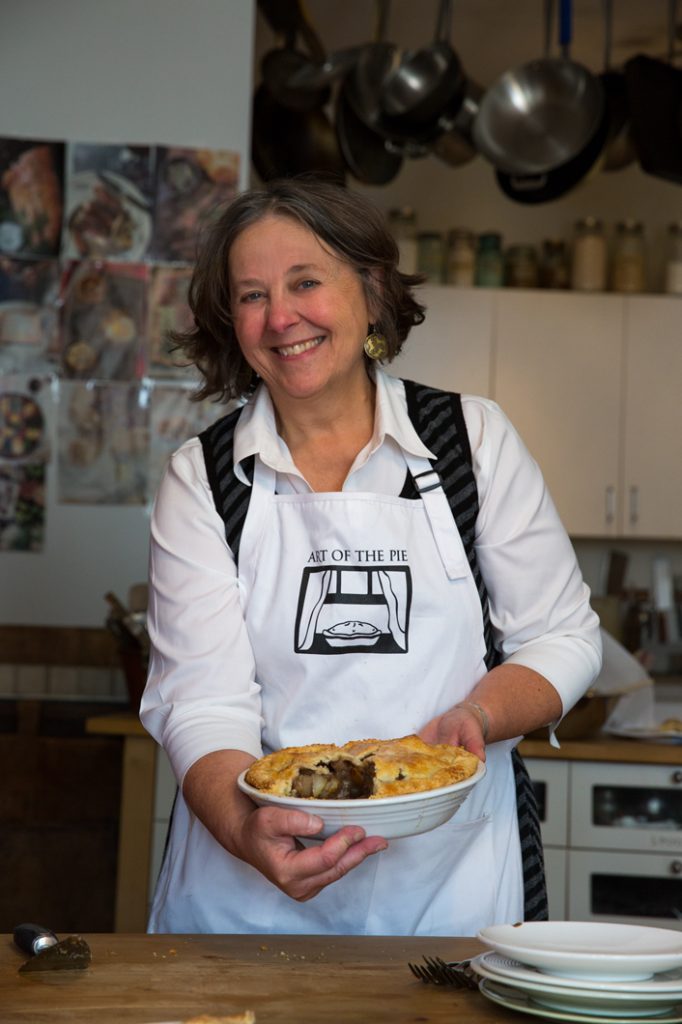
Photo Credit: © Andrew Scrivani
Kate McDermott's Pumpkin Pie
Reprinted with permission from Countryman Press, a division of W. W. Norton & Company.
This pie should have a slight jiggle in the middle, about the size of a silver dollar, when it comes out of the oven. It will “set up” as it cools.
Ingredients
- 1 recipe single crust pie dough *
- 3 eggs, lightly beaten
- 1 (15 oz) can (about 2 cups or 425 grams) pumpkin puree
- 1 cup canned lite coconut milk or evaporated milk
- 3/4 cup (150 grams) sugar (equal parts white and packed brown sugar)
- 1/2 teaspoon (3 grams) salt
- 1 teaspoon (2 grams) cinnamon
- 1 teaspoon (2 grams) ginger
- 1/4 teaspoon (.25 gram) freshly ground nutmeg
- A tiny pinch of ground cloves
Instructions
- Preheat the oven to 425°F (220°C).
- Roll out a pie shell and place it in a pie pan. Trim excess dough from the edges and crimp.
- Whisk the eggs in a medium bowl until they are light-colored and fluffy. Stir in the pumpkin, coconut milk, sugar, salt, cinnamon, ginger, nutmeg and clove until the ingredients are thoroughly mixed.
- Pour the filling into the pan. Place the pie in the oven and turn down immediately to 375°F. Bake for approximately 50 minutes.
- Remove the pie from the oven and set on a rack to cool completely.
Notes
* You can find the dough recipes here. Kate offers a variety of crusts including a gluten-free crust!
Nutrition Information:
Yield:
8Serving Size:
1Amount Per Serving: Calories: 179Total Fat: 11gSaturated Fat: 5gTrans Fat: 0gUnsaturated Fat: 5gCholesterol: 71mgSodium: 150mgCarbohydrates: 15gFiber: 1gSugar: 0gProtein: 4g
The nutritional information for recipes on this site is calculated by online tools and is merely an estimate.
Keep in touch with Kate on Social Media: Pinterest | Facebook | Instagram | Twitter | Google+ | Tumbler
To get inspired by Andrew Scrivani’s always stunning perspective of the world through his camera lens, make sure you visit his website and follow his work in magazines, cookbooks, and for The New York Times!
Keep in touch with Andrew on Social Media: Facebook | Instagram | Twitter | Pinterest
While I am taking care of my husband after his stroke, some of my friends have generously offered to help me out with the blog. Thanks for understanding and have fun discovering these incredibly talented food writers and recipe developers. Enjoy!
Create a New Tradition Today!
Welcome! The suggestions here are not intended as dietary advice or as a substitute for consulting a dietician, physician, or other medical professional. Please see the Disclaimers/Privacy Policy page for additional details. Unauthorized use, distribution, and/or duplication of proprietary material from The Heritage Cook without prior approval is prohibited. If you have any questions or would like permission, please contact me. We participate in the Amazon Services LLC Associates Program, an affiliate advertising program designed to provide a means for sites to earn advertising fees by advertising and linking to amazon.com. As an Amazon Associate, I earn a small amount from qualifying purchases without any additional cost to you. This page may contain affiliate links.