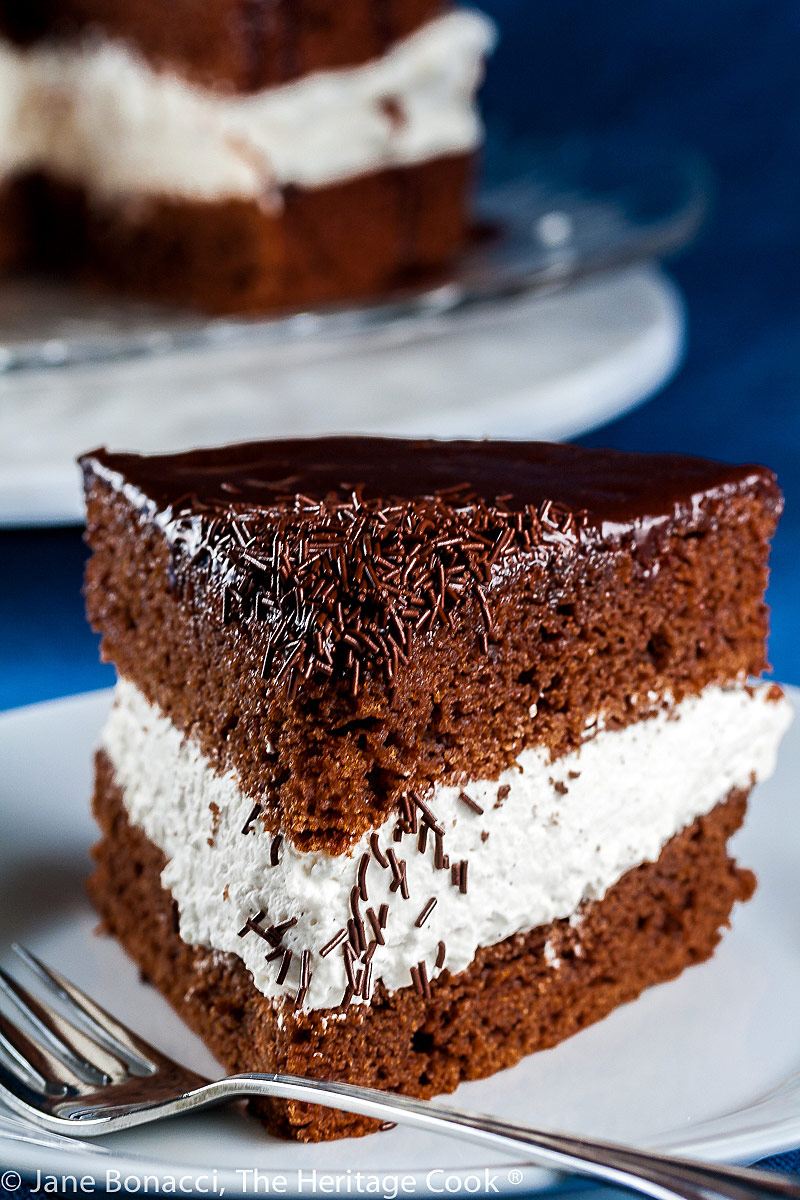
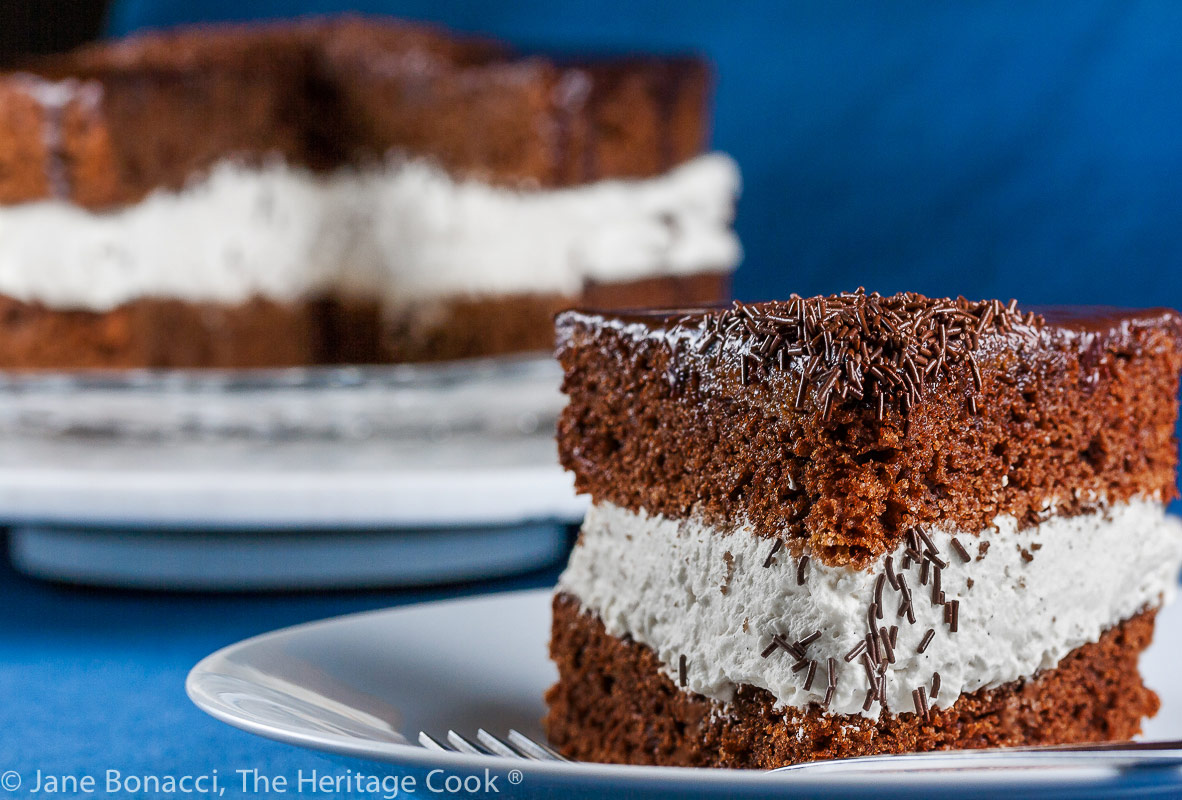
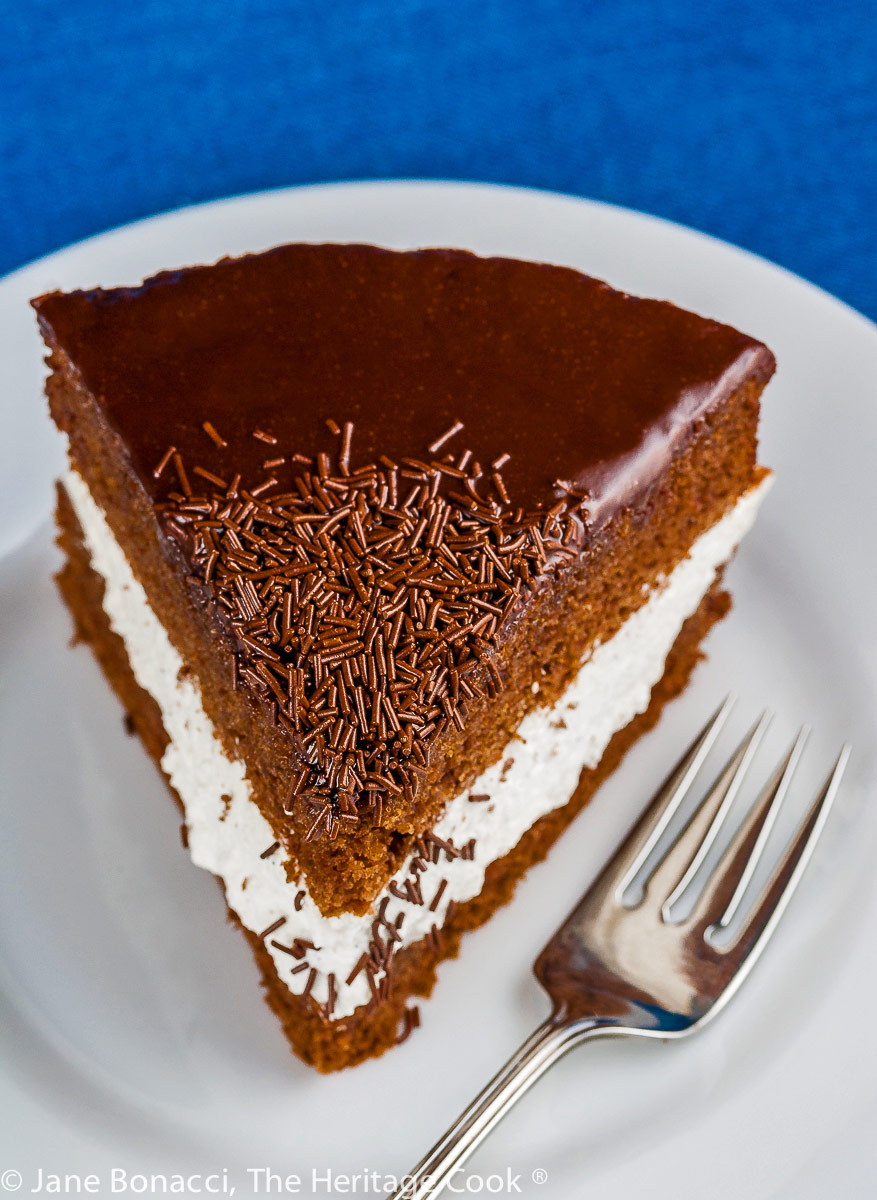
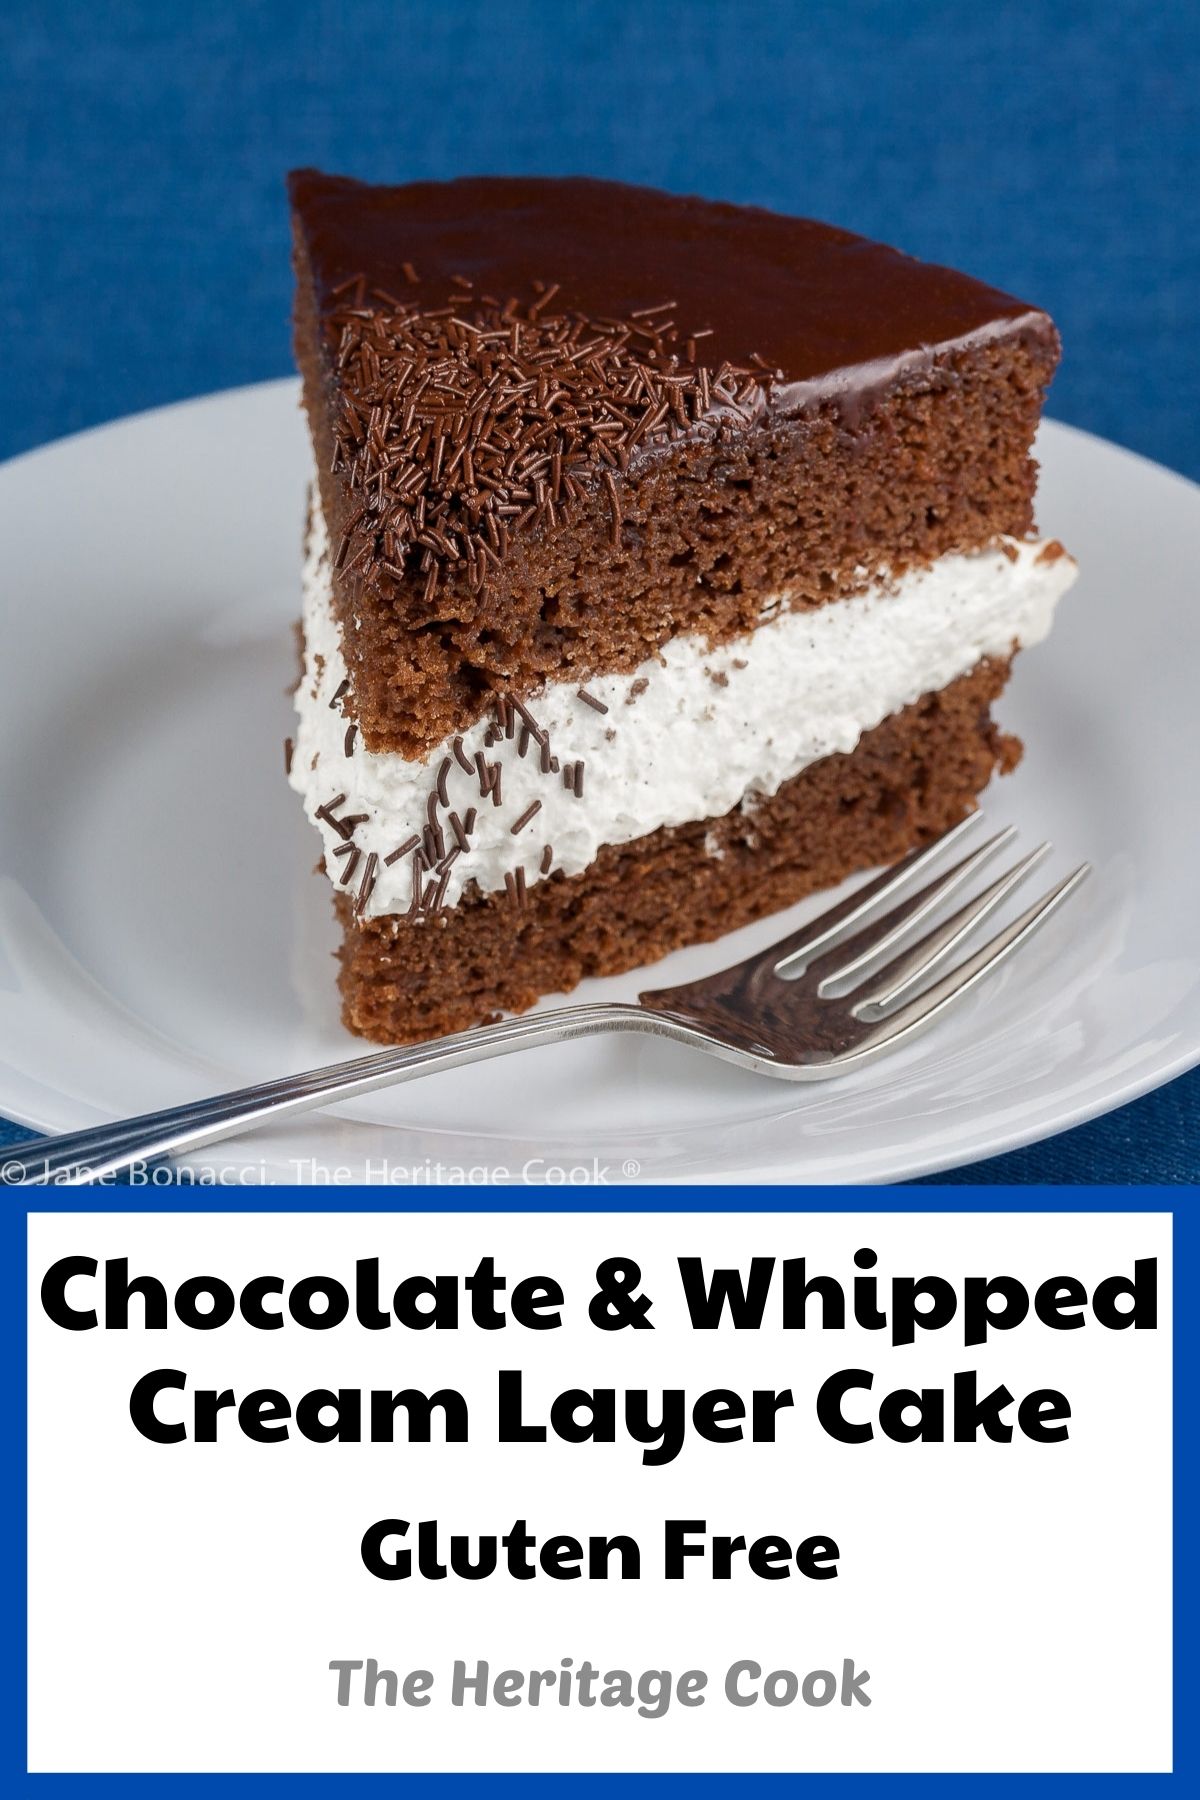
Chocolate layer cakes are what we dreamed of as kids and what we try to create, sometimes with limited success, as adults. Today’s Chocolate and Whipped Cream Layer Cake is a delightful way to celebrate any occasion. Light and airy sweetened whipped cream filling a luscious chocolate cake is the thing that dreams are made of!
Layer cakes have always been a bit of a nemesis for me and it is the one type of cake that most people ask me to make for them. Aarrgghh!
I have relatively good success when I am baking them at my own home, but when I have to take them to a party, something always happens. The layers come out lopsided setting me up for challenges, the frosting gets messed up, or heaven help me, the top layer slides off completely. It took me too many years to finally figure out that rather than assemble them ahead of time, if at all possible, take the components with me and assemble them onsite. Please learn from my mistakes and make it a lot easier on yourself!
Today’s Chocolate and Whipped Cream Layer Cake is absolutely lovely. I used my 8-inch cake pans. I wound up with layers that baked up perfectly flat. What a treat! There was no need to shave them. I think they would be even better when baked in smaller pans, thicker and moister. So, if you have multiple 6 or 7-inch pans, you can try those too. Smaller cakes are so adorable!
The Artist doesn’t really care for sweet desserts, so he was thrilled when I told him the filling was a simple whipped cream and not a heavy buttercream loaded with sugar. And when I told him that the cake was being covered with chocolate ganache, he nearly jumped up and down with delight. He planned what he would eat for dinner around dessert, choosing something lightweight so he could have more cake!
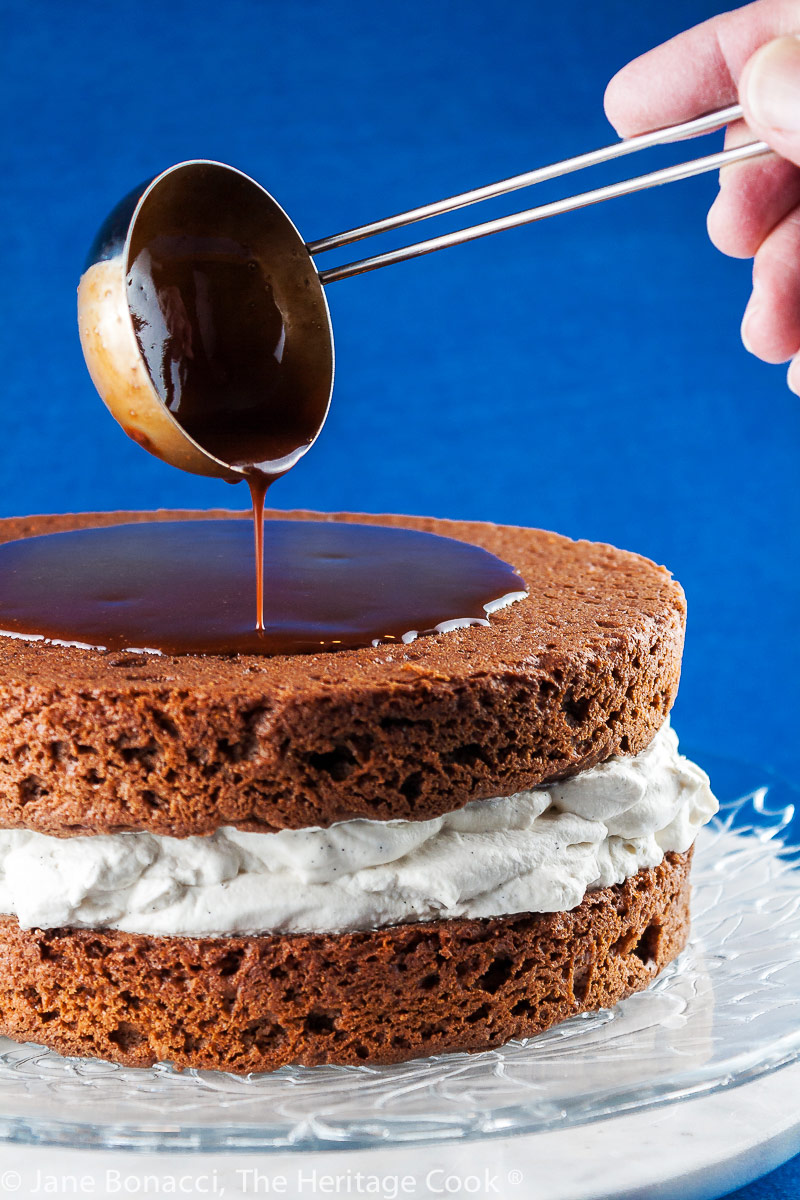
And he was more than happy to pour the ganache for the photographs because that meant he could help clean up the leftovers (read lick the bowl)!
Did you know that a cup of flour isn’t always the same? The volumes are remarkably variable when you consider all the different ways you can get the flour into the cup. Whether it has been whisked or lightened first. Whether it has been scooped directly into the cup using the cup itself or whether you scooped the flour with a spoon and poured it into the cup. Did you sift it first and then carefully pour it into the cup? Did you shake it to level the top or did you use a knife and scrape it across the top of the cup? You can see that no matter how careful we are, the results are bound to differ each time we measure.
Here is some great information on why measuring techniques differ and the benefits of using a scale. See, it isn’t just me! In addition to the variables in measuring, flour absorbs moisture from the air in our homes. It is heavier on wet or humid days and if you don’t weigh it, you will always have too much flour in your recipes on those days.
If you bake a lot, especially with gluten-free, I recommend you use a kitchen scale to weigh your dry ingredients, especially the flour(s). Using the metric system (grams and kilograms) is much more accurate than our American ounces and pounds. 1 ounce equals just over 28 grams … using grams automatically makes your measuring much more accurate.
Kitchen scales are quite reasonably priced and take all the guesswork out of measuring. and there are many online conversion sites that help you adjust any recipes you want. Now that I’ve converted to using a kitchen scale, I can’t imagine how I baked without one. I love that every single time I make a recipe it turns out exactly the way I expect it to! It is a miracle LOL.
The next time you are looking for an elegant, show stopping cake for a party or special occasion, look no further – this Chocolate and Whipped Cream Layer Cake is the dessert for you, it’s a winner!!
Did you enjoy this recipe? Let me know in the comments, I love hearing from you!
Key Ingredients for Chocolate and Whipped Cream Layer Cake:
- Self-rising flour, baking powder, cocoa powder, butter, sugar
- Eggs, milk, vanilla, dark chocolate, whipping cream,
- Powdered sugar, optional toppings/decorations
PRO Tip – How to Make Self-Rising Flour:
Self-rising flour is one of those ingredients that is often found in southern kitchens, but most of the rest of us rarely keep it on hand. Whenever I have a recipe that calls for it, I just whip up this concoction. I make as much as the recipe calls for, or as close as I can get to it and add a little extra AP flour if needed. And because I bake gluten-free I use my GF blend in place of the AP flour. Here is the recipe…
Whisk together:
2 cups (240 g) all-purpose flour or GF flour blend (see Note)
3 tsp baking powder
1 tsp salt
How to make Chocolate and Whipped Cream Layer Cake:
- Make the Cake: Butter two 8-inch round cake pans; whisk together the self-rising flour, baking powder, and cocoa until blended
- Cream the butter and sugar until smooth and lightened in color, then add the eggs, milk, and vanilla, beating until smooth; add the dry ingredients in two additions, beating after each addition until creamy and smooth
- Scrape the bowl and beater, mixing in any unincorporated ingredients; divide batter evenly between buttered cake pans; bake 15 to 20 minutes until cakes pull away from the sides of the pans and a toothpick comes out with a few moist crumbs
- Cool in the pans for 5 minutes, then turn them out on a wire rack to cool completely
- Prepare the Ganache: In a heatproof bowl set over a saucepan with 2-inches of water in the bottom, bring to a simmer then add the butter and chocolate to the bowl; stir together until fully melted, smooth, and glossy, then remove the pan from the heat leaving the bowl on the pan, stir occasionally as it cools slightly
- Make the Cream Filling: Whisk the cream on your stand mixer along with the sugar, to stiff peaks, then beat in the vanilla; set aside
- Assemble the Cake: Place one cake layer on a plate or platter and pile all of the whipped cream on top of it, invert the second layer on top of the whipped cream and press gently to spread the cream to the edges making sure the top is level
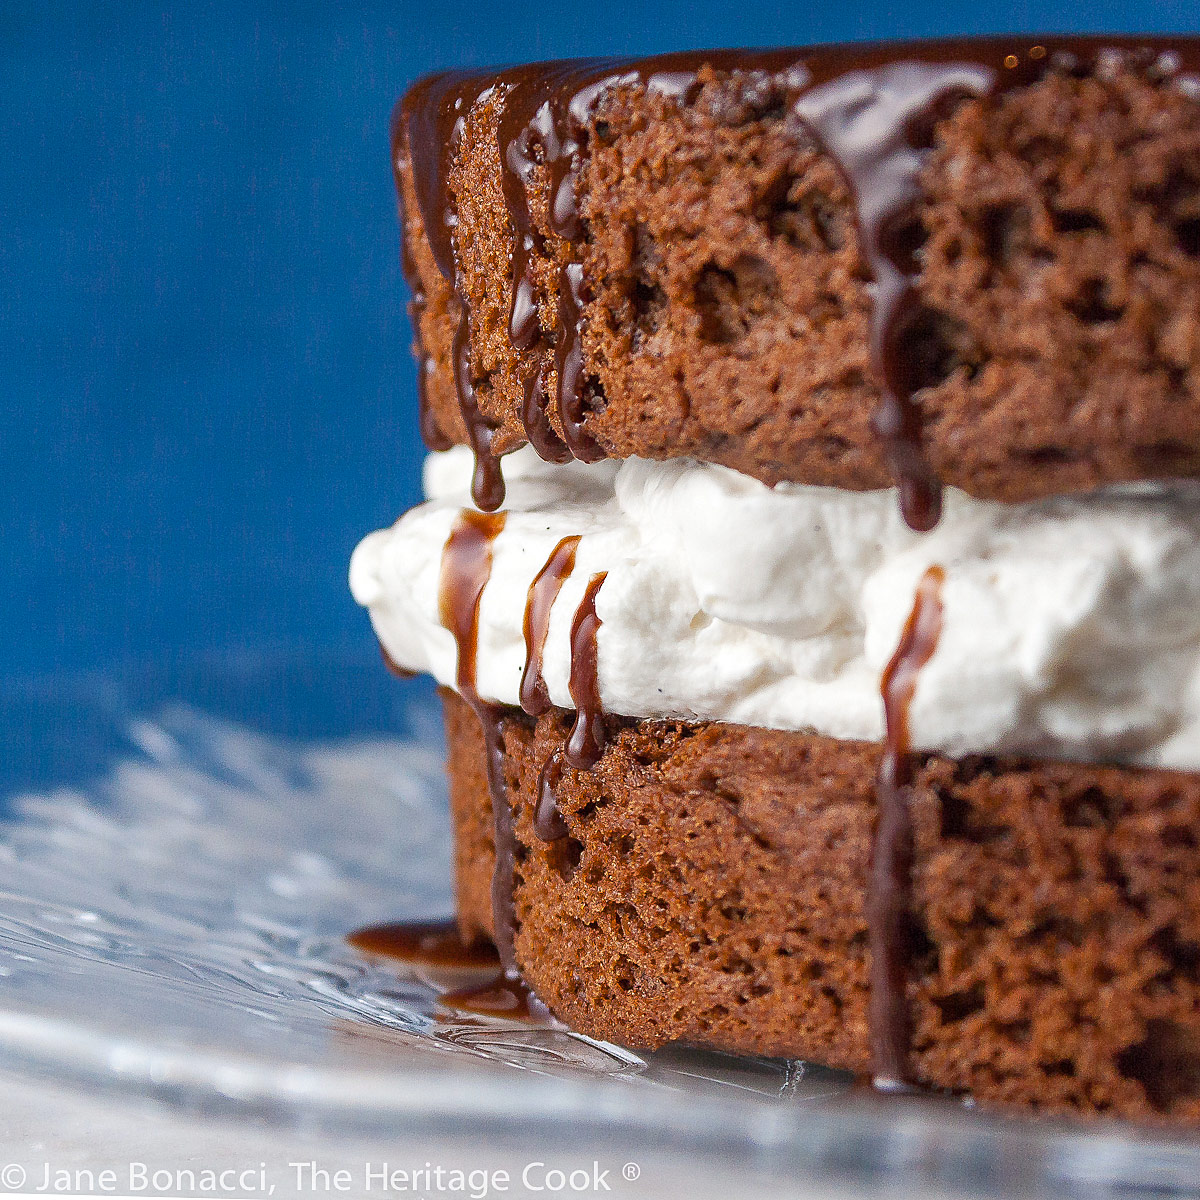
- Using a small ladle, pour the ganache in the center of the top of the cake and ease it toward the edges until the entire surface is covered and some has dripped down the edges; sprinkle with garnishes if desired and transfer the cake on the serving plate to the refrigerator to rest until the chocolate is set
- When ready to serve, use a serrated knife to carefully cut the cake using a sawing motion so the cream doesn’t squish out from between the layers; serve and enjoy
PRO Tip:
When a recipe states “or as needed” next to an ingredient, it can be frustrating if it is the first time you are making the recipe. But think back to other similar recipes you have made in the past and use your best judgment. If it is a dry weather day, add a little more milk (about 1 tbsp). If it is a hot and muggy day, you probably will not need it.
PRO Tip:
The cake needs to be refrigerated to set the chocolate. Be sure there is room on a shelf that has enough clearance for the cake.
Recommended Tools (affiliate links; no extra cost to you):
- Kitchen scale
- Mixing bowls
- 8-inch round cake pans
- Stand mixer or hand mixer
- Medium saucepan
- Small ladle
- Serrated bread knife
Gluten-Free Tips:
My standard gluten-free recipe (see link below) worked really well when used to make the self-rising flour blend. It takes just a minute to put the ingredients together. I did not have to make any other adjustments to the recipe. Make sure the chocolate you use is gluten-free as well as the baking powder.
NOTE: You can adjust any recipe to gluten-free by using 120 grams per cup of my favorite gluten-free flour blend. If you are using another brand of gluten-free flour, whisk the mix, spoon it lightly into a measuring cup until mounded, level off the top with a straight edge, and weigh the flour left in the cup. Use that weight as your standard per cup of that specific flour. Do this for each flour blend you use. Commercial blends such as Pamela’s, Bob’s Red Mill 1-to-1, or King Arthur Measure for Measure are all good choices.
Chocolate and Whipped Cream Layer Cake (Gluten-Free)
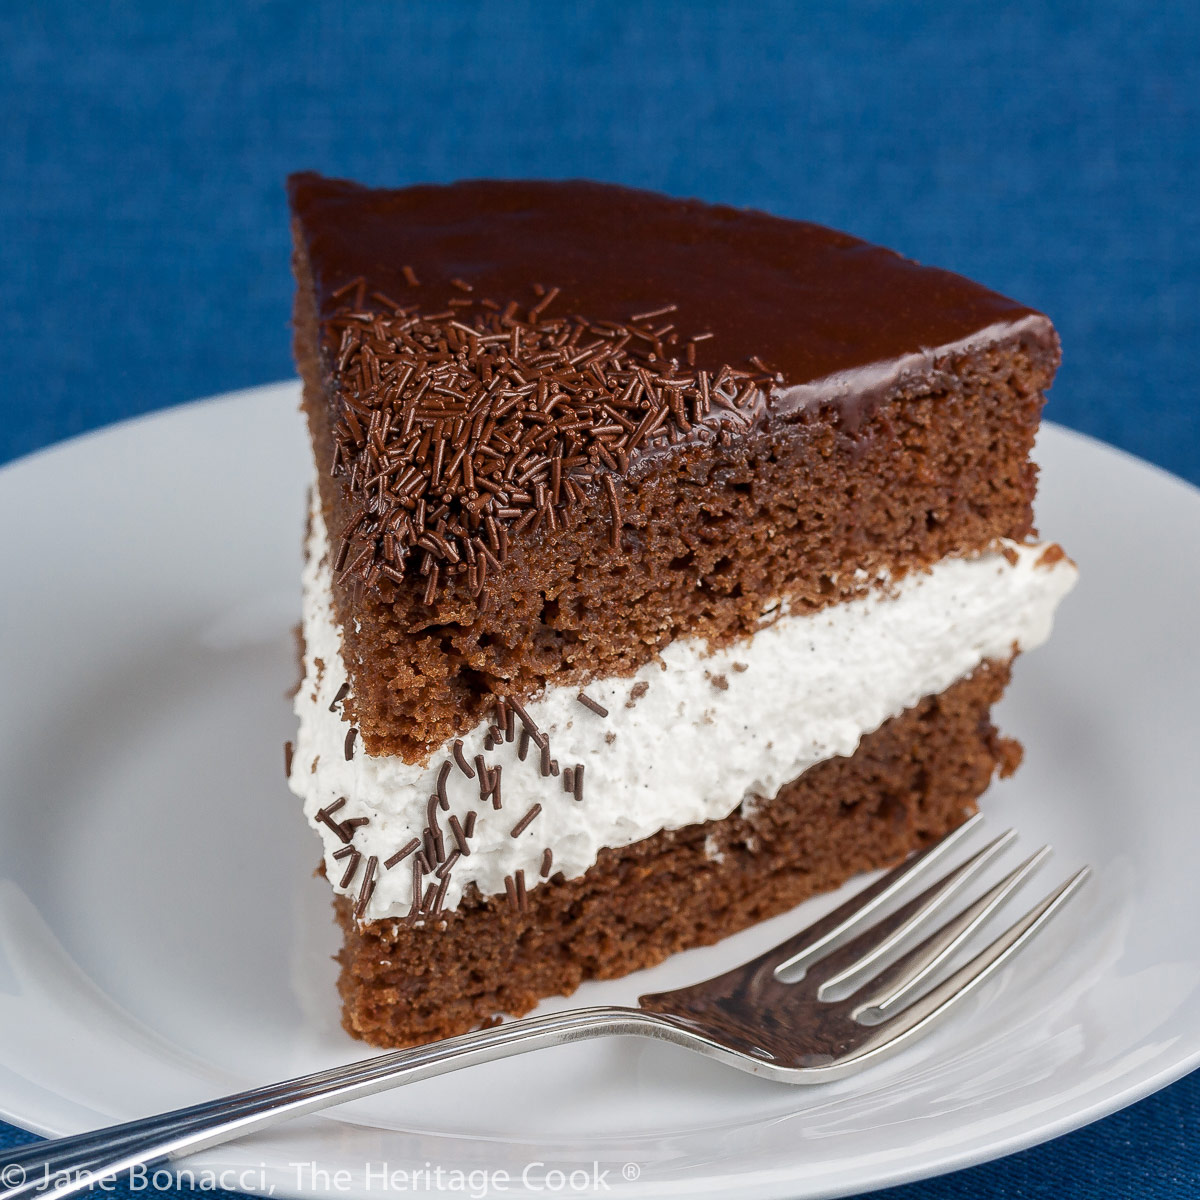
Today’s Chocolate and Whipped Cream Layer Cake is a delightful way to celebrate any occasion. Light and airy sweetened whipped cream filling a luscious chocolate cake is the thing that dreams are made of!
Ingredients
Cake
- 175 g (6 oz) self-rising flour, sifted (See Note below on how to make gluten-free self-rising flour)
- 1 tsp baking powder (in addition to what is in the flour)
- 3 tbsp cocoa powder
- 175 g (6 oz; 1-1/2 sticks) butter, at room temperature
- 175 g (6 oz) granulated sugar (slightly less than 1 cup)
- 3 large eggs
- 2 tbsp milk, plus more if needed
- 1 tsp pure vanilla
Ganache Icing
- 1 stick (113g; 4 oz) cool butter, cubed
- 3-1/2 oz dark chocolate, finely chopped
Filling
- 1-1/4 cups cold heavy whipping cream
- 3 tsp vanilla paste or pure extract
- 3 tbsp powdered sugar, or to taste
Optional Toppings
- Chocolate Jimmies, chocolate curls, shaved chocolate, sliced almonds, shredded coconut, etc.
Instructions
- Make the Cake: Set a rack in the center of the oven and preheat to 350°F. Butter 2 (8-inch) cake pans, line with a circle of parchment and butter the parchment. Set aside.
- In a medium mixing bowl, combine the self-rising flour, baking powder, and cocoa. Whisk together until blended.
- In the bowl of your standing mixer, cream together the butter and sugar until smooth and lightened in color, about 3 minutes. Add the eggs, milk, and vanilla and beat until smooth. Turn off the mixer and thoroughly scrape the bottom and sides of the bowl. Add in the dry ingredients and beat for 1 to 2 minutes until the batter is creamy and smooth. If needed, add a touch more milk to thin the batter slightly.
- Again, stop the mixer and scrape the bowl, being careful to make sure there are no unincorporated ingredients in the bottom. If there are, stir the batter until everything comes together.
- Divide mixture evenly between the prepared pans and use a small offset spatula to spread it out into an even layer. Place the pans in the hot oven on the same rack. Bake, for 15 to 20 minutes (spinning them front to back halfway through baking) or until the cakes start to pull away from the sides of the pans and a toothpick inserted in the center comes out with just a few crumbs on it. Remove pans from the oven and let cool about 5 minutes and then turn the cakes out onto a wire rack, remove the parchment, and cool completely.
- Cake layers can be baked a day in advance. Cool thoroughly and wrap tightly in plastic; store in the refrigerator. Return to room temperature before assembling the cake.
- Prepare the Ganache: Place a heatproof bowl on top of a saucepan with about 2-inches of water in it. Bring the water to a simmer over medium heat. Reduce the heat to low and place the butter cubes and chopped chocolate in the bowl. Stir with a flexible spatula, mixing the butter and chocolate together until all the chocolate is melted and the mixture is smooth and glossy. Hold the bowl with a hot pad if needed and be careful of escaping steam.
- Remove the saucepan from the heat; leave the bowl on the pan, stirring occasionally, to cool slightly.
- Make the Filling: In the bowl of your standing mixer fitted with the whisk attachment or using a hand mixer, beat the cream with the sugar to stiff peaks. Beat in the vanilla. The cream needs to be quite stiff so the layers won’t slide around as much. Set aside.
- Assemble the Cake: Place one cooled cake layer, top-side-down, on a serving plate or platter. Pile the whipped cream into the center of the cake layer. Gently place the second cake layer, top-side-down on the whipped cream and press down slightly. This will spread the cream out to the edges and help make sure the top layer is level.
- Pour the ganache in the center of the top of the cake and nudge it, if needed, with an offset spatula toward the edges, allowing it to dribble down over the sides. Make sure the entire top of the cake is covered with the ganache. You can also use the bottom of a ladle to push the ganache toward the edges - have you ever watched a pizza maker spread the pizza sauce on a crust? This is just like that only gentler. Work in concentric circles from the center out to the edges, pushing the ganache toward the edge as you move the ladle. Hard to describe, but easy to do!
- Transfer the cake on the plate or platter to the refrigerator and let rest until the chocolate is set. Pile the chocolate curls or jimmies (if using) in the center of the top of the cake.
- To Serve: Using a serrated knife, cut each slice using a sawing motion and holding the top layer in place as you cut down. Wipe the knife clean with a damp paper towel between each cut. Use a cake or pie server to slip under the slice and carefully transfer it to a plate.
- Store the cake, covered, in the refrigerator.
Recipe found at www.theheritagecook.com
NOTES:
You can adjust any recipe to gluten-free by using 120 grams per cup of my favorite gluten-free flour blend. If you are using another brand of gluten-free flour, whisk the mix, spoon it lightly into a measuring cup until mounded, level off the top with a straight edge, and weigh the flour left in the cup. Use that weight as your standard per cup of that specific flour. Do this for each flour blend you use. Commercial blends such as Pamela's, Bob's Red Mill 1-to-1, or King Arthur Measure for Measure are all good choices.
*Making Self-Rising Flour: Self-rising flour is one of those ingredients that is often found in southern kitchens, but most of the rest of us rarely keep it on hand. Whenever I have a recipe that calls for it, I just whip up this concoction. I make as much as the recipe calls for, or as close as I can get to it and add a little extra AP flour if needed. And because I bake gluten-free I used my GF blend in place of the AP flour. Here is the recipe…
Whisk together:
1 cup (120 g) all-purpose flour or GF flour blend (see Note)
1-1/2 tsp baking powder
1/2 tsp salt
Nutrition Information:
Yield:
10Serving Size:
1Amount Per Serving: Calories: 8761Total Fat: 68gSaturated Fat: 31gTrans Fat: 1gUnsaturated Fat: 27gCholesterol: 168mgSodium: 178mgCarbohydrates: 1761gFiber: 62gSugar: 92gProtein: 234g
The nutritional information for recipes on this site is calculated by online tools and is merely an estimate.
If you enjoyed this recipe, be sure to follow me on social media so you never miss a post:
Create a New Tradition Today!
Welcome! The suggestions here are not intended as dietary advice or as a substitute for consulting a dietician, physician, or other medical professional. Please see the Disclaimers/Privacy Policy page for additional details. Unauthorized use, distribution, and/or duplication of proprietary material from The Heritage Cook without prior approval is prohibited. If you have any questions or would like permission, please contact me. We participate in the Amazon Services LLC Associates Program, an affiliate advertising program designed to provide a means for sites to earn advertising fees by advertising and linking to amazon.com. As an Amazon Associate, I earn a small amount from qualifying purchases without any additional cost to you. This page may contain affiliate links. This post was first shared in Aug 2015. The article was updated in 2022.

