This week is The Artist’s birthday. Thank goodness he will finally be able to drink legally, ROFL. It’s been hectic and crazy around here while I get ready to turn in the second half of the cookbook, but we both need to take a minute to breathe, relax, and celebrate.
When he was young, his favorite cake, the one he always asked for, was a chocolate/pistachio marble bundt that him mom made with boxed cake mixes and instant pudding. His tastes have changed and he prefers my “from scratch” cakes these days. The only thing missing is the pistachio, so I think this is a pretty darn great interpretation.
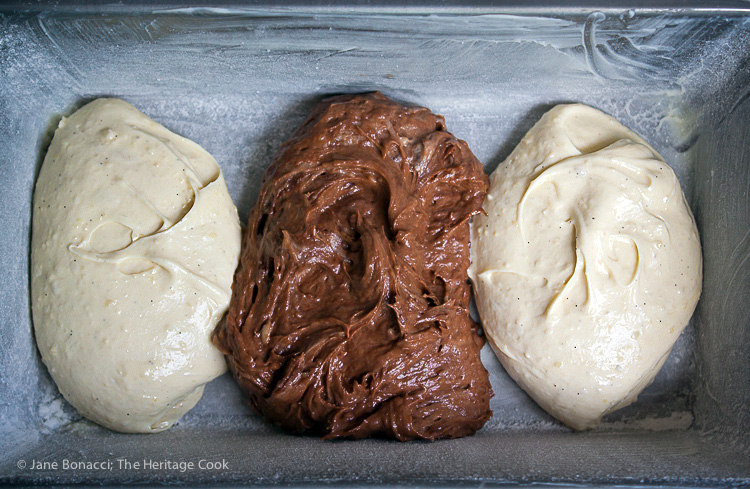
Alternating dollops of chocolate and vanilla batters
This cake is the ultimate blending of chocolate and vanilla, such a classic flavor combination. You could easily add additional flavorings if you like such as complementary alcohols, flavored oils, or spices. Some ideas that come to mind to blend with the chocolate batter would be orange, coconut, peppermint, or raspberry. All of those could be added to the “white” batter. I love recipes that give me options. You can totally customize this to please your family!
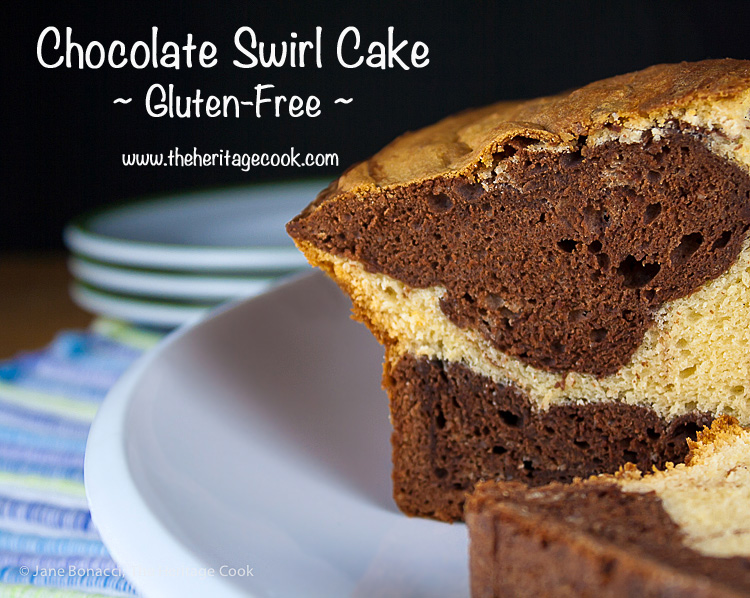
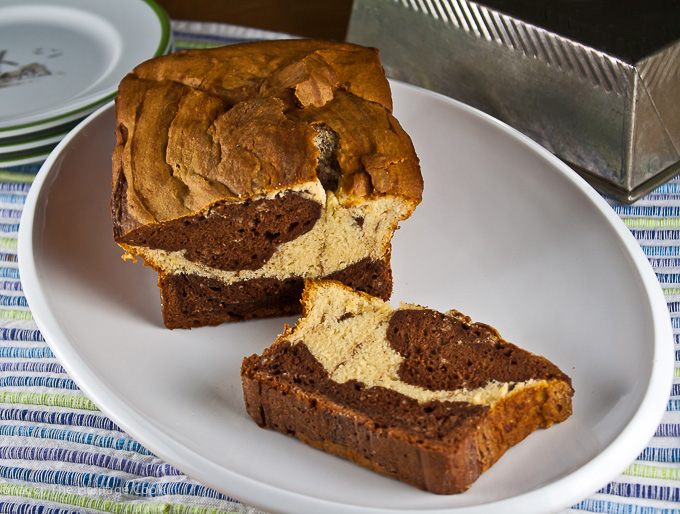
Because the chocolate batter tends to be thicker than the white chocolate batter, feel free to add a little extra milk to thin it out slightly. If the batter is too thick, you won’t get the right marbling. My chocolate batter was too heavy and I wound up with large hunks of chocolate cake instead of delicate marbling. It still tasted fantastic, but I would have liked a more ‘artistic’ look to my slices. It probably would have benefitted from a little more vigorous dragging of the knife through the batter, but The Artist certainly didn’t complain, LOL!
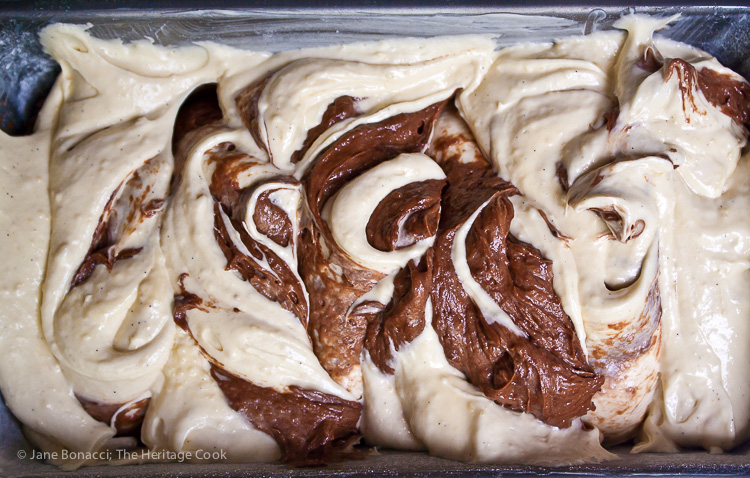
Two batters swirled before baking
One of the most fun aspects of making a marbled cake is not knowing what it will look like until you make the first slice. As you can see in the photos, from the top the batter looks like it was really well blended. But obviously the heavier chocolate batter didn’t mix with the white chocolate batter as well as I would have liked.
I used Scharffen-Berger semisweet block chocolate and unsweetened cocoa to get a nice, rich chocolate flavor for the dark batter. And Guittard’s white chocolate (I think it is the best) and extra vanilla paste for the light batter gave it a rich and creamy with a subtle flavor.
I loved the cake and was impressed with the texture that I got with my gluten-free flour blend and almond meal. Adding almond or hazelnut meal (flour) to your baked goods in place of a portion of the flour gives you a lovely mouthfeel and richness. The nuts lend their own oils to baked goods and really make a big difference. If you are a gluten-free baker, add some to your next sweet dessert and see what you think. You may fall in love the same as I have!
This cake travels beautifully and would make a lovely hostess gift or something to take to someone who is having a party. Also, it is easy to convert to gluten-free for those who cannot eat wheat products and no one would even know or care that it was gluten-free.
You may have noticed that the name of this cake matches the milk shake I shared last week. I thought it would be fun to serve them together and get a double dose of chocolate, vanilla, with ice cream alongside a big slice of the cake. I can’t think of a better way to celebrate a birthday!
Happy Birthday to The Artist ~ thank you being such a wonderful partner in life! And Happy Chocolate Monday my friends!
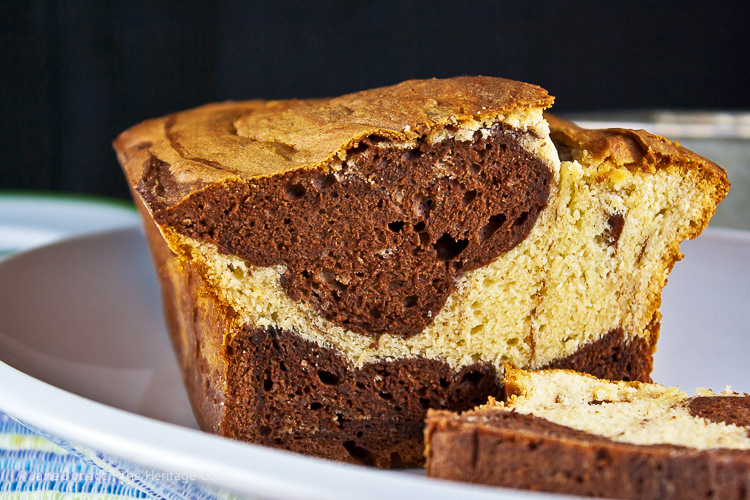
Swirls of chocolate and vanilla make this cake as much fun to slice as it is to eat!
Jane’s Tips and Hints:
When you are swirling the dough, don’t over-do it. I took a class once from Nick Malgieri, one of the country’s greatest bakers and teachers, and that day he make a marble cake. He makes only two sweeps, in opposite directions, through the two batters to blend them! I can never stop at just two, but I try to control myself. And remember, by layering the batters in alternating colors, the cake is already marbled naturally – you’re just adding a little pizazz. 🙂
Gluten-Free Tips:
Use a gluten-free flour blend such as the one I use found here. This recipe adapts beautifully following the adjustments I added to the ingredients list. Make sure that you use gluten-free flour to dust your baking pan and not regular flour!
- Cake Batter
- 2 cups plus 2 tbsp all-purpose flour, plus extra for dusting
- (or 1-3/4 cups gluten-free all-purpose flour blend + 6 tbsp almond meal plus extra GF-AP flour for dusting)
- 1-1/4 tsp baking powder (1-1/2 if using GF flour)
- 1/2 tsp salt
- 4 large eggs (5 eggs if using gluten-free flours)
- 1/2 tsp pure vanilla extract
- 1-1/2 sticks (12 tbsp) unsalted butter, at room temperature
- 1 cup granulated sugar
- 1/2 cup whole milk or evaporated milk (not low-fat)
- Chocolate Batter
- 2 oz (290g) semisweet chocolate, chopped finely
- 2 tbsp butter
- 2 tbsp unsweetened cocoa powder
- A little extra milk if needed
- Vanilla Batter
- 3 oz white chocolate, chopped
- 1 tbsp butter
- 2 tsp vanilla bean paste or vanilla extract
- Place a rack in center of the oven and preheat to 325°F. Butter and flour (use GF flour if needed) a 9x5x2-1/2 or 10x5x2-1/2 inch loaf pan. Place the pan on an insulated baking sheet or on two double-panned regular baking sheets (one set inside the other). Double-panning helps insulate the cake creating a more even baking environment.
- In a medium bowl, whisk together the flour, baking powder and salt. Set aside. Break the eggs into a small bowl and add the vanilla; set aside.
- In your stand mixer fitted with the paddle attachment (or a hand mixer and a large bowl) beat the butter on medium speed until smooth, fluffy and lightened in color, about 3 minutes. Add the sugar and beat for another 2 to 3 minutes until smooth and creamy.
- While the butter and sugar are creaming, melt the two chocolates. Place the chocolate ingredients in two small heatproof bowls, chocolate in one, white chocolate in the other, and set your microwave to half-power. Heat each one individually in 30-second bursts, stirring to help the chocolates melt more evenly.
- Add the eggs to the creamed butter and sugar, one at a time, beating well after each addition. Don't be concerned if the batter looks curdled, this is normal and will disappear when you add the dry ingredients. Reduce the mixer speed to low and alternately add the flour mixture and the milk, beginning and ending with the dry ingredients, mixing just until each addition is incorporated.
- Transfer half the batter to the bowl that held the dry ingredients. Stir and fold the melted dark chocolate mixture into this bowl, making sure that you are getting the batter from the bottom of the bowl to the top. Continue stirring and folding until the batter is smooth and evenly combined. Set aside.
- Add the white chocolate mixture to the original batter left in the stand mixer’s bowl; beat with the mixer until smooth.
- Drop dollops of each batter into the prepared pan in a random pattern, alternating the batters. Using a table knife or long wooden skewer, drag and zigzag it the length of the pan. Wipe off the knife. Repeat, starting at the opposite end. Don’t over mix the batter or you'll lose the marbled effect and end up with a muddy-looking loaf. (Note: I was a bit too cautious and wound up with large sections of chocolate batter.)
- Bake the cake for 30 minutes and spin the pans so the front is now facing the back of the oven. Continue baking for another 30 minutes and then check it with a wooden toothpick. If it is getting too brown on top but needs more baking time, tent the top loosely with a piece of foil. The cake may need up to 30 minutes more to bake, depending on your oven, how dark your baking pan is and what additions you've made. The cake is done when a thin knife or cake tester inserted in the middle comes out clean.
- Transfer the cake pan to a rack to cool for 15 minutes and then remove it from the pan and continue to cool it (right side up) on the rack until it's room temperature.
- Yield: 6 to 8 servings
Create a New Tradition Today!
Let’s connect! If you ever need any entertaining or cooking advice, need to alter a recipe for gluten-free, or want recipe suggestions, don’t hesitate to contact me. I can also be found at the social media site links on the right. Thanks for joining the Heritage Cook Family!
Unauthorized use, distribution, and/or duplication of proprietary material from The Heritage Cook without prior approval is prohibited. This includes copying and reprinting content and photographs. If you have any questions or would like permission, I can be contacted here. Feel free to quote me, just give credit where credit is due, link to the recipe, and please send people to my website. The suggestions here are not intended as dietary advice or as a substitute for consulting a dietician, physician, or other medical professional. It is the reader’s sole responsibility to determine which foods are appropriate and safe for their family to consume. The author makes no claims regarding the presence of food allergens and disclaims all liability in connection with the use of this site. Please see the Disclaimers page for additional details.
Thank You!

