Happy Chocolate Monday everyone! In a tribute to Canada, today’s recipe for Nanaimo Bars is a favorite of people around the world but was created in the town of Nanaimo on Vancouver Island in British Columbia. Located just north of Victoria, Nanaimo is a lovely city surrounded by some of the most spectacular wilderness in the world. Nanaimo Bars have been around a long time, but in 1986 a contest was held to find the ultimate version. The winner of that contest is what I based my version on and boy is it a winner!
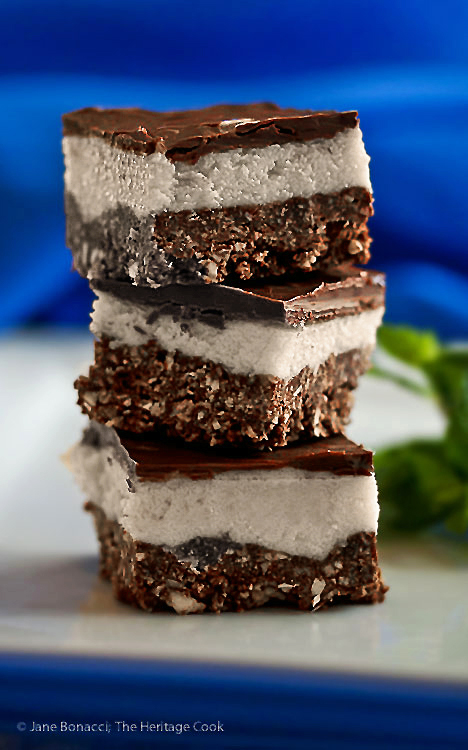
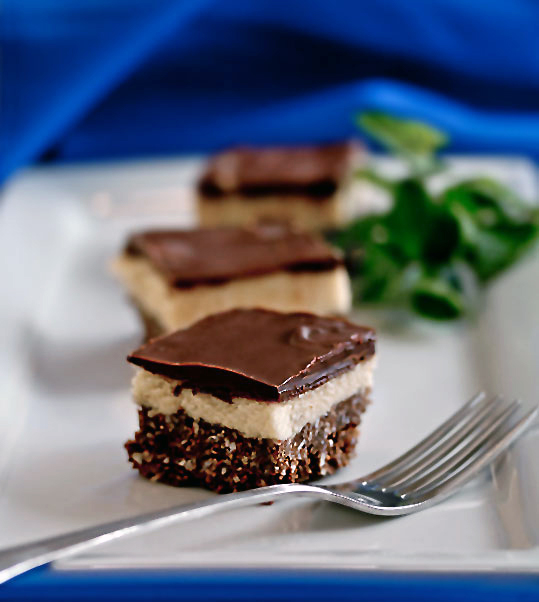
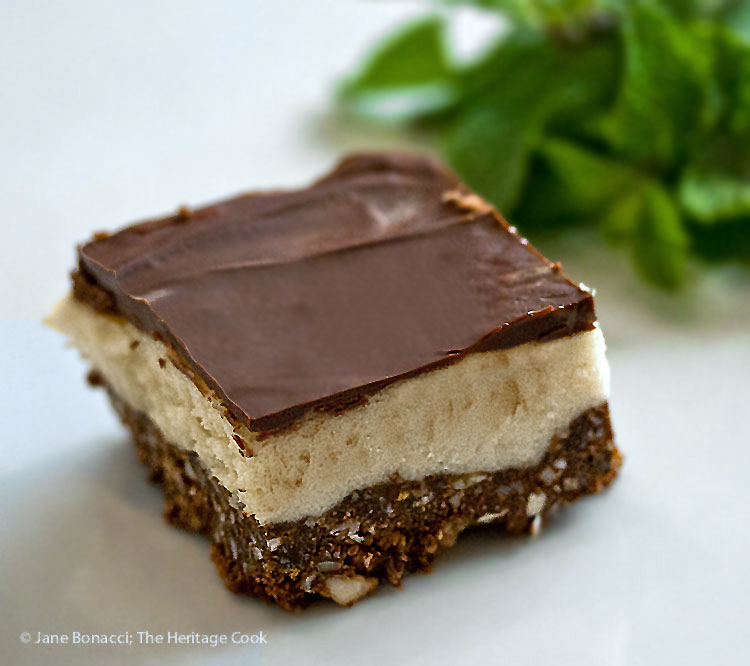
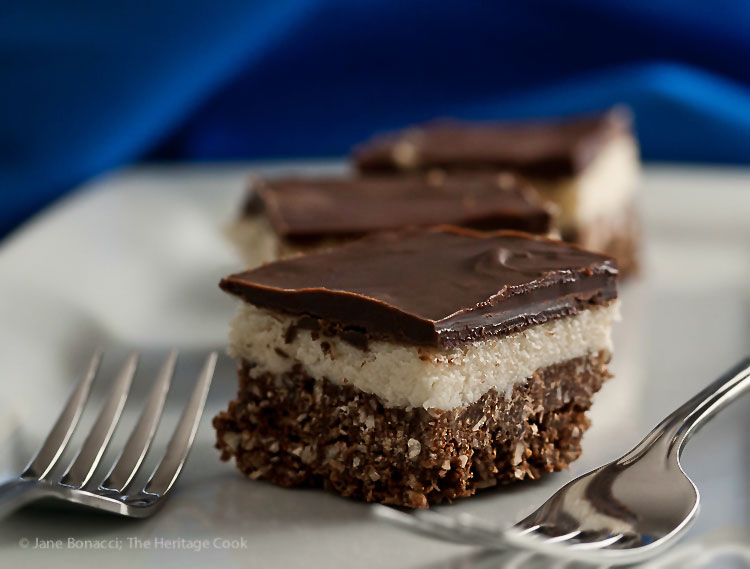
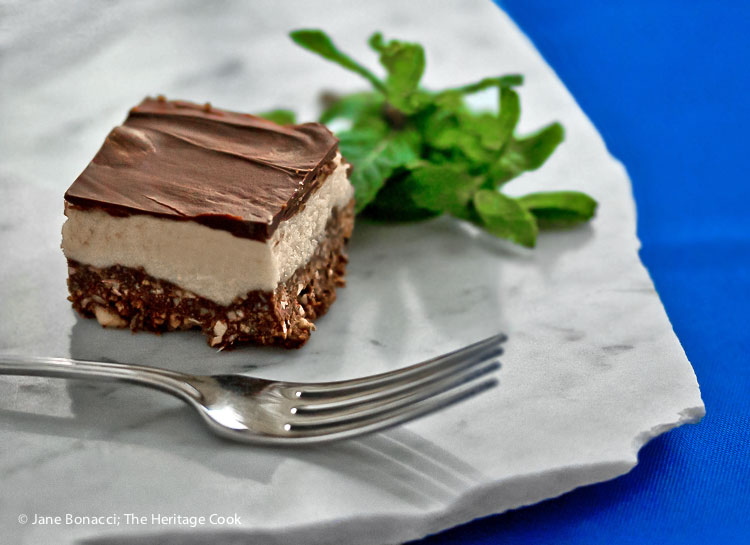
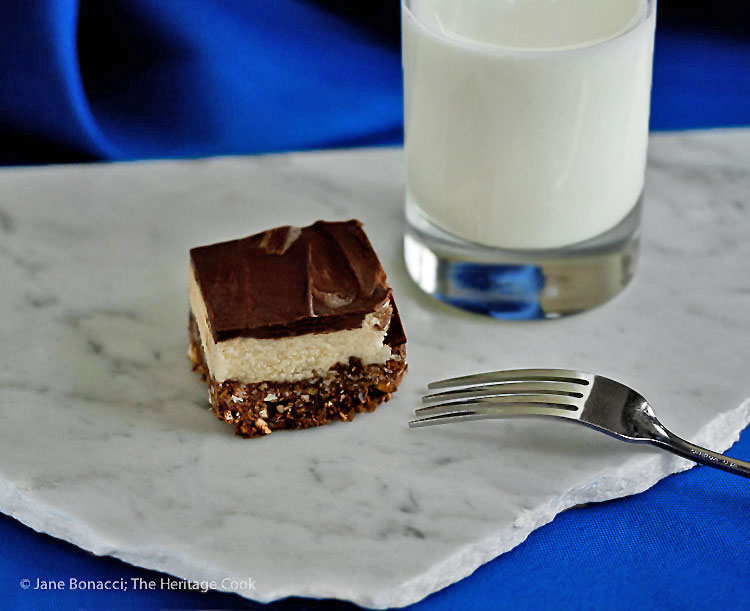
Nanaimo Bars are made of three distinct layers; the bottom is a blend of graham cracker crumbs, butter, cocoa and coconut for a crunchy texture. The middle layer is a whipped pudding/buttercream that is luxuriously creamy. And the top is a decadent covering of chocolate ganache. You wind up with a crunchy, creamy, fudgy dessert sure to please the child in all of us, especially perfect for the chocoholics in our lives.
I made a few changes to the recipe, to make them gluten-free, but it is fairly close to the original. The bottom layer calls for an egg to be beaten into the butter/cocoa mixture. But because I needed these to be safer at room temperature, I substituted molasses, which acts as a binder like an egg does. The middle layer uses a Canadian product called Bird’s Custard Powder to impart a delightful, very specific flavor. The American equivalent is instant vanilla pudding mix. I also added a bit of vanilla to boost the flavor because I am addicted to vanilla, LOL. If it is a particularly dry day (like it was when I made mine) you may need additional cream. I added an extra 1-1/2 tbsp until it was smooth and easy to spread.
The original recipe called for unsalted butter, but because The Artist doesn’t care for overly sweet desserts, I used salted butter. I also used unsweetened coconut, again to help cut back on the sweetness. I used almond meal, but you could use hazelnut meal or finely chop your favorites in a food processor, such as pecans or walnuts.
This is an easy recipe, just a bit time consuming. You have to wait for each layer to chill before adding the next. If you use a metal baking pan, it will speed up the process because it conducts temperature better than most materials.
Children would love to help pat the bottom layer into the pan. When you pour on the top layer, work quickly before the cream layer melts beneath it. If you have someone who can pour the chocolate while you spread it, it would be perfect.
There is lots of room for interpretation too. I think adding dried cherries or cranberries to the bottom layer would be delicious. You could add some orange zest for a pop of flavor. You could make the middle layer chocolate as well for the insatiable chocoholics in your life. If you want to get a bit fancier than I did, you can melt some white chocolate and use it to drizzle over the top of the ganache, either before or after cutting them.
These are extremely rich so I recommend that you cut these into small squares. Serve these for your child’s upcoming slumber party, family gathering, or potluck supper and you will be a hero!
Have a fabulous week!
Gluten-Free Tips:
You can find gluten-free graham crackers, but I find most of them are pretty gritty, so I used almond meal instead. Be sure you use a gluten-free vanilla pudding mix or, if you have trouble finding one, you can make your own version. I have a recipe for a GF version here as part of another recipe. Look toward the bottom of the page for the homemade vanilla pudding recipe.

- Bottom Layer
- 1-3/4 cups (200g) almond meal or graham cracker crumbs (for gluten-free, use GF graham crackers)
- 1 cup (130 g) unsweetened shredded or chopped coconut
- 1/2 cup (1 stick/115g) butter
- 1/4 cup (50g) granulated sugar
- 1 tbsp molasses (not blackstrap)
- Pinch kosher or fine sea salt
- 5 tbsp unsweetened cocoa powder
- 1 tsp pure vanilla extract
- Middle Layer
- 1/2 cup (1 stick/115g) butter, at room temperature
- 2 to 3 tbsp heavy cream (plus more if needed, see note)
- 1/2 tsp pure vanilla extract
- 2 tbsp vanilla custard powder such as Bird’s Custard Powder (available at Whole Foods stores or online at Amazon) or instant vanilla pudding mix (gluten-free version if needed)
- Pinch salt
- 2 cups (254g) confectioners’ sugar, sifted
- Top Layer
- 6 oz (170 g) semisweet or bittersweet chocolate, coarsely chopped
- 2 tbsp (28 g) butter
- For the easiest serving, line an 8x8-inch pan (a 9x9-inch pan will also work, the bars will just be thinner) with parchment or foil, making the pieces long enough to drape over the edges, creating “handles.”
- For Bottom Layer: Combine almond meal and coconut in a large mixing bowl; set aside.
- Melt butter in a saucepan over medium heat. Remove from the heat and stir in the sugar, molasses, salt, and cocoa. Return to the heat (medium-low) and cook, whisking constantly until smooth, 1 to 2 minutes. Remove from heat. Stir in vanilla. Pour into crumb mixture, and using a spatula, stir until evenly mixed.
- Pour into prepared baking pan and smooth to an even layer, making sure you press it into the corners. Cover pan with plastic wrap and refrigerate until firm, 30 to 60 minutes.
- For Middle Layer: Cream butter until smooth, then add cream, vanilla pudding mix, salt, and Confectioners’ sugar. Beat on low until smooth and blended, scraping bowl as needed. Increase speed to medium-high and beat until smooth and creamy, about 3 minutes, or until sugar is dissolved. If you do not beat this long enough it will be grainy. You want it to be the consistency of a thick buttercream frosting. Add a touch more of cream if needed for a spreadable consistency.
- Spread smoothly over bottom layer using an offset spatula or the back of a spoon. Cover and refrigerate until firm, about 30 minutes.
- For Top Layer: Melt chocolate and butter together in a heatproof bowl set over a saucepan with barely simmering water over low heat. Remove from heat and set aside to cool slightly (cooling isn’t needed as much if middle layer is very well chilled. (See Cook’s Note below.)
- Pour over middle layer, smooth top with an offset spatula making sure the entire surface is covered, cover and chill until chocolate has set, about 15 minutes.
- To serve, lift cooled bars out of pan (using the parchment to assist) and set on a cutting surface. If you want perfect edges, cut a thin slice off of each side. You can nibble on these pieces while saving the squares for your guests. Use a very sharp hot knife and slice into equal small squares. NOTE: Heat the knife under hot running water and wipe dry with a cloth for the cleanest cuts. The hot knife will cut right through the bars, but may leave some smears of the chocolate on the white layer. Reheat and wipe dry after each cut.
- If the chocolate top is cracking, let warm up about 5 minutes before continuing. Use a small offset spatula or knife to ease them out. Store, covered, in the refrigerator. Serve cool or at room temperature. If desired, you can drizzle some melted white chocolate in a decorative pattern over the top of the bars or on the plate before serving.
- These bars freeze very well, so make some extra and pop them into the freezer, tightly covered. The graham cracker crumbs may be kept in an airtight container for up to 2 weeks. Always store almond meal or ground almonds in the freezer.
- Yield: 16 to 25 squares (depending on size of pan you use and size of squares)
- NOTE: It is very important that the chocolate be cool but still liquid. If not, the custard layer will melt and mix with the chocolate, becoming difficult to spread. Allow the chocolate mixture to cool to room temperature but not solidify before spreading the top layer on. Chilling the layers will also help with this step.
- Variation: You can also use a round cake pan in lieu of a square one. Cut into wedges and serve as you would a piece of pie.
Create a New Tradition Today!
Let’s connect! If you ever need any entertaining or cooking advice, need to alter a recipe for gluten-free, or want recipe suggestions, don’t hesitate to email me. Thanks for joining the Heritage Cook Family!
Unauthorized use, distribution, and/or duplication of proprietary material from The Heritage Cook without prior approval is prohibited. This includes copying and reprinting content and photographs. If you have any questions or would like permission, I can be contacted here. Feel free to quote me, just give credit where credit is due, link to the recipe, and send people to my website. The suggestions here are not intended as dietary advice or as a substitute for consulting a dietician, physician, or other medical professional. It is the reader’s sole responsibility to determine which foods are appropriate and safe for their family to consume. The author makes no claims regarding the presence of food allergens and disclaims all liability in connection with the use of this site. Please see the Disclaimers page for additional details.
Thank You!


SallyBR
Never had those, but heard they are spectacular… triple layer of deliciousness!
great photos, mouthwatering….
Jane Bonacci
I hope you give them a try Sally, they are absolutely addicting – in a good way, LOL! 😉