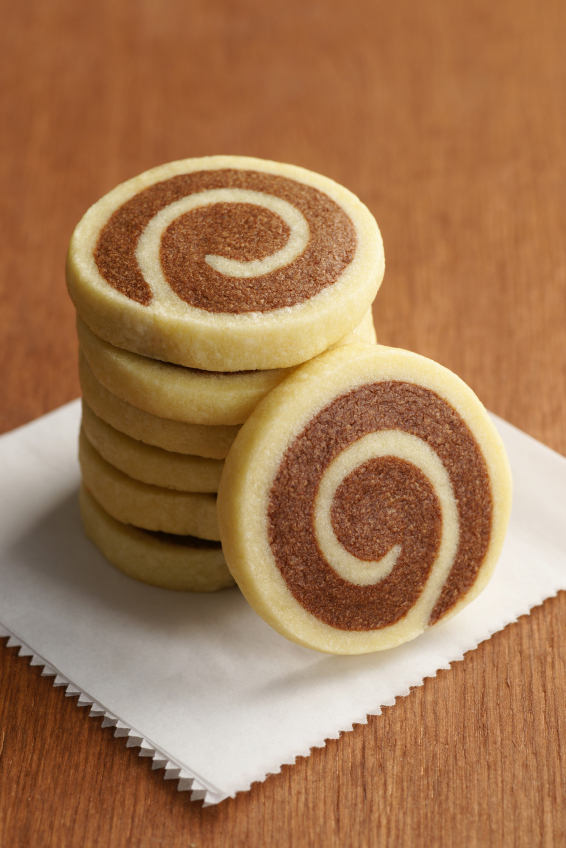
Stack of pinwheel cookies
If I were forced to choose between chocolate and vanilla, I would choose vanilla. I know this will shock you, especially since I created Chocolate Mondays, but I have always loved vanilla. When my brothers were fighting over the chocolate ice cream, I was happily enjoying my vanilla cone. But my most favorite is a combination of the two … a hot fudge sundae, classic cheesecake with chocolate sauce, or these beautiful cookies.
A few years ago our neighbor was hosting a memorial service for her father. With everything else going on, she didn’t know what to do about dessert. I volunteered to help her out and decided to make a trio of cookies, a selection of different flavors, something for everyone and the easiest to transport.
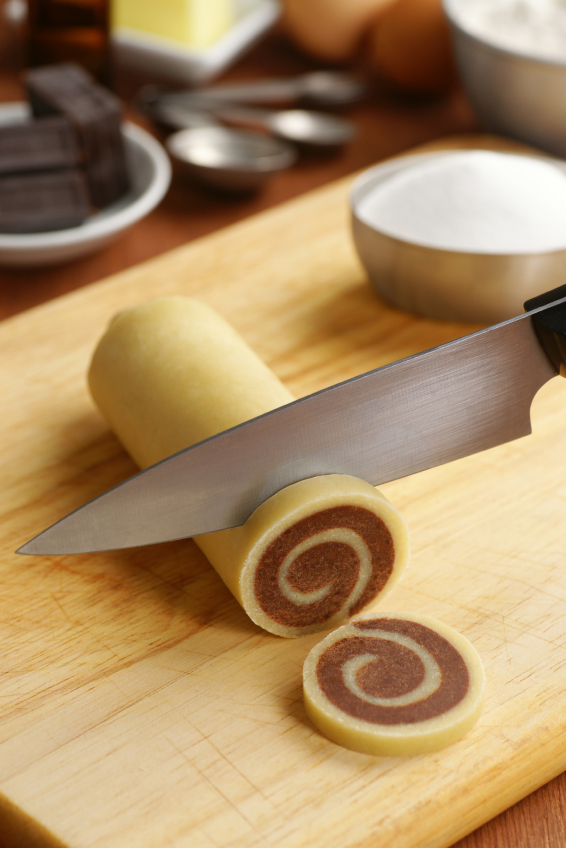
That day, because I was doing so much baking, I made the marbled version and they were beautiful. They were also really fun to make. You take the vanilla and chocolate doughs, smash them together, roll into a log and have the most delicious slice-and-bake cookies you’ve ever made. You get a little chocolate and vanilla in every bite, just right for those who have trouble making a decision 😉
If you are looking for a project to make with children, put these on your list. The kids will love combining the two doughs, seeing the patterns that emerge as you slice the logs, and watching the cookies bake in the oven. Then the best part of all, eating them!
When you have more time, try making the pinwheel version. I usually double the recipe, giving me more dough to work with. You can roll the vanilla on the outside or flip them and have the chocolate on the outside. Whichever one you choose, the “outside” flavor needs to be rolled into a rectangle a bit larger than the other. If you want, you can divide the dough into 1/3 and 2/3 so that one flavor is more dominant.
For an even more dramatic look, you can use the same dough to make checkerboard cookies. To do this form each of the doughs into rectangles about 1/3-inch thick, chill until firm, cut them into equal lengths, stack them varying the colors, and refrigerate until firm (about 2 hours). For great step-by-step directions, see this page from Fine Cooking.
You can also add different flavorings to the vanilla dough for variety. If you are making these for Halloween (or a San Francisco Giant’s party!) you can add some cinnamon, nutmeg, cloves, and orange food coloring for orange and black cookies. Piled high on a platter, they would make a beautiful centerpiece for a buffet.
At the holidays, try adding some peppermint extract to the chocolate dough and red food coloring to the vanilla. Tuck some seasonal greens around the edge of the platter and nothing could be more festive. You could even brush the vanilla portion with a little egg wash and sprinkle it with colored sugars for a little extra sparkle.
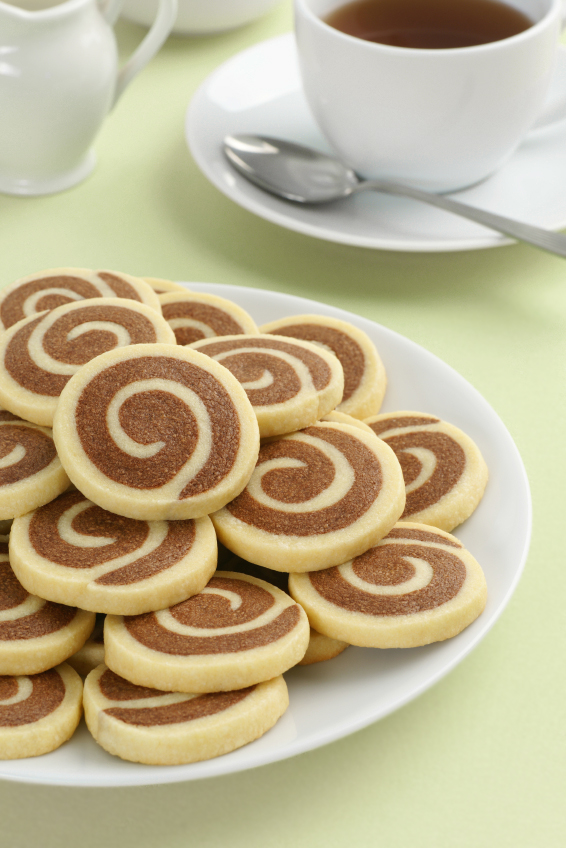
The age-old battle between chocolate and vanilla will continue as long as there are people who bake and those who enjoy their labors. But with these cookies, everyone is happy and nobody has to make a choice. I choose these cookies – how about you?
Happy Chocolate Monday!
Jane’s Tips and Hints:
One way to keep the log of dough from flattening out on one side is to lay the wrapped log in a baguette baking pan or a mailing tube. And don’t forget that you can freeze the logs and have freshly baked cookies any time you like!


- 1-1/2 cups (6-3/4 oz) all-purpose flour
- 1/2 tsp baking powder
- 1/4 tsp table salt
- 1/2 cup (4 oz) unsalted butter, softened
- 3/4 cup granulated sugar
- 1 large egg, lightly beaten
- 1 tsp pure vanilla extract
- 2 tbsp unsweetened cocoa powder
- 2 oz semisweet chocolate, melted and cooled slightly
- For Marbled Cookies: Several hours ahead or the day before baking, in a medium bowl, sift together the flour, baking powder, and salt. Set aside.
- With an electric mixer, beat the butter and sugar until light and fluffy. Beat in the egg and vanilla, scrape down the sides of the bowl, and beat again until blended. Add the flour mixture slowly, beating just until combined.
- Remove half the dough (about 9 oz) and set aside. Whisk the cocoa into the melted chocolate; add to the dough remaining in the mixing bowl. Beat briefly to blend.
- Divide the chocolate and vanilla doughs into 8 pieces each, more or less the same size. Recombine the pieces, alternately pressing the chocolate and vanilla pieces together, to create a marbled ball.
- On a lightly floured surface, roll and shape the ball into a 9-inch long log. Handle the dough as little as possible to keep the marbled pattern more distinct. Wrap in plastic and chill until very firm, 2 to 3 hours.
- To Bake: Preheat the oven to 350°F. Cover your cookie sheets with parchment paper or silpat liners.
- Unwrap the firm dough and roll the log briefly on the counter to make it more evenly round. Cut it crosswise into 1/4-inch thick slices; arrange slices 1-inch apart on prepared sheets.
- Bake until the edges are lightly browned, 9 to 11 minutes, rotating the sheets from top to bottom and front to back after 5 minutes (don’t skip this step!). Remove from oven and cool on sheets for 5 minutes then transfer to wire racks to cool completely.
- Note: The cookies can be tightly spaced as they don’t really spread. Make sure you watch them closely for browning. If you cook them too long they will taste burned, even if they aren’t. It is always easy to overcook a chocolate cookie.
- For Pinwheel Cookies: Prepare the vanilla and chocolate doughs as described above. Roll the vanilla dough out into a rectangle. Roll the chocolate dough into another rectangle slightly smaller than the vanilla. Lay the chocolate dough on top of the vanilla dough. Roll into a log starting at the long edge. Wrap in plastic and chill for 2 to 3 hours. Continue as described above.
- Yield: about 3 dozen 2-1/2-inch cookies
I love to hear from you … please leave a comment below and don’t forget to do your math before hitting Enter!
Unauthorized use, distribution, and/or duplication of proprietary material without prior approval is prohibited. If you have any questions or would like permission, I can be contacted via email: theheritagecook (at) comcast (dot) net. Feel free to quote me, just give credit where credit is due, link to the recipe, and please send people to my website, www.theheritagecook.com.
Thank You!


Pavani
Wow.. These pinwheel cookies look PERFECT. I could stare that those photos forever.. So pretty.. I wish i could make my cookie logs as round as yours. Thanks for the tip for making round logs.
aspen
i love these they are awsome .thankyou so much for sharing your resipe.ps.i am only 11 years old and me and my best friend alyssa made them all by our self
Cathy
Hi Jane!
I shared the cookies to my FB page named The Inspired Dish. I started this page so I could feature all my favourite blogs and recipes. Thanks for sharing!
Jane Bonacci, The Heritage Cook
Thank you Cathy for including me!!
Cathy
Those look so pretty! The are absolutely perfect in every way! Do you mind if I share on my FB page? They wouldn’t last more than a day around my house! (3boys)
Jane Bonacci, The Heritage Cook
Hi Cathy,
They don’t last long at our house either, LOL. I would be honored if you shared them on your FB page. You can go to my page and do a share from there. Just scroll back to May 14th and you should find it easily.
Thanks!!
Veronica
These cookies are great! Jane made them once for one of my holiday cookie exchange parties and they’re unforgettable.
Jane Bonacci, The Heritage Cook
Thanks Veronica. Those exchange parties were such fun!