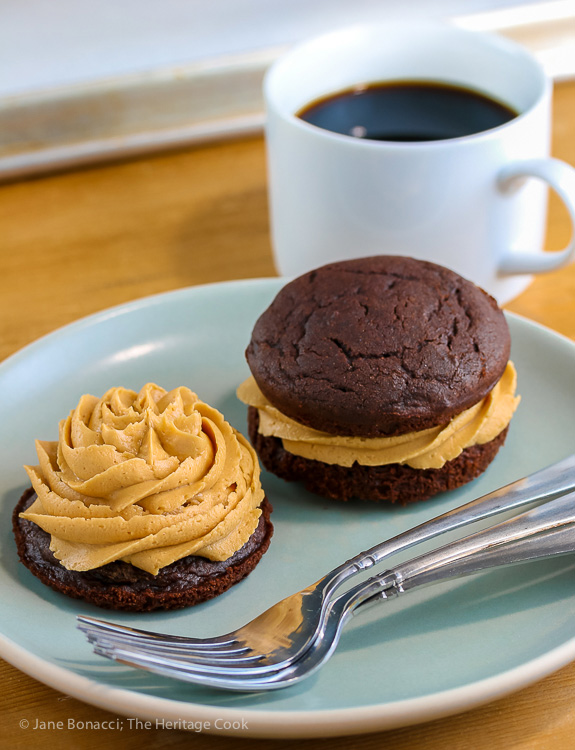
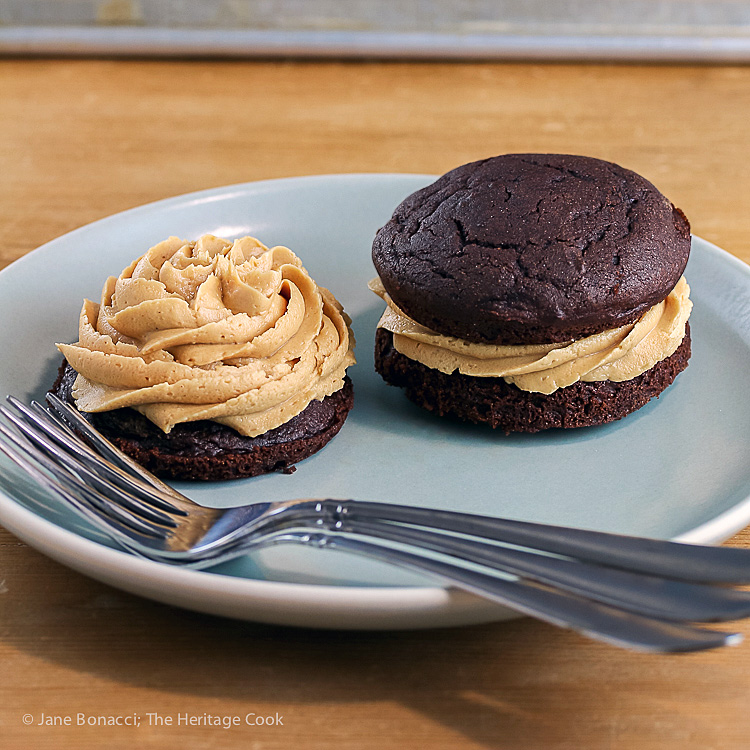
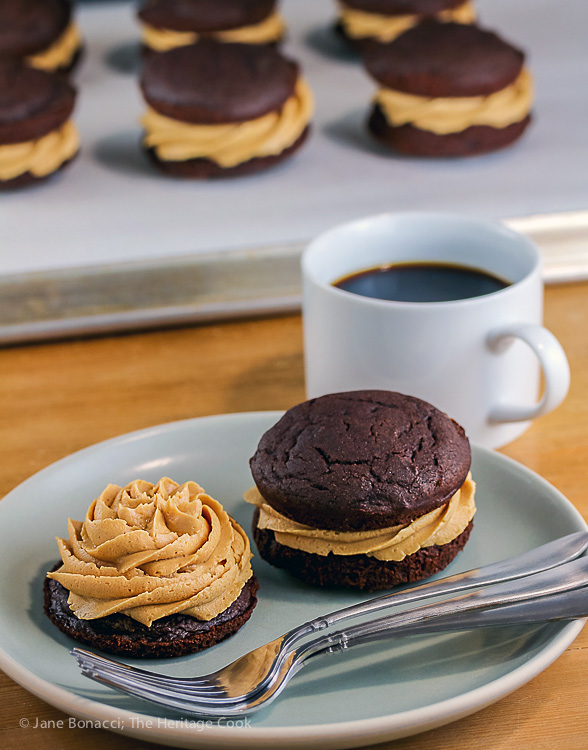
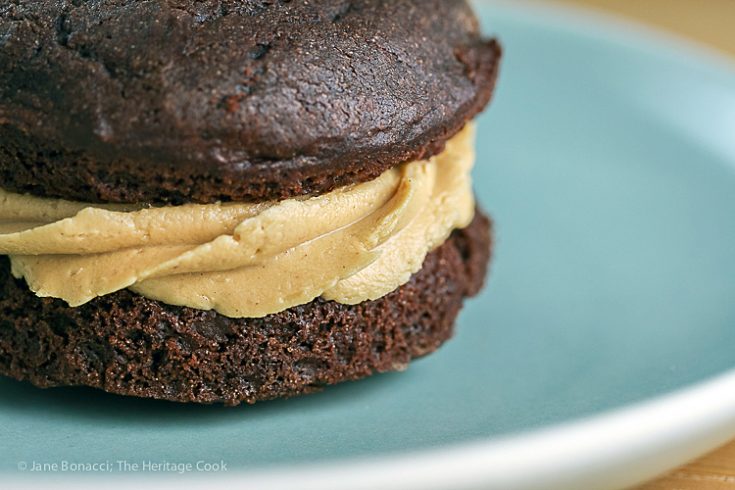
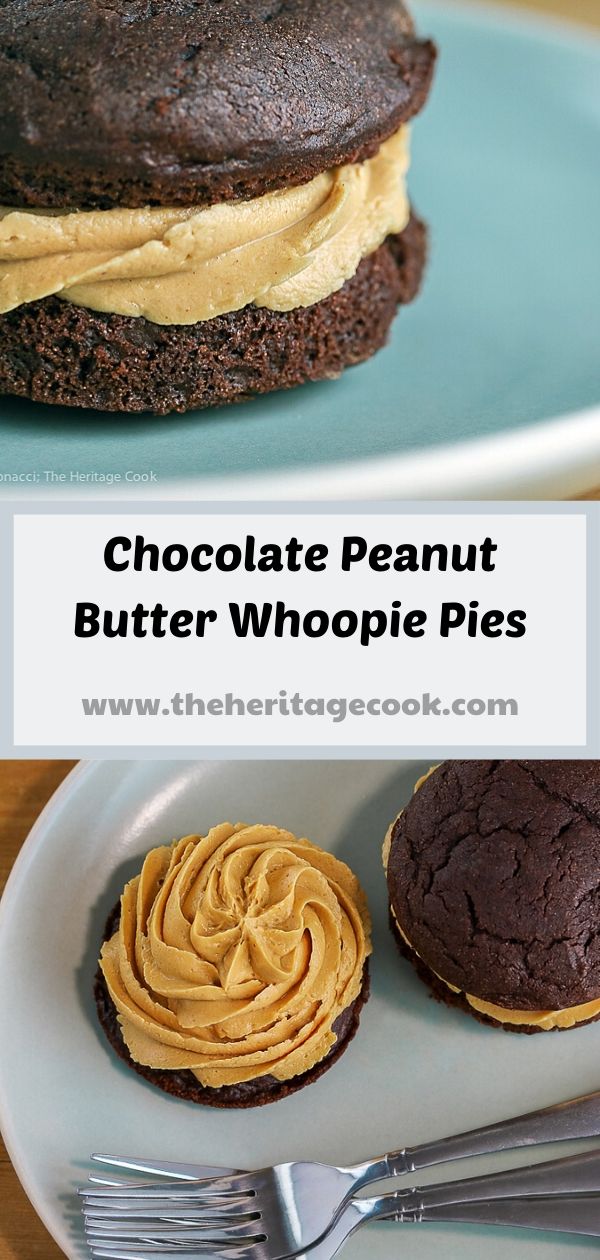
Chocolate Whoopie Pies may be one of my favorite truly American desserts. Delicate cakes sandwiched with a sweet filling in between, often marshmallow based, they are the devil to eat – you are guaranteed to get messy – but pure heaven in every bite! Today’s recipe includes a luscious peanut butter filling that can also double as a frosting if you are making a cake or cupcakes. Watch out, you can’t stop at just one!
Today’s recipe is adapted from the incomparable Dorie Greenspan. If you want a recipe that will work every single time, Dorie is your gal. I had originally planned on using a different cake recipe and a peanut butter filling I’ve made before, but once I saw that Dorie had the same flavor combination, there was no question which recipes I would be using!
The combo of chocolate and peanut butter in a whoopie pie has been on my mind for over a year but it kept getting pushed out. Today I finally get to share it with you! These are rich and indulgent, with deep dark chocolate flavor that balances the sweet and creamy peanut butter filling.
I increased the ingredients for the filling by half again, giving you plenty to be generous when piping, a trend that people love. If you want a less sweet dessert, just reduce the amount of filling you use. You can always add more later if you want!

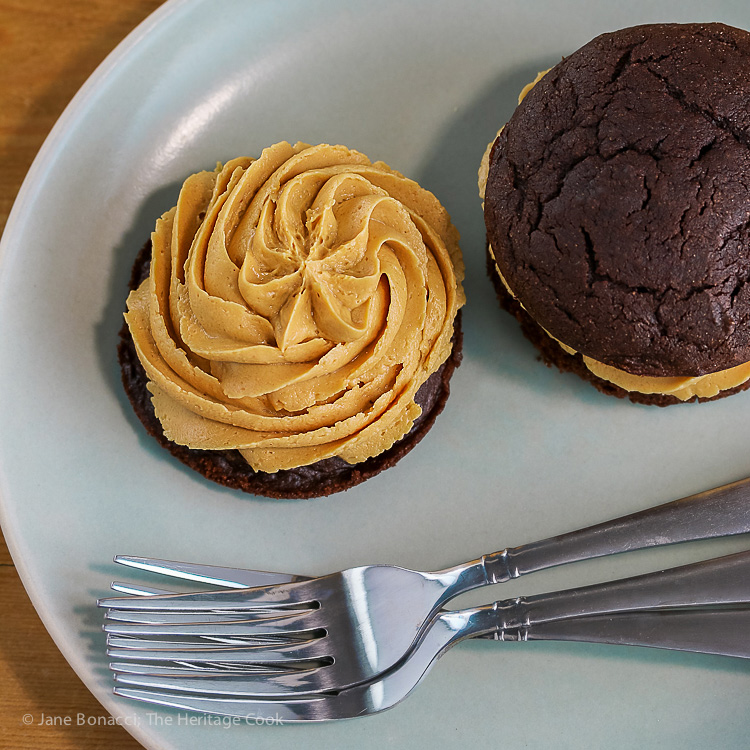
Close up of creamy peanut butter filling
I decided to use a decorative piping tip to make them more fun and as soon as I saw how pretty the filling was, I decided to make a couple of open-faced whoopies. Aren’t they beautiful and elegant! Can you imagine these beautifully piped and sprinkled with chocolate jimmies for the holidays! They would definitely be the first thing to disappear on a buffet!
Dorie’s recipe calls for pans with 24 (2-inch) depressions, similar to the size of a macaron. Most whoopie pie pans (mine included) have 12 indentations and are sold as singles. Unless you have two pans, you will have to make two batches of the cakes. I wish I had the smaller version like Dorie’s; they would make the perfect two-bite cakes that you could eat without getting frosting all over yourself!
You can make these Chocolate Whoopie Pies with the traditional marshmallow filling, flavored with vanilla or anything you like (perhaps orange?!). Virtually any buttercream frosting would also work. Change the colors to fit the holiday – how fun would it be to have purple, green, and yellow whoopie pies for Mardi Gras parties. Let your imagination go wild and I bet you come up with an intriguing, delicious flavor combo all your own!
Have a wonderful Chocolate Monday my friends ~ thanks so much for visiting!
How to make Chocolate Whoopie Pies:
- Whisk together the dry ingredients
- Beat the butter with the sugars and add the egg; beat until smooth
- Scoop batter into a whoopie pie pan
- Bake 8 to 10 minutes then cool to room temperature
- Beat the filling ingredients until soft, fluffy and smooth
- Pipe filling on the bottom of half the cakes and top with the remaining cakes to create sandwiches
- Eat and enjoy!
Is there a quick way to bring an egg to room temperature?
If you forgot to leave out an egg to warm up, you can place the whole, un-cracked eggs in a bowl. Cover with hot tap water and let sit for 5 to 10 minutes. Dry and use as directed in your recipe.
What if my child is allergic to peanuts?
You can use an alternate nut or seed butter in place of the peanut butter. Just be sure it isn’t a natural-style variety with the oil on top – the oil has to be fully blended so you don’t get a greasy texture.
PRO TIP:
Using a heavy-duty stand mixer takes all the work out of this recipe, allowing you to walk away and get other things done while it whips the filling. My KitchenAid has paid for itself at least 20 times over. Just having it for Thanksgiving alone is worth the price! If you don’t already have one, put it on your wish list and maybe you’ll get one for your birthday or during the holidays!
Key Ingredients for this Recipe
- All-purpose flour or gluten-free flour blend
- Unsweetened cocoa powder
- Baking soda, baking powder, and salt
- Unsalted butter
- White and brown sugars
- Large egg
- Vanilla and whole milk
- Creamy peanut butter
- Confectioners’ sugar
Kitchen Tools I Use to Make This Recipe
Other Chocolate Dessert Recipes You May Enjoy:
- Brigadeiros, Brazilian Chocolate Candies
- Peanut Butter Ganache Sandwich Cookies
- Pumpkin Swirl Brownies
- Chocolate Chip Muffins
- Chocolate Pumpkin Cake with Chocolate Cream Cheese Frosting
Gluten-Free Tips:
Using a gluten-free flour blend makes it easy to convert these. If you have someone who is allergic to peanuts, you can use any creamy nut butter you like. Just be sure it isn’t a “natural” version, you need the oil to be completely emulsified to avoid a greasy texture.
Chocolate Whoopie Pies with Creamy Peanut Butter Filling (Gluten-Free)
Chocolate Whoopie Pies, a classic dessert, are made even better when combined with a luscious creamy peanut butter filling. You guys are going to love these!
Ingredients
Whoopie Pies
- 2 cups (240g) all-purpose flour or gluten-free flour blend
- 1/2 cup (42g) unsweetened cocoa powder
- 1-1/4 tsp baking soda
- 1/4 tsp baking powder
- 1/2 tsp fine sea salt
- 1 stick (8 tbsp; 113g) unsalted butter, at room temperature
- 1/2 cup (100g) granulated sugar
- 1/2 cup (100g) packed brown sugar
- 1 large egg, at room temperature
- 1/2 tsp pure vanilla extract
- 1 cup (240 ml) whole milk, at room temperature
Peanut Butter Filling
- 1 stick (113 gr) unsalted butter, at room temperature
- 3/4 cup (192 gr) creamy peanut butter (not natural)
- 3/4 cup (90 gr) confectioners’ sugar
- 3/4 tsp pure vanilla extract
- 1/2 tsp fine sea salt
Instructions
Prepare the Whoopie Pies: Place a rack in the center of the oven and preheat 350°F. Butter or spray a whoopie pie pan, even if the pan is nonstick. If you don't have a whoopie pie pan, line a baking sheet with parchment paper.
In a bowl, whisk the flour, cocoa, baking soda, baking powder and salt together. Set aside.
In the bowl of your stand mixer, beat the butter on medium until soft and creamy. Add both sugars and beat until well blended. Add the egg and beat for 2 minutes. Then add in the vanilla.
Reduce the mixer speed to low and add the dry ingredients alternately with the milk, beginning and ending with the dry ingredients. Mix only until the dry ingredients are incorporated and you’ve got a thick, smooth, silky batter.
Using a spring-loaded 2 tbsp cookie scoop, place a rounded scoop in each of the whoopie molds -- no need to flatten the batter, it will spread as it bakes. If not using a form, drop rounded scoops on the parchment-lined baking sheet, being sure to leave at least 2-inches between each one. Unless you have two whoopie pans, you will have to bake the cakes in batches. Cover the leftover batter between baking the batches.
Bake for 8 to 10 minutes, or until the cakes puff and spring back when lightly pressed in the center and a toothpick comes out clean. Leave the cakes in the pan for a couple of minutes and then transfer carefully to a wire rack to cool. If you baked the cakes on parchment, slide the paper off the baking sheet onto a rack and let the cakes cool to room temperature before carefully lifting them off the paper.
Bake the remaining batter. Cool the cakes to room temperature before filling them.
Make the Filling: Working in the bowl of your stand mixer fitted with the paddle attachment, or in a medium bowl with a hand mixer, beat all the ingredients together on medium-high speed until soft, fluffy and smooth, about 3 minutes.
Fill the Whoopie Pies: Using a piping bag with a plain or star tip or a spoon, pipe a generous amount of filling on the flat side of half the cakes. Top with the other halves, flat side down, twisting the tops gently just to make certain that the pieces are “glued” together.
Storing: Best the day they’re made, the whoopee pies, without the filling, can be individually wrapped airtight and frozen for up to 2 months. Defrost in the wrapper then fill and serve as directed above.
Notes
Adapted from a recipe by the incomparable Dorie Greenspan
If you love this recipe, be sure to follow me on social media so you never miss a post:
| Facebook | Pinterest | Instagram | Twitter |
Create a New Tradition Today!
First Published: 17 Apr 2017
Last Updated: 11 Nov 2019
Welcome! The suggestions here are not intended as dietary advice or as a substitute for consulting a dietician, physician, or other medical professional. Please see the Disclaimers/Privacy Policy page for additional details. Unauthorized use, distribution, and/or duplication of proprietary material from The Heritage Cook without prior approval is prohibited. If you have any questions or would like permission, please contact me. We participate in the Amazon Services LLC Associates Program, an affiliate advertising program designed to provide a means for sites to earn advertising fees by advertising and linking to amazon.com. This page may contain affiliate links.


Diane
These took longer than 8-10 minutes to bake. More like 18 minutes.
Jane Bonacci
Hi Diane – every oven is different and our timing directions are estimates. It sounds like your oven may run cooler and take longer to bake. You may want to consider having it calibrated or use an oven thermometer to see how it compares to what you set it for.