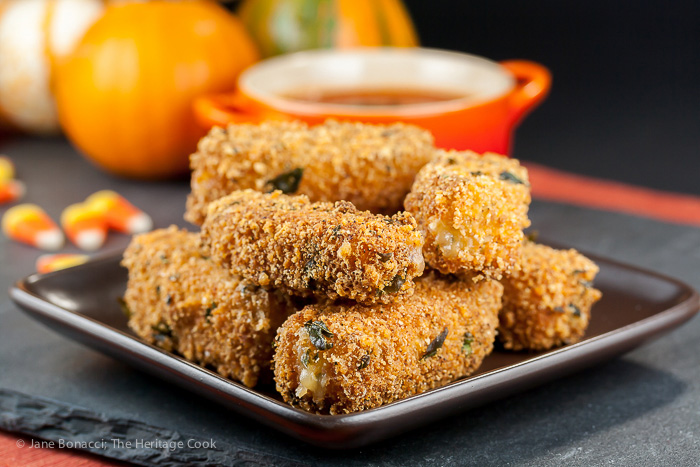
You know the cheese has melted when you see small drops coming out of the ends of the sticks
Happy Halloween everyone! Today, as part of the Food Network’s #FallFest, we are celebrating the greatest costume party in the nation. I have had a blast coming up with something fun and a little frightening to help you throw a spooky and delicious Halloween party!
When I was just starting my business career after college, I didn’t earn much money and it was always challenging to stretch the paycheck over the months. Thank God for happy hour hors d’oeuvres!
My friends and I used to buy a glass of wine and then graze our way down the food table, our version of the single girl’s dinner. Some bars had amazing buffets and they were always packed with other young professionals, looking to relax after work and grab a cheap bite to eat at the same time. Those were our favorite haunts.
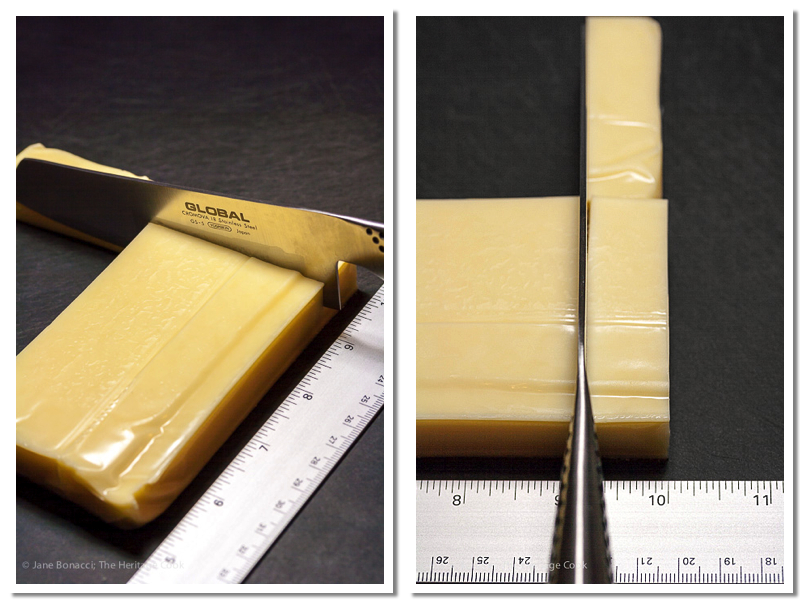
Easy cutting – measure the first one then use it as a guide for the rest
Chicken wings, potato chips, ribs, French fries, stir-fries, they were all regular menu items. But my favorite was the deep fried cheese. Indulgent and packed with protein, it was always so satisfying. Somehow greasy foods and drinking always seem to go together, LOL. Eventually I no longer needed to save money and could afford to buy myself an actual dinner. But sometimes I still crave the soul-soothing foods from those fun days.
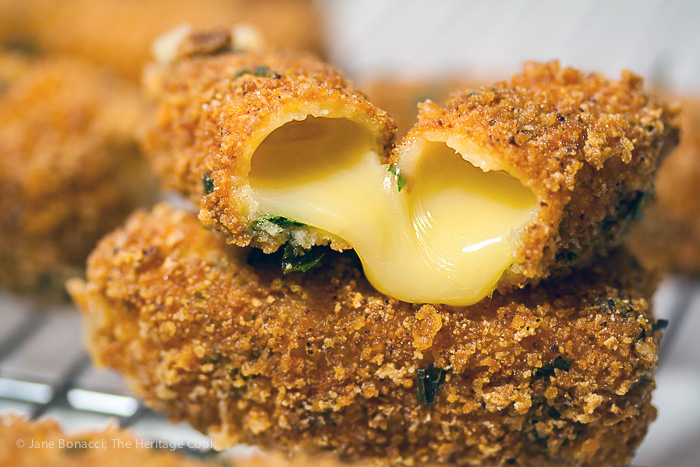
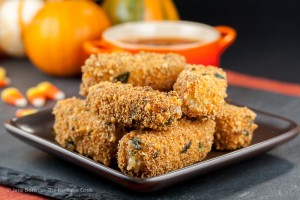
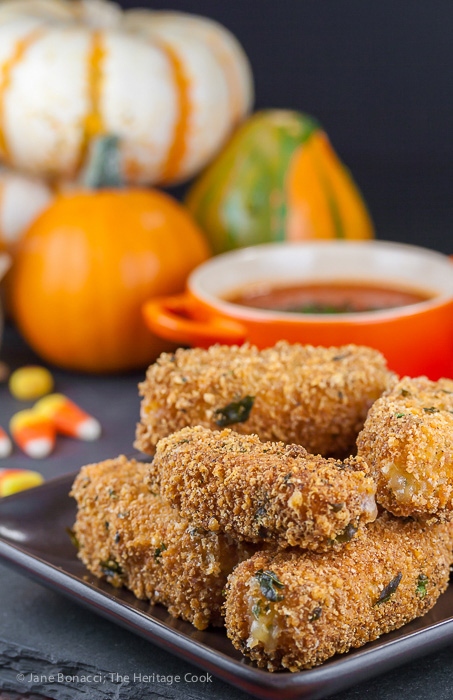
The cheese hot and melted with the crispy, crunchy coating
Today’s recipe is a recreation of those treats, with a little extra kick from chili pepper in the sauce and the cheese shaped into ghoulish finger shapes. When dipped in the red sauce, everyone will have fun pretending they are nibbling on Zombie fingers! 🙂
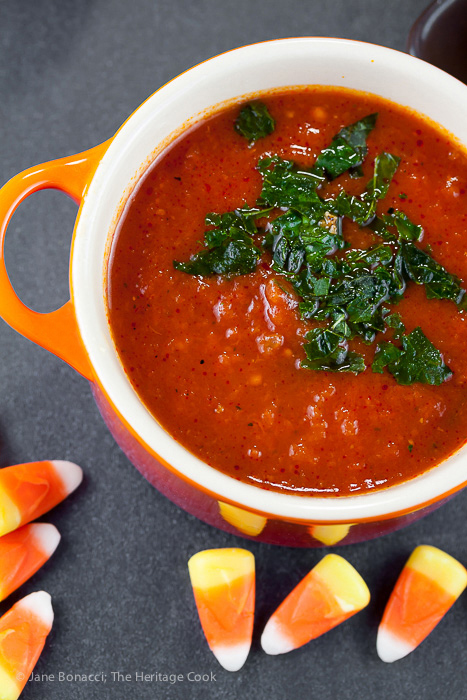
Spicy marinara sauce piping hot and ready for dipping!
One place where GF flours are actually better than wheat is in fried foods. Rice flours in particular fry up very crispy without being heavy. Even if you are not required to eat gluten-free, you may fall in love with frying foods dredged in rice flours.
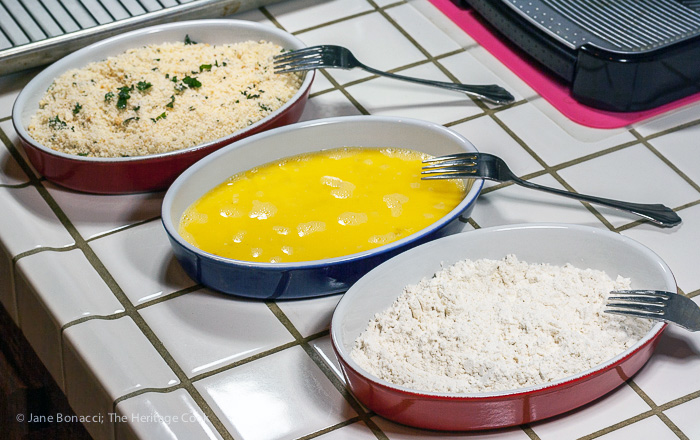
Professional-style breading station in your own kitchen
Preparing these appetizers is a two-step process that allows you to do most of the work in advance and all you have to do the day of the party is fry them until crispy and golden brown and serving while hot to your hungry crowd. Cooking them in batches ensures everyone gets them while they are oozing, adding to the allure for the devilish hobgoblins in your crowd.
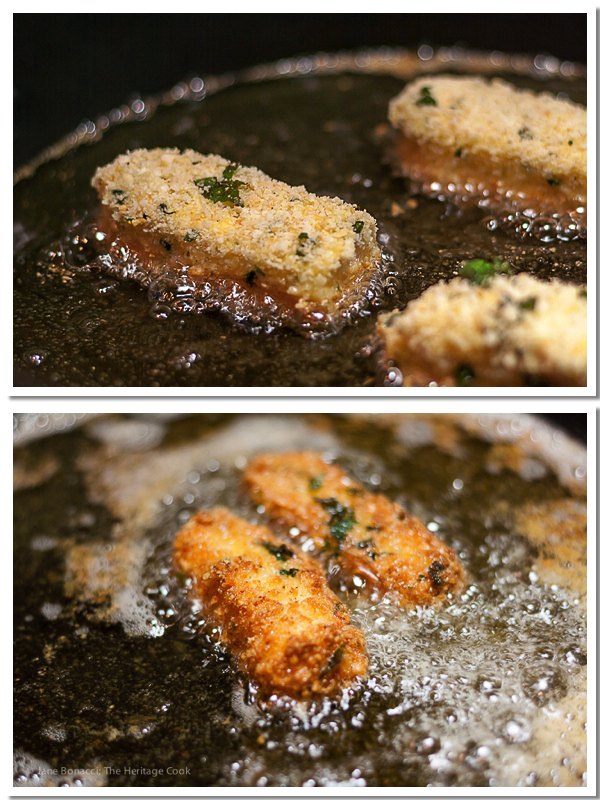
Gluten free cheese turning golden brown
Shape and bread the cheese sticks and freeze them until solid. You can do this a day ahead! The sauce should be made a day or two in advance because like many soups, sauces, and stews, the flavors get better when it has had a chance to rest in the refrigerator.
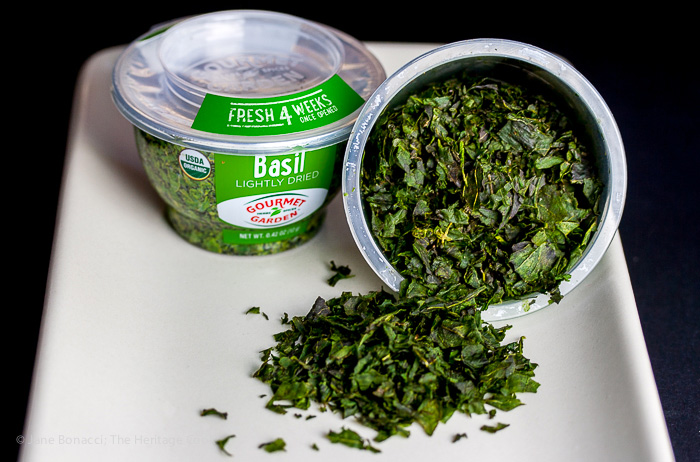
Gourmet Garden’s new Lightly Dried Basil ~ Stays fresh for 4 weeks!
A new ingredient I am using is the brand new Lightly Dried Herbs from Gourmet Garden. These are not like the freeze dried abominations of yesteryear, they are picked fresh, quickly chopped and then dried just enough so that they will stay fresh up to 4 weeks!! They are packed with flavor that erupts when you add them to your meals.
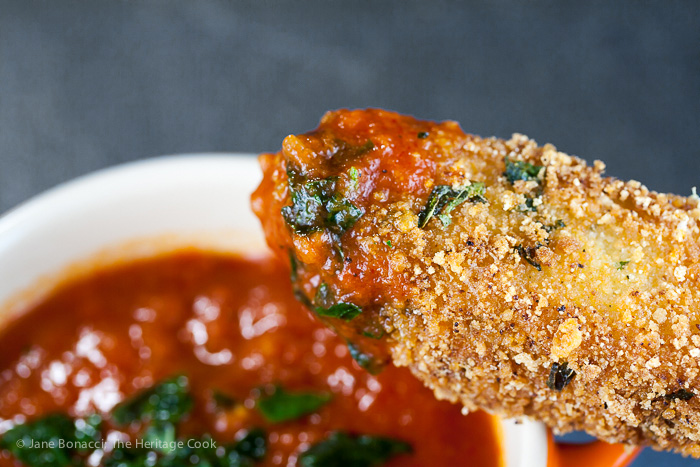
Zombie fingers never tasted so good
They were the perfect way to get fresh herb flavor into the bread coating for the cheese sticks, blending easily and distributing flavor in every bite. I used the traditional Gourmet Garden pastes in tubes that we know and love to season the sauce. There is no easier, more delicious way to pack flavor into every single bite and absolutely no waste!
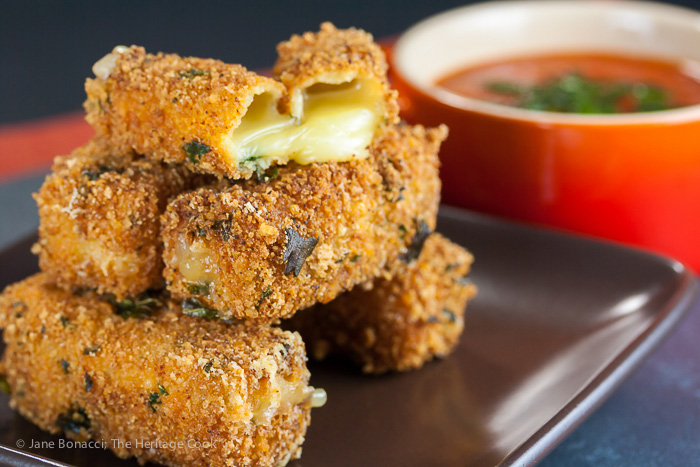
Perfect for your Halloween party, football game or any time of the year
I hope you enjoy these appetizer snacks and you can serve them all year long at any gathering. You don’t need to wait another year to make them and I’m sure your guests will be thrilled to see them on the party buffet!
Happy Halloween! Mwahahaha …
Jane’s Tips and Hints:
Whenever you are working with both wet and dry ingredients at the same time, like the dipping and dredging for these appetizers, it pays to use one hand for the dry ingredients and the other for the wet. By keeping one hand mostly dry, you avoid the inevitable piles of ingredients clinging to your fingers. For example, I set the cheese stick in the flour with my left hand and coat it, I move it to the eggs and use my right hand to cover it thoroughly with the eggs – transfer it to the breadcrumbs and again using my left hand, I pick up the panko and pat it all over the surfaces and set it on the drying rack.
Gluten-Free Tips:
Ian’s brand of gluten-free panko is the best I’ve found at mimicking the crunch of regular panko. Whole Foods carries it here in California, but if you have trouble finding it, take a look at their website for location assistance or you can order it from Amazon.
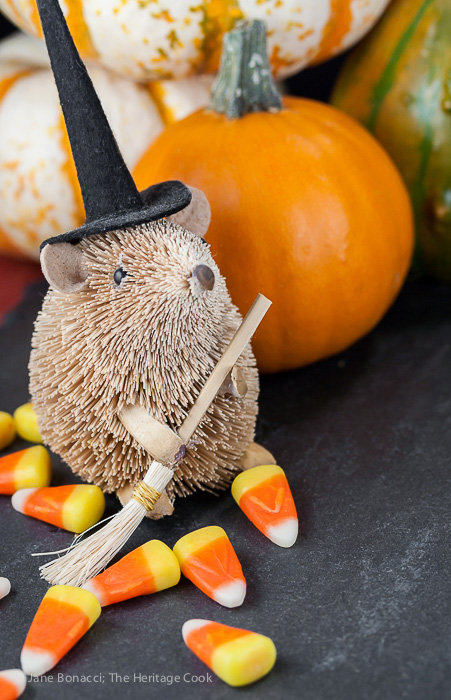
My Kitchen Witchy Mouse keeps a close eye on my foods so they don’t burn!

- Mozzarella Sticks/Fingers
- 1-1/2 cups panko or dried breadcrumbs (I use Ian’s brand gluten-free Panko crumbs with excellent results)
- 1-1/3 cups grated Parmesan cheese, pulsed in a food processor until about the same consistency as the breadcrumbs
- 1 tsp onion powder
- 1/2 tsp kosher or sea salt
- 1/4 tsp freshly ground black pepper
- 3 tsp Gourmet Garden Lightly Dried Basil
- 3 large eggs, beaten
- 1/2 cup gluten-free flour blend, rice flour, or all-purpose flour
- 1/2 tsp kosher or sea salt
- 2 (8 oz) blocks of mozzarella cheese, cut crosswise into 1/2-inch thick strips, or 16 pieces of string cheese, wrappers removed
- 1-1/2 cups organic vegetable or olive oil, or as needed
- Dipping Sauce
- 2 tbsp organic olive oil
- 1 med onion, peeled and finely chopped
- 1 tsp Gourmet Garden Chunky Garlic
- 2 to 3 tsp Gourmet Garden Italian Herbs, to taste
- 1 to 3 tsp Gourmet Garden Chili Pepper, to taste
- 26 to 28 oz crushed tomatoes, preferably Pomi brand
- 1/4 cup water
- 1/4 cup good-quality red wine or additional water
- 1/4 tsp granulated sugar
- Kosher or sea salt and freshly ground black pepper, to taste
- Gourmet Garden Lightly Dried Basil, for garnish
- Make the Cheese Sticks/Fingers: Line a baking sheet with parchment paper and set a wire rack on top. Place on your kitchen workspace.
- In a medium shallow baking dish (such as an au gratin), combine the breadcrumbs, 1 cup of the Parmesan, onion powder, and salt. Stir with a fork until evenly blended. Add the Lightly Dried Basil, stirring with a fork until evenly distributed in the breadcrumbs. Place next to the baking sheet.
- In a second shallow baking dish beat the eggs until well blended. Set next to the breadcrumb mixture. Place the flour and salt in a third shallow dish, stir with a fork to blend, and set next to the beaten eggs. You have just set up a breading station like the pros use!
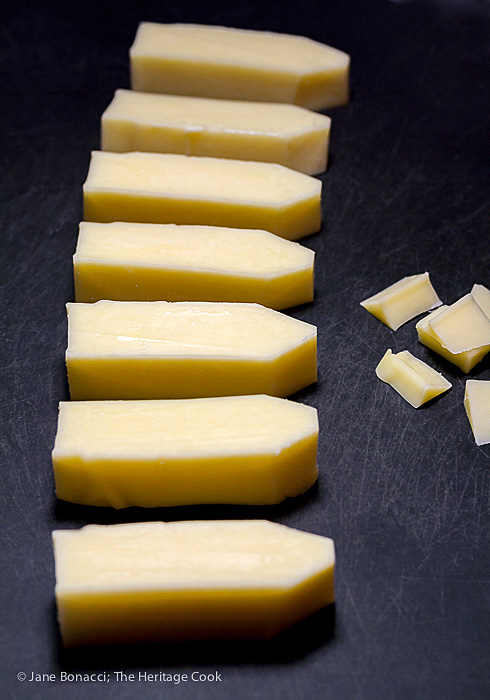
- Cut the blocks of cheese into 1/2-inch sticks. Using a sharp paring knife, carve one end of each stick to look like the pointed end of a finger. Leave them squared off if you are serving this at another time of the year. If you are making these for little ones, you may want to turn the strips on their sides and cut in half lengthwise to make them a little more slender and easier to eat. Adults will appreciate the larger size.
- Roll the cheese sticks in the flour, tapping off excess. Then dip each stick into the eggs, completely coating them and allowing any excess to drip back in the pan. Place the sticks in the breadcrumb mixture and cover with the breadcrumbs, patting them on each side until completely coated. Place on the wire rack set over the baking sheet. Continue until all the cheese sticks have been coated.
- Repeat the process, skipping the flour the second time, and dip the sticks back in the eggs and then in the breadcrumbs for a second coating. Set them back on the wire rack.
- Gently cover the baking sheet with aluminum foil and place in the freezer. Leave in the freezer until completely frozen, 1 to 1-1/2 hours. They can be made to this point up to 2 days in advance and kept covered in the freezer until ready to cook.
- Prepare the Dipping Sauce: In a large saucepan, Dutch oven, or stockpot, heat the oil over medium-high heat. When shimmering, add the onions and cook, stirring often, until translucent and softened. Add the garlic and cook for about 15 seconds or until it becomes fragrant. Stir in the Gourmet Garden herbs and cook another minute. (This infuses the oil with the herbs, making the dish more flavorful.) Pour in the tomatoes and wine, stirring to combine. Add the sugar, salt and pepper to taste.
- Reduce the heat to medium-low and simmer for about 30 minutes or until the flavors have blended and the sauce has reduced slightly, stirring often. Taste and adjust seasonings, adding more herbs if desired. Remove from the heat. The sauce can also be made a day or two in advance. Store, covered, in the refrigerator and reheat over medium heat when ready to serve.
- Keep sauce warm. Refrigerate any remaining sauce to use for another meal. It is great over pasta!
- Fry the Cheese Sticks: Remove the cheese sticks from the freezer and set next to the stove. Place a baking sheet with a wire cooling rack set inside it beside the pan of cheese sticks. Preheat the oven to 250°F.
- In a saute skillet with straight sides (10-inch diameter with 2-inch non-sloped sides), pour in the oil. It should be deep enough to come halfway up the sides of the cheese sticks. Depending on your pan, you may need more or less than the 1-1/2 cups called for. My pan needed about 11 ounces. Attach a candy or frying thermometer to the side of the pan. Heat the oil over medium heat to 350°F. Any lower and the breadcrumbs will soak up the oil; hotter and they will burn before the inside is melted.
- Working in batches and using tongs, gently add a few of the cheese sticks to the hot oil, making sure there is plenty of room between them for the most even browning and easier turning. Fry them until golden brown, about 1 minute per side. Use the tongs to gently turn them, being careful not to pinch too tightly and knock off any of the breadcrumb coating. Move them around as needed to keep them separated.
- When they are done, lift them out of the oil letting any excess drip back into the pan and transfer to the lined baking sheet. Immediately sprinkle with some of the remaining cheese. Transfer to a warm oven to hold while you finish the rest of the sticks. Fry the remaining cheese sticks, add them to the serving platter, and sprinkle with remaining 1/4 cup of cheese.
- To Serve: Pour warm sauce into a medium bowl or 6 smaller heatproof bowls such as ramekins for individual dipping. Place sauce on a warmed platter and sprinkle a little of the Lightly Dried Basil on top. Arrange the fried cheese sticks around the bowl. Serve immediately.
- Yield: about 6 appetizer servings
- Double coating the cheese sticks with breadcrumbs and then freezing them, keeps the cheese from melting too quickly when they hit the hot oil. When pre-frozen, they have enough time to get a nicely golden brown exterior and soft center, perfect for dipping in the spicy sauce!
Create a New Tradition Today!
This recipe is part of Food Network’s weekly Fall Fest. See the links below for more inspiration and great recipes and check out our Pinterest page for even more!
Feed Me Phoebe: 7 Frighteningly Healthy Halloween Recipes
Jeanette’s Healthy Living: Creamy Red Curry Coconut Butternut Squash Soup
The Heritage Cook: Fried Cheese “Fingers” with Spicy “Bloody” Dipping Sauce (Gluten-Free)
The Lemon Bowl: Lebanese Stuffed Peppers with Cinnamon and Pine Nuts
Weelicious: Cookie Dough Bites
Devour: The Best Halloween Candy and Cocktail Pairings
Elephants and the Coconut Trees: Halloween-Themed Appetizer: Beet and Cucumber Rolls
Taste with the Eyes: Malted and Salted: Milk Chocolate Pots de Creme
Big Girls, Small Kitchen: Olive Oil-Maple Granola Walnuts
Swing Eats: Scary Monster Fingers Cheesy Bread Sticks (gluten-free)
Napa Farmhouse 1885: Cabbage Slaw with Peanut Sauce Vinaigrette
Red or Green: Spicy Chard Chips
Virtually Homemade: Pumpkin Spice White Chocolate Rice Krispie Treat {Gluten Free}
Dishing With Divya: Egg Puffs
FN Dish: Trick or Treat! Your Guide to Being the Most-Popular House on the Block
Let’s connect! If you enjoy The Heritage Cook, you can follow me on Pinterest, Facebook, and Twitter. If you ever need any entertaining or cooking advice, need to alter a recipe for gluten-free, or want recipe suggestions, don’t hesitate to email me. Thanks for reading!
Unauthorized use, distribution, and/or duplication of proprietary material from The Heritage Cook without prior approval is prohibited. This includes copying and reprinting content and photographs. If you have any questions or would like permission, I can be contacted via email. Feel free to quote me, just give credit where credit is due, link to the recipe, and please send people to my website, www.theheritagecook.com. Please see the Disclaimers page for additional details.
This site is not intended to provide medical advice. The suggestions here are not intended as dietary advice or as a substitute for consulting a dietician, physician, or other medical professional. It is the reader’s sole responsibility to determine which foods are appropriate and safe for their family to consume. Always consult your doctor. The author makes no claims regarding the presence of food allergens and disclaims all liability in connection with the use of this site.
Disclosure: This is a sponsored post. I received compensation and products from Gourmet Garden for recipe development.
Thank You!



Foodiewinelover, Gina
Amazing blog, love the vibrant photos Jane!
Katrina
Darn, those look good. And I love you for making them gluten free. Well, I would have done that, too, and I have some of those Ian’s GF bread crumbs—and some mozzarella cheese. Yum!