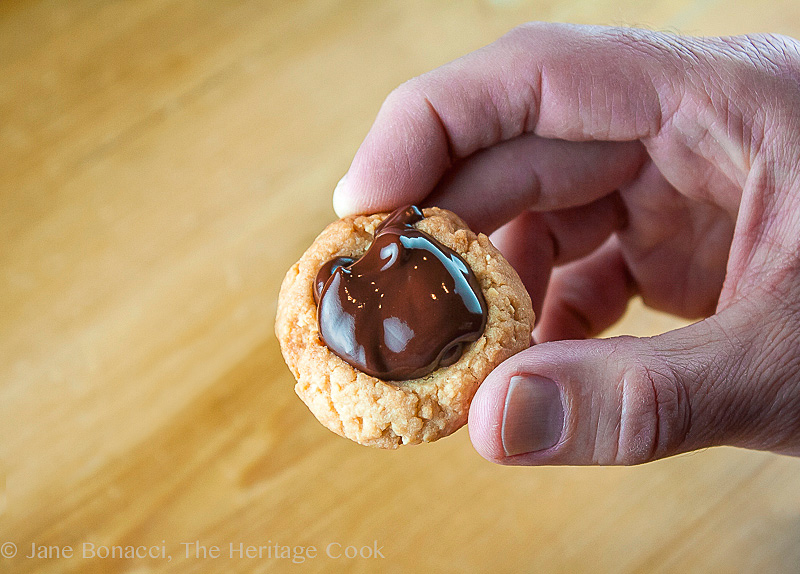
The Artist holding a cookie before devouring it! Gluten Free Chocolate Thimble Drops; 2016 Jane Bonacci, The Heritage Cook
These simple to make cookies are truly amazing treats. A beautiful combination of citrus-scented crunchy, nutty cookies with a smooth, glistening chocolate ganache filling that lingers in your senses long after it is gone.
I made mine with gluten-free flour and they were wonderful. One trick to great gluten-free baked goods is to use a super finely ground rice flour in your blend. This greatly reduces the grittiness so common in many GF baked goods. My favorite brand is Authentic Foods and you can easily recognize their varieties in gold foil bags. You can find it in many gourmet grocery stores, gluten-free shops, and of course online. You can buy it directly from Authentic Foods or on Amazon.
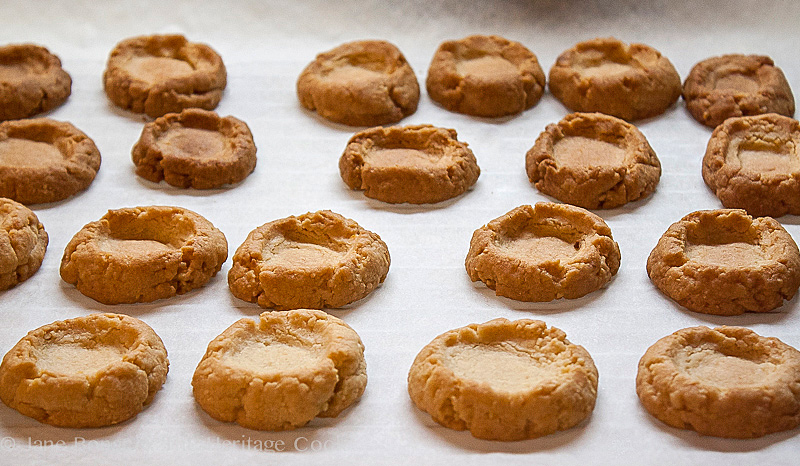
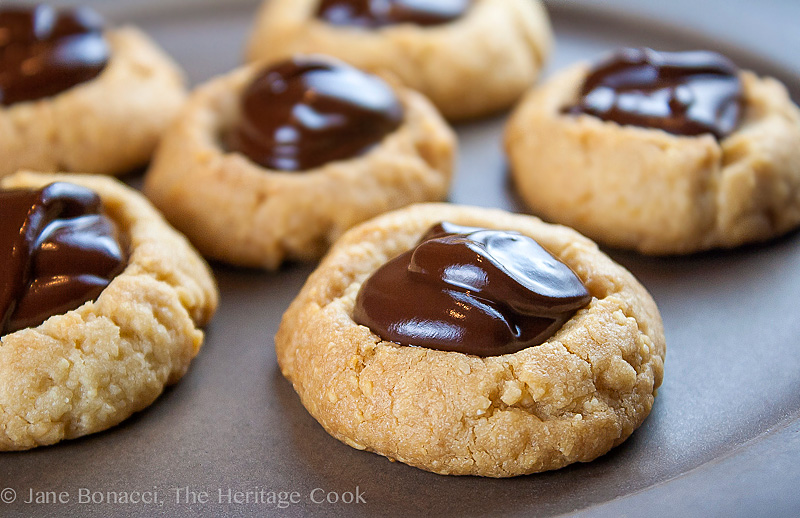
These got a little dark; bake yours less
You may ask, why bother with finely ground rice flour when the dough also contains almond meal? The almonds add a lot of texture, but they are not sandy or gritty. The almond meal from Bob’s Red Mill is safe for those avoiding gluten and adds a tremendous richness to baked goods. When you combine it with the butter, these tiny cookies are decadent. Their diminutive size is a good thing because it only takes a bite or two to be completely satisfied.
Another selling point of these cookies is that they do not contain any eggs. For those of you with children with multiple allergies, this will be a great option for birthday parties and other events where children are gathered. If you want to make them dairy-free, you can use Earth Balance Buttery Sticks in place of the butter.
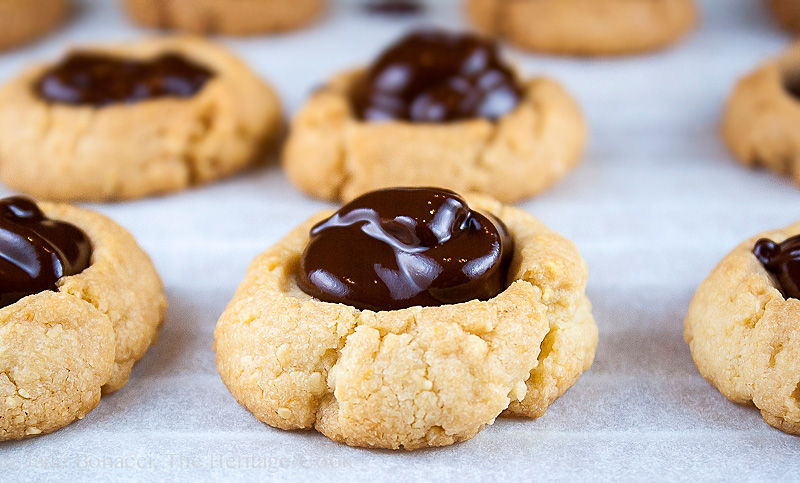
Finished piping chocolate in the centers
You may notice that my cookies are far darker than they should be. That is what happens when I make dinner at the same time I am trying to bake. I forgot to reset the timer after taking them out of the oven the first time. They are still delicious, but follow the recipe instead of the photos and bake yours for a shorter time than I did – you’ll be happier with them!
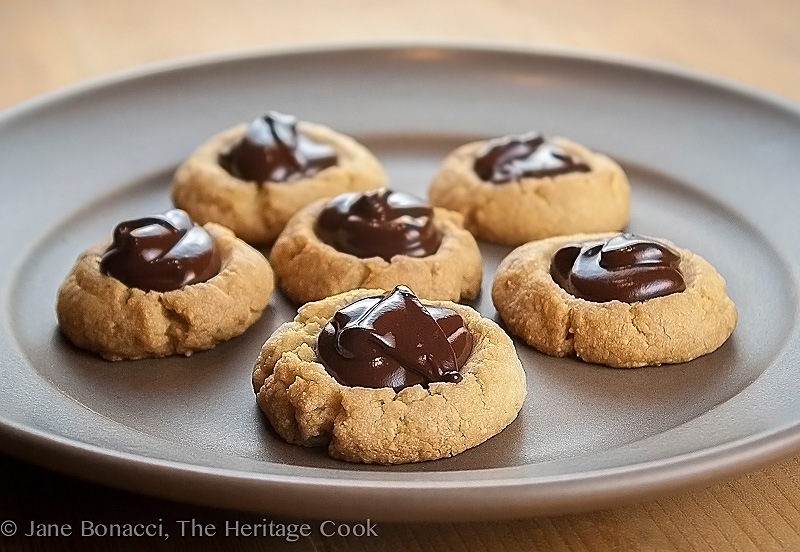
These are really lovely little cookies, the perfect bite-sized treat with a glass of milk, cup of tea, or espresso. And while I chose to fill them with chocolate, you can use anything you like. A white chocolate ganache would be wonderful and more traditional fillings are raspberry and apricot jam. Blueberry, peach, mint, or even pepper jelly would be fun and different options to try.
The next time I make these I will double the ingredients. The recipe only makes about 24 cookies and you could easily eat three or four at a time. These are so good that it would be nice to have enough to make some with chocolate and some with another filling. Oooh, maybe some lemon curd – now, that’s what I’m talking about!
I hope you enjoy these tiny bites of heaven as much as The Artist and I do. Have a fabulous week and Happy Chocolate Monday!!
Jane’s Tips and Hints:
Keep your bags of nut meals in the freezer.
Gluten-Free Tips:
If you use a gluten-free flour blend and certified gluten-free almond meal, such as that from Bob’s Red Mill, these cookies are naturally gluten-free. They are also egg-free for anyone with multiple allergies.


- Cookies
- 1 cup all-purpose flour or gluten-free flour blend
- 3/4 cup finely ground almond meal
- 1 stick (4 oz) butter, at room temperature
- 1/4 cup granulated sugar
- Finely grated zest from 1 small tangerine or lemon
- 1/2 tsp vanilla extract
- Chocolate Filling
- 4 oz bittersweet chocolate (about 70%), chopped coarsely
- 2 tbsp butter
- 2 tsp golden syrup or light corn syrup
- Pinch sea salt
- Preheat oven to 350°F. Line two small baking sheets (or one large one) with parchment paper.
- Make the Dough: In a small bowl, whisk together flour and almond meal. Set aside. In a food processor, combine the zest with the sugar. Pulse about 20 seconds until they’re blended and the sugar is lightly colored.
- In the bowl of a standing mixer, combine the butter and citrus-sugar mixture. Beat on medium speed until light and fluffy, about 4 minutes, stopping once or twice to scrape down the sides and bottom of your bowl with a rubber spatula. Add the vanilla extract and beat for a few more seconds.
- Reduce the mixer speed to low, and then add the almond meal-flour mixture a little at a time. Beat just until just incorporated into the dough -- don’t overmix. Stop the mixer, remove the beater and use a rubber spatula to incorporate any remaining dry ingredients in the bottom of the bowl.
- Scoop teaspoon-sized balls of dough (a melon scoop or mini ice cream scoop work well) and roll them to form small balls. Place the balls about 1-inch apart on the parchment-lined baking sheet(s). You can place them fairly close together because they will not spread much as they bake.
- Make Indentations in Dough: Using your thumb, the handle of a wooden spoon, or the back of watermelon scoop gently press an indentation into the center of each cookie. Use the fingers of your other hand to hold the dough balls, gently pressing the sides together if they start to split a little. Make the centers plenty deep and wide to hold the chocolate filling but be careful not to press all the way through the dough. You are just making a divot to hold the chocolate after baking.
- Bake the Cookies: Bake cookies about 8 minutes, and pull the baking sheet out of the oven and set it on the stove. The cookies tend to puff up as they bake. Using the same wooden spoon handle or other implement, very gently press the centers down a bit, flattening them again. Return the sheet to the oven, this time with the opposite side facing the back of the oven and continue baking another 5 minutes. Check again, tapping the centers down if needed and cook another 2 minutes or until the cookies are only slightly colored around the edges. Be careful to not overbake.
- When done, remove from oven and transfer the cookies to cooling racks. If you have baked the cookies on parchment, carefully lift one end and slide the paper and cookies straight onto the cooling rack. Leave until fully cooled.
- Make Chocolate Filling: In a medium heatproof bowl set over a pot of simmering water, combine the chocolate, butter, golden syrup, and sea salt. The golden syrup will help keep the mixture smooth and shiny. Leave the mixture alone until the chocolate and butter start to melt. Then stir occasionally and move the chocolate pieces around so they are submerged in the melted chocolate, which will speed up the melting. Using a hot pad, remove the bowl from the heat, set the bowl on a kitchen towel and stir until melted and smooth. Pour into a heatproof measuring cup with a spout.
- Fill Cookies: When cookies are cool, fill the thumbprints with the melted chocolate. Pour the chocolate slowly, gently shaking the measuring cup to help the chocolate flow. Fill each cookie, going back to add more to those that don’t have as much chocolate as the others. There will be plenty of chocolate to go around.
- Leave the cookies undisturbed for about an hour or until the chocolate centers are set before packing away.
- Yield: about 2 dozen cookies
- You can easily double the recipe to make more cookies for larger gatherings or to serve two or more different fillings.
Create a New Tradition Today!
Let’s connect! If you ever need any entertaining or cooking advice, need to alter a recipe for gluten-free, or want recipe suggestions, don’t hesitate to email me. Thanks for joining the Heritage Cook Family!
Unauthorized use, distribution, and/or duplication of proprietary material from The Heritage Cook without prior approval is prohibited. This includes copying and reprinting content and photographs. If you have any questions or would like permission, I can be contacted here. Feel free to quote me, just give credit where credit is due, link to the recipe, and send people to my website. The suggestions here are not intended as dietary advice or as a substitute for consulting a dietician, physician, or other medical professional. It is the reader’s sole responsibility to determine which foods are appropriate and safe for their family to consume. The author makes no claims regarding the presence of food allergens and disclaims all liability in connection with the use of this site. Please see the Disclaimers page for additional details.
Thank You!



Louise
Good Morning Jane:)
As I drink my morning coffee, I wish I could just nibble on one of these delectable drops.
I will definitely be sharing them with my daughter who is, as you know, always on the lookout for allergy free nibbles:)
Thank you so much for sharing, Jane…
Jane Bonacci
You always brighten my day Louise! The cookbook I’ve written with a friend is packed full of options your daughter will love – GF breads! And we include options for dairy-free, yeast-free, gum-free, corn-free, and more. <3