When I was ten I made my first cake all by myself (from a box mix) and was incredibly proud. I gratefully accepted the accolades of my family that evening at dinner as everyone ate it for dessert. I liked the attention I got and it sparked my creativity. Within a couple of years I was making everything from scratch like my grandmother had taught me. And by the time I was a teenager I was pretty fearless in the kitchen, happily experimenting with any recipe that looked interesting. My mother gladly turned over the baking to me, relieved not to have that responsibility anymore. She was really great at gardening, knitting, and decorating, but baking was not her forte.
Standing beside grandmother and watching her bake from scratch had taken away all the fear of baking most people grow up with. I baked all the family pies, birthday cakes, and cookies and made candies. I taught myself to bake bread and loved doing it by hand. For me baking has always been a fun adventure.
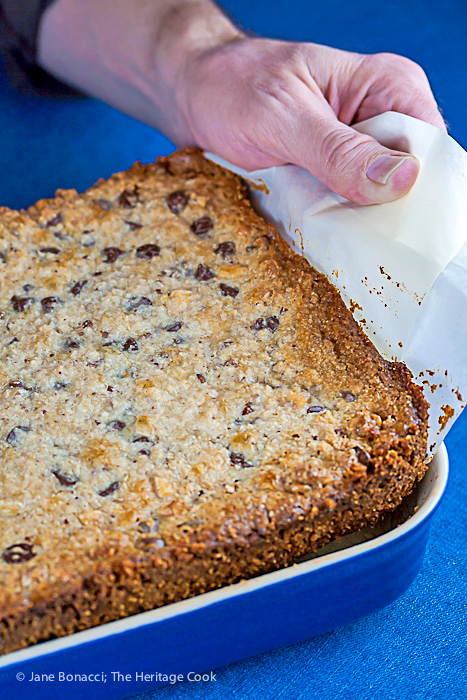
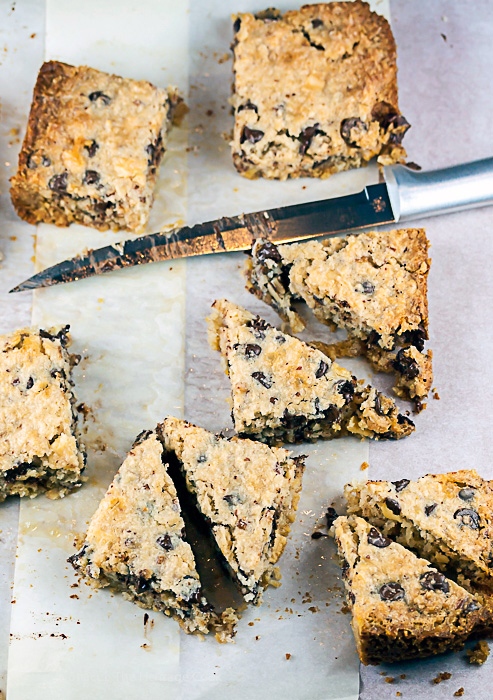
Using a parchment sling helps lift the bars out of the pan
Surprisingly Congo Bars were not part of my childhood – actually very little chocolate was on the menu. My brothers and parents were not as crazy about chocolate as other people and as the youngest, I followed their lead. It is funny that I would grow up to write Chocolate Mondays. I had to become an adult before I got to taste and fall in love with these wonderful snacks!
Regular bar cookies are pretty sturdy, but when you convert them to gluten-free, they can become more fragile. Letting them cool completely before taking them out of the pan or cutting them does help. Don’t be surprised if these crumble a little as you lift them out of the pan and they may be challenging to cut cleanly. But no matter what, they are still delicious!
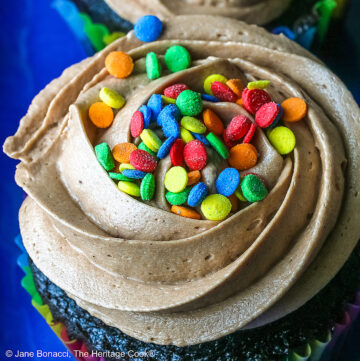
The Artist and I like any dessert that can be cut into individual servings, making it easier to sneak little bites when no one is looking. 🙂 I love having treats for friends and neighbors who drop by and small bites are easy to take to events, parties, and picnics.
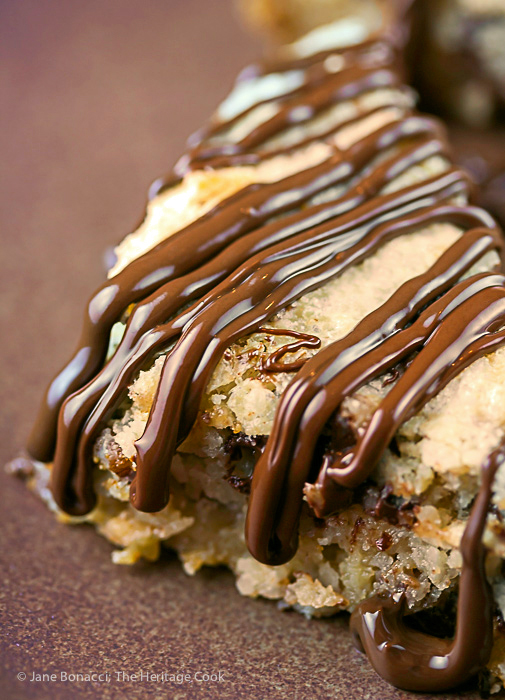
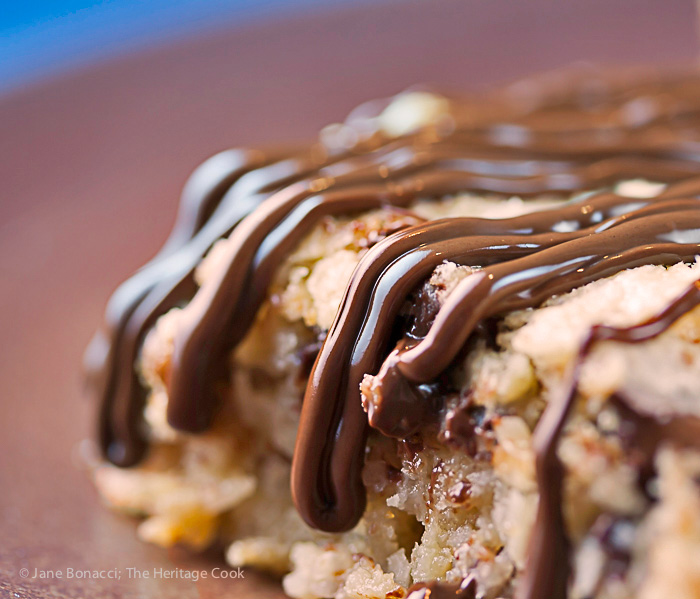
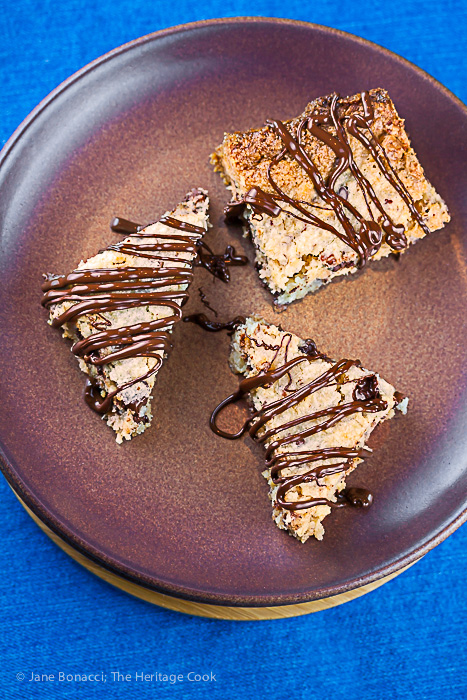
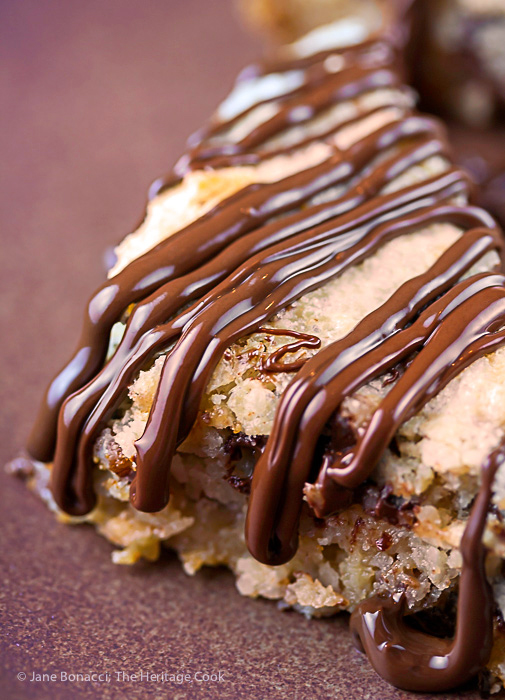
I decided to add a little more chocolate to these – who doesn’t want more chocolate? So I melted a small amount (about 3 to 4 tbsp) extra chocolate chips in the microwave. The microwave can be deceiving. The chips look like they are still solid, but they are melted inside and collapse the second you touch them! Only heat in bursts of about 20 seconds at a time and check the chips between each. You definitely do not want to burn the chocolate! And if you do, throw it away and start over.
The next time you are looking for the perfect after school snack for your kids, a sweet treat to finish your meal, or having something for those chocolate cravings we all get, give these bars a try. I think you will find they are the perfect choice!
Happy Chocolate Monday!
Jane’s Tips and Hints:
If you want to cut these into triangles instead of squares, cut the block into slightly larger squares and then cut each square from one point to the opposite one to create triangles.
Gluten-Free Tips:
I just swapped out my gluten-free flour blend for the all-purpose flour called for in the original, using 120 grams per cups of flour called for. As long as yours has a little xanthan gum or guar gum in it, the crust will hold together. If your blend does not include it, add 1/4 tsp to the dry ingredients.
Dairy-Free Tips:
Enjoy Life Foods has great chocolate chips and chunks that are free of gluten, dairy, peanuts, soy, casein, potato, wheat, tree nuts, fish, sesame, egg, shellfish, and sulfites – they are safe for virtually everyone! They do not have a white chocolate yet, so just use more of the regular chips in place of the white chocolate called for in the recipe.
The best dairy-free replacement for butter in baking is Earth Balance Buttery Sticks. They are very close in texture and melting capacity. You can use them in virtually all your baking projects.
- Crust
- 5 tbsp butter, melted (use margarine or Earth Balance for dairy-free), plus more for the pan
- 1/4 cup all-purpose flour or gluten-free flour blend
- 1/4 tsp xanthan gum (if using gluten-free flour blend without xanthan)
- 1/4 tsp baking powder, gluten-free if needed
- 1 tsp kosher or fine sea salt
- 1 cup almond meal (Bob’s Red Mill is gluten-free)
- 1/4 cup firmly packed light brown sugar
- Filling
- 1-1/4 cups unsweetened coconut
- 2/3 cup semisweet chocolate chips (use EnjoyLife for gluten and dairy-free)
- 1/2 cup white chocolate chips (use more EnjoyLife chocolate chips for dairy-free)
- 1/2 tsp kosher or fine sea salt
- 3/4 to 1 cup (from a 14 oz can) sweetened condensed milk or sweetened condensed coconut milk for dairy-free (see Note below)
- 1/2 cup chopped pecans, walnuts, almonds, optional
- Extra chocolate chips to drizzle over the top, optional
- Make the crust: Preheat the oven to 350°F (176°C). Lightly butter an 8-inch or 9-inch square baking pan. Line the pan with a sheet of parchment, folded lengthwise to fit, leaving two ends hanging over the ends of the pan. This will create a sling to help you remove the bars from the pan. Butter the parchment and add extra layer of butter to the two sides of the pan not covered with parchment.
- Combine the flour, baking powder, and salt in the bowl of your food processor. Pulse a few times to blend. Add the almond meal and brown sugar, and pulse until crumbly. Pour the butter over the top and pulse until the butter is completely incorporated and the mixture starts to clump together.
- Spread the crumb mixture in the bottom of the prepared baking pan, pressing down gently with your hands. Spread to the edges of the pan to fully cover the bottom.
- While you have the food processor out, quickly chop the pecans or other nuts for the filling and set aside.
- Bake the crust for 10 minutes, or until lightly golden. Remove from the oven and let cool at least 30 to 45 minutes on a wire rack to firm up. The almond mixture is delicate and needs time for the butter to harden again.
- Make the Filling: While the crust is cooling, in a large mixing bowl, stir together the coconut, dark and white chocolates, salt, and the pecans, if using. Add 3/4 cup of the condensed milk. Stir well using a flexible spatula until all the coconut is moistened, being sure to get all the ingredients on the bottom of the bowl. If the mixture is too dry, add the rest of the condensed milk. The mixture will be heavy and very sticky.
- Drop dollops of the filling around the crust and then use an offset spatula to gently press the mixture together and into the corners. Try to get it fairly evenly spread over the top. Don’t press and push too hard or the crust will separate.
- Place the hot oven and bake for 20 minutes, or until the top is set and light brown. The edges will brown before the center so if they start to get too brown, tent loosely with foil. When the center is set, remove from the oven and place on a wire rack to fully cool and let the filling firm up, at least 2 hours before cutting. If desired, once it has cooled to room temperature you can place it in the refrigerator to speed up the process.
- When the bars are completely firm, run a knife around the edges that are not covered with parchment and lift the block out of the pan using the parchment paper as handles. Cut into squares or diamonds for serving.
- If desired, you can melt some more chocolate, pour into a resealable plastic bag, press it into one corner and snip off a bit of the point of that corner. Set the cut pieces onto a wire rack set over a sheet of parchment. Drizzle the chocolate over the pieces in a random pattern.
- Yield: 12 to 16 bars
- For a recipe on how to make your own dairy-free sweetened condensed milk from coconut milk, check out this article from Detoxinista!
Create a New Tradition Today!
Let’s connect! If you ever need any entertaining or cooking advice, need to alter a recipe for gluten-free, or want recipe suggestions, don’t hesitate to ask. Feel free to quote me, just give credit where credit is due, link to the recipe, and send people to my website. Unauthorized use, distribution, and/or duplication of proprietary material from The Heritage Cook without prior approval is prohibited. If you have any questions or would like permission, please contact me. The suggestions here are not intended as dietary advice or as a substitute for consulting a dietician, physician, or other medical professional. Please see the Disclaimers page for additional details. Thanks for joining the Heritage Cook Family!