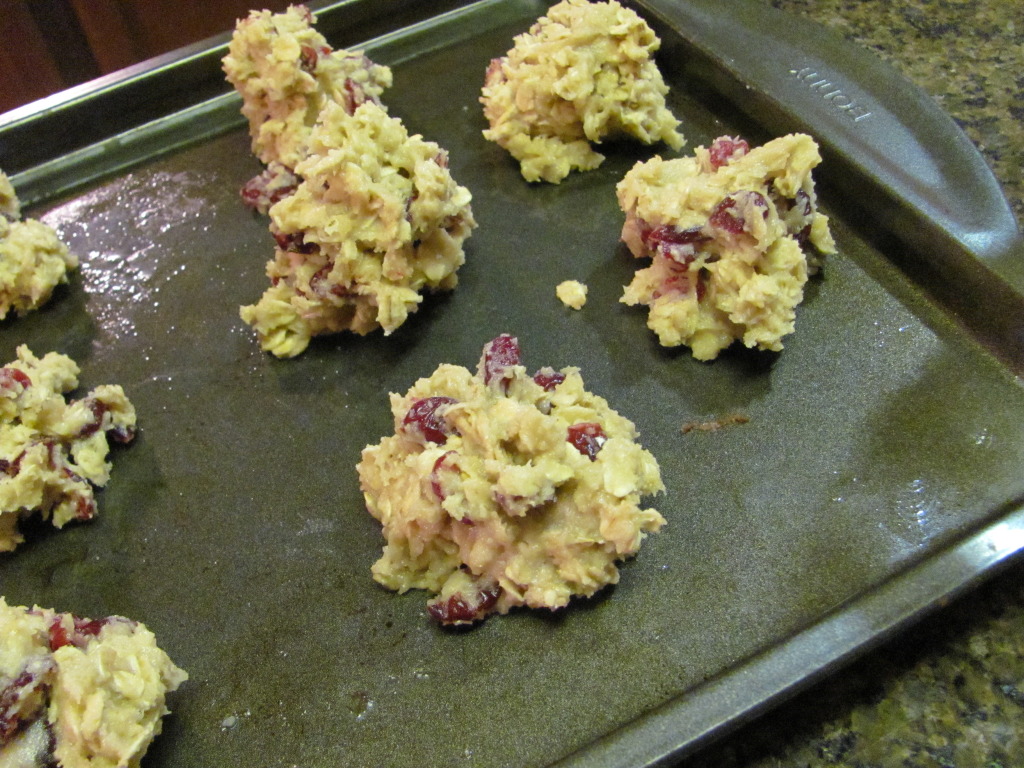
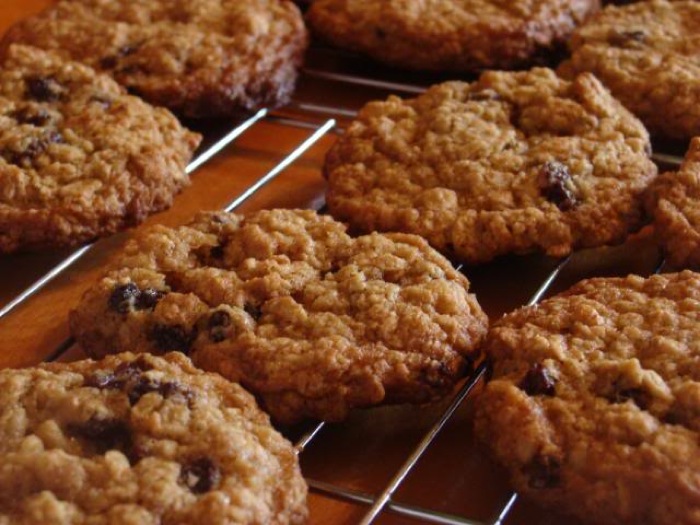
We all grew up with oatmeal cookies made from the recipe on the back of the box. And they were good! But what if we added some healthier ingredients and livened up the flavors a bit? Then we have a real winner. I love the tartness of dried cranberries, especially when paired with rich pecans. Add in some oatmeal and you’ve got breakfast in a cookie. Now this is what I call health food, LOL!
Today’s recipe for oatmeal cookies is from a member of the James Beard Foundation. Have you ever heard of James Beard? I affectionately think of him as the grandfather of today’s American cuisine … James Beard was born and spent his childhood in Portland, Oregon. His parents were both passionate about cooking with fresh ingredients so it is natural that he grew up also loving food. Though he wanted to be an actor and studied abroad for several years, he needed to supplement his income and began a catering business. Lucky for all of us, it flourished and he followed that path.
A prolific cookbook author, his first book was dedicated to cocktail food (Hors d’Oeuvres & Canapes), followed soon after by Cooking it Outdoors, the first serious book on outdoor cooking. During WWII he spent most of his time setting up canteens for sailors in Puerto Rico, Rio de Janeiro, Marseilles, and Panama, some of the greatest food centers in the world! He brought the art of French cooking to American middle class housewives, longing for something new to present to their families.
He participated in the first cooking show in this country (in 1946) as well as being featured on other radio and television shows, and over the years was continually writing magazine and newspaper articles and acting as a consultant to many restaurateurs and food producers. In 1955 he started the James Beard Cooking School in New York. He was the Pied Piper of freshly prepared dinners, utilizing healthy, local ingredients, preaching his philosophy to people at a time when everyone was extolling the virtues of canned, frozen foods and TV Dinners. He was so far ahead of his time!
His assistant at his cooking school was Marion Cunningham who went on to write the first update to the original Fannie Farmer cookbook, the first real American cookbook! While Julia Child is rightfully credited with being one of the biggest influences in American cooking, James also featured prominently and was extremely influential. He was declared “The Father of American Gastronomy” and his name remains synonymous with American Food.
The James Beard Foundation was established to provide scholarships to aspiring food professionals and to evangelize the American culinary tradition. Since 2001 the Foundation has awarded over $2 million in scholarships to those pursuing careers in the food industry, further promoting his beliefs. After Beard’s death in 1985, Julia Child came up with the idea to preserve his home in New York City and Peter Kump, a former student of Beard’s spearheaded the effort to purchase the house and create the Foundation.
In the heart of Greenwich Village, the James Beard House is a place where Foundation members, the press, and general public are encouraged to savor the creations of both established and emerging chefs from across the country and globe at regularly held Chef’s Dinners.
James Beard said, “There is absolutely no substitute for the best. Good food cannot be made of inferior ingredients masked with high flavor.” Today I bring you this simple recipe for flavorful, chewy oatmeal cookies, celebrating James’ spirit and love of food!
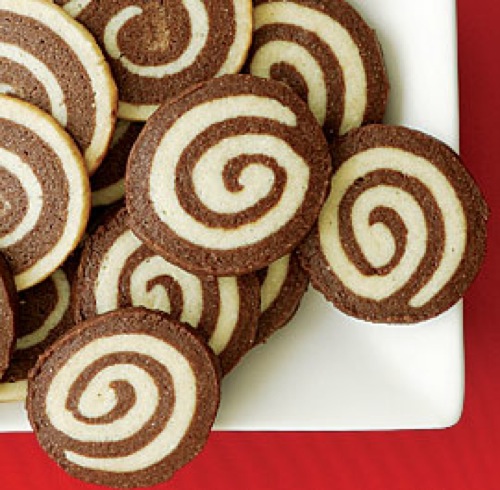
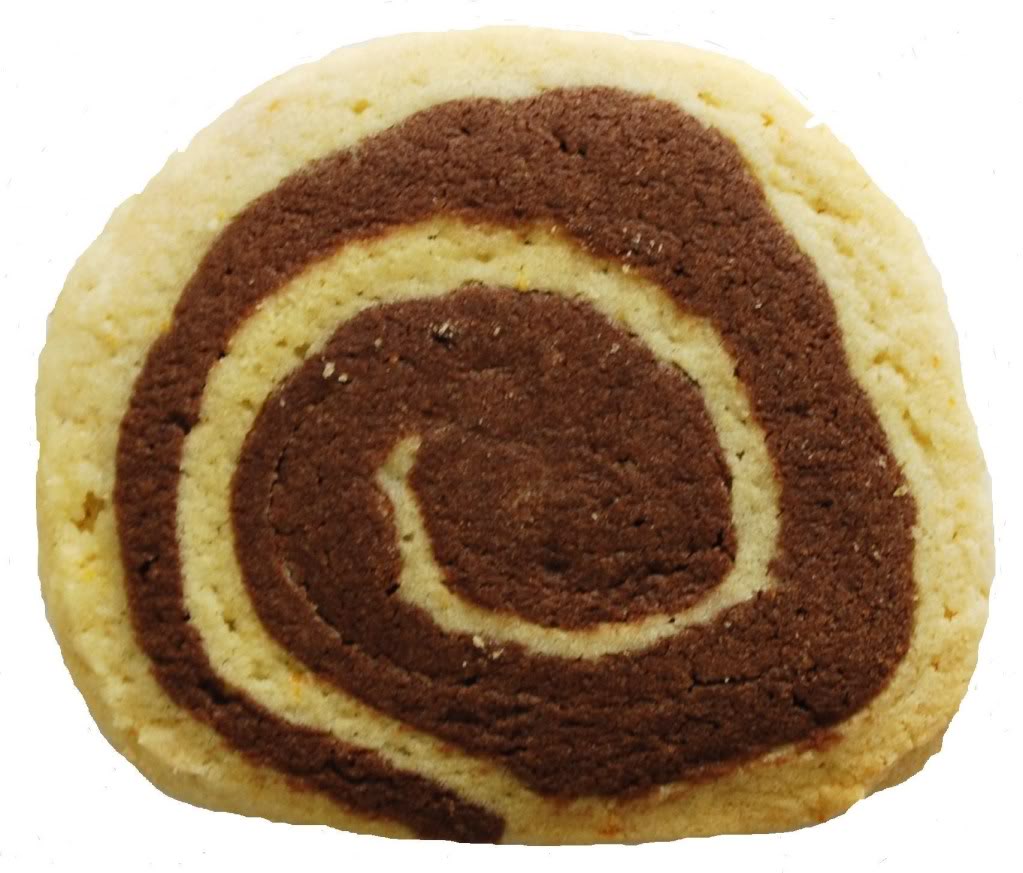
The second recipe is for Chocolate Pinwheel Cookies. Yes, I know it’s not Chocolate Monday! Consider this a bonus for the week, LOL. Labor intensive but oh so worth it, they are beautiful and really add a lot of interest to a plate of cookies. Besides, everyone loves chocolate and vanilla together! You can invert the layers and have either the chocolate or vanilla as the outer layer. I like to make some of each for variety.
I love to roll the finished logs in sparkling sugar – it is so pretty! If you have the vanilla on the outside, think about colored sugar for the holidays. If you have the chocolate on the outside, white, natural, or even edible white glitter would be great. If you want to coat it with chopped nuts, brush the log first with a beaten egg white then roll in the nuts. They need more “glue” than sugars do.
Use a very sharp knife to cut these and use a sawing motion so you don’t squish the log. You can reshape the slices if they get a little distorted. For the cleanest lines, chill the logs well before baking so they don’t melt together as much. After slicing, lay the cookies (on the baking sheet) in the refrigerator to firm up again. A trick to help logs keep their round edges is to slice a paper towel cardboard center in half and use it to hold the dough while it is resting. You could also use a French baguette pan!
This dough can be made several days ahead of time. Assemble the logs, wrap well in plastic and store in the refrigerator. For longer storage, you can freeze the logs and cut off just what you need, then return the unused portion to the freezer! A wonderful gift for family and friends is to give them frozen logs of dough, with a copy of the recipe wrapped around them. Then you can have freshly baked cookies all year long!!
Jane’s Tips and Hints:
For the most accurate measuring, use a scale. If you don’t have one, that is fine, but use proper measuring technique when filling measuring cups. Fluff the flour with a fork or whisk, scoop flour into cup using a spoon, then scrape off excess flour.
When doubling recipes, beware that your equipment may not be able to handle a large batch. And seasonings (like salt) do not scale exactly. When simply doubling it is fine to also double the seasonings, but if you are going higher use slightly less the amount of seasonings.
When you are looking for dried cranberries, make sure you buy the sweetened variety. Unsweetened cranberries are tart enough to curl your toes!
A recipe with baking soda will require regular cocoa (or another acidic ingredient) – not Dutch-processed – because it needs the acid to activate it! If a specific type of ingredient is called for in a recipe, you should investigate before substituting a different ingredient!
For drop cookies, using an ice cream scoop (preferably spring-loaded with a sweep to help empty it) speeds up the process of portioning out dough!
Kitchen Skill: Sifting Dry Ingredients
Why: To remove any lumps, aerate the flour, and thoroughly integrate dry ingredients
How: Many of us were born using a sifter – a contraption with a handle you turn to move dry ingredients through a wire mesh strainer. These days with improved ingredients, this isn’t as necessary as it once was. But it is still important, so when called to do so, you can use a wire mesh strainer the same way. I have a set of 3 sizes of wire baskets that I use. They are wonderful and would be a great holiday gift!

- 2 cups all-purpose flour
- 2 cups cake flour
- 1-1/2 tsp baking soda
- 1 tsp salt
- 3 tsp cinnamon
- 3/4 tsp ground cloves
- 3/4 tsp allspice
- 1 lb (2 cups) unsalted butter, at room temperature
- 2 cups light brown sugar, packed
- 1/2 cup granulated sugar
- 4 large eggs
- 2 tsp pure vanilla extract
- 1-1/2 cups chopped pecans, toasted
- 3 cups old-fashioned rolled oats
- 2 cups dried sweetened cranberries
- Preheat the oven to 375°F.
- Line two cookie sheets with parchment paper. Place the cranberries in a small bowl. In another bowl, sift together the flours, baking soda, salt, cinnamon, cloves, and allspice. Set aside.
- Beat the butter and sugars together until creamy and smooth. Add the eggs, one at a time, beating after each addition. Beat for 2 or 3 minutes on high until light and fluffy. Add the vanilla. Stir in half the sifted dry ingredients, mixing until combined. Add remaining dry ingredients and just before they are thoroughly mixed, add the pecans, oats, and cranberries. Stir well to evenly distribute the ingredients.
- Spoon heaping tablespoons of the batter onto the prepared cookie sheets, leaving about 1-1/2 inches between the cookies. Flatten slightly with the back of a spoon or the flat bottom of a glass. Bake for 9 to 12 minutes, until golden brown. Cool a minute or two on the cookie sheet before transferring to a rack to cool completely.
- Yield: about 80 cookies (6 to 7 dozen)

- 13-1/2 oz (3 cups) unbleached all-purpose flour
- 1/2 tsp table salt (if using Kosher salt, increase to 1 tsp)
- 1/4 tsp baking soda
- 10 oz (1-1/4 cups) unsalted butter, slightly softened
- 1-1/4 cups granulated sugar
- 1 large egg
- 1-1/2 tsp pure vanilla extract
- 1 tsp instant espresso powder
- 2 tbsp boiling water
- 3 tbsp unsweetened Dutch-processed cocoa powder
- 3 oz bittersweet chocolate, melted & still warm
- Mix the Dough: Sift together the flour, salt, and baking soda. In the bowl of a stand mixer fitted with the paddle attachment, cream the butter on medium-low speed until smooth, about 2 minutes. Add the sugar in a steady stream and mix for another 2 minutes. Add the egg and vanilla and mix until well combined, scraping the bowl as needed. Reduce the speed to low and add the dry ingredients in two additions, mixing just until combined. Remove about 1/3 of the dough and set aside (this should be about 2 cups less 2 tbsp of the dough). NOTE: Or you can do what I do ... double the recipe and divide evenly into chocolate and vanilla. I make half with "vanilla" on the outside, and the other with "chocolate" as the outer ring!
- Dissolve the espresso powder in the boiling water and set aside briefly to cool. Then mix the espresso and cocoa powder into the remaining dough. Reduce the mixer speed to low, add the warm melted chocolate and mix just until thoroughly combined.
- To Divide and Shape the Dough: Portion each flavor of dough into 3 equal pieces. Using a kitchen scale makes this easy. Shape each piece into a 5-inch square on a piece of plastic wrap and wrap well. The chocolate pieces will be thicker than the vanilla dough. Refrigerate for 30 minutes. If the dough becomes too hard, let it stand a few minutes at room temperature before rolling.
- Tear off 12 (12-inch) squares of waxed paper. Roll each piece of chilled dough into a 7x7-inch square between two sheets of parchment paper. (Roll dough thinner or into larger squares if you want more “pinwheel” turns in the swirl pattern.) Without removing paper, layer the squares of dough on a baking sheet and refrigerate for 10 to 15 minutes. Have ready three 15-inch sheets of plastic wrap.
- To Shape the Cookies: Remove one square of the vanilla dough and one square of chocolate, and peel off the top sheet of paper from each. Invert the chocolate onto the vanilla (or vanilla onto chocolate), taking care to align the two layers as evenly as possible. Cover with one of the pieces of paper. Using your rolling pin, gently roll over the dough to seal the layers together. Peel off the top layer of the waxed paper.
- Starting at the edge closest to you, carefully curl the edge of the dough up and over with your fingertips, so no space is visible in the center of the pinwheel. Using the waxed paper as an aid, continue rolling the dough into a tight cylinder. After the cylinder is formed, roll it back and forth on the counter to slightly elongate it and compact it. Transfer the dough to the plastic wrap, centering it on the long edge closest to you. Roll tightly, twisting the ends of the plastic firmly to seal. With your hands on either end of the log, push firmly to compact the dough. It should be about 9 inches long and 1-1/2 inches thick.
- Repeat with remaining dough. Refrigerate the logs until firm enough to slice, about 3 hours, or freeze up to 3 months.
- Bake the Cookies: Position racks in the upper and lower thirds of the oven. Heat the oven to 350°F. Line two rimmed baking sheets with parchment.
- Working with one log at a time, use a sharp, thin-bladed knife to slice the dough into 3/16-inch rounds. Set the rounds about 1 inch apart on the prepared pans and bake until the tops of the cookies feel set, 12 to 14 minutes (don’t let the edges become too brown). To ensure even browning, rotate the sheets as needed during baking.
- Let the baked cookies stand for 1 minute on the pan. While they’re still warm, use a thin metal spatula to transfer them to racks. When cool, store between sheets of waxed paper in an airtight container for up to 2 weeks, or freeze for up to 3 months.
- Yield: about 10 dozen 2-inch cookies
- VARIATION: Chocolate Peppermint Pinwheels: If you want, you can flavor the “vanilla” dough with a little peppermint extract. When you make the first division of dough, set aside “vanilla” dough and add the chocolate to remaining dough. Remove dough from mixing bowl, wash bowl thoroughly, return “vanilla” dough to bowl and beat in about 1/4 tsp of extract. Proceed as directed above. Before slicing, roll log in finely crushed peppermint candies.
Chocolate Cookies (can be used with ice cream sandwiches)
Unauthorized use, distribution, and/or duplication of proprietary material without prior approval is prohibited. I can be contacted via email at: heritagecook (at) comcast (dot) net. Feel free to quote me, just give credit where credit is due, link to the recipe, and please send people to my website, www.theheritagecook.com.
Thank You!


