Today’s Recipes: Double Nut Maple Squares, Ginger Bar Cookies, Pecan Caramel Bars, Chocolate-Bourbon Toffee Bars, and The Ultimate Lemon Shortbread Bar!
When it comes to baking cookies, do you shake in your boots and swear you cannot possibly make them? Do you go cold when someone mentions their holiday baking rituals? Are you envious because no matter how hard you try, your cookies come out like hockey pucks? Have you lost hope of ever being able to proudly serve a plate of homemade cookies? Never fear, there is hope! Your salvation is commonly referred to as a “bar” cookie or a “square”. While similar to the more traditional cookie, these are usually softer and moister. That translates to harder to mess up! They are baked as a single unit and then cut into serving portions. And sometimes you don’t even need to bake them. An example of that is Rice Krispie Treats. Anyone can make wonderful cookies … just a slightly different version.
Christmas cookies don’t have to be as elaborate as you might think. I always have loved a mix of drop, slice and bakes, and bar cookies in addition to one or two “fancy” ones. You get a wonderful assortment of textures and flavors without all the hassle! Look for recipes that can be made quickly and then one or two that are more labor intensive. You will be less stressed and everyone will enjoy themselves more!
The basic bar cookie starts with a bottom layer or “crust” that is mixed an smoothed into a baking dish. You bake that either wholly or partially depending on the topping you are using. Sometimes, if you are using a jam or chocolate for example, you want to add the next layer quickly on top of the hot crust so it melts and is easier to spread evenly.
Several of these recipes call for a sprinkling of powdered sugar over the top of the finished bars. As you probably have experienced, when powdered sugar sits very long it disappears and you have to reapply before serving. King Arthur has a remarkable product – Snow White Topping Sugar – a powdered sugar that doesn’t melt! You can sprinkle it over cakes or cookies and 3 days later it still looks like it was just applied! If you want to have exceptional looking baked goods, you should consider buying this special sugar.
When I decided on today’s theme, I started going through all my cookie bar recipes, looking for favorites and a nice array of flavors. As I was reading through them I got so inspired that I wrote a whole new one of my own!! I hope you enjoy all of these treats!
Jane’s Tips and Hints:
If you are shipping treats to loved ones out of town, these cookie bars are perfect. They pack beautifully and tend to hold up much better than other types of cookies. Because of their moistness, they won’t arrive crushed into crumbs. You can also leave them whole, wrapped tightly with plastic wrap and then a layer of foil. They can then be cut when they arrive.
Kitchen Skill: Juicing Citrus Fruits
You will need a reamer or juicer to get all the juice from the fruit. I prefer a wooden reamer because it never slips if my hand is wet and the natural drag of the wood is very efficient at getting every last drop!
If you microwave each piece of fruit for about 10 seconds and then roll it on the counter while pressing down, it will release significantly more juice!
- For crust
- 1-1/4 cups unbleached all-purpose flour
- 1/3 cup sugar
- Pinch of salt
- 6 tbsp (3/4 stick) chilled unsalted butter, cut into pieces
- 1 large egg yolk
- 1 tbsp whole milk
- For filling
- 1/3 cup pure maple syrup
- 1/3 cup (packed) golden brown sugar
- 1/4 cup whipping cream
- 2 tbsp unsalted butter
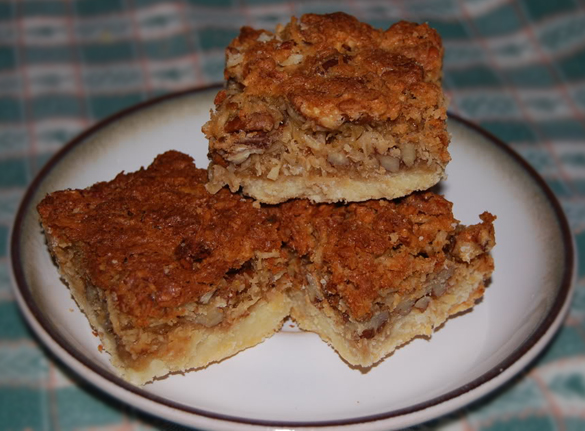
- 3/4 cup pecans, toasted, coarsely chopped
- 3/4 cup walnuts, toasted, coarsely chopped
- 1/2 tsp vanilla extract
- Make crust: Preheat oven to 350°F. Butter an 8x8x2-inch metal baking pan.
- Combine flour, sugar and salt in a food processor and blend. Add butter and process until mixture resembles coarse meal. Combine egg yolk and milk in small bowl. Drizzle egg mixture into processor; process using on/off turns just until dough clumps together but is still dry.
- Transfer dough crumbs to prepared pan. Press crumbs onto bottom and halfway up sides of pan. Bake until crust is set and pale golden, about 25 minutes. Transfer pan to a rack and cool.
- Make filling: Combine maple syrup, sugar, cream, and butter in a heavy-bottomed medium saucepan. Bring mixture to boil. Boil 2 minutes. Remove from heat and stir in nuts and vanilla.
- Pour filling over crust, spreading nuts evenly. Bake until filling bubbles all over, about 8 minutes. Transfer to wire rack and cool completely. Cut into bars (3 parallel cuts each direction) and serve at room temperature. (Can be prepared 1 day ahead. Store cookies between sheets of waxed paper in an airtight container at room temperature.)
- Yield: 16 squares
- 2 cups (9 oz) all-purpose flour
- 1 tsp baking soda
- 1/4 tsp table salt (if using Kosher salt, use 1/2 tsp)
- 2-1/2 tsp ground ginger
- 1-1/4 tsp ground cinnamon
- 1/2 tsp ground cloves
- 13 tbsp (6-1/2 oz) unsalted butter at room temperature (1 stick plus 5 tbsp)
- 1-1/3 cups granulated sugar
- 2 tbsp plus 1-1/2 tsp molasses (this is the same as 2-1/2 tbsp)
- 4-1/2 tsp honey
- 2 extra-large eggs
- Confectioner’s sugar or Snow White Topping Sugar for sprinkling
- Heat oven to 350°F. and lightly grease a 9x13-inch baking pan.
- In a medium bowl, whisk the flour with the baking soda and spices until blended.
- With a stand mixer (use the paddle attachment) or a hand mixer, beat the butter, sugar, molasses, and honey until creamy and well blended, about 4 minutes. Add the eggs, one at a time, beating after each addition until blended. Add the flour mixture and mix on low speed until just blended.
- Scrape the batter into the prepared pan and spread out evenly. Bake until the edges just begin to pull away from the sides of the pan and a pick inserted in the center comes out almost clean, 23 to 25 minutes. Set the pan on a rack to cool completely. Cut into bars, squares, or triangles. Sift a light coating of powdered sugar over the cookies just before serving.
- Store at room temperature or freeze in an airtight container, separating the layers with sheets of waxed paper.
- Yield: 32 (3x2-inch) bars


- Crust
- 1 cup unsalted butter (2 sticks), at room temperature
- 1/2 cup granulated sugar
- 1/4 tsp salt
- 2 cups bleached all-purpose flour
- Topping
- 1-1/2 cups firmly packed light brown sugar
- 1/2 cup light corn syrup or cane syrup
- A pinch of salt
- 1/2 cup (1 stick) butter
- 1/4 cup heavy whipping cream
- 2 tsp pure vanilla extract
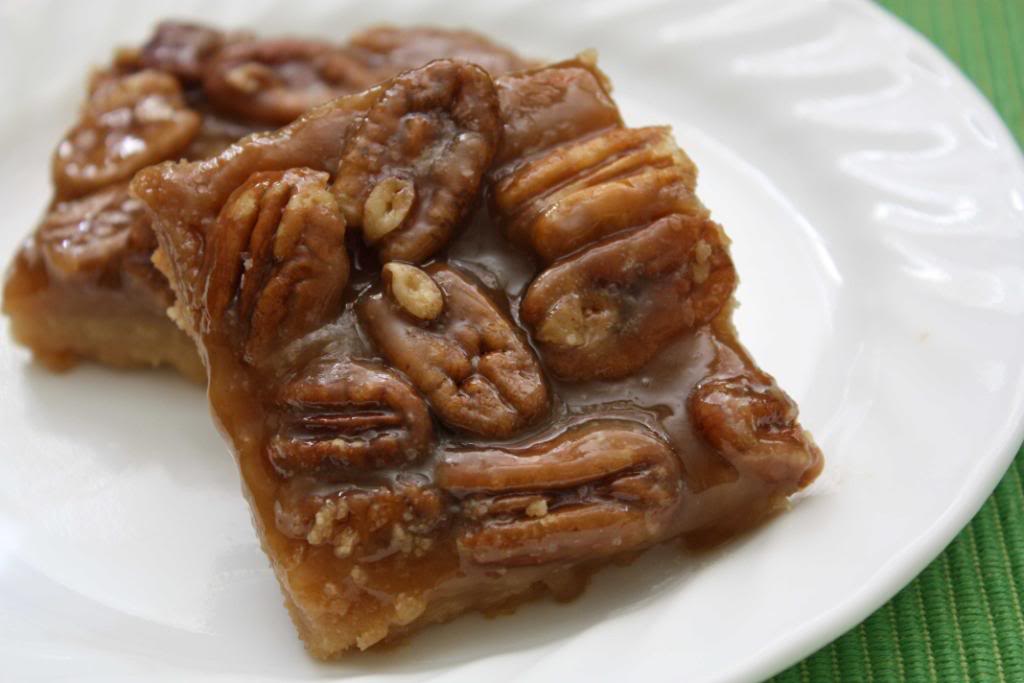
- 4 cups pecans, lightly toasted and coarsely chopped
- Position an oven rack so that the bars will bake in the middle of the oven and preheat the oven to 350°F. Grease the bottom and sides of a 9x13-inch baking pan. Set aside.
- To make the Crust: In a bowl, beat the butter with an electric mixer at medium speed until soft and creamy, about 45 seconds. Add the sugar and salt and mix until well blended. Add the flour, about 1 cup at a time, and mix until the dough is smooth, about 2 minutes. Scrape the dough into the prepared pan and spread evenly. Place a piece of plastic wrap over the dough and press on the dough through the plastic wrap with your fingertips to form a smooth, even layer on the bottom of the prepared pan. Remove plastic wrap.
- Transfer the pan to the preheated oven and bake until the crust is golden brown, about 20 minutes. Remove the pan to a wire rack and set aside. Don’t worry about the crust being slightly under-baked. It will finish in the second baking.
- To make the Topping: In a saucepan, combine the brown sugar, corn syrup, salt, and butter. Place over medium heat and bring the mixture to a full boil, stirring constantly. Remove from the heat, add the cream and vanilla, and mix until well blended. Add the toasted pecans and stir well.
- Pour the topping mixture onto the crust and spread out evenly. Return the pan to the oven and bake until the topping is bubbling all over, about 25 minutes. Remove the pan to a wire rack to cool completely. Trim off the hard outer edges if desired and cut into 12 equal bars (or smaller pieces if desired).
- The bars may be covered tightly and stored at room temperature for up to 2 days.
- Yield: 1 dozen large bars
- Crust
- 1cup all-purpose flour
- 1/4tsp salt
- 1/2cup butter, softened
- 3/4cup packed brown sugar
- 1 egg, lightly beaten
- 1/2 tsp vanilla
- Toppings
- 1cup cashew pieces, chopped
- 1cup toffee pieces (chocolate covered or plain, either is fine)
- Chocolate-Rum Icing
- 8 oz bittersweet chocolate, chopped
- 3 tbsp butter
- 1 tbsp cane syrup, corn syrup, or agave nectar
- 1 to 2 tbsp bourbon, rum, or brandy (you can use orange juice for a non-alcoholic option)
- Preheat oven to 375°F. Line a 9x13-inch baking pan with foil, leaving the edges long enough to drape over the sides. You will use these overhangs to help you remove the bars from the pan. Lightly butter the foil and set aside.
- For the Crust: Sift the flour and salt together. Set aside.
- In a large mixing bowl, beat butter with an electric mixer on medium speed until smooth, about 30 seconds. Add the sugar, egg, and vanilla. Beat until combined, about 30 seconds. Stop the motor, remove the bowl from the mixer and scrape sides and bottom of bowl. Make sure there aren’t any unmixed ingredients in the bottom. Return to the mixer and mix on medium until light and fluffy, about 2 more minutes. Turn off the motor and add the flour and salt. Starting on low, beat just until combined. Increase speed to medium and finish mixing for 30 seconds.
- Spread dough evenly in prepared baking pan. Bake for about 15 minutes or until edges begin to brown and surface is dry. The residual heat will finish baking the crust.
- Remove from oven and sprinkle the top with the chopped nuts and toffee pieces. Set aside.
- For the Icing: In a heavy-bottomed medium saucepan, combine the chopped chocolate and butter. Cook over low heat, stirring often, until melted. Remove from the heat and stir in the cane syrup and alcohol or juice. Whisk until smooth. Let cool for 5 minutes. Pour into a squeeze bottle or a freezer zip-top bag. Cut the tip off a corner of the plastic bag if using, and drizzle over the nuts and toffee in a decorative pattern or completely haphazardly depending on the look you want. Use as little or as much as you want. Any remaining icing can be held up to a week in the refrigerator. It is delicious served over ice cream!! You can also melt a little white chocolate and drizzle that over the top for more contrast!
- Let cool completely in pan on wire rack 30 minutes. Use the overhanging foil to gently lift the “cookie” out of the pan. Slide it off the foil onto a cutting board. Use a sharp knife to trim off the edges (if needed) and cut into bars. To easily divide into equal portions, cut the “cookie” in half lengthwise. Then cut each half into thirds. Spin the pan and repeat, cutting perpendicular to the first cuts, again first in half and then each half into thirds.
- Serve immediately or store in an airtight container with waxed or parchment paper between layers.
- Shortbread Base
- 10 tbsp cold unsalted butter
- 2 tbsp powdered sugar
- 2 tbsp granulated sugar
- 1-1/4 cups bleached all-purpose flour
- Lemon Curd Topping
- 4 large egg yolks
- 3/4 cup sugar
- 3 fluid oz lemon juice, freshly squeezed (about 2-1/2 large lemons)
- 4 tbsp unsalted butter, softened
- Pinch of salt
- 2 tsp lemon zest (finely grated)
- 2 tbsp powdered sugar for dusting
- Equipment
- 8x8x2-inch baking pan, preferably metal, the bottom and 2 sides lined with an 8-inch by 16-inch strip of heavy-duty aluminum foil. (If using a glass pan, lower the oven temperature 25°F.)
- Shortbread Base: Cut the butter into 1-inch cubes, wrap it, and refrigerate.
- Food Processor Method: In a food processor with the metal blade, process the sugars together for 1 minute or so, until the sugar is very fine. Add the butter and pulse in until the sugar disappears. Add the flour and pulse in until there are a lot of little moist crumbly pieces and no dry flour particles remain.
- Dump the mixture into a plastic bag and press it together. Remove the dough from the plastic bag and knead it lightly, until it holds together.
- Electric Mixer Method or by Hand: In Scotland, it is said that the best shortbread is mixed with the fingers and that each woman's fingers lend something distinctive and special to the finished cookie. I find that the texture is more delicate when the dough is mixed with the fingers rather than in a machine. For either method, use superfine sugar for the best texture and be sure to soften the butter.
- In a medium bowl, whisk together the sugars. In a large bowl, cream the butter with the sugars until light and fluffy. With your fingers or with the electric mixer, mix in the flour until incorporated. If using the mixer, add the flour in 2 parts.
- To Bake: Place 1 oven rack in the middle of the oven and preheat to 325°F.
- Pat the dough into the prepared pan. Use a fork to prick the dough all over.
- Bake for about 30 to 40 minutes or until the edges are lightly browned and the top is pale golden (do not brown). Crust should be very slightly under-cooked.
- While the shortbread is baking, prepare the Lemon Curd Topping: Have a strainer, suspended over a bowl, ready near the range.
- In a heavy non-reactive saucepan, beat the egg yolks and sugar with a wooden spoon until well blended. Stir in the lemon juice, butter, and salt. Cook over medium-low heat, stirring constantly, for about 6 minutes, until thickened and resembling hollandaise sauce, which thickly coats a wooden spoon but is still liquid enough to pour. (A candy thermometer will read 196°F.) The mixture will coat a wooden spoon and when you drag your finger along the back of the spoon, the sauce won’t flow to fill the space left. The mixture will change from translucent to opaque and begin to take on a yellow color on the back of a wooden spoon. It must not be allowed to boil or it will curdle. (It will steam above 140°F. Whenever it starts to steam, remove the pan briefly from the heat, stirring constantly to prevent boiling.)
- When the curd has thickened, pour it at once into the strainer. Press it with the back of a spoon until the liquid has flowed through the strainer and only the coarse residue remains. Discard the residue. Stir the lemon zest into the strained curd.
- When the shortbread is baked, remove it from the oven, lower the oven temperature to 300°F, pour the lemon curd on top of the shortbread, smoothing the top, and return it to the oven for 10 minutes.
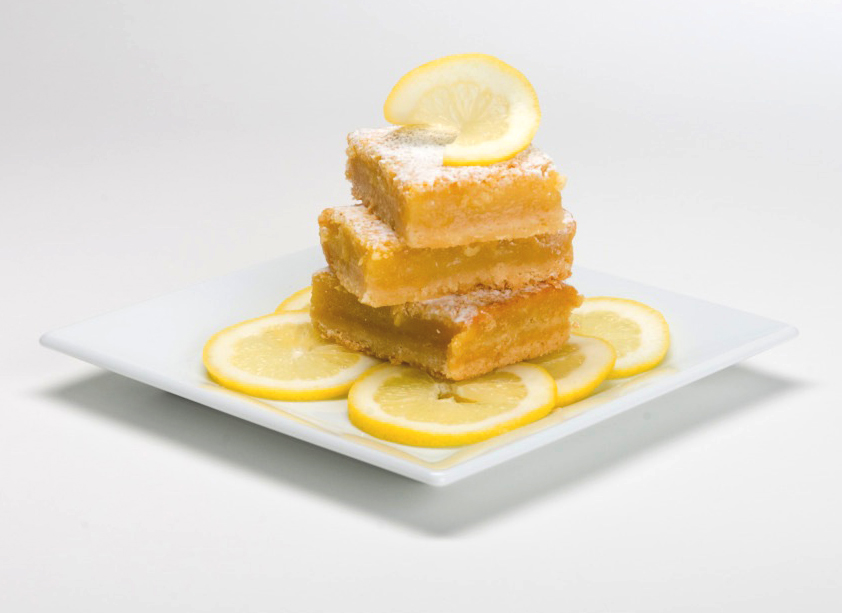
- Cool the lemon curd–topped shortbread completely in the pan on a wire rack. Refrigerate the pan for 30 minutes to set the lemon curd completely before cutting into bars. Place the powdered sugar in a small wire strainer and tap the strainer with a spoon to sprinkle a thick, even coating, entirely covering the lemon.
- Run a small metal spatula between the sides of the pan and the pastry on the 2 sides without the aluminum foil. Use the foil to lift out the lemon curd–covered shortbread onto a cutting surface. Gently ease the foil out from under the shortbread if you can. Use a long, sharp knife to cut the shortbread first in thirds, then in half the other way, and then each half in thirds. Wipe the blade after each cut. If it starts to get difficult to cut, run the knife under hot water, wipe dry, and cut again.
- The powdered sugar will start to be absorbed into the lemon curd after several hours, but it can be reapplied before serving. (Use the King Arthur Snow White Topping Sugar to avoid this step.)
- Yield: Makes 1-1/2 dozen (2-2/3 by 1-1/3 inch) bars
- Store: In an airtight container at room temperature, or in the refrigerator or freezer. It will keep 3 days at room temperature, 3 weeks refrigerated (individually wrapped in plastic wrap to prevent drying), or 3 months frozen.
Other Heritage Cook recipes that you might also enjoy:
Unauthorized use, distribution, and/or duplication of proprietary material without prior approval is prohibited. I can be contacted via email at: heritagecook (at) comcast (dot) net. Feel free to quote me, just give credit where credit is due, link to the recipe, and please send people to my website, www.theheritagecook.com.
Thank You!


NANCY NOTTAGE
Wow, just had my first bite of the ginger bar cookies. Delicious! So moist and flavorful. Not too sweet, which I really like. I love the flavor of butter and spices mingled together. Must have another bite. OMG, this is so good.
Jane Bonacci, The Heritage Cook
YEA!! I am thrilled you like the recipe. Will it become an annual tradition? I love them too!
NANCY NOTTAGE
Jane, I am so excited todays topic. Bar cookies are my favorite cookie to make. I am looking forward to trying them, especially the ginger bar cookie. Thanks so much.–Nancy
Jane Bonacci, The Heritage Cook
Wonderful Nancy! I hope you have a great time playing with the new cookie options!!