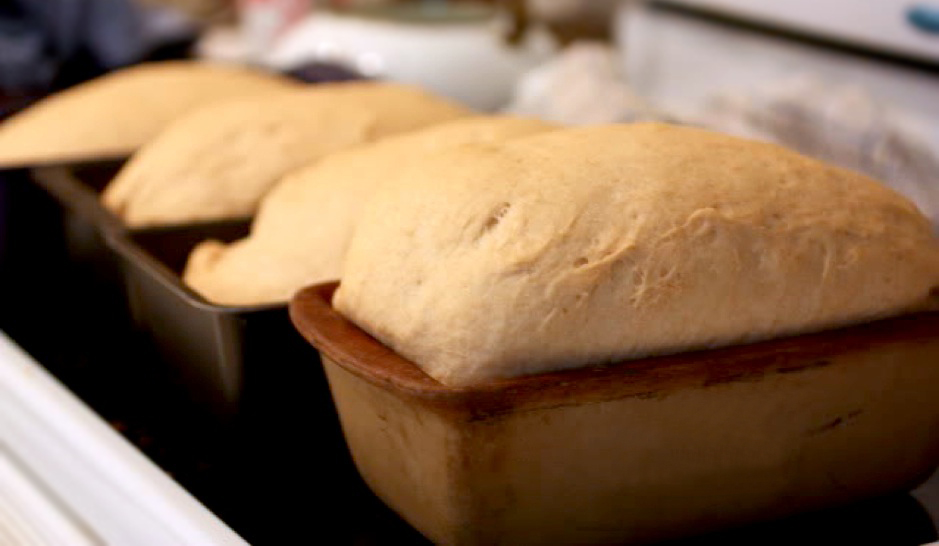
I have loved baking bread ever since high school when I picked up my copy of the red plaid covered Better Homes and Gardens Cookbook. I started with their simple white bread and was thrilled with the loaves it yielded. Warm from the oven and with the kitchen smelling like my grandmother’s baking, I knew I was hooked. I couldn’t wait for it to cool before cutting off a large slice and slathering it with fresh butter. I don’t think there is anything better in this whole wide world!
Last week one of my readers wrote asking me if I had any clues I could give her on how to bake whole-wheat bread. She is a very accomplished baker who loves to make loaves of white, sourdough, French, Kaiser rolls, and pizza crust. However, anytime she attempts to make whole-wheat, she can use the loaves as doorstops. I was excited at the opportunity to research the phenomenon of wheat breads.
When I think of bread baking experts in this country, there are almost too many to count. I have been incredibly blessed to work with several of them and take classes from others. Each offers their unique perspectives on the intricacies of bread. There are wildly differing opinions and techniques, but each produces simply amazing bread. But when I think about why yeast, flour, and water interact to create a perfectly leavened dough, Shirley Corriher is my professor.
A graduate of Vanderbilt University with a degree in chemistry, she worked as a biochemist at their medical school. She took her skills in chemistry and turned them toward the kitchen to help all of us understand the reasons behind recipes. She is a James Beard Award winner, was voted the Best Cooking Teacher of the Year by Bon Appetit, and has won a plethora of other honors. On top of all that, she is one of the kindest, funniest people you will ever be lucky enough to meet. If she is coming to a cooking school near you, by all means make sure you take her class! And nobody who likes to cook should be without both of her incredible cookbooks, Cookwise: The Hows and Whys of Successful Cooking, and Bakewise: The Hows and Whys of Successful Baking. If you have a question, she will have an answer and a recipe for you! Today’s recipe for her Land of Milk and Honey Whole Wheat Bread is sure to become one of your favorites.
Last year at the IACP annual conference in Portland, OR, I met the delightful Nancy Baggett. She is one of the most respected baking teachers in the country and is an award winning cookbook author. A regular contributor to Gourmet, Food & Wine, Bon Appetit and other periodicals, she is also a favorite of morning news programs. And who wouldn’t want to smell the aromas of her baking endeavors! In her latest book, Kneadlessly Simple, Nancy explores the controversial topic of breads that require little or no kneading. It was wonderful to see her present this technique to a large audience of professional bakers. She demonstrated while we tasted samples she had baked earlier in the morning. While a few of us were skeptical at first, we were won over the instant we tasted her breads. They were just as delicious and light as traditional breads, with a well developed crumb and perfect crust. I know you will enjoy making her All-Purpose Light Wheat Bread recipe.
Making whole-wheat is completely different from other types of breads. If you try to make bread using only whole-wheat flour, you are guaranteed to produce hockey pucks. Wheat flour must be blended with white flour to lighten it. There are two general types of wheat, soft and hard. Soft wheat, typically grown in the Midwest and South, is lower in protein. It is best used in recipes that contain chemical leaveners like baking powder and baking soda, such as biscuits, quick breads, and cakes. It is often packaged as pastry or cake flour. Hard wheat, sometimes called winter or red wheat, grows best in the cooler climates of our northern and western states and is much higher in protein. That protein is needed to support the rising dough and make the perfect loaf of bread.
The newest version of wheat flours, white whole wheat, is made from a lighter colored, more mildly flavored type of wheat. It is still whole wheat and behaves similarly. Because whole-wheat flour contains the wheat kernel and the sharp edges can cut the chains of gluten, adding some white flour increases the overall gluten content. For more detailed information on the various types of wheat, their protein percentages and a break down by brand see the charts at the bottom of this article.
One challenge to bread bakers is that what we call “all-purpose” flours have different protein percentages depending on where you live in the United States. If you live in the northern or western states, the AP flour is fairly high in protein and will make decent loaves of bread, but biscuits and cakes may be a bit tougher. You can substitute a little bread flour to boost the protein content or cake flour to cut it further. If you live in the South, AP flours tend to be lower in protein, making them perfect for pastries and tender biscuits. Add a little flour labeled “good for bread” or one that says it is made from hard wheat when you are making bread.
On top of that, the big producers of AP flour lose a lot of the natural nutrition of the wheat in their milling process. While they can add some of this back, there is still the issue of their lack of organic practices. In most cases, yeast just seems to react better to organic flour. It rises faster and higher. Any homemade bread will be healthier for your family, contain far fewer chemicals, and taste infinitely more delicious. Organic ingredients cost more, but when you weigh the cost against the flavor and health benefits, I personally think the difference in price is worth it.
One baker wrote, “Diastatic barley malt powder or malted barley flour is frequently added to flour destined for making bread. It contains enzymes that convert starches to sugar and is reported to improve yeast activity, bread texture, and storing qualities. It is used in very small quantities. Add 1/2 tsp per loaf when using flour where it is not listed as an ingredient. King Arthur AP and Bread flour list it. Whole wheat and White whole wheat do not.” I like the slightly sweet flavor it adds to baked goods.
The next primary ingredient in bread making is yeast. There are several types and brands in the stores and their differences are more profound than I had realized. One of the reasons for letting bread dough rise is to develop flavor. A longer proofing time helps you get a deeper, more complex flavor. One thing that really surprised me was that “instant” yeast basically needs the same amount of time to rise as regular active yeast. Instead of proofing it in warm water, you add it to the dry ingredients. Because the granules are much smaller it doesn’t need to be proofed. You will see a relatively fast first rise, but that’s just because it activates more quickly. It still needs the same amount of proofing time to fully rise and develop flavor.
Professional bakers often use instant yeast because it stands up to the lengthy rise times sometimes required in a bakery. In general, the longer the rise time, the better the flavor. When a recipe calls for a preferred type of yeast, you absolutely need to use it. The baker developed the recipe specifically to take advantage of its characteristics. When it just calls for “yeast” you should use Active Dry yeast.Instant yeast is actually stronger than active dry yeast. If you want to substitute it and your recipe calls for 1 packet (2-1/4 tsp) active dry yeast, use 1-3/4 tsp of instant yeast.
In normal recipes, whole-wheat dough requires a tremendous amount of kneading to fully activate the gluten. In some recipes it can take up to 30 minutes. Just imagine, our grandmothers and great-grandmothers used to make all their bread by hand. They mixed it in a bowl with a wooden spoon and then kneaded it all until it felt right. There is a suppleness to perfectly kneaded bread that is unmistakable. But these days we have equipment to make it easier. Unless you want one heck of a workout, use a heavy-duty stand mixer. I love my KitchenAid because it is an absolute workhorse and can take the punishment of kneading bread dough.
I could go on for days on this topic, but I think I’ll stop here for today. My advice to you is to roll up your sleeves and dive into bread baking with abandon. Yes you will have failures, but along the way you will learn a lot – about bread and about yourself! There are many life lessons in bread baking, not the least is that patience will be rewarded with a delectable loaf of the best bread!
In addition to Bakewise and Kneadlessly Simple, here are a few of my other favorite cookbooks with a focus on bread baking:
- Artisan Bread at Home by The Culinary Institute of America
- Peter Reinhart’s Artisan Breads Every Day by Peter Reinhart
- Secrets of a Jewish Baker by George Greenstein
- Tartine Bread by Chad Robertson
- The All-Purpose Baking Cookbook from King Arthur Flour
- The Bread Baker’s Apprentice by Peter Reinhart
- The Village Baker by Joe Ortiz
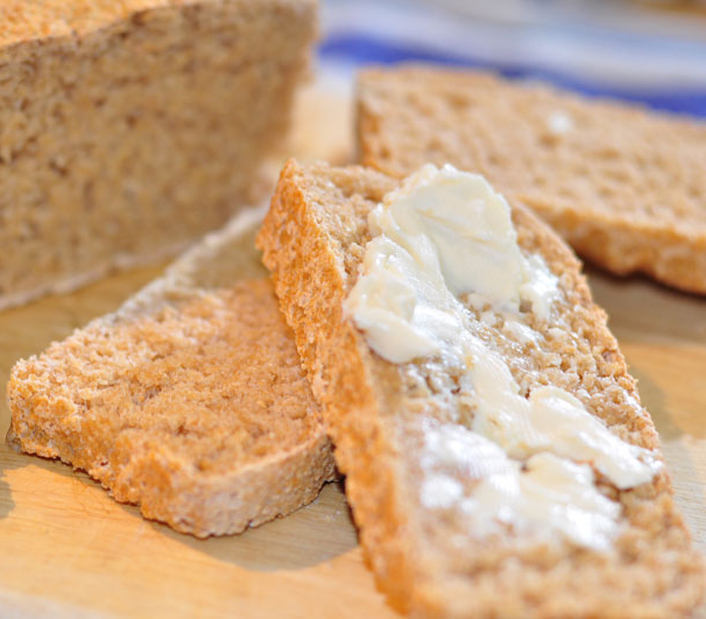

- 3 cups (15 oz) unbleached all-purpose white flour, plus more as needed
- 1 cup (5 oz) whole-wheat flour, plus 1 tbsp for garnishing top of loaf
- 3 tbsp granulated sugar
- Generous 1-3/4 tsp table salt
- 3/4 tsp instant, fast-rising, or bread machine yeast
- 3 tbsp corn oil, plus extra for coating dough top and baking pan
- 2 cups plus 1 tbsp ice water, plus more if needed
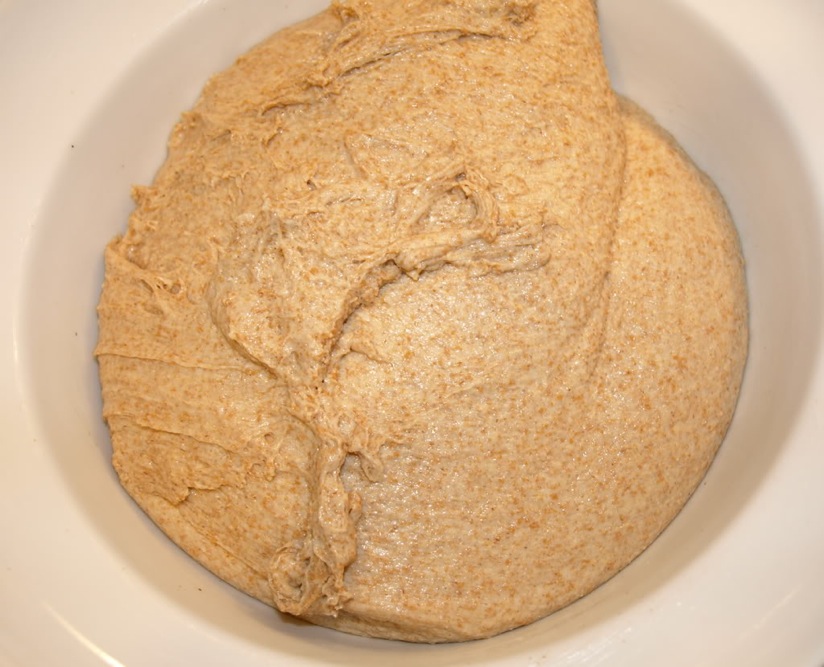
- First Rise: In a large bowl, using a spoon, thoroughly stir together the white flour, whole-wheat flour, sugar, salt, and yeast. In another bowl or measuring cup, whisk the oil into the water. Then vigorously stir the mixture into the bowl with the flour, scraping down the sides and mixing until thoroughly blended. If too dry to mix together, add just enough more water to facilitate mixing, but don’t over-moisten, as the dough should be stiff. If necessary, stir in enough more white flour to stiffen it. Brush or spray the top with oil. Tightly cover the bowl with plastic wrap. If desired, for best results or for convenience, you can refrigerate the dough for 12 to 18 hours; if convenient, vigorously stir once during the rise.
- Second Rise: Vigorously stir the dough. If it is not stiff, stir in enough more white flour to yield a hard-to-stir dough. Using an oiled rubber spatula, gently lift and fold the dough toward the center all the way around (this organizes the gluten for shaping the dough into a loaf). Invert it into a very well greased 9x5-inch loaf pan. Using an oiled rubber spatula or your fingertips, smooth out the top and press the dough out into the pan. Brush or spray the top with oil. Evenly sprinkle the top with 1 tbsp whole wheat flour. Using a well-oiled serrated knife or kitchen shears, make 3 to 4 evenly spaced diagonal 1/2-inch deep slashes down the loaf. Cover the pan with nonstick spray-coated plastic wrap.
- Let Rise Using any of These Methods: For a 1-1/2 to 2-1/2 hour regular rise, let stand at warm room temperature; for a 1 to 1-1/2 hour accelerated rise, let stand in a turned-off microwave along with 1 cup of boiling water; or for an extended rise, refrigerate, covered, for 4 to 24 hours, then set out at room temperature. When the dough nears the plastic covering, remove it and continue the rise until the dough extends 1/8-inch above the pan rim or doubles from its deflated size.
- Baking Preliminaries: 15 minutes before baking time, place a rack in the lower third of the oven; preheat to 375°F.
- Baking: Bake on the lower rack for 50 to 60 minutes, or until the loaf is well browned and crisp on top. If necessary, tent loosely with foil to prevent over-browning. Bake for 10 to 20 minutes more, until a skewer inserted into the thickest part comes out with just a few particles on the end (or until the center registers 208°F to 210°F on an instant-read thermometer). Then bake for 5 minutes longer to make sure the center is done. Cool in the pan on a wire rack for 10 minutes. Turn the loaf onto a rack and cool thoroughly.
- Serving and Storing: Serve warm, cool, or toasted; the bread slices best when cool. Cool thoroughly before storing in plastic or foil. Keeps at room temperature for 2 to 3 days. May be frozen, airtight, for up to 2 months.
- Yield: 1 large loaf, 12 to 15 slices
- VARIATION: All-Purpose Whole-Wheat Bread - Use 2 cups white flour and 2 cups whole-wheat flour. If desired, add 1 tbsp more sugar to balance the wheat flavor. Proceed exactly as directed in the original recipe.
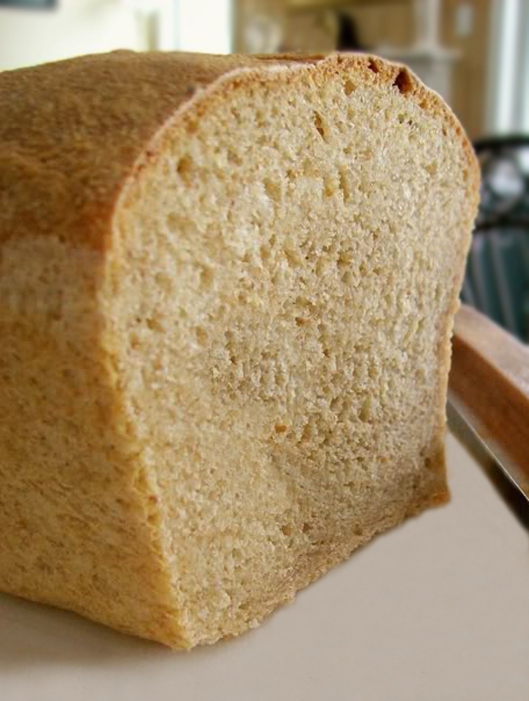

- 2-1/2 cups (12 oz) spooned and leveled bread flour
- 1-1/2 cups milk, scalded (see Note)
- 1-1/4 cups (5.3 oz) spooned and leveled whole-wheat flour
- Nonstick cooking spray
- 1 package (2-1/4 tsp) instant yeast, such as RapidRise or Quick-Rise
- 1/10 of a crushed quarter of a 500 mg vitamin C tablet (ascorbic acid), about 10 mg
- 3 tbsp honey
- 1 large egg yolk
- 1 tsp fine sea salt
- 1/4 cup ice water
- 1 tbsp canola oil, divided
- 1 large whole egg, beaten
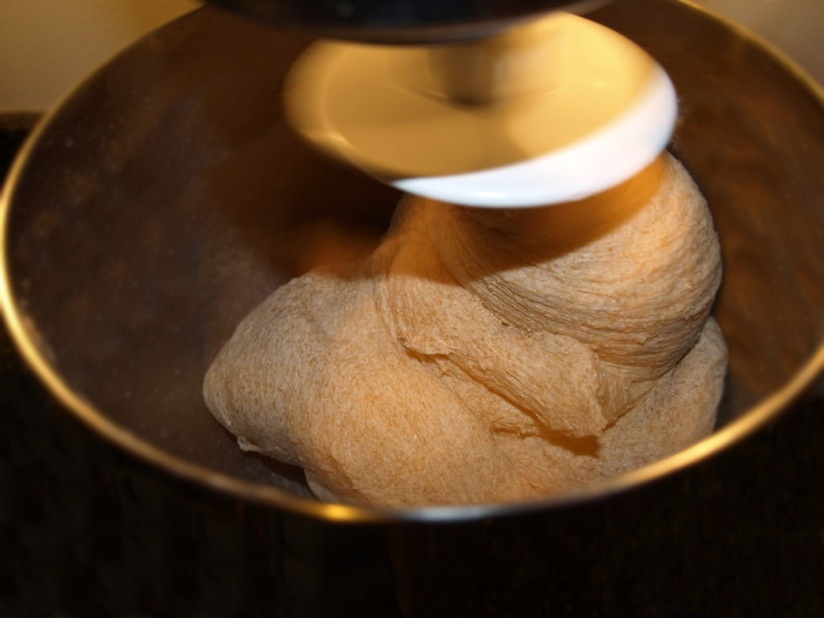
- In the bowl from your standing mixer, stir the bread flour into the scalded milk. With a dough hook, on low speed, mix in the whole-wheat flour for 1 minute. Lightly spray a piece of plastic wrap with nonstick cooking spray and place over bowl. Allow to stand for 30 minutes at about 70°F.
- Sprinkle the yeast over the dough. Mix on low for a few seconds. Add the vitamin C, honey, and yolk. Mix on low for a few seconds. Sprinkle salt over the dough, add the ice water, and mix on the second speed for 2 minutes. The dough should be soft. Adjust with bread flour or water as needed.
- Place the dough in an oiled bowl, turn to coat, and cover with plastic wrap sprayed with nonstick cooking spray. Let stand for 30 minutes.
- With a paper towel, lightly oil an area on a clean countertop. Dump out the dough onto this area so that the smooth top is now on the bottom. Allow it to spread out as far as it will. Pick up dough on the left side, lift up about 1/3 of the dough, and gently fold it across to the right, trapping some air as you make the fold. Allow it to spread for a few seconds, then lift up about 1/3 of the right side of the dough and bring it across to the left. Again, allow the dough a few seconds to spread. Pick up the bottom edge of the dough and bring about 1/3 of it up and across the top. After it settles, pick up the top edge, lift about 1/3 of it up, and bring it towards you. You will have made 4 folds of the dough.
- Place the dough back in the bowl, turning it over so the smooth side is back on top. Cover with the sprayed plastic wrap and allow to rise until more than doubled, about 1 hour.
- After this rise, lift the dough out and place on the oiled counter, smooth top up. With both hands in a cupping motion, tuck the sides under, creating a smooth top. By tucking the dough into a tight smooth round, you create a covering to better hold gases. With both hands, grab the sides of the round and stretch it sideways into an oval. Let it spring back slightly, and then pull it out again. Cover with plastic wrap sprayed with nonstick spray and allow to stand for 15 minutes.
- Cup the dough with both hands, fingers spread out behind the loaf on either side with your thumbs in front of the loaf. Press your thumbs into the dough and down against the table. This pulls or tucks in part of the bottom half of the dough. At the same time, pull the top of the dough tight and forward with your fingers. Now move your thumbs down slightly and press down and in again to knead and tuck again. Repeat this motion 2 or 3 times until the loaf is stretched taut and well tucked in. Pinch the bottom seam tightly together. The ends go down to a slight taper. Tuck them tightly under, then pinch the ends and bottom seam together.
- Spray a 9x5x3-inch loaf pan with nonstick cooking spray and place the loaf in it. Brush the loaf with some of the beaten egg. Cover with plastic wrap lightly sprayed with nonstick cooking spray and allow to rise until more than doubled, about 1 hour.
- When the loaf has been rising about 20 minutes, arrange a shelf in the lower third of the oven, place a baking stone on it, and preheat the oven to 375°F.
- Place a few clean small rocks (about 1 to 2 inches each) in a metal pan with 2-inch sides; place on the floor of the oven. You are going to pour about 1 cup of boiling water over the rocks just before you place the dough in the oven. The moisture will condense on the relatively cool dough and keep it a little moister, allowing the dough to rise well before its crust forms. Place about 1-1/4 cups water in a saucepan and bring to a low boil.
- With oven mitts on, very carefully pour the boiling water into the pan with the stones. Keep your head and arms out of the way of the great billow of steam that comes up. Close the oven door immediately.
- Brush the loaf again with beaten egg and place on the hot stone. Bake until it is well browned, 45 to 55 minutes. The loaf should sound hollow when thumped lightly on the bottom. You can also check for doneness by inserting an instant-read thermometer in the bottom center of the loaf and pushing it to the center. The loaf is done when the center is over 200°F. Place the loaf on a rack to cool.
- Yield: 1 (9x5x3-inch) loaf
- To scald milk, rinse a heavy nonstick pan with cold water. Pour in the milk and, over medium heat with regular stirring, bring milk almost to a simmer (about 185°F). Remove it from the heat and allow to cool.
Additional Information for Curious Bakers
Types of Wheat Grown in the United States
Dr. Jim Beuerlein; Professor, Horticulture and Crop Science, Ohio State University
Durum Wheat, the hardest of all wheat grown in the U.S., is seeded in the spring and contains a high amount of protein (1216%), which is good for pasta products macaroni, spaghetti, and other noodles. Durum wheat is grown mainly in North Dakota and has subclasses such as Hard Amber Durum, Amber Durum, and Durum wheat.
Hard Red Spring Wheat contains the highest protein content (1316.5%) making it an excellent bread wheat with superior milling and baking characteristics. Hard red spring wheat is grown mostly in Montana, the Dakotas, and Minnesota. This wheat is seeded in the spring and may have either a hard or a soft endosperm. Subclasses are Dark Northern Spring, Northern Spring, and Red Spring wheat.
Hard Red Winter Wheat is the class of wheat used mostly for bread and all-purpose flour. This wheat is fall-seeded, has medium to high protein content (1013.5%), and can have either hard or soft endosperm. Hard red winter wheat accounts for more than 40% of the U.S. wheat crop and half of U.S. wheat exports. This wheat is produced in the Great Plains, between the Mississippi River and the Rocky Mountains, and from Texas to the Dakotas and Montana. It has a wide range of protein and good milling and baking qualities. The flour is used to produce bread, rolls, some sweet goods, and all-purpose flour.
Hard White Wheat is the newest class of wheat to be grown in the United States. Hard white wheat is closely related to red wheat except for the color genes and has a milder, sweeter flavor, equal fiber, and similar milling and baking qualities. Hard white wheat is used in yeast breads, hard rolls, bulgur, tortillas, and oriental noodles. This wheat is used in domestic markets and is exported in limited amounts.
Soft Red Winter Wheat is seeded in the fall, has a low to medium protein content with soft endosperm, and is used to make cakes, pastries, flat breads, and crackers. It is grown east of the Mississippi and has no subclasses. Ohio is the leading producer of soft red winter wheat followed by Arkansas, Illinois, and Missouri. Ohio wheat is known for making higher-quality flour than that coming from any other soft red winter wheat-producing state.
Soft White Wheat is used much the same way as soft red wheat (for bakery products other than bread) and is grown mostly in the Pacific Northwest and to a lesser extent in California, Wisconsin, Michigan, and New York. Soft white wheat has low protein and high yields. Subclasses are Soft White, White Club, and Western White wheat.
Some Common Flour Brands and their Protein Percentages
Brand ……………………………………..% Protein
Gold Medal Better for Bread 12.2 to 12.7
White Lily Bread 11.7
King Arthur All Purpose 11.7
Hudson Cream Short Patent 11 plus
Pillsbury All Purpose 10.5
Hodgson Mill All Purpose 10
Gold Medal All Purpose (CA) 9.8 to 11
Gold Medal All Purpose (TN) 9.8 to 11
Big Springs Mill A #1 Patent 8 to 9
White Lily All Purpose 8
Stone Buhr White 4.48
Protein Percentages in Various Types of Flour
Flour Type …………% Protein ……….Recommended Uses
High-Gluten 14 to 15 Bagels, pizza crust, blending with other flours
Whole-Wheat 14 Hearth breads, blending with other flours
Bread 12 to 13 Traditional breads, bread machine breads, pizza crusts
All-Purpose 9 to 12 Everyday cooking, quick breads, pastries
Self-Rising 9 to 11 Biscuits, quick breads, cookies
Pastry 8 to 9 Pie crusts, pastries, cookies, biscuits
Cake 5 to 8 Cakes, especially those with a high ratio of sugar to flour
I gathered information from the following online sources:
Unauthorized use, distribution, and/or duplication of proprietary material without prior approval is prohibited. If you have any questions or would like permission, I can be contacted via email at: heritagecook (at) comcast (dot) net. Feel free to quote me, just give credit where credit is due, link to the recipe, and please send people to my website, www.theheritagecook.com.
Thank You!




Winnie
Great post! So thorough. I love baking bread, too…
Jane Bonacci, The Heritage Cook
What are your favorites to bake Winnie? Does anything smell better?
Nancy
Thanks for all the great information. I think that the major problem with the recipe I used is that it called for too much whole wheat flour. I’m anxious to try these recipes–I will conquer this yet!
Thanks again!
Jane Bonacci, The Heritage Cook
Hi Nancy, I am thrilled that you figured out where your recipe is probably off kilter. I can’t wait to hear you celebrate your successful baking adventure!!!
Jane Bonacci, The Heritage Cook
Thank you ladies! I actually had to stop myself from writing more. Bread is such a complex and beautiful thing! I hope everyone enjoys the information – I find it all fascinating. Have fun baking!!
Shelby
What a beautiful loaf of bread and what an awesome post this is. I love all of information here!
Lindsey @ Gingerbread Bagels
Wow this post is SO helpful! Thank you for sharing such great information. Bread is my favorite thing to bake and I’m always trying to learn more. Thank you thank you!
And your bread is gorgeous. 🙂