Mouthwatering aromas wafting skyward from backyard barbecues. The sound of ice clinking in glasses, joyous laughter, the sizzle as new food hits the hot grill, and splashing water as kids play in the pool. Warm, balmy evenings with the whisper of a cooling breeze. The deep green of a grassy lawn disappearing into an old stone wall. The mysterious blue of a twilight sky as day surrenders to night. This is summer to me.
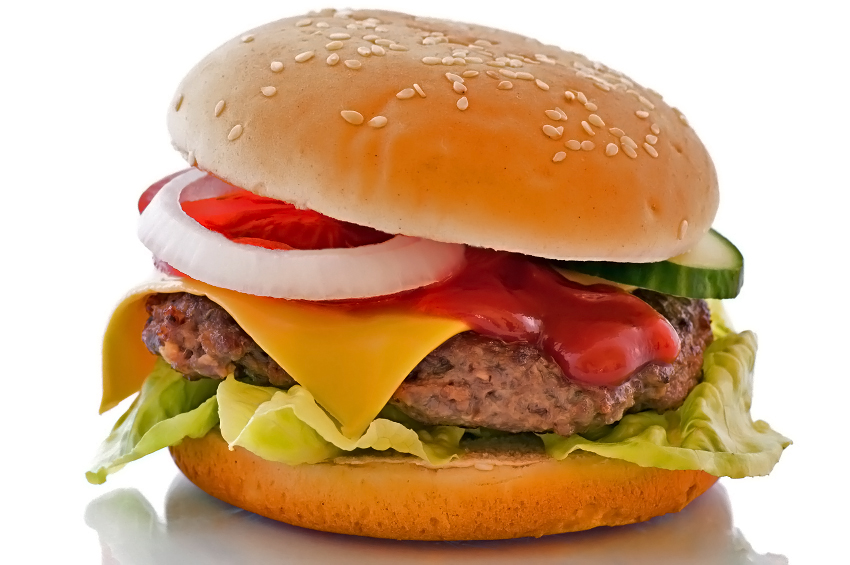
Today we are celebrating barbecued hamburgers. Served with a slices of ripe tomatoes, lettuce and cheese, everyone grew up eating burgers. While Americans want to believe they started here, history shows that ancient Egyptians ate ground meat and while not usually called a “hamburger,” it has been formed into patties all over the world. For the most part early burgers were eaten raw. When Genghis Khan’s grandson, Khubilai Khan’s army invaded Russia in the 1200’s, their meat patties were adopted by the local chefs. They named the raw ground meat “Steak Tartare” after the Mongols whom they called Tartars.
In the 1600’s ships from Hamburg, Germany brought steak tartare back to Germany and it became known as tartare steak. The German form was made from salt beef, minced and mixed with onions and breadcrumbs. In the late eighteenth century, the largest seaports of Europe were in Germany. Sailors who visited Hamburg started calling the patties “Hamburg Steak” and when German immigrants arrived in America they brought their favorite foods with them, including the Hamburg Steak. Over time the term “steak” was dropped and the manner of preparation evolved to what we know today.
The hamburger got its first widespread attention at the 1904 World’s Fair in St. Louis, Missouri. A reporter for the New York Tribune newspaper wrote about a new sandwich called a hamburger, a minced meat patty grilled until crisp and served between slabs of bread. In 1921 White Castle Hamburgers was founded and became the world’s oldest hamburger chain. Ten years later, the popular newspaper cartoon strip Popeye the Sailor Man introduced a new character called Wimpy. He never seemed to have the money to pay for his favorite meal, a hamburger, saying, “I’d gladly pay you Tuesday for a hamburger today.” Children all over the country became devotees of both Wimpy and the hamburger.
When you throw your burgers on the grill, think about also adding the tomato and onion slices. Cooking them over the fire adds an extra boost of smokiness, enhancing the flavor of the burgers. Onions are notorious for falling apart, so I use a skewer to hold them together while they cook. You can also use a grill basket
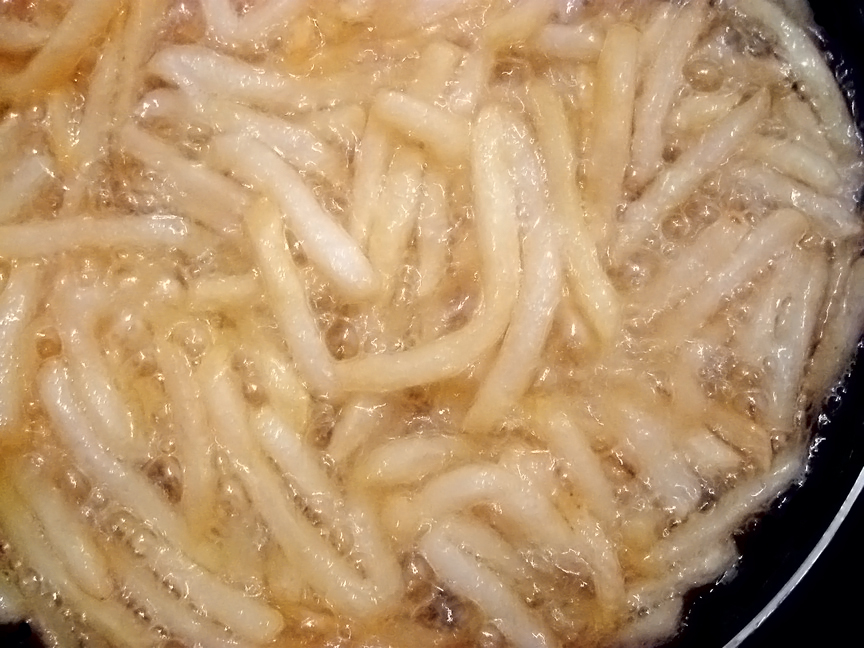
I don’t know who the first person was who teamed burgers with French fries, but I would like to shake their hand. There is no better sidekick than hot, crispy fries fresh out of the fryer. I grew up eating homemade French fries and know how great they are. My mother would peel 5 pounds of potatoes for one meal! Our deep fryer got a lot of use when I was little and I loved to watch the potatoes gradually turn golden brown in the steaming and bubbling oil.
The secret to perfect French fries is to fry them twice. Yep, that’s right, twice. The first time cooks the interior so your fries are light and airy in the center. The second frying is done at a higher temperature and crisps the outside. Make sure you let them cool slightly between frying and always drain on paper towel-lined sheets.
While canola oil is the healthiest choice for your frying oil, you can get great results with other fats too. In the olden days our grandmother’s always used lard. These days I would recommend you buy leaf lard which is especially clean tasting. You can reuse the oil a few times if you strain out any solids before storing it. Lately you are seeing a lot of restaurants offering potatoes fried in duck fat. Talk about finger licking good! If you want to avoid the lingering smell of hot oil in the house, you can use an electric deep fryer in your garage or on the patio. Your neighbors will love the cooking scents coming from your house, LOL.
If you want a real treat, make your own hamburger buns from scratch. They are actually quite easy to make and don’t take as long as bread does to rise. Start the buns about midday and they’ll be baked and ready by the time you are ready to grill the burgers. If this is too much work or you don’t have the time, many gourmet grocery stores are selling very high quality buns. I like brioche if I can find it. It gives you a buttery goodness that is hard to beat.
The Vidalia Onion Committee has a wonderful website chock full of great information on how to store and use them, and recipes that will have you drooling. I have included a recipe for Vidalia Sliders that was won their cook-off competition. I know once you have tried their unique combination of ingredients, you will have a hard time going back to plain old burgers!
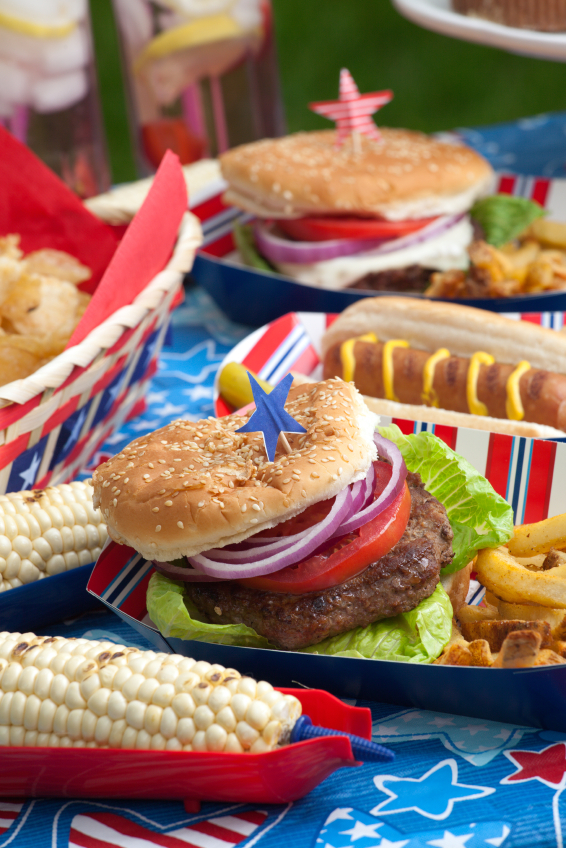
Whether you stay with the traditional ingredients or try something daring, enjoy this taste of Americana with your family and friends as you watch the fireworks and celebrate our country’s independence. Happy Fourth of July!
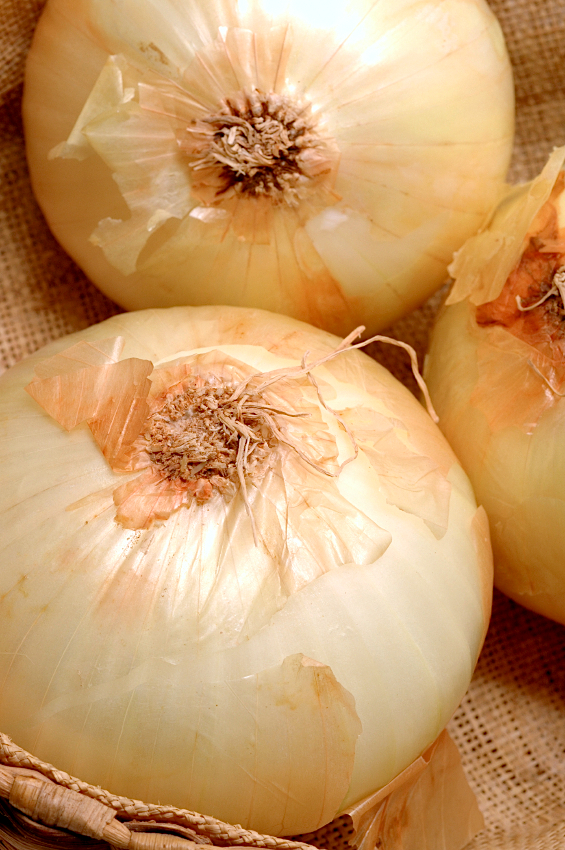
Sweet Vidalia onions
Jane’s Tips and Hints:
Adding a little soy sauce to the meat gives it a boost of indescribable flavor that will have your guests asking, “What is that flavor?” When the burgers are cooking, never press down on them. That releases all the wonderful juices that you need to keep them moist. To avoid a bulging patty, when you are forming them, press the center to make a slight indent. As the proteins tighten this depression will fill in giving you a perfectly flat burger.
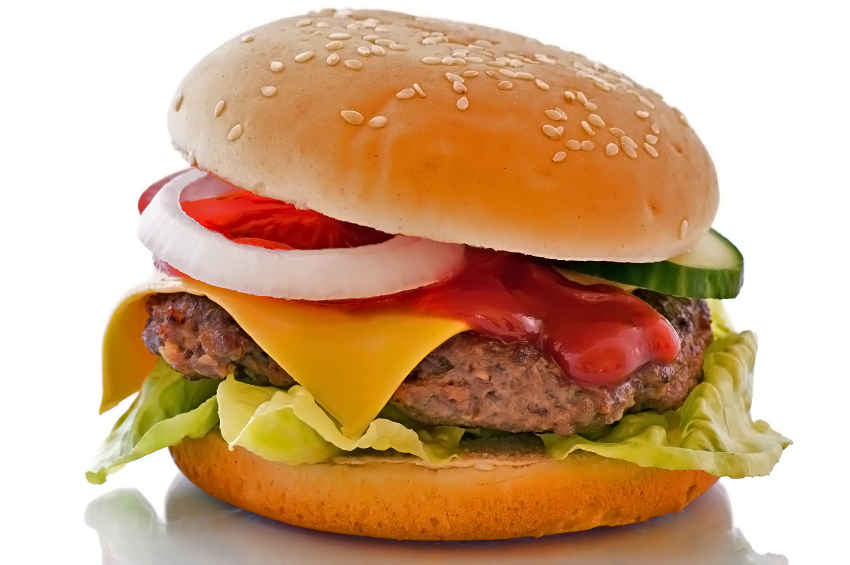

- 2-1/2 lb freshly ground chuck and/or sirloin, preferably 20% to 30% fat
- 1 tsp soy sauce or kosher salt
- 1 tsp freshly ground black pepper
- 6 slices of cheese
- 6 large hamburger buns
- 6 thick slices ripe tomatoes
- Crisp iceberg lettuce leaves, stem portion removed
- Thin slices of mild onion, such as Vidalia or red
- Set up your grill for 2-tier cooking. If using charcoal, light the coals and when covered with ash, bank most of them on one side of the grill bed. If using a gas grill, preheat with all the zones on and then turn off one or two to create a cooler area.
- Place your meat in a large bowl and season with the soy sauce (or salt) and pepper. Toss lightly to distribute the seasonings. Working gently, form into 6 patties. Press the center of each one to create a shallow depression. This will help avoid a bulging burger that looks more like a baseball than a disk. Don’t overwork the meat and handle as little possible to avoid melting the fat with the heat of your hands.
- Place the patties over the direct heat and cook for about 1-1/2 minutes per side. Move them to the cooler side of the grill and continue cooking for about 3 minutes longer per side for medium. If you have freshly ground meat from a reputable butcher you can eat your burgers rare to medium-rare. If you are less sure, cook them to at least medium. But remember that the longer you cook them, the drier they will become.
- When done, transfer to a clean platter and tent with foil. Let them rest off the heat for about 5 minutes. While the meat is resting, you can toast the buns if you like on the cooler side of the grill. Watch them carefully, especially if you are using Brioche buns, so they don’t burn.
- On the bottom half of the buns layer the lettuce, burger patty, tomato and onions. Add any other garnishes that you like and serve immediately.
- Burgers
- 1-1/2 lb ground chuck
- 1/2 cup peeled, grated apple (such as Granny Smith)
- 1/4 cup finely chopped Vidalia onion
- 2 tsp chopped fresh sage
- 1 tbsp brown sugar
- 2 tsp Dijon mustard
- 1/4 tsp red pepper flakes
- 1-1/4 tsp salt
- Toppings
- 1 tbsp butter
- 2 tbsp olive oil, divided
- 1/2 medium Vidalia onion, thinly sliced
- 1/4 cup mayonnaise
- 1/4 tsp garlic
- 12 soft dinner rolls, split and warmed (such as Hawaiian)
- 1/2 lb Brie, rind removed, sliced
- Make Burgers: In a large bowl, gently combine ground chuck, apple, onion, sage, brown sugar, mustard, pepper flakes and salt. Form into 12 patties; refrigerate.
- Prepare Toppings: Meanwhile, heat butter and 1 tbsp olive oil in a large skillet over medium-high heat. Cook and stir sliced Vidalia onion until golden, about 10-15 minutes.
- Remove onions from skillet; set aside and cover. In same skillet, heat remaining olive oil over medium heat. Cook burger patties, in batches as needed, until desired doneness, about 3 minutes per side for medium.
- In a small bowl, combine mayonnaise and garlic. Spread rolls with mayonnaise. Place burgers on the bottom half. Layer on the Brie and warm onions. Top with roll tops and serve.
- Dough
- 3/4 cup lukewarm water
- 2 tbsp butter
- 1 large egg
- 3-1/2 cups unbleached all-purpose flour
- 1/4 cup granulated sugar
- 1-1/4 tsp salt
- 1 tbsp instant yeast
- Toppings
- 1 egg white beaten with 1/4 cup water
- 2 to 5 tbsp sesame seeds, optional
- 2 tbsp melted butter
- In the bowl of a stand mixer fitted with the paddle attachment, combine all the dough ingredients until smooth. Switch to the dough hook and knead until the dough climbs up the hook, about 3 minutes. You can also do this by hand. Combine the ingredients in a bowl and turn out onto a floured work surface, kneading until smooth and elastic, and no longer sticky. Add flour as needed. You can also put the ingredients into a bread machine and let it do the kneading for you.
- Place the dough into a large oiled bowl, cover with a clean kitchen towel and place in a warm draft-free area. Let rise until doubled in volume, about 1 to 2 hours.
- Gently deflate the dough and divide it into 8 pieces. Shape each piece into a round ball, pulling the top taught. Press the top with the palm of your hand to flatten into a rounded disk about 3-inches diameter. Transfer to a lightly greased or parchment-lined baking sheet, cover with a clean kitchen towel, and let rise for 40 to 60 minutes or until noticeably risen.
- While the rolls are rising, preheat the oven to 375°F.
- Brush the tops of the buns with the egg wash, and quickly sprinkle with sesame seeds. Bake for 15 to 18 minutes or until golden brown. Remove from the oven and brush the tops of the buns with the melted butter.
- Transfer to a wire rack and cool completely. When ready to serve, split horizontally with a sharp knife, making the bottom thinner than the rounded top.
- Yield: 8 large buns
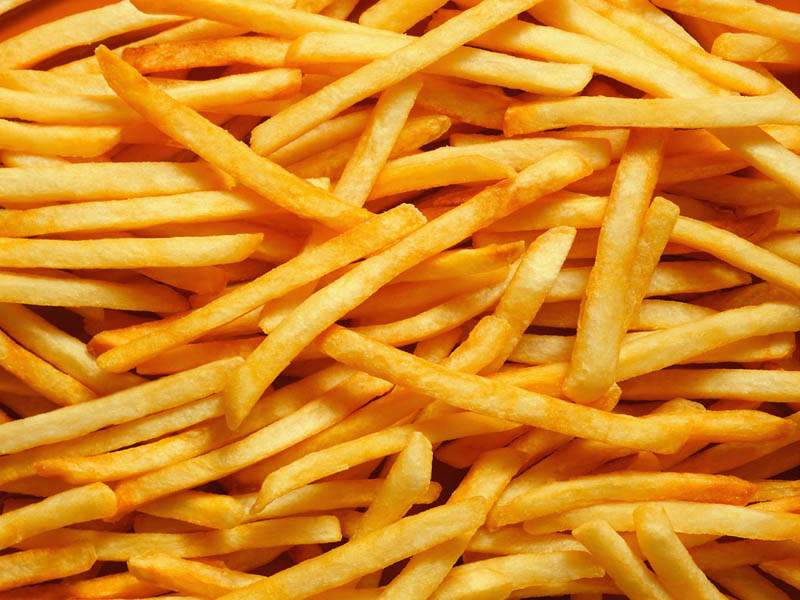

- Organic canola oil, for frying
- 4 large Russet potatoes
- Kosher salt, to taste
- Scrub potatoes and cut them into strips 1/4-inch to 1/2-inch wide. Place in a colander and rinse them with cold running water until the water becomes clear. You want to rinse off a good portion of the starch. Place in a bowl and cover with ice water. Refrigerate 30 minutes. Potatoes will hold in the water up to 2 days.
- Heat 3 inches of the oil in a deep fryer or Dutch oven to 325°F. Use a deep-fry/candy thermometer for accuracy.
- Working in batches if necessary, carefully place potatoes in hot oil. Fry 2 to 3 minutes until limp and just beginning to get a little color. Using a heatproof slotted spoon or spider, remove from oil and transfer to a paper towel-lined baking sheet. The blanched potatoes will not be fully cooked yet and will still look fairly raw. Let them rest at least 10 minutes to cool slightly. They can be held at this point for up to 2 hours.
- Bring the oil temperature to 360°F. Return potatoes to hot oil and cook until golden brown and crispy, about 2 more minutes. Transfer to fresh paper towel-lined baking sheet, immediately sprinkling with salt to taste, and keep warm in a low (200°F) oven until ready to serve.
- Yield: 2 to 4 servings
Thank You!




Carolyn
I’ve made fries once at home. Just once…I am talking the real FRIED fries. It’s a lot of work, but darn they are good!
Jane Bonacci, The Heritage Cook
I agree Carolyn – worth the effort on occasion!
Carrie Oliver
May be a silly question but is there a way to keep fries crispy (and even warm) on the road, e.g. taking them to a picnic?
Jane Bonacci, The Heritage Cook
Hi Carrie – I’ve been trying to figure out how you could do this, but it would be difficult. I think the best way would be to layer them between sheets of paper towel (to absorb any excess moisture) and then keep the container warm. Probably better to serve chips at a picnic and save these for a hosted event at home!