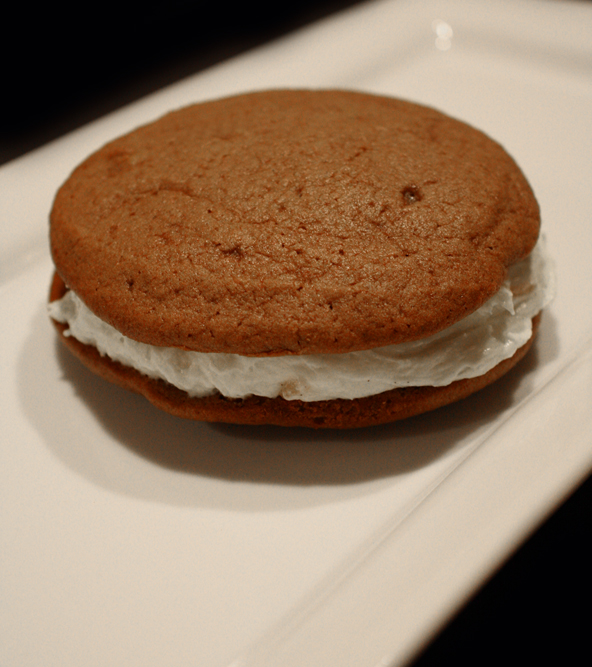
If you grew up in New England, in particular Maine or Pennsylvania, chances are your favorite childhood treat was a Whoopie Pie. Made from two mounded cake-like “cookies” with a sweetened cream filling, marshmallow fluff or frosting sandwiched between them. They land somewhere between a cake and a cookie, and may actually be better described as similar to slicing the tops off two cupcakes and sticking them together with frosting.
Traditionally they are made with chocolate batter, but gingerbread, peanut butter and coconut are other popular flavors. With the countdown to the holidays gaining momentum, pumpkin desserts are on everyone’s mind. Today’s Pumpkin Whoopie Pies are the perfect autumn dessert, after school snack or an “I’ve had a rough day” reward.
There is a competition between Maine and Pennsylvania over where the whoopie pie originated, but it is fairly certain that they were the creation of Amish bakers. There is an Amish legend that tells of children yelling out “Whoopie” when they discovered the treats in their lunch pails. Chances are pretty good that the first ones were made with leftover cake batter which accounts for their fluffy texture.
You can often find them being sold at roadside farm stands in Lancaster county, Pennsylvania. The unusual name happened because cakes were once baked in pie tins and the two names were often used interchangeably. The first commercially produced whoopie pies were made in the early twenties, just after World War I, and quickly spread throughout the country. Still extremely popular with children, they have begun to show up on the dessert menus of some of the finest restaurants in the nation.

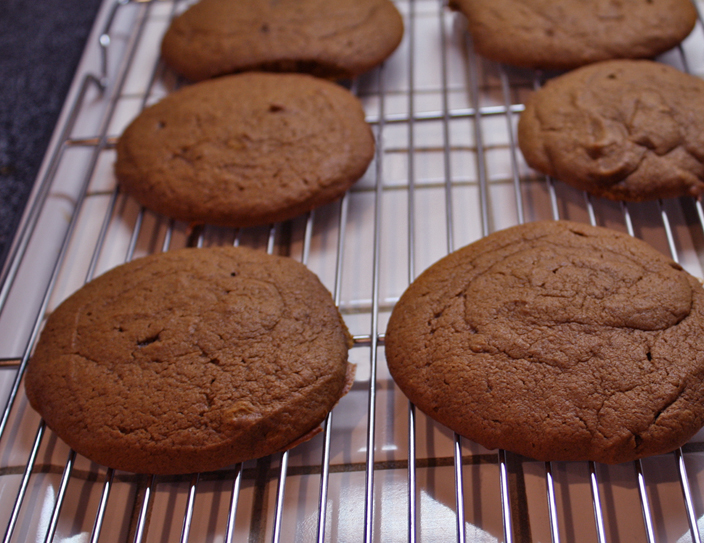
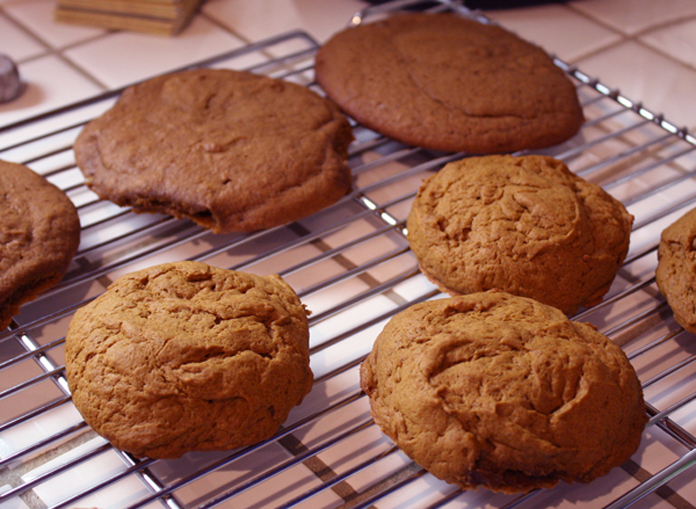
Whoopie pies made with sugar
When a friend of mine heard that I would be making pumpkin whoopie pies for today’s post, she begged to join me in my baking adventure. What fun! It is always great to have someone to cook with, bounce ideas off of and share the experience. I provided all the ingredients and equipment and was on hand to help with any questions while she made the cookies. In no time the house smelled wonderful and we were laughing our heads off.
As she finished placing the batter on the first pan, I tasted a little of it and asked if she had added the sugar. In fact she had forgotten it so instead of returning all the batter to the bowl, we decided to leave half the recipe as was and add the requisite sugar to the remaining portion. What a wonderful experiment! We got to see how the sugar interacted with the other ingredients to totally change the texture as well as the flavor of the cookies.
Although sugar is often added with other dry ingredients, it is actually considered a liquid ingredient in baking. So once we added it to the remaining batter, the consistency changed completely. It became light and fluffy, much more like the description in the recipe. It was one of the most delicious science experiments I’ve ever had the pleasure to conduct, LOL!
I decided to take half the filling and make it savory to use with the unsweetened cookies and boy oh boy was it good! I can easily see these as a great snack, appetizer or side to a meal. In fact we had some with our roast chicken dinner. They were yummy! A few tweaks and there is a winning recipe here!

Note the difference between the two versions. The taller ones are savory without sugar.
This is a perfect example of how to turn a mistake into an adventure. Instead of getting angry, we chose to change the way we thought about the ingredients and make something totally different. It was easy to do because the filling lent itself to savory seasonings. A little salt and pepper, onion powder and a few pinches of sage and we had an outstanding spread that I could have eaten with a spoon.
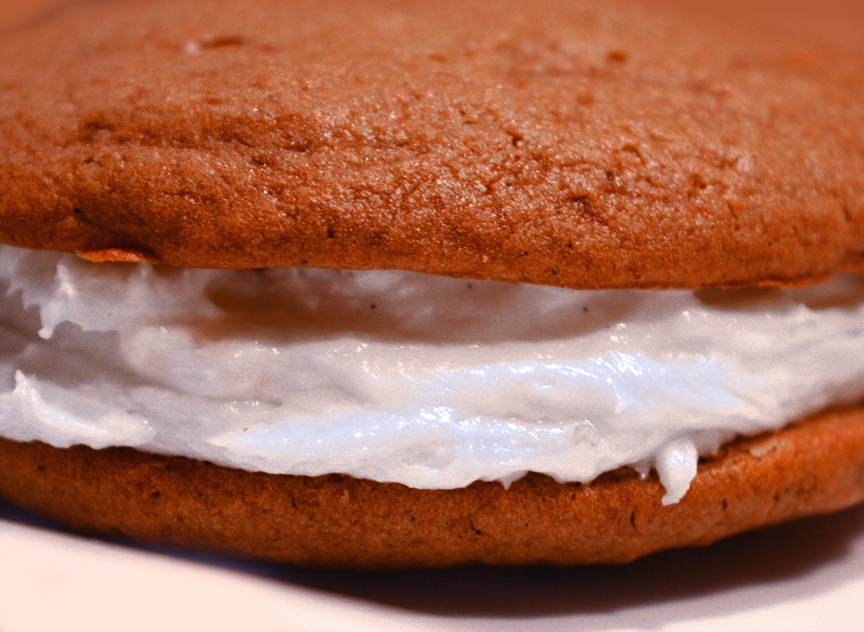
And there was more “magic” happening in the sweet filling. The recipe calls for xantham gum which I usually acquaint with gluten-free cooking. I knew it is was used as a substitute for the protein in wheat flour, but I hadn’t thought of using it as a stabilizer in sweet desserts. By adding just a couple of pinches of it to the filling, it thickened enough to give it extra body and not squish out when you bite into the sandwich cookie – one of the common challenges when eating traditional whoopie pies.
Crystallized ginger is an optional ingredient in the filling but I would absolutely use it. It added a wonderful burst of ginger flavor, a little heat and a nice texture. I liked it so much that I will probably use more the next time I make these. If you have never tried it, it is cubed semi-dried fresh ginger heavily coated in sugar. If you are a ginger fiend like me, you can happily snack on a whole bag of it in one sitting!
Do you have a Halloween party coming up? Just love pumpkin? Looking for a new, different and fun dessert for Thanksgiving or Christmas? These festive whoopie pies will be the hit of your holiday season, especially if you roll the edges in colorful sugar decorations!
Have a wonderful weekend everyone – Happy Festive Friday!

Close up of the candied ginger-studded filling – YUM!
Jane’s Tips and Hints:
I know there are many bakers out there who swear by making their pumpkin puree from scratch, and if you want to, by all means knock yourself out. But honestly, the folks at Libby have perfected the process and make an incredibly high quality product that gives you consistently good results.
NOTE: If you would like a Gluten-Free version, check out this post from a wonderful baker friend of mine, Shelby at Grumpy’s Honeybunch:
http://www.grumpyshoneybunch.com/2011/10/pumpkin-whoopie-pies-gluten-free-and.html


- Cake
- 1/2 cup soft butter
- 1/2 cup vegetable oil
- 2 cups firmly packed brown sugar
- 2 tbsp molasses
- 2 tbsp King Arthur Cake Enhancer, optional
- 1 tsp baking powder
- 1/2 tsp baking soda
- 1 tsp salt
- 2 tsp Vietnamese cinnamon
- 1 tsp ground ginger
- 1/2 tsp ground nutmeg
- 1/4 tsp ground cloves
- 2 large eggs
- 1 (15 oz) can pumpkin
- 2-1/4 cups Unbleached All-Purpose Flour or White Whole Wheat Flour (both available from King Arthur)
- Filling
- 8-oz package cream cheese, at room temperature
- 4 tbsp softened butter
- 2 cups glazing sugar or confectioners' sugar, sifted
- 1 tsp vanilla extract
- 1/4 tsp xanthan gum, optional
- 1/4 cup diced crystallized ginger, optional
- To make the cookies: Preheat the oven to 375°F. Grease two baking sheets or line with parchment paper.
- Beat together the butter, oil, sugar, molasses, cake enhancer, baking powder, baking soda, salt, and spices. Scrape the bottom and sides of the bowl, then beat in the eggs one at a time, until fluffy. Stir in the pumpkin. Add the flour in two additions, mixing well after each addition.
- Use a 1/4 cup measure to deposit the thick batter onto the prepared baking sheets, leaving about 2" around each mound.
- Bake until the cookies feel firm; a slight indentation will remain when you gently press them in the middle, about 16 to 18 minutes. (My oven took at least 5 min longer.)
- Remove from the oven, cool on the baking sheets for 5 minutes, then move to a rack to cool completely.
- To make the filling: Beat the cream cheese and butter until smooth and fluffy. Beat in the sugar in two additions. Add the vanilla and xanthan gum. Beat for 2 to 3 minutes, until very fluffy. Gently stir in the crystallized ginger.
- To assemble: Place 2 tbsp of filling on the flat side of one cookie and top with second cookie, flat side down. For best storage, wrap each pie in plastic wrap.
Thank You!


Karen Palmer
I had a friend who told me she made the whoopie pies after I told her about them! Have also heard that whoopie pies are the new cupcake! Look at you, on trend!
Jane Bonacci, The Heritage Cook
You are so funny – you didn’t have to tell the world it was you who left out the sugar, LOL!! So glad you enjoyed our kitchen adventure. So did I! You are welcome anytime to play and explore the joys of baking with me!!!
Karen Palmer
The pictures look great! Just like being there!
Jane Bonacci, The Heritage Cook
Thanks – I took them that evening after dinner. The Artist needed to be patient, LOL!
Karen Palmer
Greetings from the sugar with-holding friend! It was such a treat to bake with you. I learned SO much and apparently working with me was educational for you as well. It was great fun and the recipe was so much easier than i imagined. I will be making it again SOON!