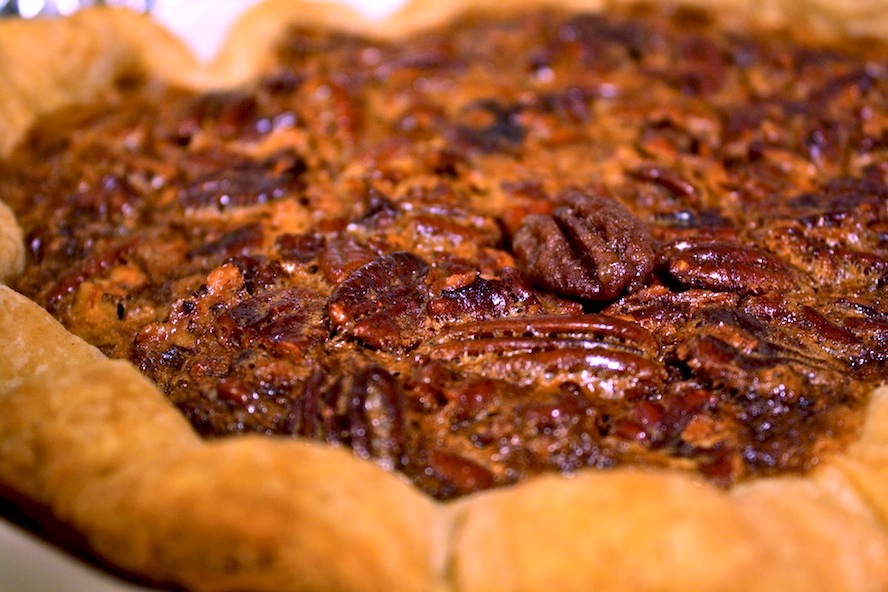
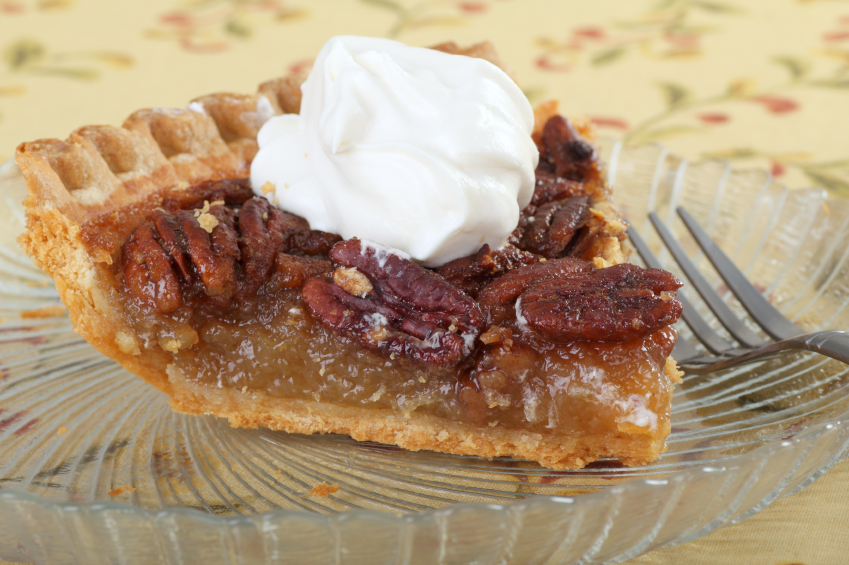
Close up of Pecan Pie
Thanksgiving certainly wouldn’t be complete without a table groaning under the weight of all the pies and other desserts. If you were asked to name the quintessential Thanksgiving dessert, I’ll bet it would be a three-way tie between apple pie, pumpkin pie and pecan pie. Not everyone (including my brother-in-law) likes the traditional Thanksgiving pies for dessert, so I am including some other treats in addition to the classics to give you plenty of options. If you are interested in attending cooking school, this resource outlines some of the best online degree programs for cooking and culinary arts.
Most people I know are intimidated if not downright terrified of baking pies, but with the right recipe and guidelines, you can make a perfect, golden brown, flaky delight! Are you ready to give it a try? I’m a great pie baker and teacher … take a deep breath and we’ll do this together!
There are just a few components to a good pie … the right pan to bake it in, a properly thickened filling, and a flaky golden crust. Yes, it can be a bit tricky, but if you take it slowly, read through the recipe a few times so you’re comfortable with it, and have a few special tools, it will be fine.
My piecrust recipe is the best one I’ve ever made. I did a lot of research a few years ago when I was getting ready to bake for county fair competitions. I gleaned the best tidbits from all different sources and put them together with my own tips for success. I hate trans fats and hydrogenated products so this is an all-butter crust. I know, you’re going to tell me that if it doesn’t have vegetable shortening in it, it won’t be flaky. Well that is taken care of by adding a little vinegar. Yes, you heard me right, vinegar. It leaves no taste behind, promotes flakiness, and helps prevent gluten from developing. Basically it makes it very hard to make a tough dough. I love ingredients like that, LOL! Even if you are scared of working with pie dough, this recipe will give you the confidence to make all the pies you want from now on!
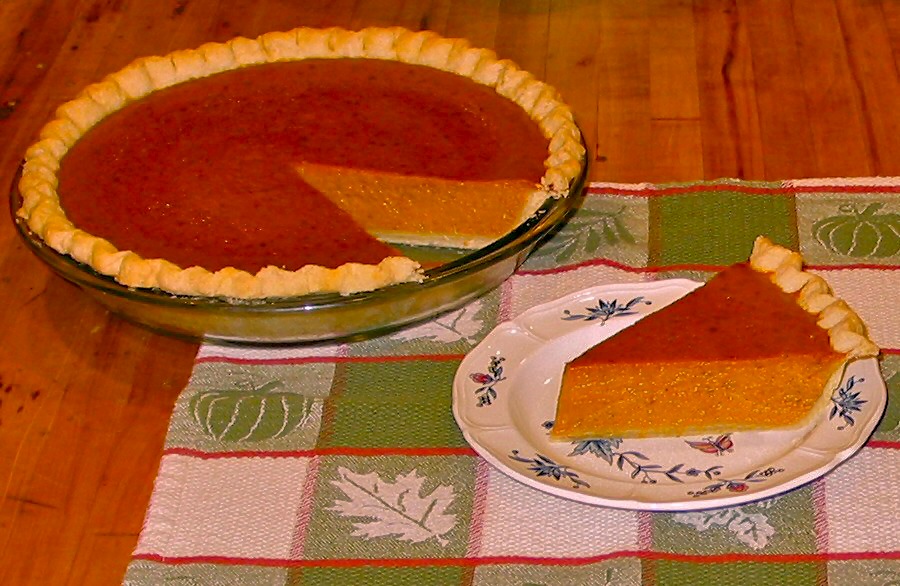
If you want to have the best pumpkin pie of your life, this is the recipe for you! It has all the same spices as the traditional recipe on the back of the can so the flavor is what you are expecting. What is different is the texture. This pie is satiny smooth and more like a mousse than a traditional pie. One bite and I knew it was going to be my annual pie from now on. I hope you feel the same way!
The last time I made this I had some filling left over so I baked it off in a couple of ramekins. OMG, I inhaled it! If you want the flavors of traditional pumpkin pie without having to deal with a crust, make this filling and bake it in individual containers. Try serving it with a dollop of maple-spiked whipped cream. Yum! And if you are taking dessert to a party, this is so much easier to transport than a pie! Think about it … you can thank me later ;o)
The fabulous southern standard, Sweet Potato Pie has gotten an update from Food and Wine with a couple of adjustments by me. A friend of mine makes the most amazing version and it became a game to see if I could figure out what was different about it. I guessed for years – but I finally figured it out and now I’m sharing it with you! A touch of lemon juice adds an amazing undertone.
And, just when you thought it couldn’t get any better, try serving it with the decadent Red Wine Caramel Sauce that is to die for! Wait until you taste it. You will grab a spoon and eat it all in one seating if you’re not careful. While it was developed to accompany this pie, it would be outstanding on cheesecake, ice cream, pumpkin pie, baked apples, pound cake or a hundred other desserts. I think it would also make a fantastic gift for family and friends. You will definitely be invited back if you bring a jar of this with you!
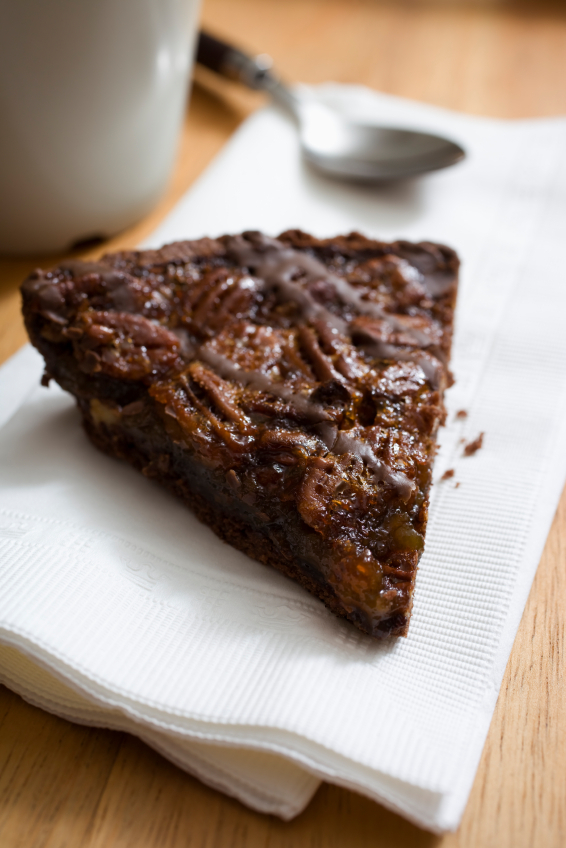
Chocolate Pecan Pie slice
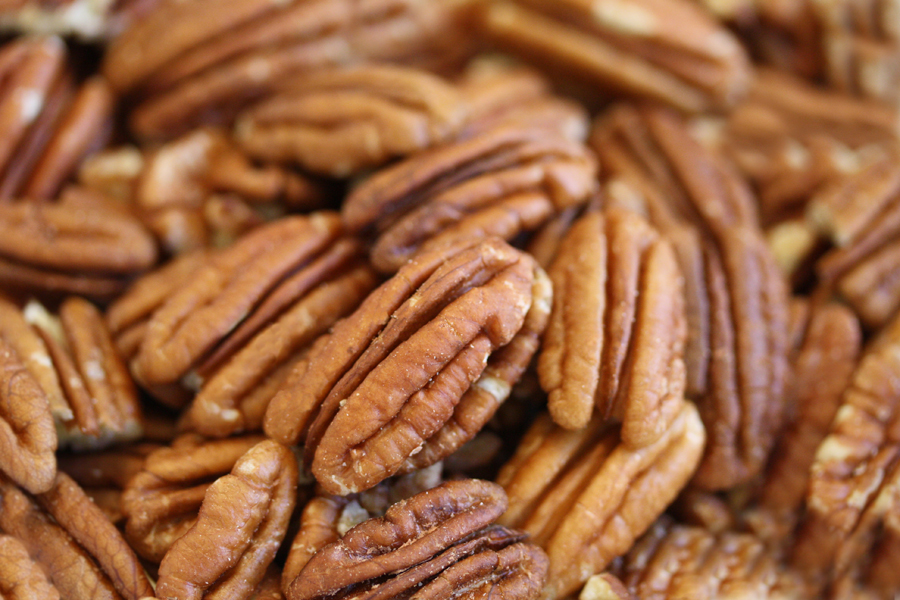
My pecan pie is a little different from most you’ve had. It is a little less sweet and has a lot more nuts. Pecan halves tend to float to the top during baking leaving you with filling on the bottom and nuts on the top. I like to chop half of the nuts so they stay suspended in the filling. And of course you can chop all of them if you like. Always taste your nuts when you get them home to make sure they are fresh. There is nothing worse than getting halfway through making the pie and finding out that they are rancid.
A newer variety of pecan pie is chocolate pecan pie. Gaining in popularity every year, it is simple to make. Just add some chocolate chips to the pecan pie filling and you’ll have a pie that tastes like what you remember from your childhood, only better!
If you want to make something a little different, you can also bake individual pies in mini tart pans or even muffin tins. Just press the dough into the forms, set them on a Silpat-lined baking sheet with sides, pour in the filling and bake, adjusting the timing as needed. If you are serving a large crowd this allows everyone to easily have a little of each kind of pie you are making. And for anyone watching their weight it is built-in portion control.
If fluting the edge of a pie is difficult for you (and anyone with long nails knows what I’m talking about!) you can use the tines of a fork to press a nice design onto the edge, or you can make a braid out of extra dough and lay that around the edge. Don’t stress over it, find something that’s easy for you to do and go with it. A rustic look is beautiful!
So, do you feel more comfortable about making a pie? If not, let me know and I’ll be happy to give you any help I can. Just write a comment at the end of the recipe and I’ll get back to you shortly.
And if you really don’t want to bake pies, you certainly don’t have to. I am including several desserts that do not involve a crust just for you! You shouldn’t have to worry about dessert when you’ve got a bunch of people coming over. A crisp is a fruit dessert with a sweet crumbled topping, similar to a streusel. It’s an apple pie without a crust! One of the tricks to a perfect apple pie (or any apple dessert for that matter) is a blend of apples. Some turn mushy when you bake them and others hold their shape. A mixture of the two gives you the best filling with great flavor and texture. Unlike a pie, this dessert holds up well and can be baked ahead. Equally good at room temperature as it is hot, this is good to take to parties or on picnics.
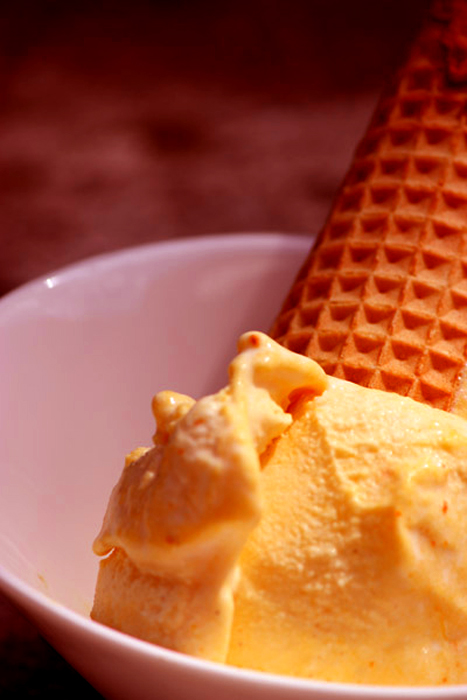
Pumpkin Ice Cream
If you love the flavor of pumpkin pie but want to serve something unexpected, make this pumpkin ice cream. Smooth, creamy, cool and refreshing after a huge meal, your guests will love it. If you want to, you can add lots of different things to this ice cream while it is still soft. You can drizzle in chocolate syrup for a swirl, add chocolate chips, chopped candied ginger, or crumbled ginger snaps for some added crunch, or chopped roasted nuts. You could even pour it into a pie plate and freeze it for an ice cream pie. So if you’re in a pumpkin mood and don’t feel like eating pie, try this smooth and satisfying dessert. It may have you re-thinking your Thanksgiving menu!
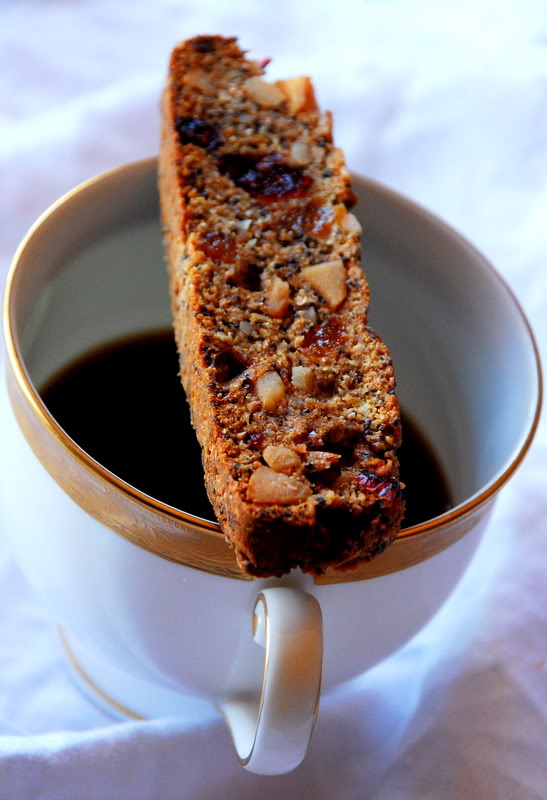
When you are looking for a new treat to bring to your family get together, this Gingerbread Biscotti is sure to be a big hit. Full of all the spiciness of gingerbread cake but with a major crunch, it is the perfect finish to a heavy dinner. You can serve this with hot apple cider for the kids or coffee for the adults and there will be plenty of noise as everyone chews happily on these cookies. You may want to double the recipe and wrap some up for your guests to take home with them. Everyone always loves getting a gift when they come to dinner!
Do yourself a favor and make the desserts a day ahead so you can relax while you’re making them. You don’t want a lot of distractions and you certainly don’t need the stress of the rest of dinner waiting to be made. Then if for some reason they don’t turn out, you still have time to make another one or run to the store and buy one already made! Or do what I do when I’m baking for a party… I always have ice cream and cookies on hand so I can throw together a dessert in an instant, just in case.
I hope you enjoy your Thanksgiving dinner, the sweet treats and spending time with your friends and family this holiday weekend. Make a list, stay focused and your meal with turn out to be the dream you’ve always wanted it to be. Enough reading, let’s get baking!
Jane’s Tips and Hints:
Practice makes perfect especially when it comes to working with pie dough (and baking in general). Even after years of making pies, if I am competing in a contest and haven’t made one in awhile, I need to make a practice pie. A lot of baking skill comes from knowing how a dough feels and looks. That takes practice, and your family will love all your attempts!
Kitchen Skill: Measuring Flour Technique
Unless it says to sift the flour first, you can use the scoop and sweep method. Fluff your flour with a whisk to lighten it. Using a spoon, scoop flour into your dry measuring cup (with straight sides and a flat top in graduated sizes) until it is heaped above the edge. Use a knife or other straight edge to sweep the excess flour off the top, leaving a smooth flat surface.


- 2 cups lightly toasted pecan halves
- 1 unbaked 9-inch pie crust (recipe below)
- 3 eggs, lightly beaten
- 1/3 cup sugar
- 1/3 cup vanilla sugar
- Dash salt
- 1 cup dark corn syrup
- 1/2 tsp vanilla
- 2 tsp bourbon, if desired
- 1/3 cup butter, melted
- Additional pecan halves for decoration (see explanation below)
- 1 lg egg
- 2 tbsp milk
- Preheat oven to 350°F. Arrange a rack in the lower third of the oven. Place a foil-lined baking sheet in hot oven. Lightly toast pecans until just starting to become fragrant. Remove from oven and let cool. Reserve half of nuts in one bowl and chop remaining half. Set aside.
- Roll out dough and gently place in a 9-inch deep-dish pie pan. Flute edges of crust and set aside. Set aside.
- Place eggs in bowl of stand mixer and beat until light and fluffy. Add the sugar, salt, corn syrup, vanilla, bourbon (if using), and melted butter. Blend until smooth. Stir in pecans and pour carefully into prepared pie shell. Distribute nuts evenly in crust.
- For a more dramatic presentation, using perfect pecan halves, create concentric circles of nuts, pointing to the center of the pie. Use enough nuts to completely cover the filling. In a small bowl, whip egg and milk together. Brush nuts and crust lightly with the egg wash. I do this when I am entering my pie in a contest. It is truly beautiful but does take time.
- Bake for 50 minutes or until a knife inserted halfway between the center and the edge comes out clean. Tent with foil if crust and top are browning too quickly. Transfer to a wire rack. Cool an hour so that the filling has time to firm up before cutting.
- Serve with lightly sweetened vanilla whipped cream or ice cream if desired. This pie keeps, covered, in the refrigerator for 1 to 2 days.
- Yield: 1 (9 inch) pie

- Pie
- 1 unbaked 9-inch deep-dish piecrust (recipe below)
- 3 eggs
- 1 cup packed brown sugar
- 1/2 cup dark corn syrup
- Pinch salt
- 2 tbsp butter melted
- 1 tsp vanilla extract
- 2 tbsp Kentucky bourbon or dark rum
- 1 cup pecan halves
- 2 cups chopped pecans
- 1 cup semisweet chocolate chips
- Toppings
- 1 cup semisweet chocolate chips, melted, optional
- 2 cups heavy cream
- 1 tsp pure vanilla extract
- Powdered sugar to taste
- Set an oven rack in the lower third of the oven and preheat to 375°F. Place crust in deep pie plate, flute the edge, and place on a baking sheet.
- In a large bowl whisk eggs until light and fluffy. Add the sugar, corn syrup, salt, melted butter, vanilla, and bourbon and whisk until well blended and the sugar is dissolved. Stir in pecans and chocolate. Pour into unbaked pie crust.
- Bake 45 to 65 minutes or until puffed and set (doesn’t jiggle in the center) and knife inserted near center comes out clean. If it is browning too quickly, tent with a piece of foil. Remove from oven and transfer to wire rack. Cool completely.
- If you like you can melt additional chocolate chips and drizzle that over the cooled pie. For the chocoholics in your life, you can pass additional melted chocolate at the table.
- When ready to serve, in a cold bowl, whip heavy cream until foamy and starting to thicken. Add vanilla and whip until blended in. Add enough sugar to sweeten to your taste, start with 2 tbsp and work your way up from there. Whip on high until cream is thick and peaks form. The peaks should be fairly soft – you can always whip it more!
- Slice pie and serve with dollops of cream.
- Crust for one 9-inch pie (recipe below)
- 1 egg white
- For the Filling
- 1 (15-oz) can pure pumpkin puree (not pumpkin pie filling)
- 3 tbsp softened butter
- 1 cup heavy whipping cream
- 3 large eggs, lightly beaten
- 1/2 cup sugar
- 1/2 tsp vanilla
- Pinch of salt
- 1-1/2 tsp ground cinnamon
- 3/4 tsp ground ginger
- 1/4 tsp ground cloves
- 1/4 tsp ground mace
- Dash of allspice
- For the Topping
- Cold heavy whipping cream
- 1 tsp vanilla
- Powdered sugar to taste
- Small pinch of kosher salt
- Prepare the crust. Chill the dough 30 minutes before rolling it out. Fit into a deep-dish pie plate and chill again while oven is heating.
- Preheat oven with a baking sheet placed on the bottom rack to 400°F.
- Place a piece of parchment paper or a large coffee filter on top of the crust (avoid using foil, which traps the steam in the crust and makes it tough), large enough that the edges are fully covered. Fill it completely with pie weights, dry beans or peas, pressing gently outward to make certain the sides are supported. Bake for 15 minutes. Remove weights and parchment, prick the bottom all over with a fork and return to the oven for 5 more minutes or until it just barely starts to show some color and feels firm to the touch. Remove crust from the oven, leaving the baking sheet in the oven.
- Let crust cool for 2 minutes and then lightly brush with egg white. The white will set and seal the crust reducing absorption of liquid from the filling. Use this trick for any filling that is extra moist.
- Make the filling: In a large bowl, whisk the pumpkin with the butter and a pinch of salt. Whisk in cream, eggs, sugar, vanilla, salt and spices. Pour mixture into pie shell, but do not overfill. Carefully place the pie on the preheated baking sheet and reduce heat to 325°F.
- Bake until the pie is puffed and set but still jiggles slightly, 50 to 65 minutes. If crust browns too quickly, cover edges with foil. Let cool completely before cutting.
- While pie cools, make the topping. With a standing mixer, using a chilled bowl and whipping attachment, whip cream until lightly thickened. Add vanilla, about 1/4 cup sugar, and salt and whip until a bit more thickened. Taste and add more sugar to your taste. Continue whipping until it reaches soft peaks. Do not over whip.
- Serve slices of pie with a dollop of whipped cream.
- Yield: 6 to 8 servings
- Crust
- 1 (9-inch) pie shell (recipe below)
- 1 egg white
- Filling
- 2 large sweet potatoes, about 1 lb
- 2 large eggs, beaten
- 1/2 cup granulated sugar
- 1/2 cup light brown sugar
- 1/2 tsp salt
- 1/2 tsp cinnamon
- 1/2 tsp ground ginger
- 1/4 tsp ground mace
- 1/2 tsp pure vanilla extract
- 1/2 tsp freshly squeezed lemon juice
- 3/4 cup heavy cream
- 3/4 cup milk
- Preheat oven to 350°F. Prepare and par-bake the pie crust as described in the Silky Pumpkin Pie recipe.
- Make The Filling: Poke the sweet potatoes all over with a fork and roast them in the oven for about 1 hour, or until they are soft. Let the potatoes cool. Turn the oven temperature down to 325°F.
- Peel and puree the sweet potatoes; you should have about 1-1/2 cups (reserve any leftovers for another use).
- In a medium bowl, whisk the eggs. Add both sugars, salt, cinnamon, ginger, mace, vanilla, and lemon juice and whisk until smooth. Add the 1-1/2 cups of sweet potato puree along with the heavy cream and milk and whisk until blended.
- Pour the filling into partially baked shell and bake for 20 minutes. Cover the rim of the pie shell with foil to prevent over-browning. Bake for about 40 minutes longer or until the filling is set. Transfer to a rack and let cool completely.
- Yield: about 10 servings
- 3/4 cup granulated sugar
- 2 tbsp water
- 3/4 cup red wine
- In a medium (light-colored) saucepan, bring the granulated sugar and water to a boil over moderately high heat, washing down the side of the pan with a moistened pastry brush. Cook without stirring until a pale-amber caramel forms, about 6 minutes.
- Remove from the heat and carefully add the red wine. Cook, stirring to dissolve the hardened caramel, until it is slightly reduced, about 3 minutes. Transfer the caramel to a pitcher and serve warm.
- Yield: about 3/4 cups.
- Make Ahead: The red wine caramel can be refrigerated for up to 1 month. Bring it to room temperature before serving.
- Dough for a 9-inch double crust pie, chilled (see recipe below)
- 2 large egg whites beaten with 2 tsp water (to make an egg wash)
- 4 to 5 medium sweet apples such as Fiji, Braeburn, Gala or Jonathan
- 2 to 3 tart apples such as Granny Smith or Pippin
- 2/3 cup sugar (use more if your apple juice is really tart)
- 4 tbsp cornstarch
- 1 tbsp all-purpose flour
- 1/2 tsp cinnamon
- 1/4 tsp ground nutmeg
- 1/2 tsp salt
- 1 cup apple juice or apple cider
- 1/2 tsp vanilla extract
- 1 tsp freshly squeezed lemon juice, optional
- 3 tbsp butter, cut in cubes, optional
- Coarse sugar such as Turbinado, Raw, or Demerara
- Set oven rack in lowest position and preheat to 400°F.
- On a well-floured surface, roll out half of dough to a 15-inch circle about 1/8-inch thick, and ease into 9-inch glass* pie pan. Do not stretch the dough. Leave edges unfinished at this point. Place pie on a foil-lined baking sheet with sides. Brush bottom crust and sides with the egg wash. You won’t use all of it. (It helps keep the filling from soaking through the bottom crust.) Set aside while you make the filling.
- Peel and core all the apples. Cut the sweet apples into larger chunks (they will get very soft and cook faster), and thinly slice the tart apples (they will hold their shape and take longer to cook.) Set aside.
- In a bowl combine the sugar, cornstarch, flour, cinnamon, nutmeg, and salt. Stir until evenly blended. Transfer to a 3-quart saucepan and add apple juice, vanilla, and lemon juice (if using). Stir well to dissolve the sugar. Bring to a low boil over medium-high heat, stirring constantly. Cook until thick enough to coat the back of a spoon. Remove from the heat. Using this technique guarantees that your filling will be thickened perfectly!
- Stir in the apples and toss until evenly distributed. Set to the side to cool slightly.
- Meanwhile, roll out second half of dough to make the top crust. Pour filling into bottom crust, dot with butter cubes if desired, and gently transfer top crust to pie. Try to set it evenly over the top of the filling. Brush the edges of the bottom crust with water or additional egg wash and press the top and bottom crusts together. Trim so there is about 1/4-inch overhang beyond the edge of the pie pan.
- Flute the edge or otherwise seal it. Brush the top of the pie with the remaining egg wash and sprinkle with the coarse sugar. Using a sharp knife, cut several vents in the top to allow steam to escape during baking. You can decorate with extra pieces of dough if desired, securing them with egg wash or water.
- Transfer pie on the baking sheet to the hot oven. Bake until both the top and bottom crusts are golden brown and the juices are bubbling in the center of the pie, about 60 to 75 minutes. You should be able to hear the pie bubbling. If the pie is browning on top too quickly, tent it with a piece of tin foil.
- Let pie cool at least 1 to 2 hours and preferably 3 before slicing. The apples will reabsorb some of the juices while the pie rests and your slices will be picture perfect.
- Yield: 8 to 10 servings; 1 (9-inch) pie.
- You can also make a lattice top by cutting dough into strips and weaving them on top of the pie. This is a more advance technique that you may want to wait to try until you are more comfortable working with dough and making pies.
- Using a glass pie pan will allow you to see when the bottom crust is cooked all the way through. Raw dough will have a grey’ish color. The main mistake people make is under-cooking their pies.
- 4-1/2 cups all-purpose flour, sifted
- 2 tsp salt
- 2 tsp vanilla sugar or granulated sugar
- 12 oz (3 sticks) cold, unsalted butter, cut into pieces
- 1/2 cup water with ice cubes added (strain out ice just before using)
- 1 tsp vanilla extract (for fruit pies) or almond extract (for nut pies)
- 2 tsp red wine vinegar
- Mix the flour, salt, and sugar in the bowl of a food processor. Pulse a few time to blend. Add half the butter and pulse just until you have a crumbly, sandy mixture. Add the remaining butter and pulse 2 to 3 times. You should still be able to see large sized pieces of butter.
- Mix the water, extract, and vinegar together. Drizzle the water/vinegar mixture over the dry ingredients and pulse just until a dough starts to form. You should still see medium bits of butter. Note: If the weather is very dry, you may have to add more water to make the dough come together.
- Divide dough in half, form into flat disks, and wrap with plastic wrap. Refrigerate at least 30 minutes. (Dough may be frozen and used later; let thaw in refrigerator overnight before rolling out.) Allow dough to warm up a few minutes before rolling.
- Set dough on a lightly floured work surface. Sprinkle a little flour on top of the dough and on the rolling pin. Roll outward from the center to the edges, lifting the dough and turning it a quarter turn every few strokes. Don’t worry if the edges split a bit, you can patch that later. If it starts to stick to the rolling pin or work surface, dust with more flour. The dough should feel smooth and soft. If the dough gets too warm or limp, put it back in the refrigerator for 15 minutes to firm up the butter. Set your pie pan upside down on the dough and cut a circle 2-inches larger than the pan.
- Using a dry pastry brush, brush off any excess flour from both sides of the dough. Roll the dough very loosely over the pin and transfer to the glass pie pan. Ease it into the pan but don’t stretch it. Dough that has been stretched tends to shrink when it bakes. Using a pair of kitchen scissors trim the excess dough to 1-inch beyond the edge of the pan. If making a single crust pie, fold the dough under until it is even with the edge of the pan and flute. Chill crust 20 minutes before filling.
- If you are making a double-crust pie, set dough into pie pan but don’t trim edges. Add the filling, roll out top crust and ease over filling. Press the top and bottom crusts together at the edges, sealing them. Trim to 1-inch beyond the edge and flute. With the tips of sharp scissors, cut 4 to 5 vents in top of crust. Chill 20 minutes before baking.
- Yield: Dough for 2 (9-inch) single crust pies or 1 (9-inch) double crust pie
- 10 oz (2-1/4 cups) unbleached all-purpose flour
- 1-1/4 cups packed dark brown sugar
- 2 tsp ground ginger
- 1-1/4 tsp baking powder
- 1 tsp ground cinnamon
- 1/2 tsp table salt
- 1/4 tsp ground nutmeg
- 1/4 tsp baking soda
- 1 cup hazelnuts or pecans, coarsely chopped
- 1/2 cup lightly packed dried apricots or dried sweetened cranberries, coarsely chopped, optional
- 1/4 cup molasses
- 2 large eggs
- 2 tsp finely grated orange zest (from about 1 medium navel orange)
- Position a rack in the middle of the oven and heat the oven to 350°F. Line a large cookie sheet with parchment.
- In a stand mixer fitted with the paddle attachment, combine the flour, brown sugar, ginger, baking powder, cinnamon, salt, nutmeg, and baking soda on medium-low speed until well blended. On low speed, briefly mix in the pecans and dried fruit. In a measuring cup, lightly whisk the molasses, eggs, and orange zest together. With the mixer on low, slowly pour in the egg mixture. Continue mixing until the dough is well blended and comes together in large, moist clumps, 1 to 2 minutes.
- Dump the dough onto an un-floured work surface. Divide into two equal piles (about 1 pound each). Shape each pile into a log that’s 10 inches long and about 1-1/2 inches in diameter, lightly flouring your hands as needed (the dough is a bit sticky). Position the logs on the lined cookie sheet about 4 inches apart. Bake until the tops are cracked and spring back slightly when gently pressed, 30 to 35 minutes. Transfer the sheet to a rack and let cool until the logs are cool enough to handle, about 10 minutes.
- Carefully peel the biscotti logs from the parchment and transfer to a cutting board. Using a slicing or serrated knife saw each log into diagonal slices 3/4 inch wide. Return the slices to the cookie sheet (no need for fresh parchment) and arrange them cut side down. It’s all right if they touch because they won’t spread.
- Bake until the biscotti are dried to your taste, about 10 minutes (for slightly moist and chewy) to 20 minutes (for super-dry and crunchy). The biscotti should still give slightly when pressed, but will harden as they cool. Transfer the cookie sheet to a rack and let the biscotti cool completely. When cool, store in airtight containers.
- Yield: about 24 biscotti
- Filling
- 3 tart apples such as Granny Smith or Pippin, peeled and cored
- 4 sweet apples such as Golden Delicious or Jonathan, peeled and cored
- 1/2 cup granulated sugar
- 1/4 tsp ground nutmeg
- 1/4 tsp ground coriander
- 1/2 tsp cinnamon
- 1/4 tsp fresh lemon zest
- 1 tbsp fresh lemon juice
- Topping
- 1/2 cup packed light brown sugar
- 3/4 cup sifted flour
- 1/4 cup uncooked oats
- 1/4 tsp salt
- 6 tbsp butter
- 1/2 cup chopped pecans
- Sweetened whipped cream or ice cream, optional
- Preheat oven to 350°F. Butter a 1-1/2 quart baking dish.
- Slice apples or cut into thin wedges and place in a large bowl. Add sugar, the spices, zest, and lemon juice. Toss together and pour into prepared baking dish.
- Combine brown sugar, flour, oats, salt, and butter in a small bowl and mix with a fork until crumbly. Add nuts and sprinkle over the top of the apples. Bake 45 minutes or until top is browned and apples are easily pierced with a fork.
- Serve warm with whipped cream or ice cream if desired.
- Yield: 4 to 6 servings

- 8 large egg yolks
- 3/4 cup granulated sugar, divided
- 1/4 tsp kosher salt
- 2 cups whole milk
- 2-1/2 cups heavy cream
- 1 tsp grated fresh ginger
- 1/2 tsp ground cinnamon
- 1/2 tsp ground nutmeg
- 1/4 tsp ground cloves
- 1 (15 oz) can pure pumpkin puree (not pumpkin pie filling mix)
- 1/2 tsp pure vanilla extract
- In a large bowl, combine about 3 cups of ice cubes with 2 cups water. Nestle a metal bowl in the middle (big enough to hold the ice cream custard) and place a strainer over the top of it. You will use this to cool the custard after cooking it. Set aside.
- Place the egg yolks in a large mixing bowl. Stir in 1/4 cup of the sugar and the 1/4 tsp salt. Whisk until smooth. Set aside.
- In a large heavy-bottomed saucepan, combine the milk, cream, and remaining 1/2 cup sugar. Add the ginger, cinnamon, nutmeg, and cloves. Whisk until smooth and the sugar is dissolved. Heat over medium-high heat, stirring constantly, until steaming and bubbles start to form at the edge of the pan. Do not boil.
- Gradually whisk about half of the hot cream into the eggs and sugar mixture stirring constantly so that the eggs don’t scramble. Whisk this back into the saucepan with the remaining hot cream. Reduce the heat to medium-low and cook, stirring constantly with a heatproof spatula (make sure it has a flat end so you can really scrape the bottom of the pan) until it is thick enough to coat the spatula. You should be able to run your finger down the center of the spatula and have the line hold without the custard running back together. An instant-read thermometer will register about 160°F to 170°F.
- Immediately pour this through the strainer into the metal bowl sitting in the ice bath you prepared earlier. Cool for 5 minutes and then whisk in the pumpkin puree. Continue to cool until it reaches room temperature, adding ice cubes as needed to keep the bath cold. When cool, whisk in vanilla and pour into a sealable container. Refrigerate thoroughly, at least several hours and preferably overnight.
- Press the mixture through a very fine-mesh strainer (this helps smooth out the consistency of the pumpkin puree), and then freeze according to the manufacturer’s instructions for your ice cream maker. Transfer the ice cream to a container and freeze until ready to serve, at least an hour. The longer you freeze it, the firmer it will be. If you like soft-serve ice cream, you can serve it right away.
- Yield: about 1 quart
Thank You!





Dana At Cooking At Cafe D
I love pecan pie. And, the idea of making one that is less sweet with more nuts certainly appeals to me. Thanks for sharing the recipe.
~
Jane Bonacci, The Heritage Cook
My pleasure Dana. It is a great pie with a lot of wonderful nutty flavor. I hope you enjoy it!
Mireya @myhealthyeatinghabits
All the desserts look scrupptious but the gingerbread really caught my eye. It looks like biscotti –mmm.
Jane Bonacci, The Heritage Cook
Thank you Mireya. The recipe is for Gingerbread Biscotti, so you are absolutely correct. Enjoy!