When I was in college I bought my first SLR camera, signed up for a photography course and learned how to use the camera, understand the effect of light on film, develop my own film, and expose the image in the darkroom. It was artistically challenging and exciting. I started looking at the world with a different perspective.
When I started the blog I only had a point and shoot camera and quickly realized if I wanted to show my food to its best advantage I needed to upgrade to a DSLR. When I did my research it was commonly accepted that the two front-runners were Nikon and Canon, both excellent quality and loved by their owners. I went to a camera shop, held lots of different camera bodies and decided that the Canon fit my small hands best.
For the past year and a half I have studied food magazines and photos that I love to figure out how they were set, lit, and shot. I took a couple of photography classes specifically focused on food photography, spent time talking with the food photographers I know and admire, and am discovering my photographic “eye” again. My style is still developing but I like what I am creating more and more with each photo shoot.
I thought it might be fun to share a few simple ways to quickly improve your photography, taking your own photographs and blog posts to a new level. These are lessons I have learned through trial and error, from classes I’ve taken, questions I’ve asked professional photographers, and from analyzing food photographs on the web and in magazines.
Here are my top five food photography tips!
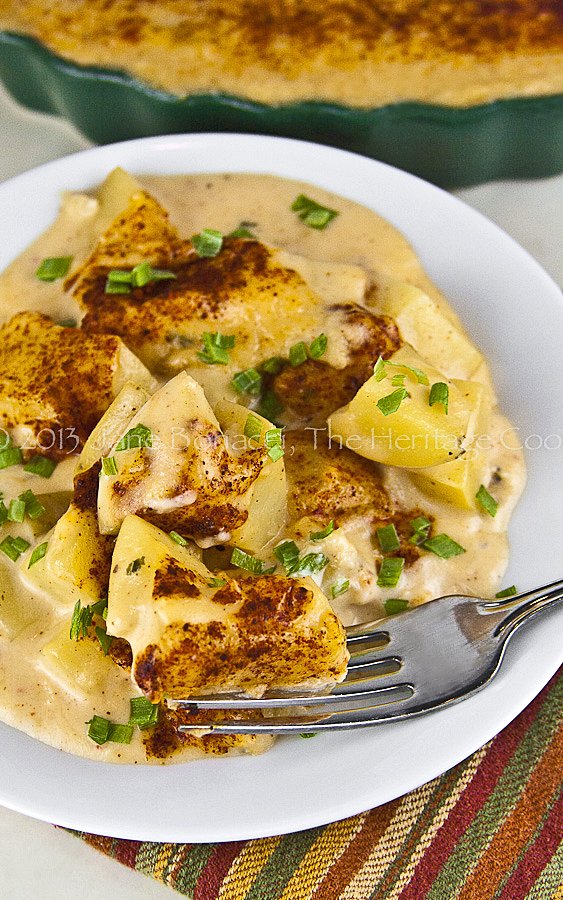
The white plate makes the Cheesy Potato Casserole pop!
1. Make Your Food the Star
Simplify your place settings for the cleanest look and to highlight the food. There is a reason why restaurants serve their meals on white plates – it makes the food look good! If you want to add color to your shots, add it with props, bright garnishes on the plate, etc. Solid colors are better than busy designs on plates because patterns distract the eye and take away from the beauty of the food you’ve prepared.
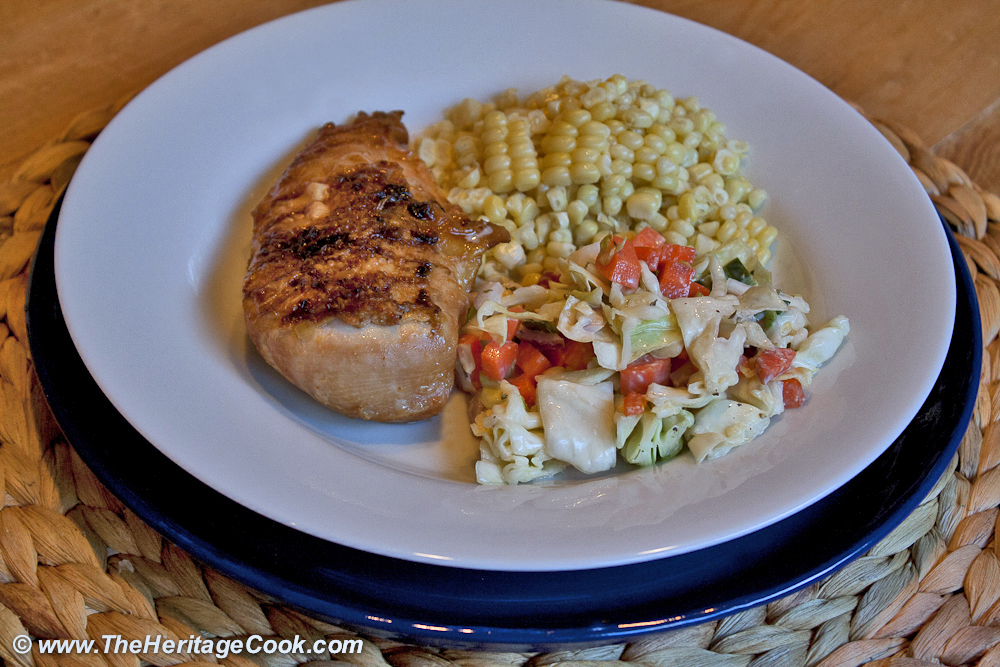
An early photo using natural light but no white balancing, see how yellow it is
2. It is All About the Light
Forget that your camera has a flash on it – NEVER use it! Find the settings that do not automatically turn on the flash (varies depending on camera brand) and use one of those. I shoot almost exclusively with Aperture Priority. Diffused natural daylight makes food look its best, but it isn’t always an option, especially when you are shooting in restaurants or at night. Request a table by a bright window if possible and try to be discrete when shooting. Here is a great video explaining Aperture Priority.
If you are shooting at home, take your food outdoors or use daylight lamps to get clean, white light. My house is naturally dark and it is almost impossible to get decent light, so I bought two EGO lights from Lowell that I use all the time. I also have a set of light reflectors that help bounce the light, softening the shadows. You can make your own DIY version of the EGO lights if you want to save some money and white foam core and foil-covered boards are terrific homemade reflectors.
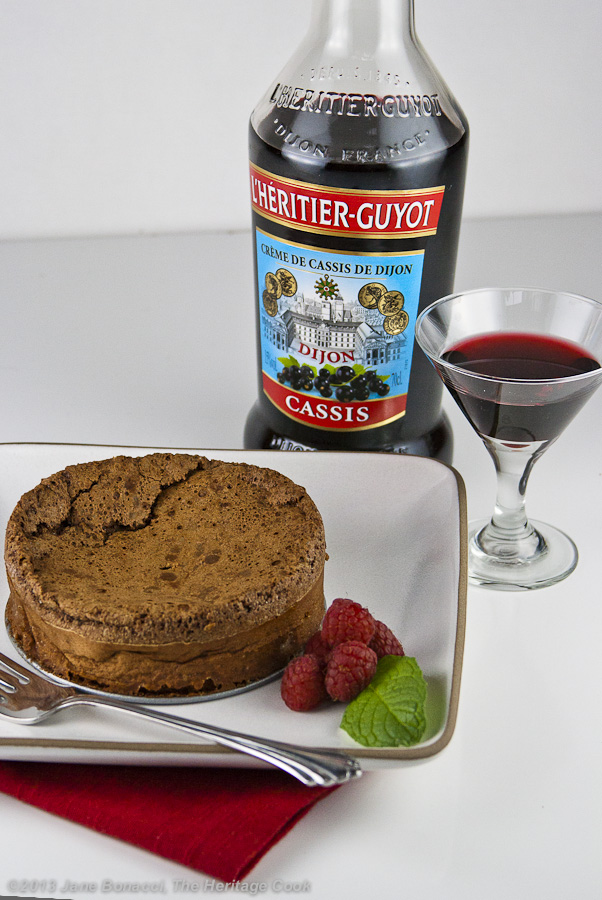
The cake looks bigger when you use a smaller plate and glass
3. Plating to Enhance Your Food
When thinking about plating your food for photography, select salad plates instead of dinner plates, small shallow bowls, and small glassware. You do not have to use as much food to make it look like there is a lot on the plate and it is easier to manage smaller portions. If you can, move farther from the plate and use a macro lens on a tripod for the best close-up images.
Use your hands and small spoons when plating your food. If you use the normal size serving spoons I can pretty much guarantee you will have drips and splatters plus dropped food all over your plate. Add a little bit at a time and build up the plate until you are happy with the design.
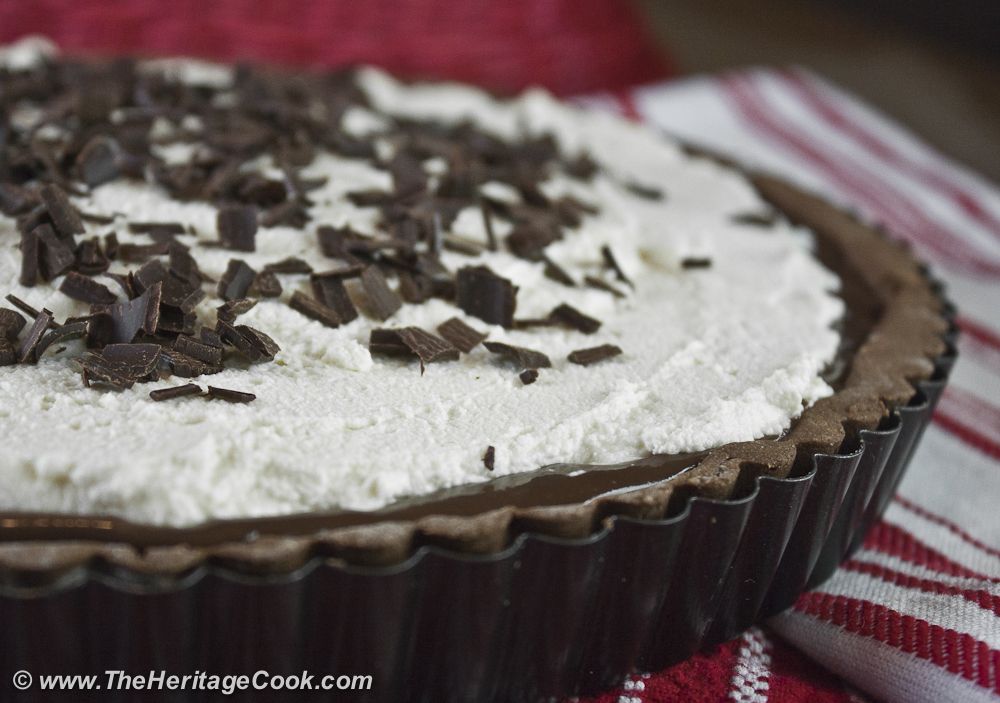
Shooting chocolate desserts on red adds color to an otherwise monochromatic photo; shot with a macro lens on a tripod
4. Stillness Equals Perfection
Blurry photos are usually due to movement. Whenever possible use a tripod to stabilize your camera. If a tripod isn’t available, brace your elbows on a table or against your sides to reduce camera shake. Take a full breath, let half of it out and hold your breath. Now click the shutter button. If your camera is on a tripod, using a shutter release cable will minimize camera movement even more.
The other thing that can make a photo uncomfortably blurred is the improper use of depth of field. While having part of the photo out of focus helps draw attention to a specific area and draws the eye in, if that area is too small, the entire photo looks out of balance. You want to adjust your aperture to define the area that is in focus. Remember with aperture setting the lower the number the smaller your depth of field (larger area of blur). If too much of your photo is out of focus, make your aperture smaller, increasing the depth of field and making the area in focus larger.
ISO controls the amount of grain in your images. The lower the ISO, the cleaner your image, but it also requires the most light. Shoot a series of photos, all exactly the same except changing the ISO for each one. You’ll see that the higher the ISO, the grainier your photos are. Shooting at 400 ISO or lower will give you the cleanest images, but there may be times when you are shooting in low-light settings when you need to boost your ISO. Be prepared to deal with the grain and noise in post-production.
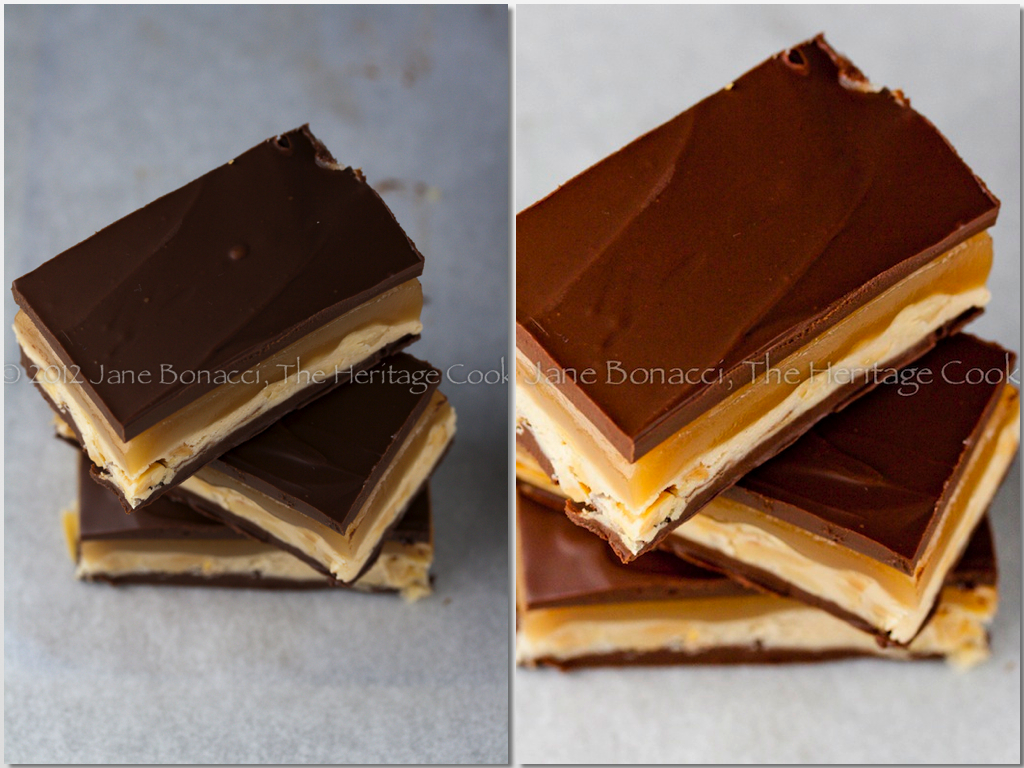
These are before and after shots of Homemade Snickers Bars. I brightened and cropped the image and took out some of the crumbs.
5. Shoot in RAW and Use Post-Production Software
If you have a DSLR camera (or are planning on buying one) that has the ability to shoot in Raw format, use it. Shooting in Raw means that everything is captured and you use your computer to do post-processing with photo editing software. This gives you the most control of the final image. If you do not want to worry about that right now, shoot in JPEG mode and the camera will make choices for you requiring less post-production adjusting. Here is an excellent article on Raw vs. JPEG: http://digital-photography-school.com/raw-vs-jpeg
There are many options when it comes to photo editing software. Some are free and do a great job at quick adjustments, but I have found that my two favorites are Lightroom and Photoshop Elements. Both are from Adobe and are fairly reasonably priced at around $100 each. Lightroom is more intuitive, but they both have a learning curve. With photo editing software you can resize the image, add a watermark, correct the white balance, crop the image, remove imperfections that are distracting, boost contrast and do color correction as needed. Just start playing around and you will discover a whole world of amazing things you can do with your photos!
Have a terrific weekend!!
Create a New Tradition Today!
Unauthorized use, distribution, and/or duplication of proprietary material from The Heritage Cook without prior approval is prohibited. This includes copying and reprinting content and photographs. If you have any questions or would like permission, I can be contacted via email at theheritagecook (at) comcast (dot) net. Feel free to quote me, just give credit where credit is due, link to the recipe, and please send people to my website, www.theheritagecook.com. Please see the Disclaimers page for additional details.
Thank You!



Marnely Rodriguez Murray
Oh what great tips, thanks Jane!
Jane Bonacci, The Heritage Cook
My pleasure Marnely! I hope everyone enjoys these tips I’ve learned and they help make people happier with the shots they take!
Sid's Sea Palm Cooking
Thank you for the tips. I can’t afford either a Canon or a Nikon, so I make do with my Kodak, but your tips will hopefully help me out with it. I can shoot in RAW with it, but haven’t played with that yet. And usually, when I make my food and shoot it, I don’t have the luxury of time to set up the perfect shot. I do make use of natural light when I can. I have some great windows in my kitchen and I use them for light when I can.
Jane Bonacci, The Heritage Cook
Hi Sid,
I know some really great bloggers who take amazing photos with a camera phone and other less robust cameras, so keep working with your Kodak and I’m sure you’ll enjoy your shots.
Re: setting up the perfect shot. If you are trying to get dinner on the table for a family, I understand. One thing I do is set up my photo shot area before I start cooking, using stand ins for where my food will eventually be. This allows me to get the look I want when I have more time and am not as rushed. Then when dinner is ready, I serve my family first and they start eating while I am plating and shooting my images for the blog. It isn’t perfect, but it is better than running around like crazy!
Good luck and have fun!!
sippitysup
Great tips! XOGREG
Jane Bonacci, The Heritage Cook
Thank you Greg – that is a huge compliment coming from you! I love your new book and can’t wait for it to get here!!
Denise
Great tips Jane!
Jane Bonacci, The Heritage Cook
See Denise, I was paying attention, LOL!! I have a long way to go to get to your level, but I’m making progress!!
Angie | Big Bear's Wife
wonderful tips!
Jane Bonacci, The Heritage Cook
Thanks so much Angie!! I miss you smiling face at SRC! <3
Katrina
Thank you for this. I know my photography skills stink. I’ve decided they aren’t horrible, but I don’t have time to focus on that as much with family, the blog and the food. Someday though! Great info, thanks.
Jane Bonacci, The Heritage Cook
I completely understand Katrina. I make the food and serve my husband, then I plate my hero shot and photograph it while he eats. I’ve gotten pretty good at presetting the photo with stand ins and the swapping in the finished plate. When you do this all ahead, it only takes a few minutes to grab your photos.