When I first found out that I was gluten-intolerant, I went into a tailspin. I grieved for all the foods I could no longer eat – the baked goods, fried foods, flavored chips and snacks, pizza, breads … the list seemed endless. But I knew I could figure out gluten-free baking and would eventually be able to produce my own versions of my childhood favorites.
Just like every child in America, I grew up eating Oreo cookies. There was the never-ending debate as to whether it was better to eat them all in one bite or to start with the filling before devouring the cookies. I’m still not sure which way is better, but I do know that the discussion will continue as long as Oreos are available. I still crave their deep chocolate flavor and vanilla-spiked filling and am on an odyssey to find a great homemade gluten-free version. And after this baking adventure, my quest continues! 😉
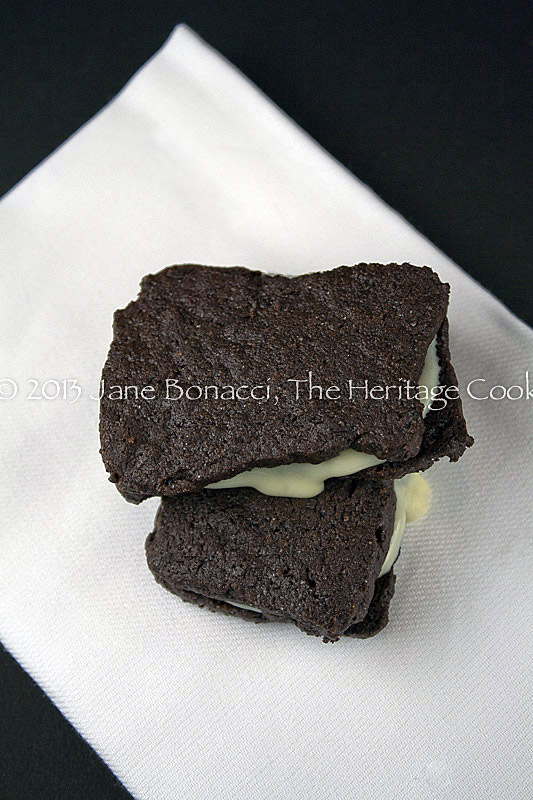
The attempt to use the supposedly oreo-like filling failed but was tasty
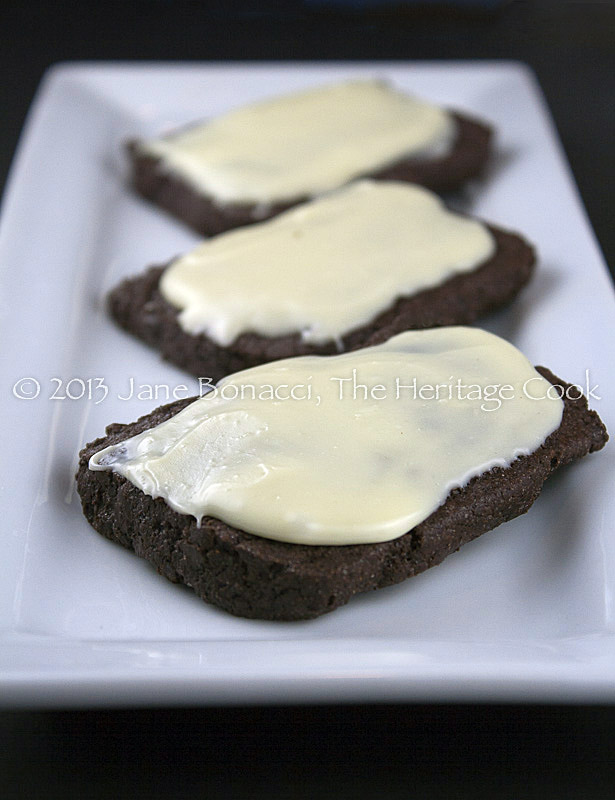
The recipe I started with is supposed to make Oreo-style cookies, but I was suspicious from the moment I saw the list of ingredients. I ran into trouble early on and wasn’t sure I could salvage the recipe, but didn’t want to throw out all the expensive ingredients I had assembled. I made a few adjustments and now have a cookie that has a deep chocolate flavor balanced by a delicate white chocolate frosting. It isn’t an Oreo replacement, but is a great cookie in its own right.
Because I am using gluten-free flours, I never know exactly why something might not be working, but hopefully in time I will figure out most of them. This time the recipe required substantially more liquid than originally called for, so an egg, a splash of vanilla and some cream became the stars of my latest GF baking adventure!
When I made the recipe the way it was originally written, substituting a gluten-free flour blend for the all-purpose flour, the “dough” wouldn’t hold together and looked like a pile of dirt when I poured it out of the mixing bowl. I refrigerated it, thinking that the resting time would give it a chance to fully hydrate. Unfortunately, it didn’t. Even after resting for several hours it looked exactly the same as when I put it in the refrigerator. I thought I was going to have my first baking failure and not have anything to show you for Chocolate Monday!
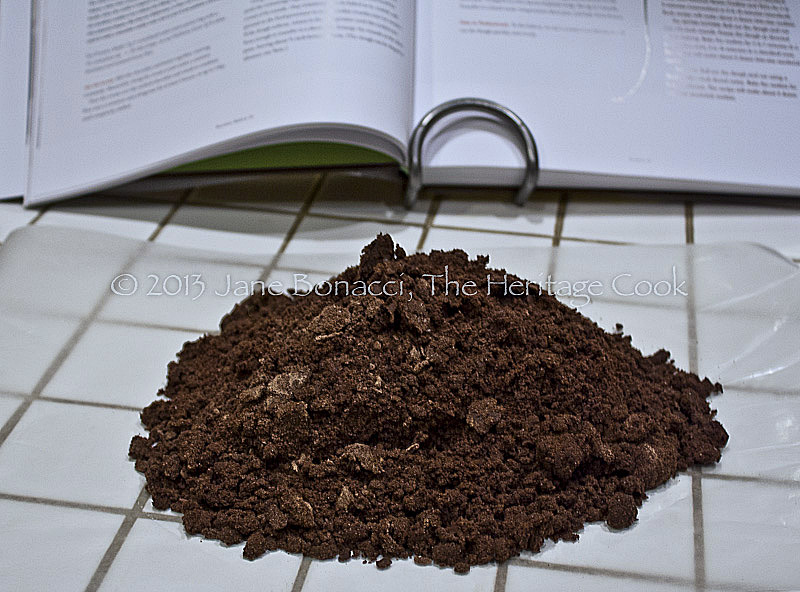
This is what the cookie “dough” looked like BEFORE I made my adjustments!
I decided that adding an egg and a splash of vanilla would help. I tried that and it still wasn’t moist enough to hold together so I added 2 tbsp of cream. Finally it started to clean the sides of the bowl in the mixer and I had a dough I could work with.
By the way, one advantage to using gluten-free flours is that you don’t have to worry about over-working the dough. You can beat it till the cows come home and never have tough dough! OK, that is a bit of an exaggeration, but you get my point, LOL.
Rather than roll out the dough and cut with cookie cutters as suggested in the original recipe, I formed it into a rectangular log and cut it into slices. You could also make round log, this was just the easiest form for me to create at the spur of the moment. Making slice and bakes are so much faster than rolled cookies and always my preference. We could easily make this dough ahead, form it, wrap it with plastic, and freeze it for later baking. I love that option!
The other problem I had was with the filling. Even after time in the freezer and then hours in the refrigerator, it still wasn’t stiff enough to mimic the Oreo filling. But the combination of heavy cream and Guittard white chocolate is amazing. I was licking every drop off my fingers and dipping the cookies in it! There was no way I was going to throw this delicious concoction away, so I used it to frost the cookies instead.
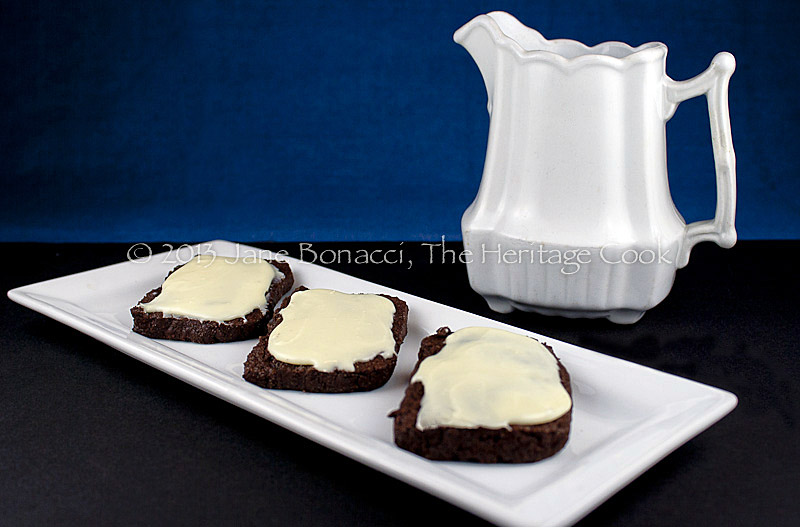
You all know how much I love the combination of chocolate and vanilla … Instead of a chocolate sandwich cookie that I thought I would have, I ended up with deep, dark, tender chocolate cookies topped with a heady vanilla frosting. I now have a new great recipe to add to next year’s holiday baking list. They will most definitely be making repeat appearances in our house throughout the year!
While these cookies are not what I started out to make, or even similar to what I thought I would they would be, I would gladly serve them to anyone. I am having trouble not eating the entire plate of them by myself, but I know The Artist would be very upset if there weren’t any left to have with his coffee in the morning, so I am holding myself back. Next time I may have to double the recipe so I don’t have to worry about this, LOL.
Oh gosh, it might just be time for a little more quality control (a.k.a. cookie eating)!! 😀
Happy Chocolate Monday everyone. Have a wonderful week!!
Jane’s Tips and Hints:
Even if you think a recipe is a goner, step back and think it through. There may be something you can do to rescue it or even make it better than the original!
Gluten-Free Tips:
Use a gluten-free flour blend in place of the all-purpose flour and make sure the cocoa does not contain any gluten ingredients.
Dairy-Free Tips:
See notes* below for dairy-free options and suggestions.
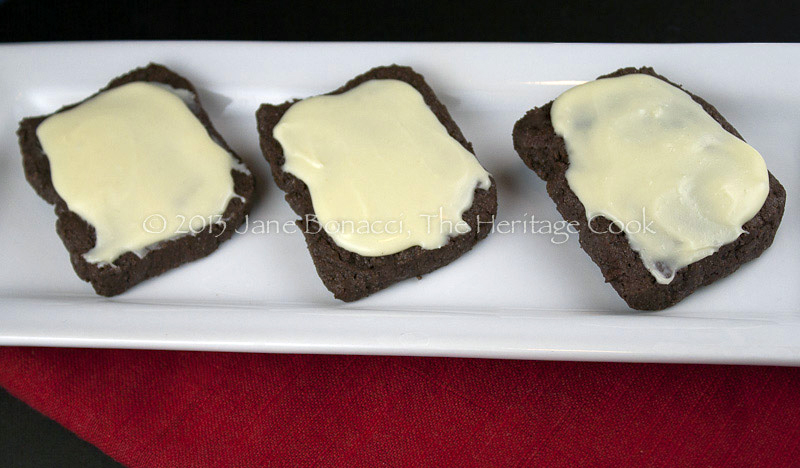

- Frosting
- 4.4 oz (125g) chopped white chocolate, preferably Guittard
- 0.5 oz (15g) butter*
- Pinch kosher salt
- 1/2 cup heavy cream*
- Cookies
- 1-3/4 cups plus 1-1/2 tbsp (259g) all-purpose flour or gluten-free flour blend
- 1 cup plus 1-1/2 tbsp (87g) cup unsweetened alkalized cocoa powder (Dutch-processed) such as Droste or Guittard Cocoa Noir
- 1/2 tsp (1.5 g) kosher salt
- 3/8 tsp (1.6g) baking soda
- 2 sticks (8 oz/227g) butter*, at room temperature
- 3/4 cup plus 1 tbsp (161g) granulated sugar
- 1 large egg
- 1 tsp vanilla extract
- 1 to 2 tbsp cream*, or as needed
- Make the Frosting: Place white chocolate and butter in a heatproof bowl and set in a saucepan with about 2 inches of water in the bottom. Bring the water to a simmer and heat chocolate and butter until melted, stirring often.
- Meanwhile, place the cream and salt in a small saucepan and scald it (bring to just under a simmer). Pour the steaming hot cream over the melted chocolate and whisk until smooth. Transfer to a small bowl and refrigerate several hours or until thick.
- You can also quicken this process by placing the bowl in the freezer and whisking occasionally until thoroughly cold and thickened. Make sure you don’t forget it or you will have a white chocolate popsicle! Hold in the refrigerator until ready to frost the cookies.
- NOTE: Some powdered sugar may help turn this into a stiffer frosting that would be easier to work with. I will add some the next time I make these. If you try this idea, let me know how it turned out!
- Make the Cookies: Place the flour in a mixing bowl and sift the cocoa, salt, and baking soda over the top. Whisk the mixture together until smooth. Set aside.
- Place the butter in the mixing bowl of your stand mixer, and using the paddle attachment, beat until lightened and fluffy, about 2 minutes. Scrape down the sides and bottom of bowl as well as the beater. Add the egg, vanilla, and 1 tbsp of the cream. Beat until smooth. Scrape the bowl and beater.
- Add half of the dry ingredients and slowly beat together until incorporated. Add remaining dry ingredients and beat until thoroughly combined. The dough will be crumbly but should start to pull away from the sides of the bowl and collect on the beater. If it is too dry, add another tablespoon of cream. Depending on the flour you use and the moisture in the air, you may need more or less cream - you are looking for a moist, clumpy consistency that holds together when you squeeze some in your hand.
- Place the cookie dough on a sheet of parchment or waxed paper and, using the paper as an aid, press it together into a long round or squared off log. Wrap with the parchment paper and then cover that in plastic wrap; refrigerate until cold and firm, up to several days in advance.
- Bake the Cookies: Set the oven racks in the upper and lower third of the oven and preheat to 325°F. Line two baking sheets with silpats or sheets of parchment paper.
- When the dough is firm, use a very sharp knife to cut into 1/8 to 1/4-inch thick slices and place on prepared baking sheets. These cookies do not spread so you can place them fairly close together, but leave enough room so the hot air can circulate around all sides of the cookies.
- Place the baking sheets in the hot oven and bake, spinning and rotating sheets halfway through, until the cookie centers are firm to the touch, about 15 to 17 minutes. Be careful not to overcook or burn them - a common issue with chocolate cookies - let your nose be your guide as much as touch and timing. Remember that if you cut your cookies into thicker slices, they will take longer to bake!
- When done, remove from the oven, let sit for 1 minute and then using a thin metal spatula, carefully transfer the cookies to wire racks to cool completely.
- Frost the Cookies: Spread a little of the chilled frosting on each cookie using an offset spatula or the back of a spoon. Alternately, you can dip a fork or whisk in the frosting and drizzle the tops of the cookies in a random pattern. Place the cookies in the refrigerator to help the frosting set up.
- These cookies are best on the day they are baked, but can be stored in an airtight container at room temperature (unfrosted) or refrigerated (if frosted), for up to 3 days.
- Yield: about 2 dozen cookies
- * For a dairy-free option, replace the butter with Earth Balance spread and the cream with coconut milk. Use dairy-free white chocolate, available online or make your own. Nicole from Gluten-Free on a Shoestring has a great tutorial and recipe for dairy-free and soy-free homemade white chocolate!
Create a New Tradition Today!
Unauthorized use, distribution, and/or duplication of proprietary material on The Heritage Cook without prior approval is prohibited. This includes copying and reprinting content and photographs. If you have any questions or would like permission, I can be contacted via email: theheritagecook (at) comcast (dot) net. Feel free to quote me, just give credit where credit is due, link to the recipe, and please send people to my website, www.theheritagecook.com. Please see the Disclaimers page (under the “About” tab above) for additional details.
Thank You!



Karen Palmer
I love the process. Thank you for sharing how you saved all that yumminess! I haven’t yet made them but I think I will like these much better that oreos!
Jane Bonacci, The Heritage Cook
Thank you Traci ~ These cookies are truly wonderful!
traci
Great job! The combination sounds wonderful!