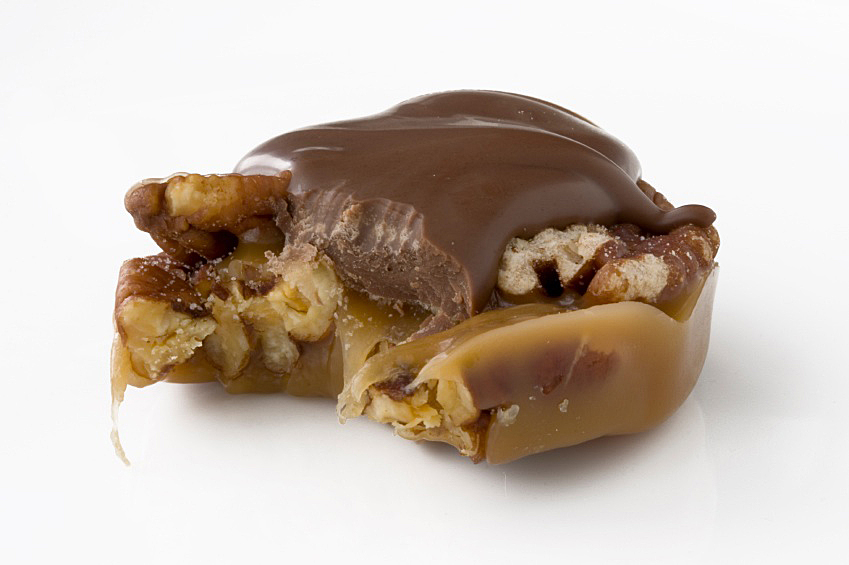
Chocolate Turtles
Today’s Recipes: Baked Caramel Corn, Best-Ever Nut Brittle, Bourbon Balls, Chocolate-Covered Caramel Nut Candies (Turtles or Squares), Chocolate-Olive Oil-Orange Truffles, Creamy Fudge, Homemade Peppermint Patties, Luxurious Chocolate Truffles, Mama’s Divinity Candy, and Pine Nut Brittle.
The holidays are the perfect time for candy and there are all kinds of sweets that appear at this time of year. My grandmother used to make a huge box of homemade caramels every December and ship it to us. What a treat it was when we got that delivery. My parents used to put the box on top of the tallest cupboard so that it was above our reach. If I had my way, I would have eaten the entire box in about 30 minutes. It was a good thing I was the littlest one and couldn’t reach it, LOL!
Caramel is my favorite candy. Hands down my favorite by miles and miles, I love the buttery, smooth, indescribably delicious flavor. Caramel syrup, chewy candies, toffee, and turtles, it really doesn’t matter. The consistency of caramel varies depending on how long you cook it. By cooking it a short time you get a creamy caramel sauce. Boil it longer and it becomes brittle and breaks when you snap it. Caramel is truly amazing and when you combine it with chocolate, popcorn, nuts or other ingredients, my happiness grows exponentially.
Both The Artist and I are addicted to the combination of mint and chocolate. Junior Mints© is still one of my favorite treats to snack on at the movies and The Artist has a weakness for Peppermint Patties©. I love the cold blast of mint against the bite of dark chocolate. A perennial holiday favorite is fudge. My father used to make the best fudge. He would cook it from scratch, always using the same pan. Then when it was cool enough – and he had this down to a science – he would beat it with an old wooden spoon until it lightened in color and got thicker. He quickly poured it into the buttered pan and we would all watch in amazement as it set up into perfect candy every time.
Chocolate Truffles, does it get any better? Solid chocolate smoothed with cream, sometimes flavored, sometimes left in their purest form. They are surprisingly easy to make. You think, “I could never make these,” but you are wrong. They may not be as perfect, but they will be just as delicious! No matter how you make them, if you love chocolate, you will luxuriate in them. One of my dreams is to wake up completely surrounded by truffles – so many that I have to eat my way out of bed! Can you imagine? What a sight that would be, LOL!
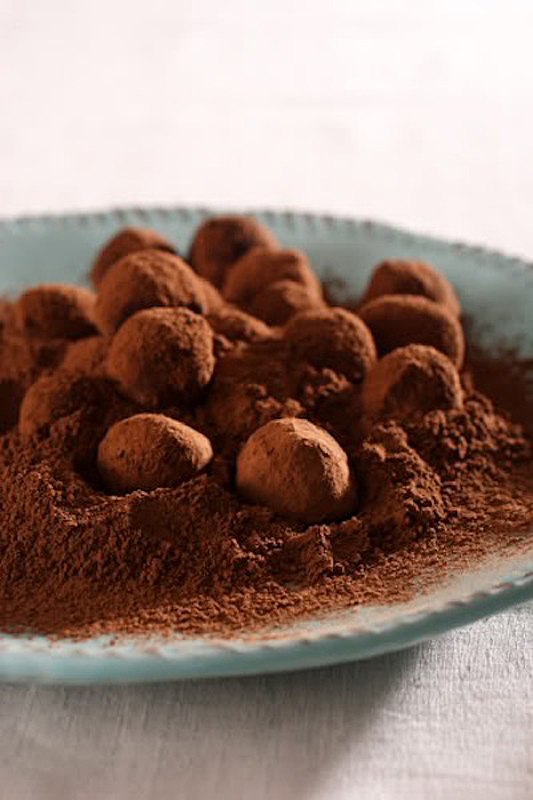
Truffles in Cocoa Powder
I am including two different recipes for truffles, one is very traditional, the other a bit more daring. I know the thought of using olive oil in a sweet dessert is a strange idea for a lot of people, but you can trust me on this one, you are going to love truffles made with it! If you are looking for a special treat, you can have these made in just a couple of hours and ready for your guests to snack on.
My mother made only one kind of candy, but she was a master at it … Divinity. She made it every year at the holidays, coloring part of it green, another portion pink and leaving the rest its natural lovely white for a festive take on the traditional seasonal colors. Made by beating a hot sugar syrup into whipped egg whites, it is lofty, sweet and totally decadent. It is often a sugar lover’s secret obsession. Every time I see it, I can see my mother’s sweet, sincere face as she made these for her children. To me they are all about Love!
And for those who are candy-challenged, here is one for you – Bourbon Balls! All you have to do is throw all the ingredients together, form into balls, roll in a coating or dip in melted chocolate (totally decadent) and set aside for a couple of days to “mellow.” No cooking and they are better when made ahead, this is the busy hostess’ best kept secret to easy entertaining!

Caramel Corn
Secrets to Working with Caramelized Sugar:
When I was a little girl, every time my grandmother came to visit she would make us candy from scratch. She was always wonderful but when she did this, she became omnipotent! If you have never made candy, it is an amazing thing to watch. The sugar cooks for what seems like forever and then it suddenly becomes golden caramel color! Every time I see it happen I get the same sense of wonderment.
We always used a thermometer but Mimi learned without using one, so just to have fun (and pass along the tradition) she taught me the age-old ways of telling when candy was ready … forming a ball in a bowl of cold water, and watching for the sugar to spin a thread. What an amazing education she gave me as a young child watching her turn sugar into candy!
You shouldn’t be afraid of making caramel, but you should be cautious when doing so. Wear long sleeves and close-toed shoes, and have a bowl of cold water nearby in case of burns. Stand back when adding anything to boiling caramel because it can splatter you. Just like anything else in the kitchen, use common sense and have a healthy respect for molten sugar.
First and foremost, stir sugar until is has dissolved and is boiling, and then NEVER stir it again! If you do, the entire batch will most likely turn back into crystallized sugar. What happens is that if even one grain of sugar sneaks into the syrup, it starts a chain reaction of crystallization. Unfortunately this is one situation where you can’t fix it. You’ll have to start all over again. Covering the pan with a lid or brushing the sides of the pan with a brush dipped in water will help keep sugar crystals from forming on the sides and being stirred into the syrup.
When you are cooking sugar, use a pan with a light interior so you can see the color change. It is very subtle at first, just a hint of yellow in the boiling sugar, then it turns a deep gold, and finally a rich brown. It will take forever for it to start changing color and then it will go quickly. Don’t get distracted, don’t answer the phone if it rings, stay focused and it will be perfect every time.
Whenever I am making candy I keep a small bowl of ice water next to the sink. Then if any of the sugar gets on me, I can immediately get my hand into the water to stop the burning. This is especially important if you will have children with you at the stove. Ice water is the best for burns and nothing beats it!
For me the hardest part is getting the candy transferred from the pot to the baking sheet quickly enough. I am not very tall so wrangling the hot pot, trying to scrape out every last bit of the candy and getting it smoothed out thinly is my biggest challenge. Over the years I have figured out a few tricks to make it easier for me and hopefully for you too.
First of all, if you have someone to help you by holding the pot, that is the best of all worlds. Let them figure out how to hold the pot steady and let you worry about getting the candy onto the pan. If that isn’t possible, set another pot upside down next to the baking sheet. You can rest the hot pot on the bottom of the other one, giving you a more stable surface to work from, at least until most of the candy is out and the pot is light enough to hold easily.
Another problem was always sticking and today’s Silpats have made that issue disappear. You’ve heard me sing their praises before, but when you are making candy, they are an absolute godsend. No matter how sticky or tacky the candy is, it peel right off. Make sure the smooth side is up and there is no need to grease or butter it. One try and you will be hooked!
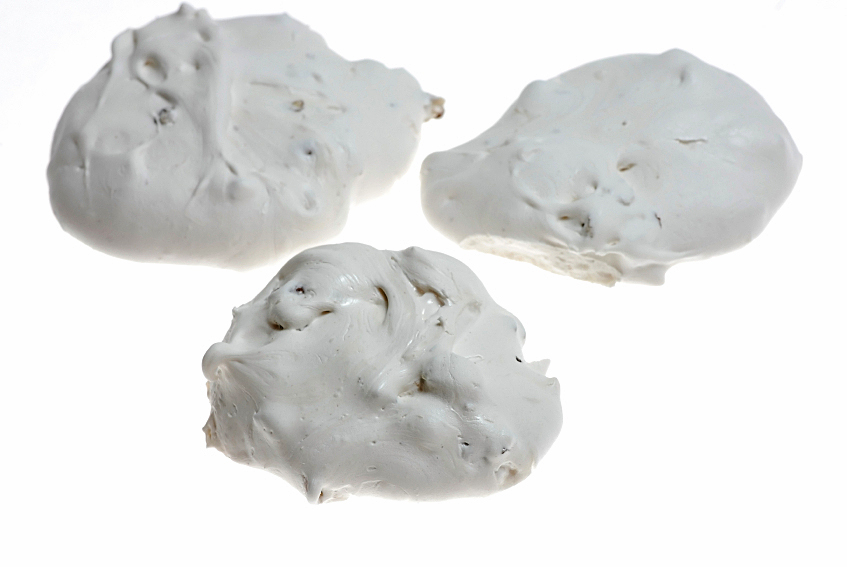
Homemade Divinity Candy
By the way, the best way to store silicone mats is flat with sheets of paper towel in between them to absorb any excess moisture. I lay mine in a stack between two of my baking sheets, right below the one holding my sheets of parchment paper. Don’t you love efficiency!
The best tool to use to spread out the caramel is an offset spatula. It is lightweight, flexible and gives you great control without the risk of your hand touching the molten sugar. Butter it before working with the caramel to help with stickiness of the candy. If you haven’t already, go buy one. You will use it all the time for frosting cakes, spreading mayonnaise on bread, making peanut butter and jelly sandwiches or any of a plethora of tasks.
If you are cooking the sugar to the crack stage, it hardens almost immediately when hitting a cold surface. I found a way to extend the time you have to spread it out on the sheet … keep the sheet, lined with a Silpat, in a slow oven (around 200°F) until about halfway through the candy cooking. Pull it out and place it on top of the stove next to the pot with the hot candy. It will still be hot when you pour out the brittle, keeping it fluid long enough to get it spread out to the perfect thin layer that is easiest to eat and that shows off the nuts the best. One Warning … keep a hot pad on the edge of the baking sheet so you don’t burn yourself by grabbing it barehanded!
Here are a few things that will make cleaning up much easier: Use vegetable spray on the bowl before you start to toss the popcorn and caramel together, and if you use a Silpat on the baking sheets, the caramel corn will release really easily. As soon as you have the popcorn coated and in the oven, fill your saucepan with water and bring to a boil. The boiling water will dissolve the caramel and clean up will be a breeze.
If you don’t have the time or inclination to make your own caramel, you can buy pre-made caramel, either in bulk from vendors such as King Arthur Flour or the individually wrapped caramels in the grocery store.
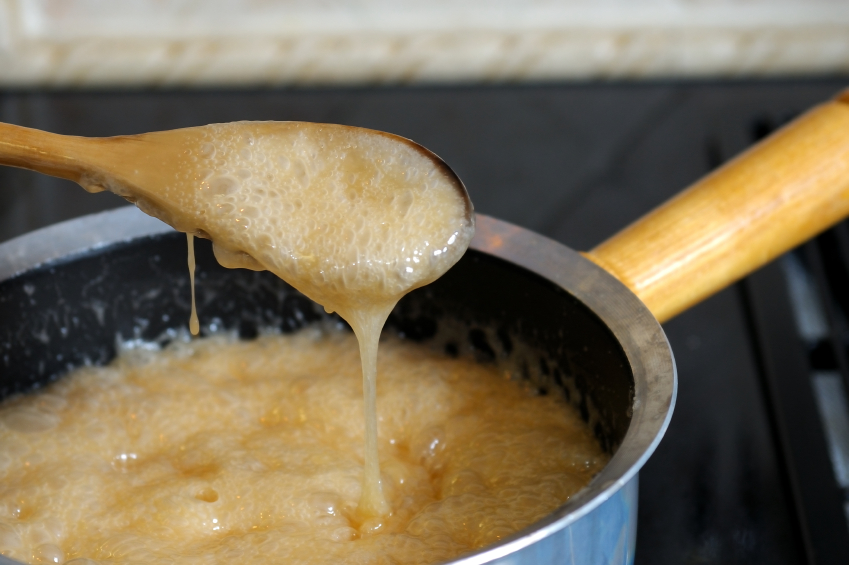
Sugar becoming caramel
Here are some more pointers to help you!!
Why Do I Add Corn Syrup?
Corn syrup acts as an “interfering agent” in this and many other candy recipes. It contains long chains of glucose molecules that tend to keep the sucrose molecules in the candy syrup from crystallizing. In fudge, the addition of “interfering agents” can be a double-edged sword: you want crystals to form, but not until the cooked mixture has cooled down to a certain degree.
Why Do I Need to Stop Stirring After the Syrup Begins to Boil?
At this point, you have dissolved the crystal structure of the sugar. Stirring or other agitation is one of the many factors that can encourage the fructose and glucose molecules in your syrup to rejoin and form sucrose—crystals of table sugar.
Why Do I Wash Down the Sides of the Pan?
The sugar crystals are dissolved at this point in the process. But a single seed crystal of sugar clinging to the side of the pan might fall in and start the cycle of re-crystallization.
Why Does the Fudge Need to Cool For Such a Long Time?
The key to a smooth and creamy texture is a fudge that’s full of thousands of tiny sugar crystals. Heating the syrup to a high temperature and then allowing it to cool, undisturbed, produces a supersaturated solution – this means that the solution contains more sugar molecules than would normally be possible at room temperature. A supersaturated solution is highly unstable, and any agitation will cause crystallization to occur throughout the solution. If fudge is stirred while it’s still hot, fewer crystals form, and they grow larger as the syrup cools, resulting in a coarse, grainy candy.
Why is it So Important to Keep Stirring Until the Fudge “Sets”?
Stirring helps control the size of the sugar crystals that form—it keeps them from growing too large, which would produce gritty fudge.
What Happens If I Add Extra Ingredients?
If you’re adding nuts or fruit, you may want to warm them slightly in a microwave before adding them. If they are too cold, the temperature difference may “shock” the fudge and cause it to solidify too quickly.
Why Is a Candy Thermometer a Good Idea and What Kind Should I Buy?
They are not expensive and greatly increase your chances of success. If you can, find one with a mercury glass tube suspended on top of a flat metal plate. This is the most accurate kind and the glass is protected from breaking by the metal.
You absolutely need one if the recipe calls for it. My favorite is made by CDN and has a metal frame protecting a glass tube with mercury in it. Make sure you can see the mercury easily – I like red because I can see it through the steam. To protect it in the drawer, I always store it in its packaging.
Why Should I Calibrate My Candy Thermometer?
Every thermometer is a little different and conditions change daily, so it is always a smart idea to calibrate them before making candy. Bring a pan of water to a boil with the thermometer clipped to the side. The thermometer should register 212°F / 100°C. If it is off slightly, adjust your final temperature by the same amount. For example if the boiling water temperature is 210°F, decrease your final cooking temperature by 2°F.
My Chocolate has a Gray Coating. Is it OK to Use?
When chocolate develops a gray covering it is called a bloom and is just the butterfat moving to the surface. It doesn’t affect the performance or taste of the chocolate.
What is Tempered Chocolate?
Tempering chocolate (heating and cooling it repeatedly) gives it a beautiful sheen, nice snap when you bite into it, and helps prevent the butterfat from separating when it sits at room temperature. It isn’t necessary to temper chocolate, especially if you are going to eat the candies right away.
Why Do You Recommend Using an Ice Cream Scoop so often?
Nothing makes forming truffles (and other treats) easier than a spring-loaded ice cream scoop. I use mine all the time for cookies and candies. I never knew how much I was missing until I used one and now I can’t imagine my kitchen without them. I have three, in graduated sizes, from 1 tbsp up to 1/4 cup. I can load a baking sheet with cookies in seconds and the portions are all even. With Christmas right around the corner, these make a really fun stocking stuffer for the cooks in your family.
Candy making is really all about science. Don’t let that scare you – anyone can make candy if you can follow a recipe and use a candy thermometer. Candy is notoriously temperamental; humidity or other changes in the weather may make it more challenging, so if it is a rainy or a high humidity day, you will need to cook the candy a few degrees higher than normal to compensate for the increased moisture in the air. If you want to know more about the reasons why candy behaves the way it does, The Accidental Scientist website has terrific information on the Science of Candy.
Now, let’s get in the kitchen and learn to make what will surely become your most requested gifts. I hope you have a wonderful holiday season full of cookies, candies, and other delicious treats!
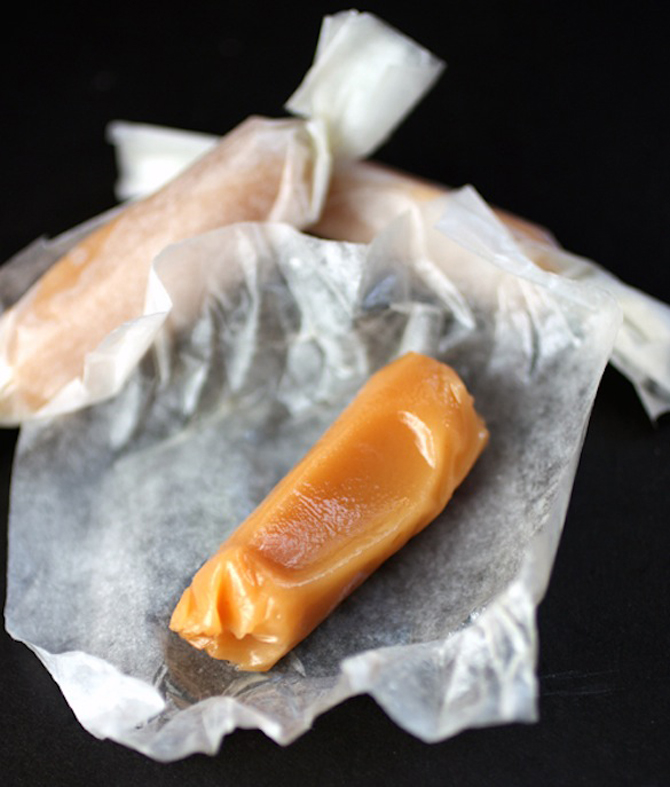
Homemade Caramels
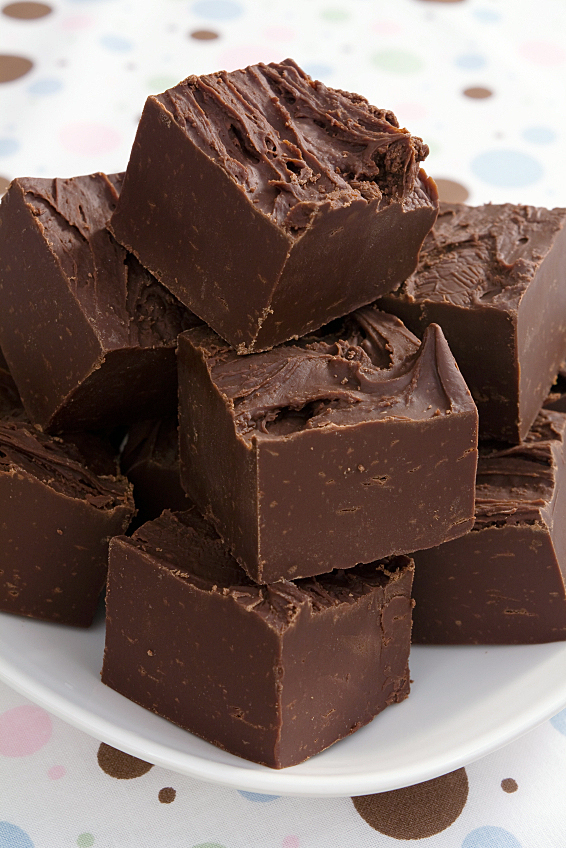

- 1 cup butter (2 sticks), melted
- 4 cups sugar
- 2 tsp white corn syrup, optional
- 1 (12 fl oz) can evaporated 2% milk
- 1 cup mini marshmallows
- 1 (12 oz) pkg of semi sweet chocolate chips or you can combine 5 oz unsweetened and 7 oz bittersweet chocolate
- 1 tsp vanilla
- 1 to 2 cups chopped nuts, optional
- Butter a 9×13-inch pan; set aside.
- In a large saucepan melt the butter, and using a wooden spoon, stir in sugar, corn syrup (if using), and evaporated milk together. Stir until sugar is totally dissolved then wash down the sides with a wet pastry brush, attach the candy thermometer to pan, and cook without stirring to the soft-ball stage, about 240°F. The temperature will rise quickly at first (as it comes to a boil) and then it will stay very still for a long time while the water evaporates. When you are close to the soft-ball stage, watch carefully because it can rise quickly.
- Remove from the heat, remove the thermometer, and add marshmallows and chocolate. Stir until marshmallow and chocolate have completely melted and are thoroughly combined. Stir in vanilla. Add nuts, if using. Pour into prepared 9×13-inch pan.
- Set aside and let sit uncovered and undisturbed until firm. If you have time, let it set up overnight before cutting it into squares. The longer you let it sit, the creamier it gets!
- Store in an airtight container, in layers separated by parchment paper or wrap individual squares in cellophane, plastic, or waxed paper.
- Yield: 1 (13×9 inch) pan fudge, about 40 pieces
- 2 cups sugar
- 1/2 cup water
- 1 stick unsalted butter
- 1/3 cup light corn syrup
- 1/2 tsp baking soda
- 12 oz roasted salted peanuts, cashews, pistachios, and/or pecans
- Fleur de sel or crushed Maldon sea salt, optional
- Grease a large rimmed baking sheet or line it with a Silpat. Oil the back of a large spoon or offset spatula. Set on tray.
- In a large saucepan, combine the sugar, water, butter and corn syrup, and bring to a boil. Cook over moderately high heat, stirring occasionally, until the caramel is light brown and reaches 300°F on a candy thermometer, about 10 minutes.
- Remove from the heat and carefully stir in the baking soda. The mixture will bubble. Stir in the nuts, then immediately scrape the brittle onto the prepared baking sheet.
- Using the back of a large oiled spoon, quickly spread the brittle into a thin, even layer. Sprinkle lightly with salt.
- Let cool completely, about 30 minutes. Break the brittle into large shards.
- Yield: 2 pounds of candy
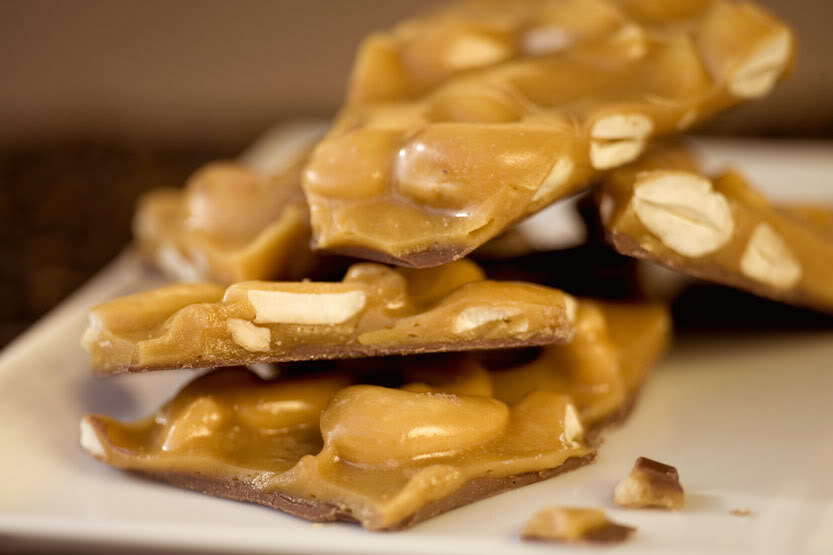

- 2/3 cup granulated sugar
- 1/4 cup light corn syrup
- 1/4 cup water
- 3/4 cup lightly toasted pine nuts
- 1/4 tsp baking soda dissolved in 1 tsp water
- 1 tsp vanilla
- Line a baking sheet with a Silpat or a piece of buttered parchment paper. Set next to stove.
- In a heavy-bottomed saucepan, combine the sugar, corn syrup, and water. Bring to a boil over medium-high heat, stirring until the sugar dissolves. Continue to cook, without stirring, until it reaches a deep amber caramel color, which is 270°F to 290°F, the soft crack stage. This will take about 8 to 10 minutes, but watch carefully because it can burn quickly!
- Remove from the heat. Carefully stir in the pine nuts, the baking soda mixture, and vanilla, (it will bubble up). Then quickly pour the mixture onto the prepared baking sheet, without scraping the pan, and spread it into a thin layer with a buttered spatula.
- Let the candy cool until hardened. Break into ragged pieces and serve. The brittle can be kept in an airtight container for up to 1 week.
- Yield: about 2 cups
- Candies
- 2-1/2 cups Confectioner’s sugar (less than 1 lb), divided , plus more for dusting
- 1-1/2 tbsp light corn syrup
- 1-1/2 tbsp water
- 1/2 tsp pure peppermint extract
- 1 tbsp vegetable shortening (preferably trans-fat-free)
- 10 oz (70% cacao) bittersweet chocolate, coarsely chopped
- Equipment
- 1-inch round cookie cutter
- Make Filling: In an electric mixer (with paddle attachment if using a stand mixer) beat 2-1/4 cups of the Confectioner’s sugar with corn syrup, water, peppermint extract, shortening, and a pinch of salt at medium speed until just combined.
- Transfer to a work surface dusted with remaining 1/4 cup Confectioner’s sugar and knead until smooth. Roll out between sheets of parchment paper into a 7 to 8-inch round (less than 1/4 inch thick). Transfer to a large baking sheet, keeping the parchment on both sides. Freeze until firm, about 15 minutes. (Freezing helps you get clean cuts.) Remove top sheet of paper and sprinkle top with confectioner’s sugar. Replace top sheet, then flip round over and repeat sprinkling on other side.
- Cut out as many rounds as possible with cutter, transferring to a parchment-lined baking sheet. Freeze until firm, at least 10 minutes. Meanwhile, gather scraps, re-roll and freeze, then cut out more rounds, freezing them until very firm.
- Temper Chocolate and Coat Patties: Melt 3/4 of the chocolate in a metal bowl set over a saucepan of barely simmering water. Remove bowl from pan and add remaining chocolate, stirring until smooth. Cool until thermometer inserted at least 1/2 inch into chocolate registers 80°F.
- Return water in pan to a boil and remove from heat. Set bowl with cooled chocolate over hot water and reheat, stirring, until thermometer registers 88°F to 91°F. Remove bowl from pan.
- Dipping: Balance 1 peppermint round on a fork and submerge in melted chocolate, lift up, letting excess drip off and scraping back of fork against rim of bowl if necessary, then return patty to sheet (to make decorative ridges on patty, immediately set bottom of fork tines briefly on top of patty, then lift fork straight up).
- Coat remaining rounds, re-warming chocolate to 88°F to 91°F as necessary. Let patties stand until chocolate is set, about 1 hour.
- Yield: Makes about 4 dozen 1-inch candies
- Make Ahead: Patties keep, layered between sheets of parchment in an airtight container, chilled, 1 month. Bring to room temperature before serving.
- 3 cups pecan halves
- 8 oz semisweet chocolate, chopped
- 4 oz milk chocolate, chopped
- 1 cup brown sugar
- 1 cup white sugar
- 1 cup dark corn syrup
- 1 cup butter
- 2 cups evaporated milk, divided
- 1 tsp vanilla
- Grease a 9×11-inch pan or line a baking sheet with a silpat; set aside. Preheat oven to 350°F. Lightly toast pecans and set aside to cool.
- Melt chocolates together in a heatproof bowl set over a pan of simmering water. Make sure the water does not touch the bottom of the bowl. The steam will gently melt the chocolate without scorching it. When it is mostly melted, remove from the heat and stir until completely smooth. Set aside until ready to use. If it gets too thick, reheat slowly over simmering water, stirring, until smooth again.
- In a 4-quart heavy-bottomed saucepan, combine the sugars, syrup, butter and 1 cup of the evaporated milk, and bring to a boil over medium heat. Add the other cup of evaporated milk slowly, stirring constantly, and cook stirring occasionally, until it reaches 255°F on a candy thermometer (hard ball stage). Add the vanilla and mix well.
- To Make Turtles: On silpat-lined baking sheet, make sets of 5 pecans each (4 legs and a head), slightly separated or chop pecans and place in small piles. Pour dollops of caramel into center of each set, partially covering each pecan (caramel becomes the turtle’s shell). Transfer to refrigerator to set. When firm, dip in melted chocolate.
- To Make Chocolate Dipped Caramel Squares: Stir pecans into caramel, pour into prepared pan without scraping the pan, and refrigerate. When firm, bring to room temperature, cut into squares then dip in melted chocolate.
- Short Cut: For the easiest Turtles, buy bulk caramel and chocolate disks. Cut caramel into cubes and flatten slightly into a disk about 2-inches in diameter. Place pecans in small piles on a silpat-lined baking sheet. Press the caramel disks onto each pile. Warm in oven for a few minutes until caramel softens. Remove from oven and top each caramel with a chocolate disk. It will soften from the heat of the caramel, or you can return to the oven for another minute. Let harden before attempting to remove from the baking sheet.


- 1 cup butter
- 2 cups brown sugar
- 1/2 cup corn syrup (I use dark, but light is fine too)
- 1 tsp salt
- 1/2 tsp baking soda
- 1 tsp vanilla
- 6 quarts popped popcorn, kept warm (I use 3 bags microwave popcorn)
- Buy plain popcorn if you can find it; try not to use buttered popcorn. Pop it and pour into a large bowl. Make sure you discard any un-popped kernels! Keep warm in a slow oven.
- Melt butter in medium saucepan. Stir in brown sugar, corn syrup and salt. Bring to a boil, stirring constantly, then boil without stirring for 5 minutes. Remove from heat and stir in baking soda and vanilla. The candy will bubble up furiously, get lighter in color, and change texture. This is supposed to happen so don’t be worried when you see it transform.
- Immediately pour over warm popcorn in very large bowl, stirring until evenly coated. Toss and toss and toss it until each kernel is coated. Turn into large baking sheets with sides. Bake at 250°F for 1 hour, stirring every 15 minutes.
- Remove from oven and cool. Break apart and store in airtight containers or zip-top plastic bags.


- Truffles
- 1 lb high-quality semisweet chocolate (about 66%) such as Scharffen Berger, Valrhona, or Guittard, chopped
- 1/2 cup heavy cream
- 8 tbsp (1 stick) unsalted butter, cut into cubes
- Optional Additions
- 1 tsp pure vanilla
- 2 tbsp brandy or other liqueur
- A few drops of flavored oil such as orange, cinnamon, raspberry, etc. (see above for more ideas)
- Optional Toppings
- Finely chopped nuts such as pistachios, pecans, or almonds
- Candies such as chocolate jimmies, ground toffee or peanut brittle, crushed peppermints, etc.
- Misc ingredients such as coconut, cocoa powder, cinnamon sugar, turbinado sugar, ground graham crackers, chopped white chocolate, powdered sugar, crushed pretzels, mini chocolate chips, etc.
- 1 lb semisweet chocolate for dipping
- Place chocolate in a heatproof bowl. Cover a baking sheet with parchment paper.
- Heat cream in a small saucepan until it is just under a boil. This is called scalding. There will be bubbles around the edges, but they won’t be large. Remove from heat and pour over chocolate. Let it sit for a few minutes to let the chocolate melt.
- Using a heatproof spatula, stir the cream and chocolate together until smooth. Stir in the butter and any flavorings you like. Work gently until everything is thoroughly combined and smooth. Do not use a whisk because you do not want to add any air to the mixture. Taste and add more flavoring if needed. You can also divide the chocolate/butter mixture and flavor each portion with a different flavoring. If you do this, make sure you label the bowls so you know what you added to each!
- Cover the bowl with plastic wrap and refrigerate until chocolate is firm but still pliable, about 45 minutes. Using an ice cream scoop, melon baller or two regular teaspoons, scoop small portions onto prepared baking sheet. Cover with plastic wrap and refrigerate until thoroughly chilled, about 30 minutes.
- Meanwhile, place any toppings you will be using into separate bowls or pie pans. Arrange next to your work surface.
- Working quickly, roll chocolate portions into balls, using the palms of your hands. If you like, to make clean up easier, you can wear latex gloves. Make sure they are powder-free! Cover and return to the refrigerator to chill again until firm. The recipe can be made to this point up to 2 days ahead.
- You can roll the truffles in any of the optional ingredients if you like or leave them plain. If you have used different flavorings, I suggest you roll them in different toppings so you can tell them apart. Set them onto a clean piece of parchment and chill until firm, at least 1 hour.
- If you prefer, you can also melt additional chocolate and dip the truffles. If you do this, you will want to keep your chocolate at an even temperature. If you don’t have one of the fancy tempering machines, you can keep the bowl of melted chocolate warm by placing a heating pad into a large bowl and nestle the bowl of chocolate on top of it. Set the heating pad to medium. You want to keep the chocolate at 90°F to 92°F for the optimum setting. If it goes above 94°F it won’t have the wonderful snap when you bite into it.
- You can use your fingers, a couple of forks or specialized dipping tools to dip the chocolates. Place the truffles in the melted chocolate, roll around to coat thoroughly, pick up, tap lightly to shake off some of the chocolate, and drag the bottom across the edge of the bowl to remove excess. Set on a wire rack or parchment to harden.
- Store in an airtight container in the refrigerator up to 2 weeks or freeze up to 3 months. Bring to room temperature before serving. Children love to help make these and are very proud to present their creations for dessert after dinner!
- Yield: about 75 truffles (1 tsp size) or 25 truffles (1 tbsp size)
- 8 oz bittersweet or semisweet chocolate (60% to 62% cacao), chopped
- 5-1/2 tbsp unsalted butter, cut into small pieces
- 1/3 cup California Olive Ranch® Arbequina Extra Virgin Olive Oil
- Pinch of fine sea salt
- 1/4 cup unsweetened cocoa powder (preferably non alkalized or natural)
- 1 organic or unsprayed orange for zesting (optional) washed well
- Place the chopped chocolate, butter, olive oil and salt in top of a double boiler over barely simmering water. Stir frequently until chocolate is melted and smooth. Pour into a bowl. Cover and refrigerate for at least 3 hours (or up to 3 days) to harden.
- Remove from the refrigerator and let mixture stand at room temperature for 15 or more minutes to soften slightly.
- Spread the cocoa powder in a shallow pie plate or cake pan. If desired, use a Microplane zester to grate zest from half the orange directly over the cocoa.
- Using a tiny scoop or melon baller, scrape it across the surface of the chocolate mixture to form an irregular round truffle, 1-inch or less in diameter. Place truffle into the cocoa powder and shake the pan to roll the truffle in the cocoa. Transfer to a covered container and repeat until all the truffles are shaped and coated.
- Cover the container and store in the refrigerator. Remove from the refrigerator about 10 minutes before serving.
- Yield: 36 to 40 small truffles
- 4 cups sugar
- 1 cup white corn syrup
- 3/4 cup cold water
- 3 egg whites
- 1 tsp pure vanilla
- 2 cups chopped pecans
- In a heavy saucepan over medium heat, stir together the sugar, corn syrup, and water. Stir only until sugar has dissolved. Do not stir after this point. Cook syrup mixture until it reaches 250°F on a candy thermometer, bringing it to a hard ball stage.
- While the syrup is cooking, beat the egg whites until stiff peaks form. Once the sugar mixture reaches 250°F, carefully pour a slow steady stream of syrup into the stiffly beaten egg whites, beating constantly at high speed. Add the vanilla and continue to beat until mixture holds its shape, approximately 5 minutes. Stir in pecans.
- Using 2 spoons, drop the divinity onto waxed paper, using 1 spoon to push the candy off the other. This may take a little practice because the technique is to twirl the pushing spoon, making the candy look like the top of a soft serve ice cream. If the candy becomes too stiff, add a few drops of hot water. You will need to work fast when making this type of candy. After you spoon the cooked sugar and nuts onto the waxed paper, you're done.
- Cool the candies on racks completely. You can store them in an airtight container for up to 2 weeks.
- Yield: about 8 servings
- Bourbon Balls
- 1 cup pecans or walnuts
- 2 cups vanilla wafer cookies, finely crushed
- 1/2 cup confectioners’ sugar
- 2 tbsp cocoa powder (either Dutch processed or regular unsweetened cocoa powder are fine)
- 1-1/2 tbsp light corn syrup (or liquid glucose syrup)
- 1/4 cup bourbon, rum, vodka, or other liquor of your choice
- Toppings
- Confectioners (powdered or icing) Sugar
- Finely chopped nuts (pecans, walnuts, hazelnuts, almonds or pistachios)
- Unsweetened Cocoa Powder
- Melted Chocolate (Dark or White)
- To Roast Nuts: Preheat oven to 350°F and place the oven rack in the center of the oven. Put the pecans on a baking sheet and bake for about 8 minutes, or until lightly browned and fragrant. Let cool completely and then finely chop.
- Make Bourbon Balls: Process the vanilla wafer cookies in your food processor until finely chopped. Add the crumbs to the chopped pecans. To this mixture add the confectioners’ sugar and cocoa powder and stir until combined. Add the corn syrup and bourbon and mix well. Add more bourbon if necessary. Chill the batter and then shape into 1 inch (2.5 cm) balls.
- Roll the bourbon balls in confectioners sugar, finely chopped nuts, or cocoa powder. If dipping in chocolate, put about 3 oz (90 grams) of chopped dark chocolate and 1 teaspoon of shortening or butter in a heatproof bowl placed over a saucepan of simmering water. Once melted, remove from heat and dip the balls, one at a time, in the melted chocolate, making sure the entire ball is coated with chocolate.
- Then, with two spoons or a dipping fork, remove the bourbon balls from the melted chocolate, allowing any excess chocolate to drip back into the bowl. Place the chocolate covered balls on a baking sheet. When all the balls have been dipped in the chocolate, place in the refrigerator until the chocolate has set. Once the chocolate has hardened you can drizzle the bourbon balls with melted white chocolate.
- Can be stored in an airtight container in the refrigerator for up to two weeks. Serve at room temperature.
Thank You!


Jane Bonacci, The Heritage Cook
I am happy you will both be trying some of these candies for the holidays! Remember that you may have to cook it a bit longer if you live in a humid or damp climate!
Katy
Definitely baking those chocolate turtles for my family this Christmas, they look divine!
Abby
I haven’t thought about divinity candy in years — I love that stuff. Now, I might even try it. 😉