 This Lemon Cheesecake with Fresh Berry Sauce is a dream come true. The luscious flavor and tang of lemon is balanced beautifully by the cream cheese for the perfect succulent creamy bite. Add a fresh berry sauce and it is truly heavenly!
I adore cheesecake and order it whenever I see it on a menu. In the spring and summer my favorite is lemon cheesecake especially when paired with a berry sauce. One of our local restaurants features it and I order it whenever I get the chance.

This year I decided to make a cheesecake for myself, a moment of pure indulgence for my birthday. You know I loved every single bite! And a bonus is I get to share it with all of you!
The berry sauce can be made a day or two in advance if you want. Just be sure to use fresh or frozen berries, not canned. If you are using frozen during the off-season, no need to thaw them first. Just use them right from the freezer. Use any fruit that you love!
Remember that cheesecakes take a long time to cool to room temperature and then sit overnight in the refrigerator. Plan for a very full day or two days to assemble this beauty. Day one you bake and cool the cheesecake, day two you decorate and serve it. Be sure you store it covered, in the refrigerator!
I love cheesecake but hate making it. Yep, cheesecake is not my idea of a fun baking adventure because of having to use a water bath. It is a pain to wrap the pan with foil because it seldom works and my pan inevitably leaks. I hate a soggy crust. It is also always hard to maneuver a really heavy pan full of boiling water in and out of the oven. So, while I love cheesecake for dessert, I rarely make it at home.

But with this recipe I used a shortcut. I used a baking pan filled with about an inch (3cm) of boiling water. No need to wrap the springform pan and very little chance of burning myself when moving the pan of water out of the oven. Winner!
My oven was hotter than I realized and the top of the cheesecake got much browner than I intended. Oops, not as pretty as I would like, but it still tastes amazing! So creamy and smooth. Watch yours more carefully and tent with foil if you see it browning too much.
One of my favorite kitchen tools is a Microplane rasp-style grater. Nothing zests citrus fruits more finely and delicately. You can use it to grate cheese, chocolate, and nutmeg too. There are various sizes for different tasks. It is so perfect and I can’t imagine not having one handy.
If you use a Microplane, you can skip the food processor step of making the lemon sugar because the zest will be super fine. I still processed mine, but that is because I only had raw sugar on hand this time, not granulated. I wanted to break the sugar down and blend it more evenly with the lemon zest.

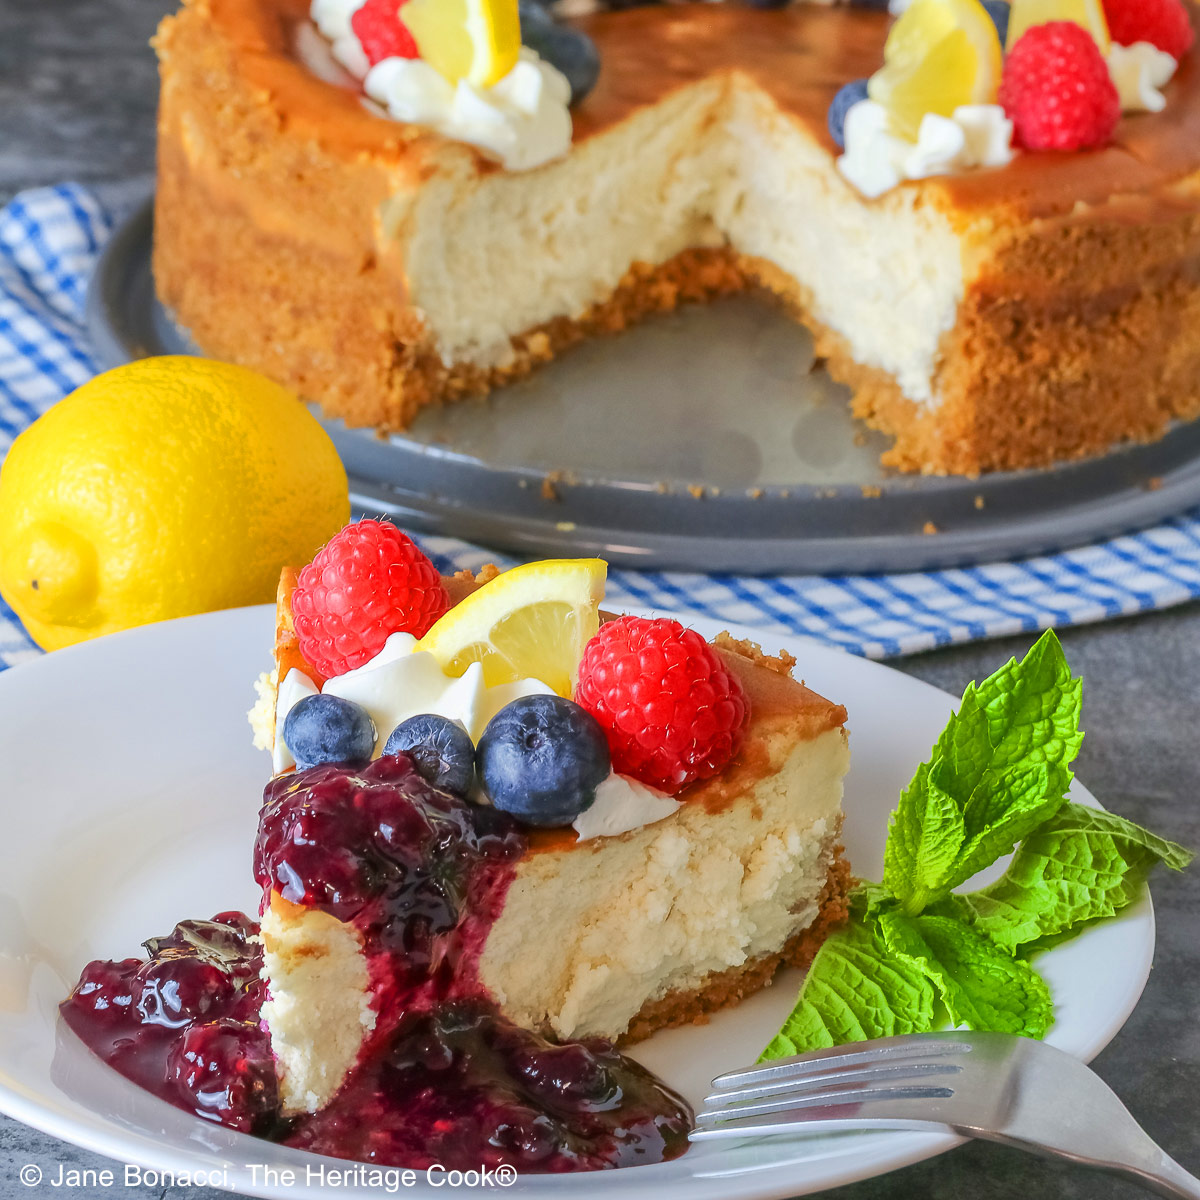
The blueberry-raspberry sauce poured over a slice of the cheesecake
I used gluten-free graham crackers to make the crust, but if you don’t need to eat gluten-free, just use regular ones in the same amount. You can also use crushed gingersnaps or almond flour – more great flavor combinations.
Creamy and dreamy, every bite is pure delight, each one better than the last. I will be making this cheesecake for our next dinner party!
The next time you have people coming over make this Lemon Cheesecake with Fresh Berry Sauce and wait for the applause. Remember, it has to chill for hours or overnight, so you can have it made several days ahead and just bring it out 30 minutes before serving!
If you try this recipe, let me know! Please leave a star rating in the recipe card, comment below, and don’t forget to snap a pic and tag it @theheritagecook on Instagram! Seeing your creations makes my day and I love hearing from you!
Ingredients needed for Lemon Cheeseake with Fresh Berry Sauce:
- Crust: GF graham crackers or gingersnap cookies, butter, sugar
- Cheesecake: sugar, lemon zest, cream cheese, lemon juice, sour cream, vanilla, eggs
- Fresh Berry Sauce: cornstarch, lemon juice, water, berries (fresh or frozen), sugar
PRO Tip:
Everything you use to make the cheesecake needs to be at room temperature. Plan ahead and leave ingredients out to warm up. I leave the cream cheese packages out overnight just to be sure.
PRO Tip:
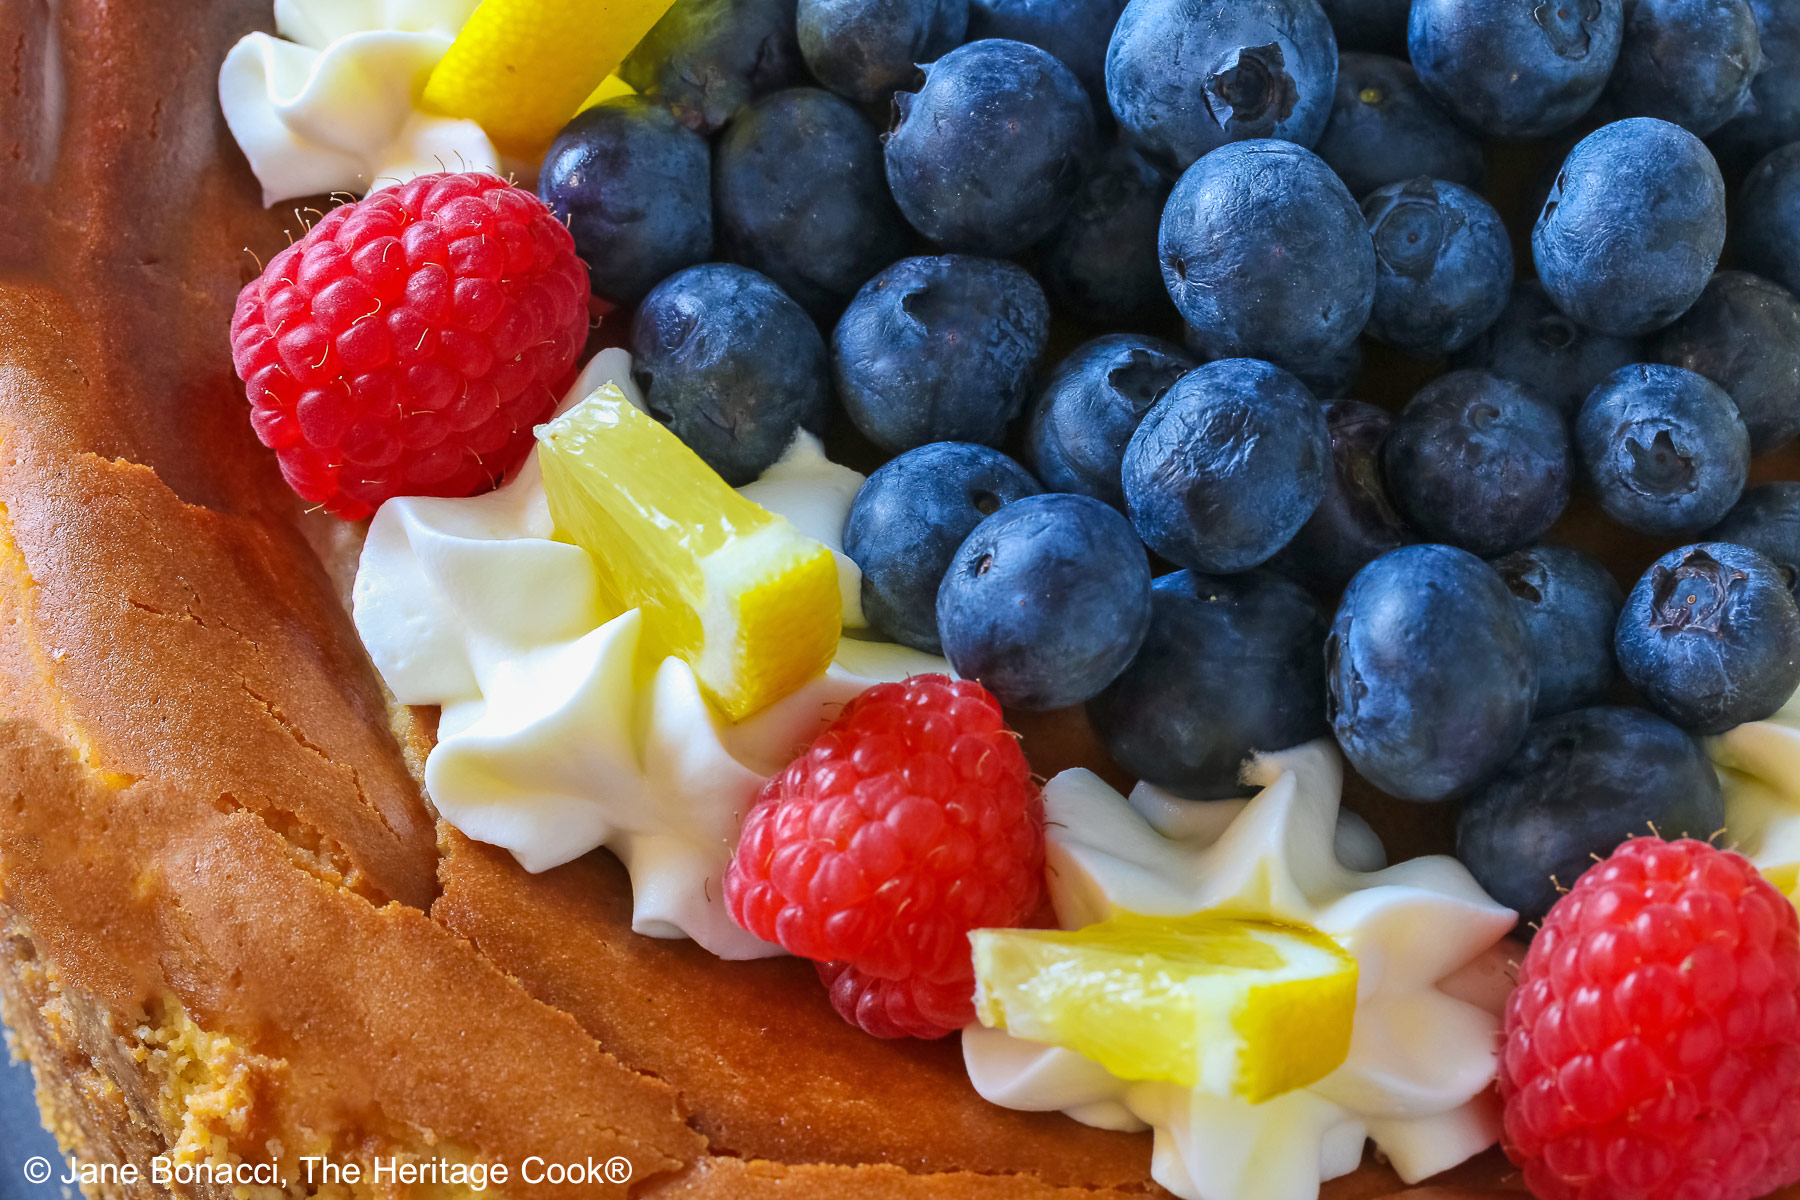
To make the mini lemon wedges, cut a lemon into fairly thin slices, then cut each slice into quarters. Each piece can be used to decorate the top of the cake. I tucked them into the piped whipped cream and they stood up beautifully.
How to make Lemon Cheeseake with Fresh Berry Sauce:
- Crust: Grind the graham crackers or cookies into fine crumbs using a food processor or blender. In a bowl combine the crumbs with the sugar and then the melted butter. Press firmly onto the bottom and slightly up the sides of a 9-inch (23cm) springform pan. Bake at 350°F (180°C) for about 10 minutes. Cool while you make the filling.
- Lemon Sugar: Put the sugar into a food processor or blender and add the lemon zest. Pulse/blend until combined and the zest is integrated into the sugar, about 10 to 12 pulses. Transfer to a bowl.
- Cheesecake Filling: Beat the cream cheese and lemon sugar together until smooth and creamy, about 2 to 3 minutes. Mix in the lemon juice, sour cream, and vanilla until fully combined.
- Beat in the eggs, one at a time, just until incorporated before adding the next one. As soon as they are mixed in, stop the motor of your mixer. Pour the batter into the baked crust. Use an offset spatula to smooth the top into an even layer.
- Alternate Water Bath: Bring a pot of water to a boil – you need 1-inch (3cm) water in a 9×13-inch (23x33cm) baking pan. Pour the water into the baking pan and place in the oven, closing the door as fast as possible to trap the steam.
- Cook Cheesecake: Bake for 55 to 70 minutes or until the edges are set and there is a 2 to 3-inch (5 to 8cm) wobbly area in the center.
- Turn the oven off, prop the door open with the handle of a wooden spoon and let the cheesecake sit in the oven with the water bath beneath to cool for 1 hour.
- Remove cheesecake from the oven and set on a wire rack for 5 minutes then run an offset spatula or knife around the cake to loosen it from the pan but do not release the springform ring! Cool the uncovered cheesecake completely to room temperature, then wrap with plastic (still in the pan) and refrigerate at least 4 hours or overnight.
- When fully chilled, loosen the cheesecake from the ring with an offset spatula or knife. Store the cheesecake, covered, in the refrigerator for up to 5 days.
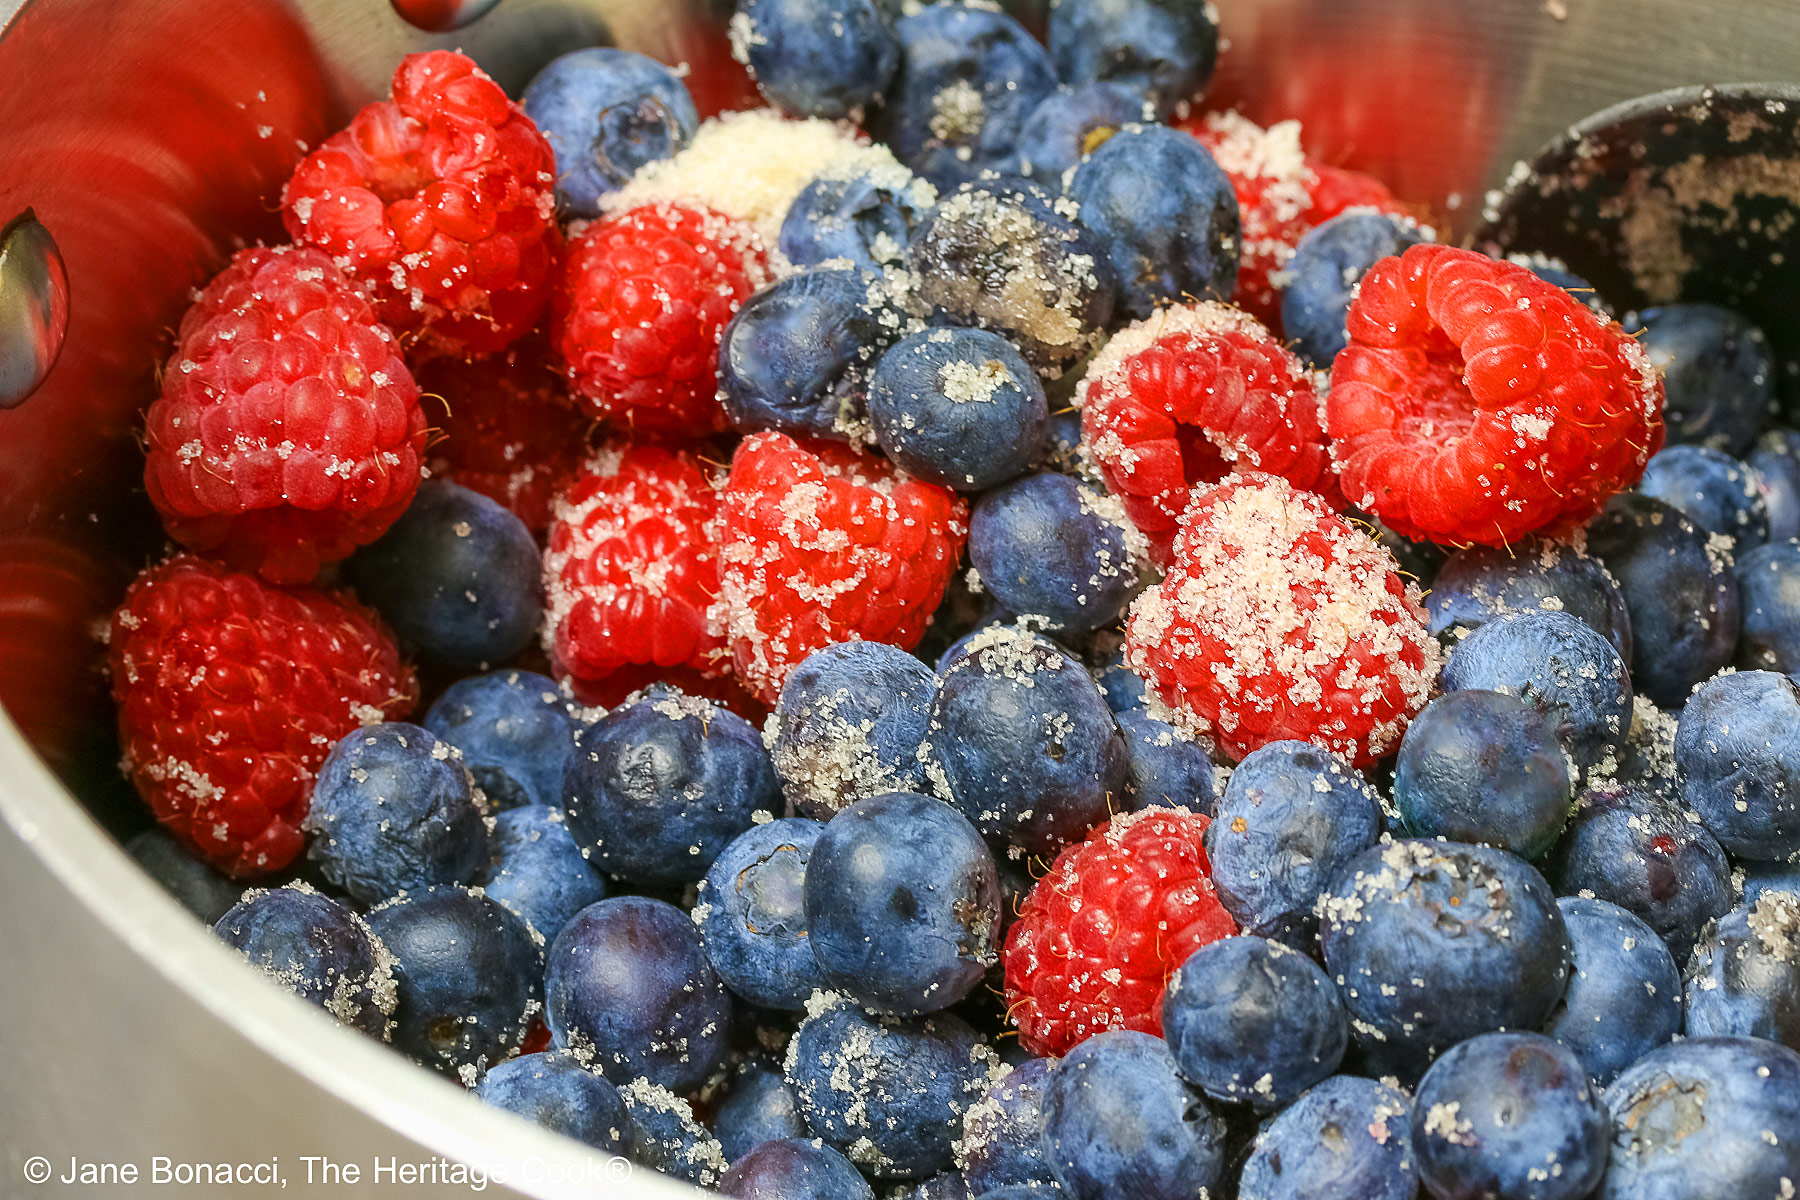
- Make Fresh Berry Sauce: In a small bowl, whisk the cornstarch, lemon juice, and warm water together; set aside. Place the berries and sugar in a saucepan and heat over medium heat, stirring constantly for 3 minutes until the juices start to release. Whisk the cornstarch mixture and add it to the berries. Cook, stirring, for another 2 to 3 minutes, smashing some of the berries as they cook. It will start to thicken and will continue to thicken as it cools. Remove from the heat and set aside to cool.
- Serving: Remove cheesecake from the refrigerator 30 minutes before ready to serve. Wrap the outside of the pan with a hot kitchen towel to gently warm the cake if needed. Run an offset spatula around the inside of the ring. Carefully release the springform latch and use an offset spatula or knife to loosen the crust from the ring and ease the sides away from the cake. Let the cheesecake sit at room temperature about 20 minutes before slicing. Add garnishes like whipped cream, lemon slices, and berries if desired. Cut into wedges and drizzle with the berry sauce before serving.
PRO Tip:
Using a Microplane, a rasp-style zester/grater, gives you the finest zest possible. They are an invaluable tool in my kitchen and worth replacing if they start to dull after years of work.
PRO Tip:
If you are using raw or coarse sugar and have a food processor, pulse it for a minute or so to break it down so it dissolves more easily.
Recommended Tools (affiliate links; no extra cost to you):
- Kitchen scale
- Grater/zester (Microplane)
- Citrus reamer
- Food processor or blender
- 9-inch (23cm) springform pan
- Stand mixer or hand mixer
- Offset spatula
- Sharp, long knife
Gluten-Free Tips:
I like Mi-Del Ginger Snaps Gluten-Free Cookies for cookie crusts. They add a burst of flavor that is delightful and complements most fillings. You can also use almond flour in the place of ground cookie crumbs.
You will get the best and most consistent results by using a digital kitchen scale and weighing your ingredients, especially when you are baking. And use grams (kg), they are much more accurate than pounds and ounces.
All recommended ingredients are gluten-free as of the writing of this article. Always check to be sure the products haven’t changed and are still safe to consume.
Lemon Cheesecake with Fresh Berry Sauce (GF)

This Lemon Cheesecake with Fresh Berry Sauce is a dream come true. The luscious flavor and tang of lemon is balanced beautifully by the cream cheese for the perfect succulent creamy bite. Add a fresh berry sauce and it is truly heavenly!
Ingredients
Crust
- 1-3/4 cups (210g) gluten-free graham cracker crumbs (about 14 full-sheets graham crackers) or GF gingersnaps (such as MiDel brand)
- 1/4 cup (50g) granulated sugar
- Pinch kosher salt
- 5 tbsp (71g) unsalted butter, melted
Cheesecake
- 1-1/3 cups (267g) granulated sugar
- 1 lemon, zested* (about 1 tbsp)
- 32 oz (4 bricks, 8-oz each; 904g) full-fat cream cheese, softened to room temperature
- 1/2 cup (120ml) freshly squeezed lemon juice (from about 3 to 5 lemons), at room temperature
- 1/3 cup (80g) sour cream or plain yogurt, at room temperature
- 1 tsp pure vanilla extract
- 3 large eggs, at room temperature (broken into a cup with a spout)
Fresh Berry Sauce
- 2 tsp cornstarch
- 1 tbsp freshly squeezed lemon juice
- 4 tbsp water
- 3 cups (420g) fresh or frozen mixed berries (do not thaw if frozen)
- 4 to 6 tbsp (50g to 75g) granulated sugar, to taste
Garnishes
- Mint sprigs
- Whipped cream
- Mini lemon wedges
- Fresh whole raspberries and blueberries or other fruits
Instructions
1. Set one oven rack to lower third position and another in the middle. Be sure there is enough room for the cheesecake pan on the middle rack and a 9x13-inch (23x33cm) baking pan on the lower rack. Preheat oven to 350°F (180°C).
2. Make the Crust: Use a food processor or blender to grind the graham crackers or gingersnaps into fine crumbs. Pour into a medium bowl and stir in the sugar and salt until combined, then stir in the melted butter with a fork until sandy texture. Alternately, you can put the cookies in a resealable plastic bag and roll over them firmly with a rolling pin. You will have to do this several times to get the fine crumbs you are looking for.
3. Press crumb mixture firmly into the bottom and slightly up the sides of an ungreased 9-inch (23cm) springform pan. Use the flat bottom of a measuring cup to smooth it. Bake the crust for 10 minutes. Remove from the oven and allow to slightly cool while you prepare the filling.
4. Make the Lemon Sugar: Place sugar in your food processor or blender. Add the lemon zest. Pulse/blend until the two are combined and the lemon zest is slightly broken down, about 10 to 12 pulses. Transfer to a bowl. Can be made a day ahead, store in a covered bowl.
5. Prepare the Filling: Using your stand mixer or a hand mixer, beat the cream cheese and lemon sugar together on medium-high speed in a large bowl until the mixture is smooth and creamy, about 2 to 3 minutes. Scrape the bowl thoroughly. Add the lemon juice, sour cream, and vanilla extract, then beat on medium-high speed until fully combined. Scrape the bowl well, especially under the beater.
6. On medium speed, add the eggs one at a time, only beating after each addition until just blended in. After the final egg is incorporated into the batter, stop mixing. This helps prevent the cheesecake from deflating and cracking as it cools. Scrape the bowl and whisk in any unincorporated cream cheese. Pour the cheesecake batter into the baked crust. Use an offset spatula to smooth the top. Do not overfill the pan, you may not use all the filling mixture. Be sure to leave room for rising.
7. Alternate Water Bath Method: Boil a large pot of water. You need 1-inch (2.5cm) of hot water in your baking pan for the water bath. Place the cheesecake on the center oven rack of the preheated oven. Place a 9×13-inch (23x33cm) baking pan on the bottom rack. Pour the boiling water into the empty rectangular pan, about 1 inch deep. Immediately close the oven to trap the steam inside. This water bath adds steam to the oven without having the cheesecake sitting inside the water itself. Much safer and no chance of a leaky, wet crust!
8. Bake the cheesecake for 60 to 70 minutes, or until the cake is nearly done. When it is done there will still be a 2 or 3-inch (5 to 8cm) jiggly circle in the center and the edges will be solid; it will finish cooking as it cools. Turn the oven off and open the oven door slightly. Hold it open with the handle of a wooden spoon. Let the cheesecake sit in the oven with the water bath beneath it to cool down for 1 hour.
9. After an hour, remove from the oven, and set on a wire rack. After about 5 minutes of resting, run a long knife or offset spatula around the cake to loosen it from the pan, but do not release the springform ring. Cool the uncovered cheesecake completely at room temperature. Wrap tightly in plastic (still in the pan) and refrigerate at least 4 hours and even better, overnight. Can be made up to 4 days in advance; keep covered and refrigerated.
10. Prepare the Fresh Berry Sauce: Whisk the cornstarch, lemon juice, and water together in a small bowl until the cornstarch has dissolved. Set aside.
11. In a medium, nonreactive saucepan, heat the berries and sugar over medium heat until the berries begin to release their juices stirring often. You can use a potato masher to smash the berries, releasing even more juice. Stir the cornstarch slurry into the berries. Bring to a boil, stirring, and then reduce the heat to a simmer and cook, stirring constantly, for 1 minute more. If it is too thick, stir in a little more water. Remove from the heat. Pour into a heatproof bowl and set aside to cool. Can be stored in the refrigerator, covered, for up to 3 days. Serve chilled or at room temperature.
12. To Serve the Cheesecake: Remove the cheesecake from the refrigerator and let sit for 30 minutes at room temperature. If needed, wrap a hot kitchen towel around the outside of the pan to gently warm the cake and release the edges. Use an offset spatula or table knife to loosen the crust from the pan, carefully release the springform lock, and ease the sides away from the cake. Cut the cake into wedges, decorate as desired, and drizzle with the fresh berry sauce before serving. For the neatest slices, dip the knife into warm water and wipe the knife clean between each slice.
13. I used a 1M piping tip to pipe small stars on the top of the cake. Then I set the lemon wedges on top of each one and added raspberries between them. I filled the center with blueberries for the photos and took most of them off for slicing. Be as creative as you like with your decorations!
Recipe found at www.theheritagecook.com
Notes
* Use a Microplane grater if possible for the finest lemon zest.
You will get the best results by using a digital kitchen scale and weighing your ingredients, especially when you are baking. And use grams (kg), they are much more accurate than pounds and ounces.
All recommended ingredients are gluten-free as of the writing of this article. Always check to be sure the products haven’t changed and are still safe to consume.
Cake adapted from Sally’s Baking Addiction
Sauce adapted from David Lebovitz’ The Perfect Scoop
Nutrition Information:
Yield:
16Serving Size:
1Amount Per Serving: Calories: 308Total Fat: 26gSaturated Fat: 15gTrans Fat: 0gUnsaturated Fat: 8gCholesterol: 105mgSodium: 257mgCarbohydrates: 15gFiber: 2gSugar: 9gProtein: 6g
The nutritional information for recipes on this site is calculated by online tools and is merely an estimate. If you need nutritional calculations for medical reasons, please use a source that you trust.
If you enjoyed this recipe, be sure to follow me on social media so you never miss a post:

Create a New Tradition Today!
Welcome! The suggestions here are not intended as dietary advice or as a substitute for consulting a dietician, physician, or other medical professional. Please see the Disclaimers/Privacy Policy page for additional details. Unauthorized use, distribution, and/or duplication of proprietary material from The Heritage Cook without prior approval is prohibited. If you have any questions or would like permission, please contact me. We participate in the Amazon Services LLC Associates Program, an affiliate advertising program designed to provide a means for sites to earn advertising fees by advertising and linking to amazon.com. As an Amazon Associate, I earn a small amount from qualifying purchases without any additional cost to you. This page may contain affiliate links. The author makes no claims regarding the presence of food allergens and disclaims all liability in connection with the use of this site.


