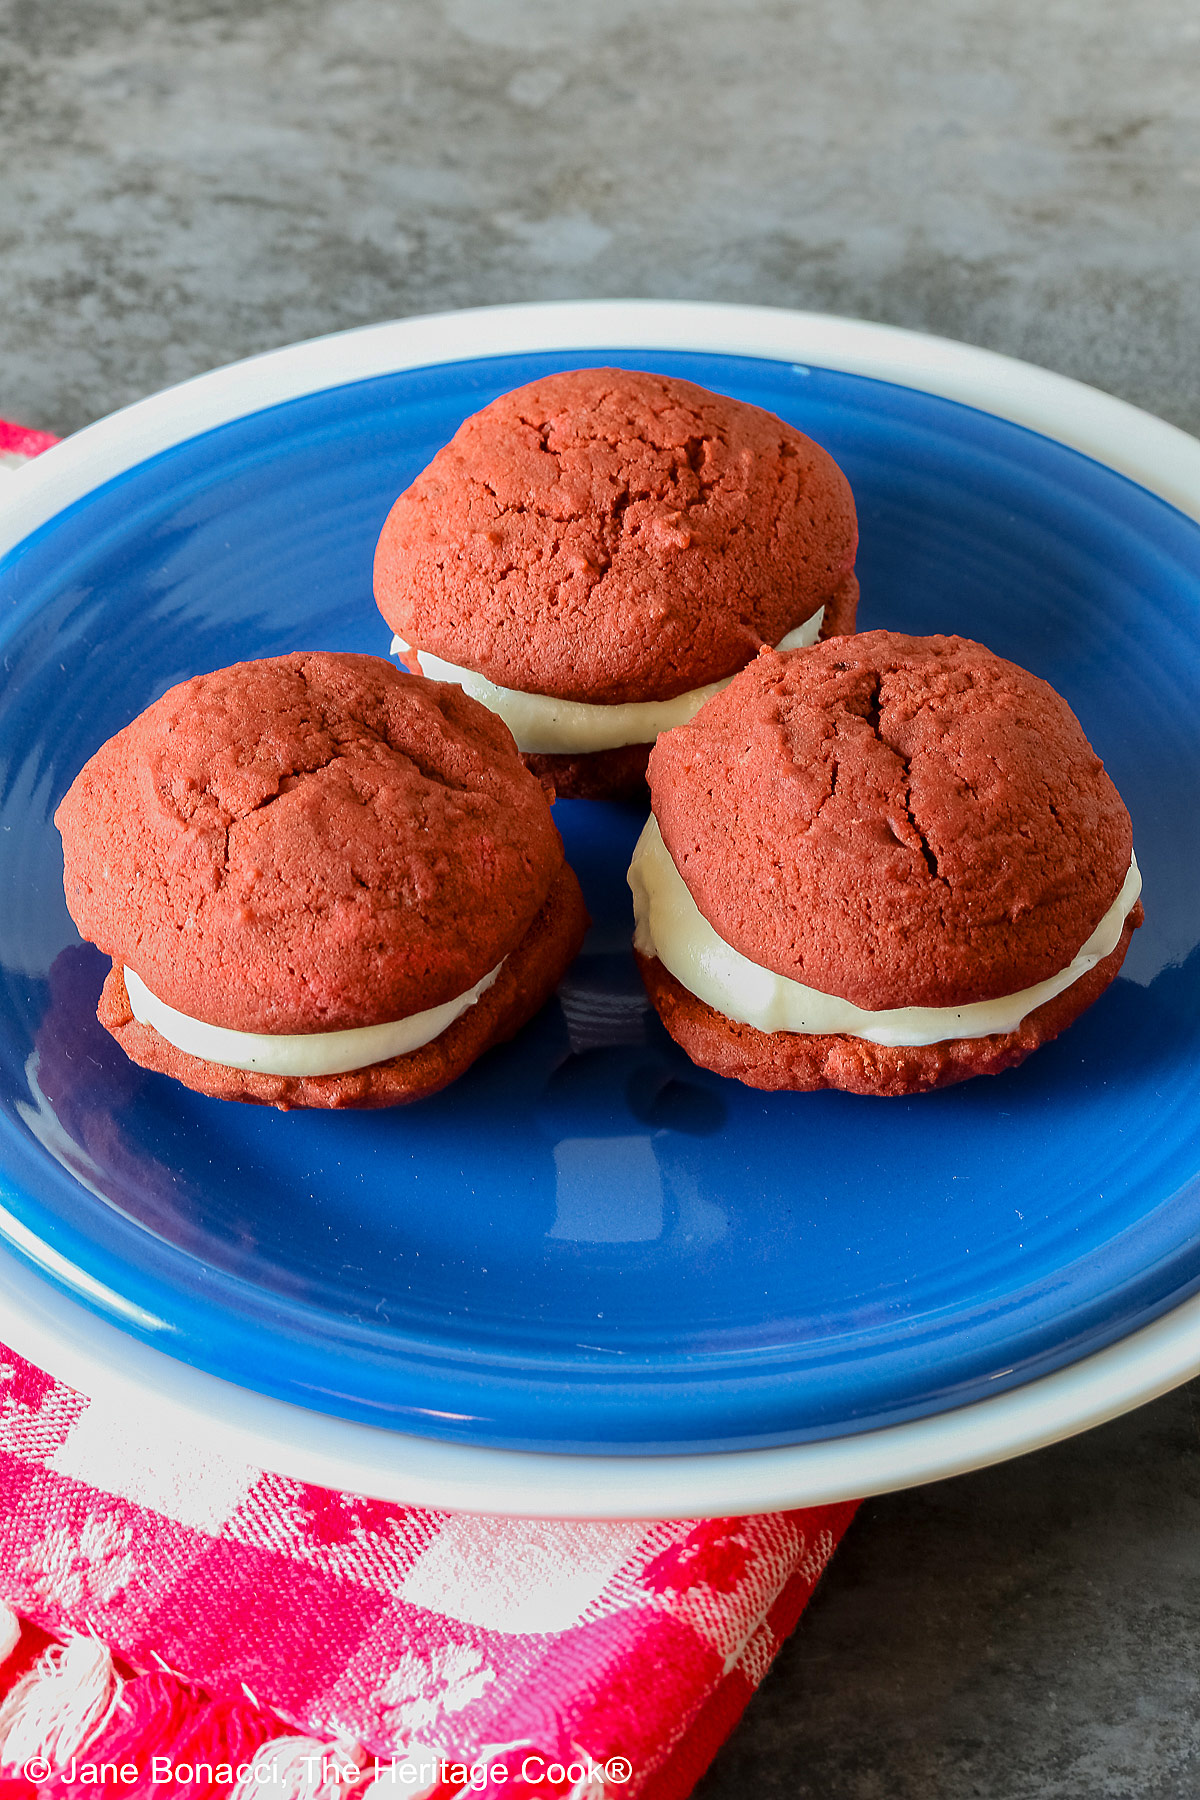
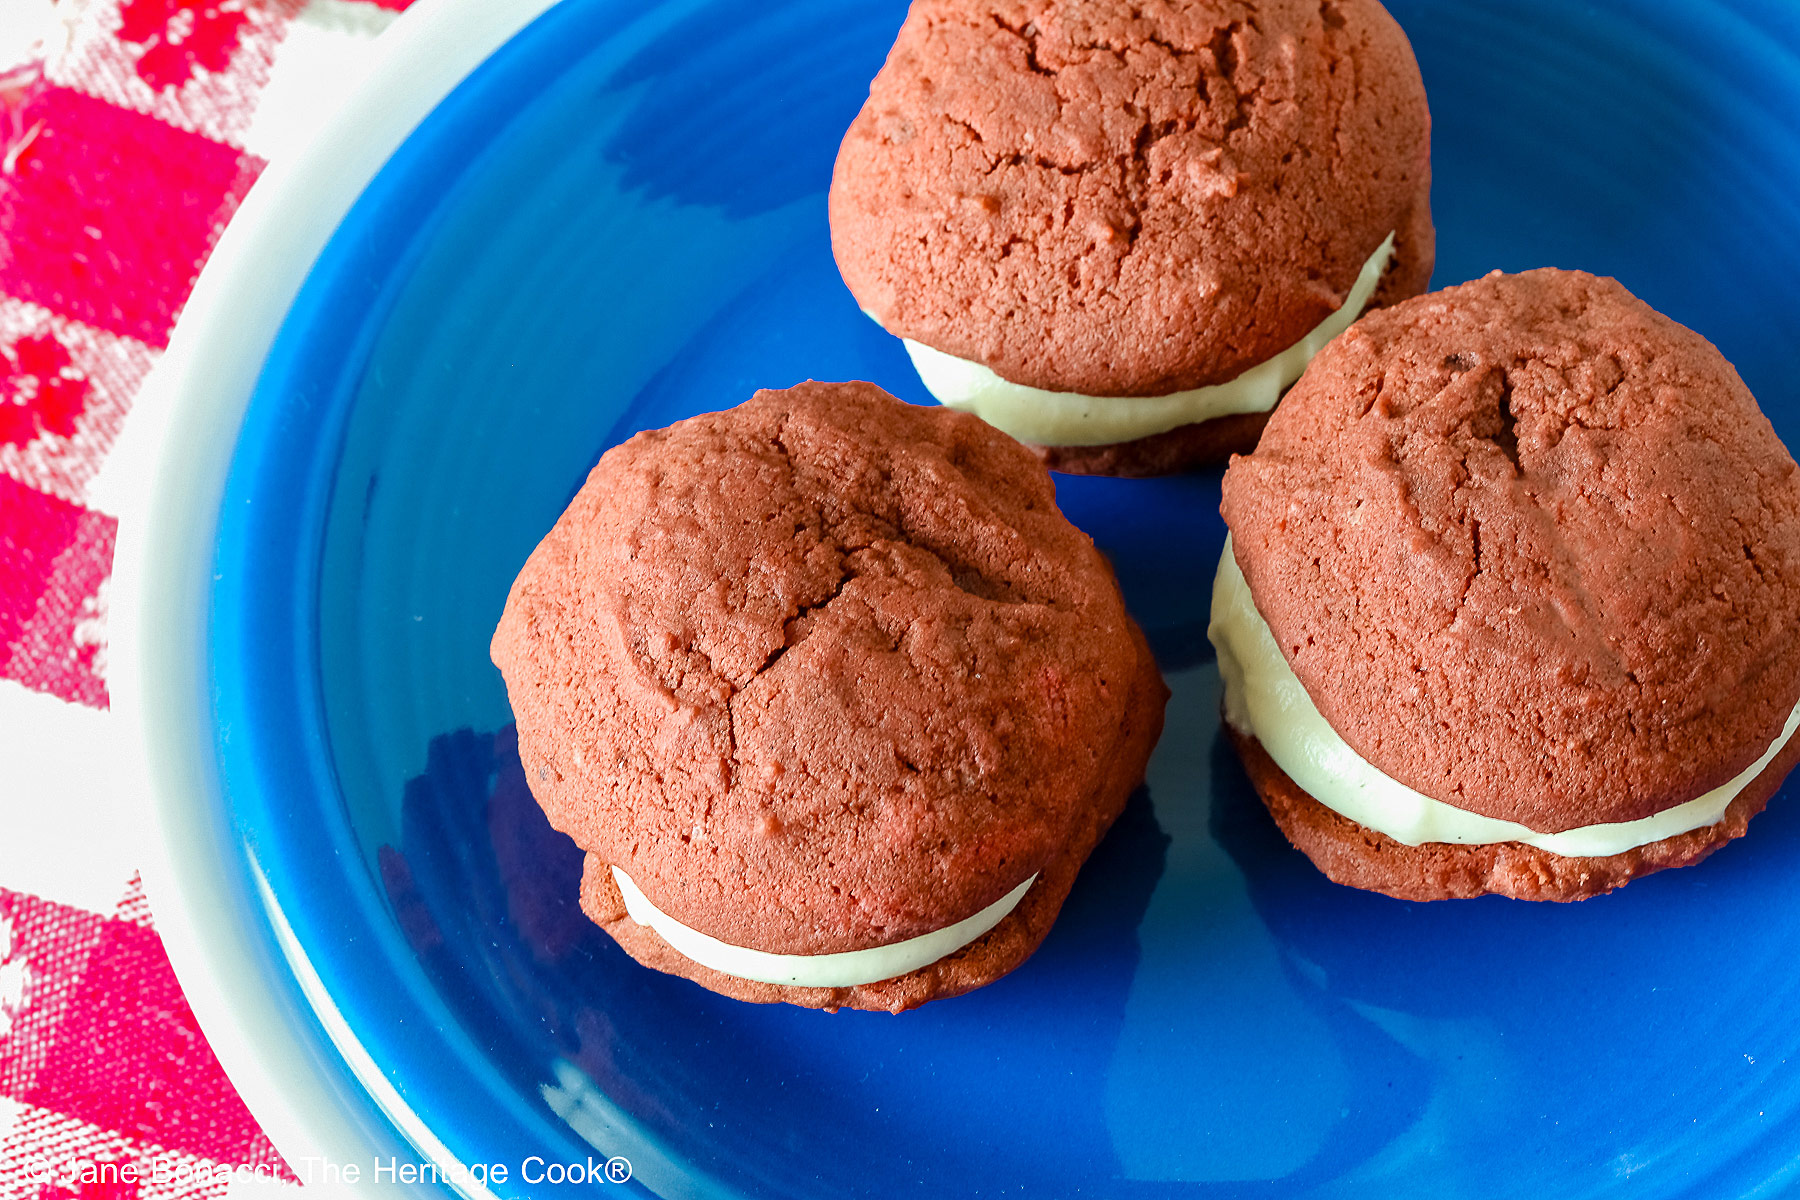
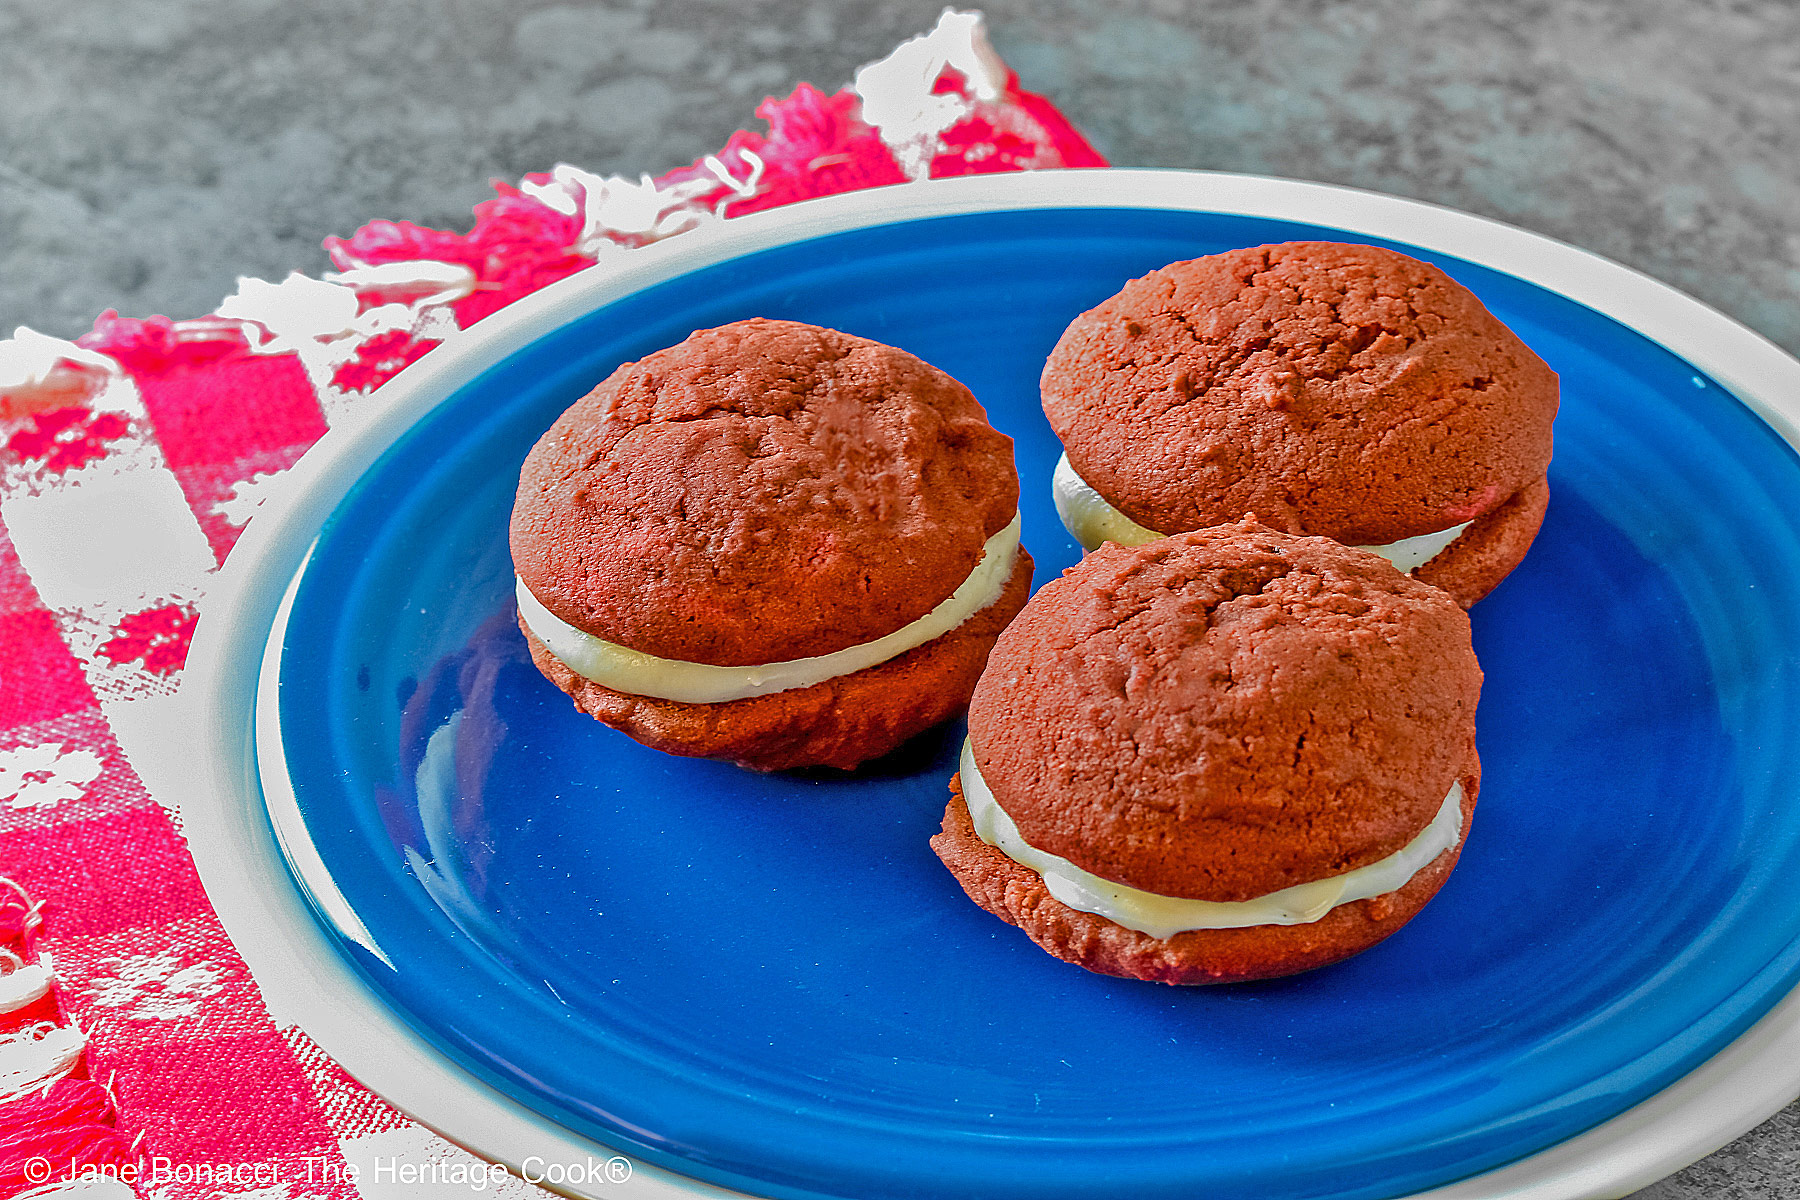
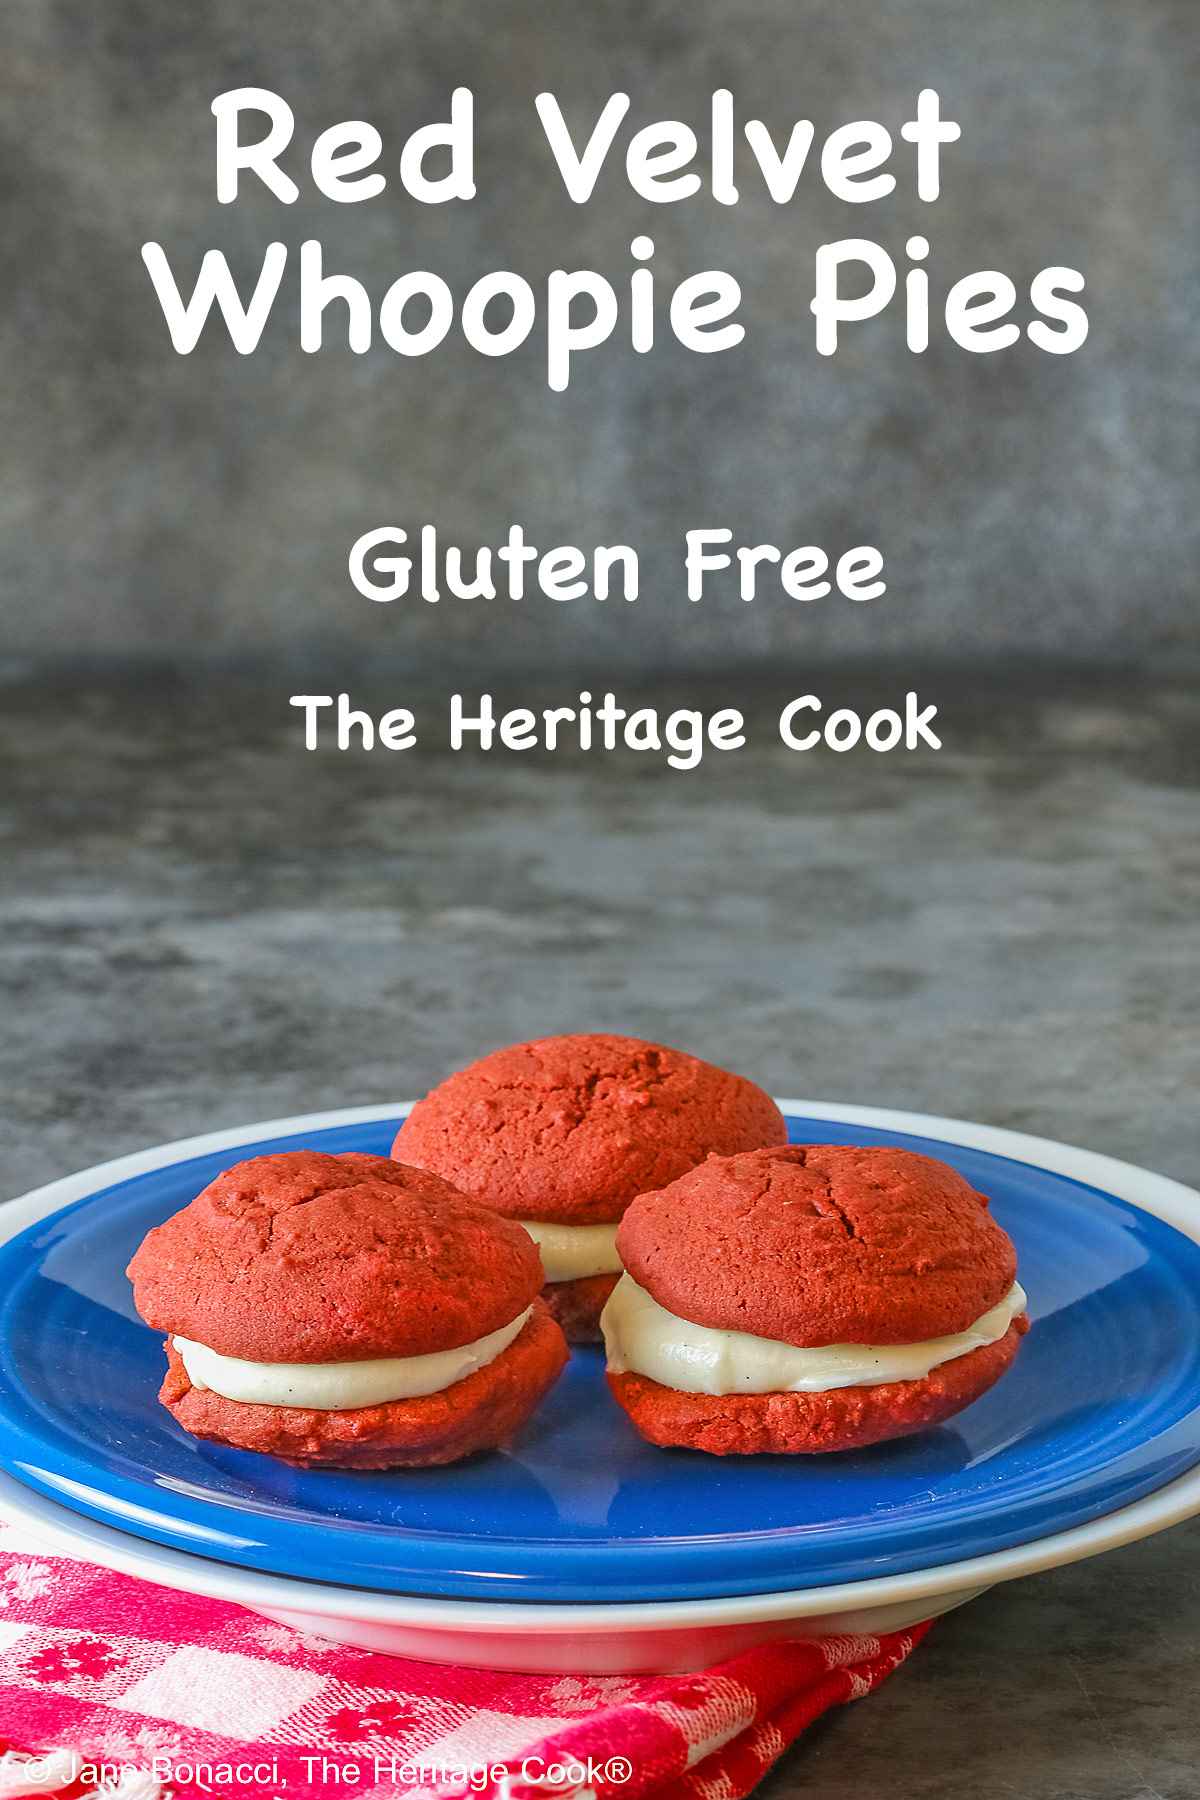
 Mini Red Velvet Whoopie Pies are a perfect option for your 4th of July barbecues and parties. They are a crowd pleaser and everyone will rush to grab one before they are gone! These little sweets are refreshingly cool because they are kept in the refrigerator due to the cream cheese filling.
Red Velvet is a classic, something that people crave and request often. The traditionally delicate chocolate flavor is enhanced in these cookies with extra melted semisweet chocolate, delighting everyone who is lucky to get one!
Traditionally they are quite large and can cover the palm of your hand. I wanted something smaller, just a couple of bites for the perfect sweet treat. Use a smaller (2 tsp; #60) size cookie scoop, slightly overfilled and you’ll have the best size for snacking!
A classic in the USA, these brightly colored treats originated in America’s northeast and from the Amish in Pennsylvania. The originals were a blend of a velvet cake and mahogany cake. The red color came from a chemical reaction between the cocoa powder, buttermilk, and vinegar.
This is how my grandmother always made her Red Devil’s Food cake, depending on the sour buttermilk to turn the cocoa to pale red. She regaled her guests and family with her cake and it was delicious. Today’s cooks use food coloring to create a much more vivid red dessert.
One of the tricks to getting bold color without affecting the texture of the batter is to use gel colorings, which are super concentrated. A little goes a very long way.
If you are using liquid coloring, it will take a large amount to equal the gel version and may affect the batter consistency and flavor. Add an extra tablespoon of flour if needed.
Gel coloring is so strong that you need to be very careful not to get it on your hands or your clothes. It does not easily wash off and may leave you with colored fingers! The gel coloring can be used for many different recipes! It would be perfect to make red cookies like candy canes for the Christmas holidays. Use kitchen gloves if you are handling the red dough.
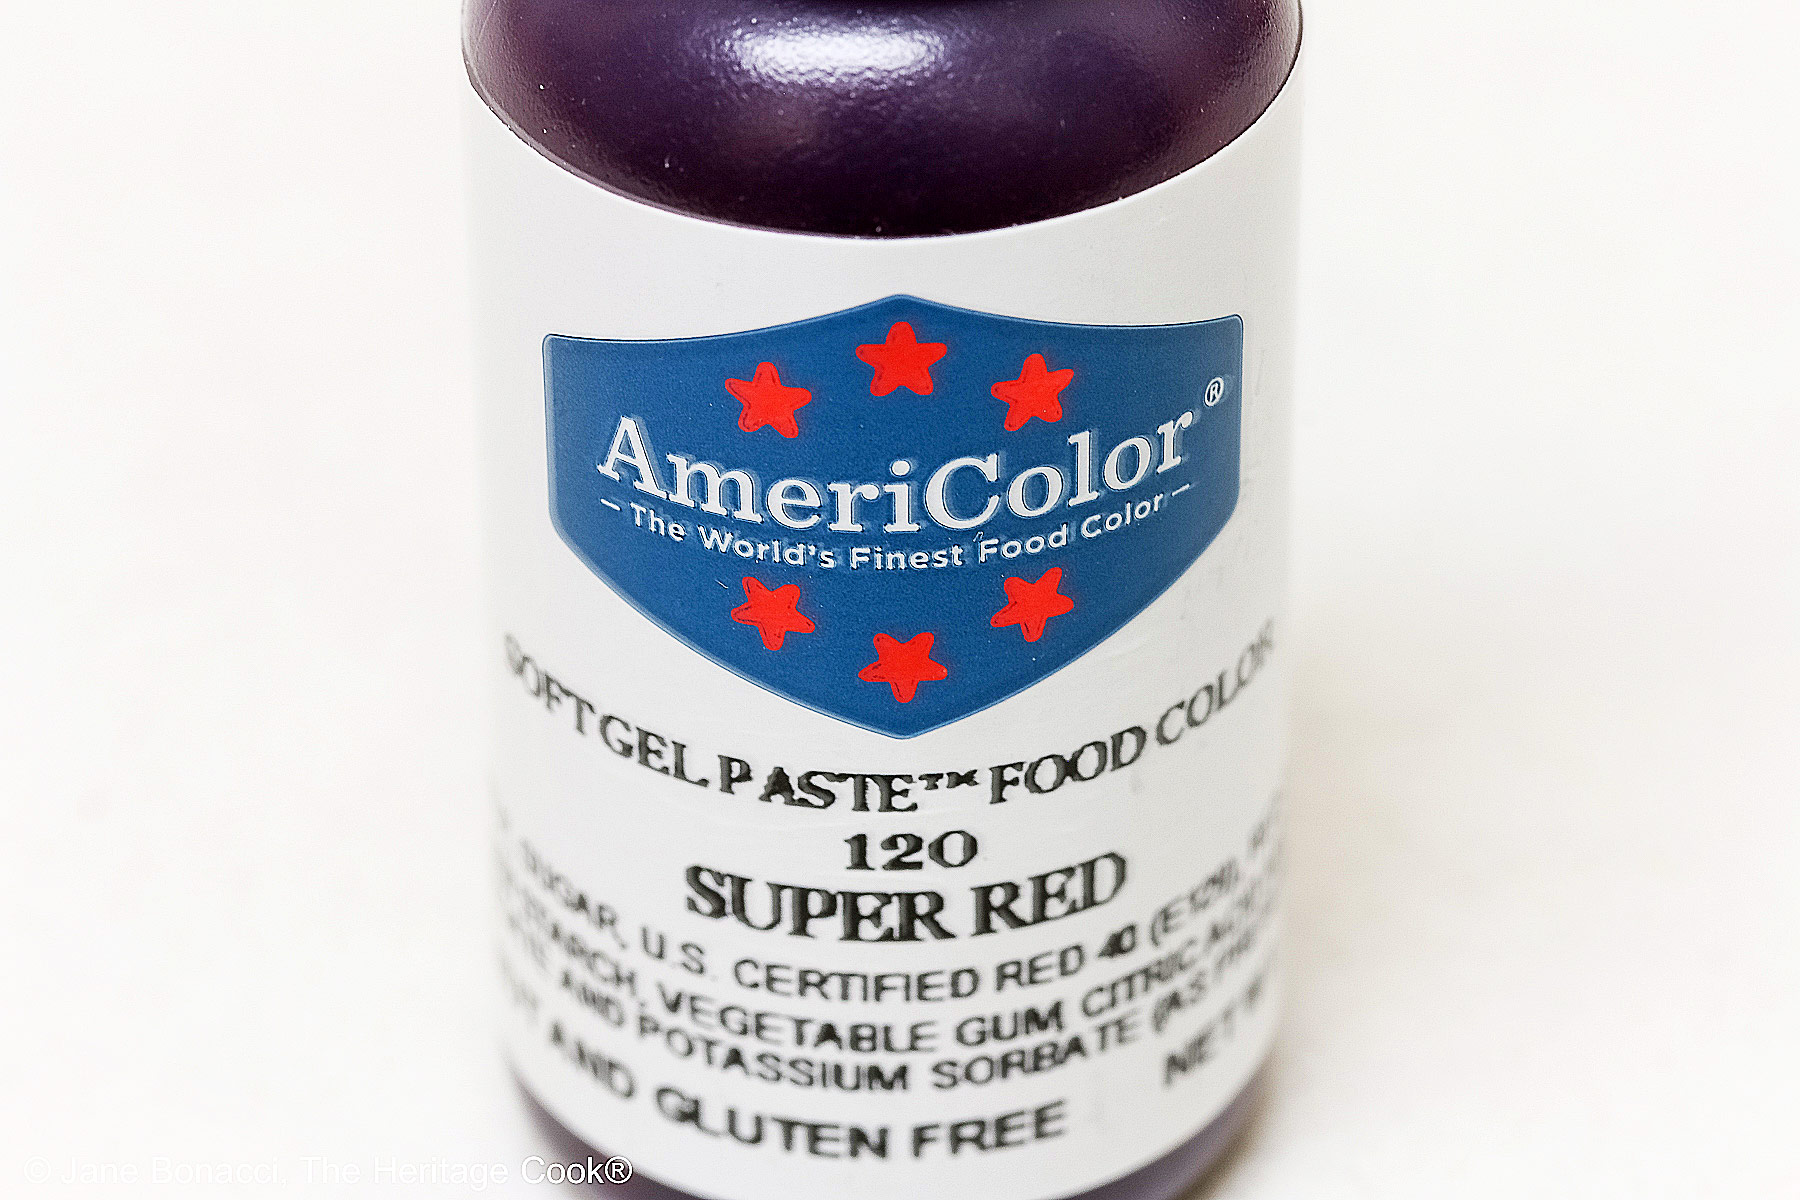
My favorite brand for gel coloring is Americolor and I bought their Super Red soft gel paste in a .75 oz (21g) bottle. It is gluten-free and Kosher! You can find it directly from the manufacturer or from Amazon. While usually sold in sets, I was able to buy a single bottle of just the red for this recipe.
Because it is so concentrated, if you are working with light colors in batter or frosting (like vanilla flavored), start with a toothpick dipped in the color, drag it through the batter or frosting, stir it in, and add more as desired.
I use regular natural cocoa powder (like Hershey’s brand) because it is lighter in color and you can see the red coloring more easily. Extra dark or black cocoa will obscure the color more.
If you love red velvet, another recipe on this website is red velvet brownies – absolutely amazing treats! You should give these a try too!
This is one recipe where you want to use a stand mixer if you have access to one. You cream the butter and sugar for 5 to 7 minutes which would be quite challenging with a hand mixer or whisk! Let the big motor do its thing and save your arm.
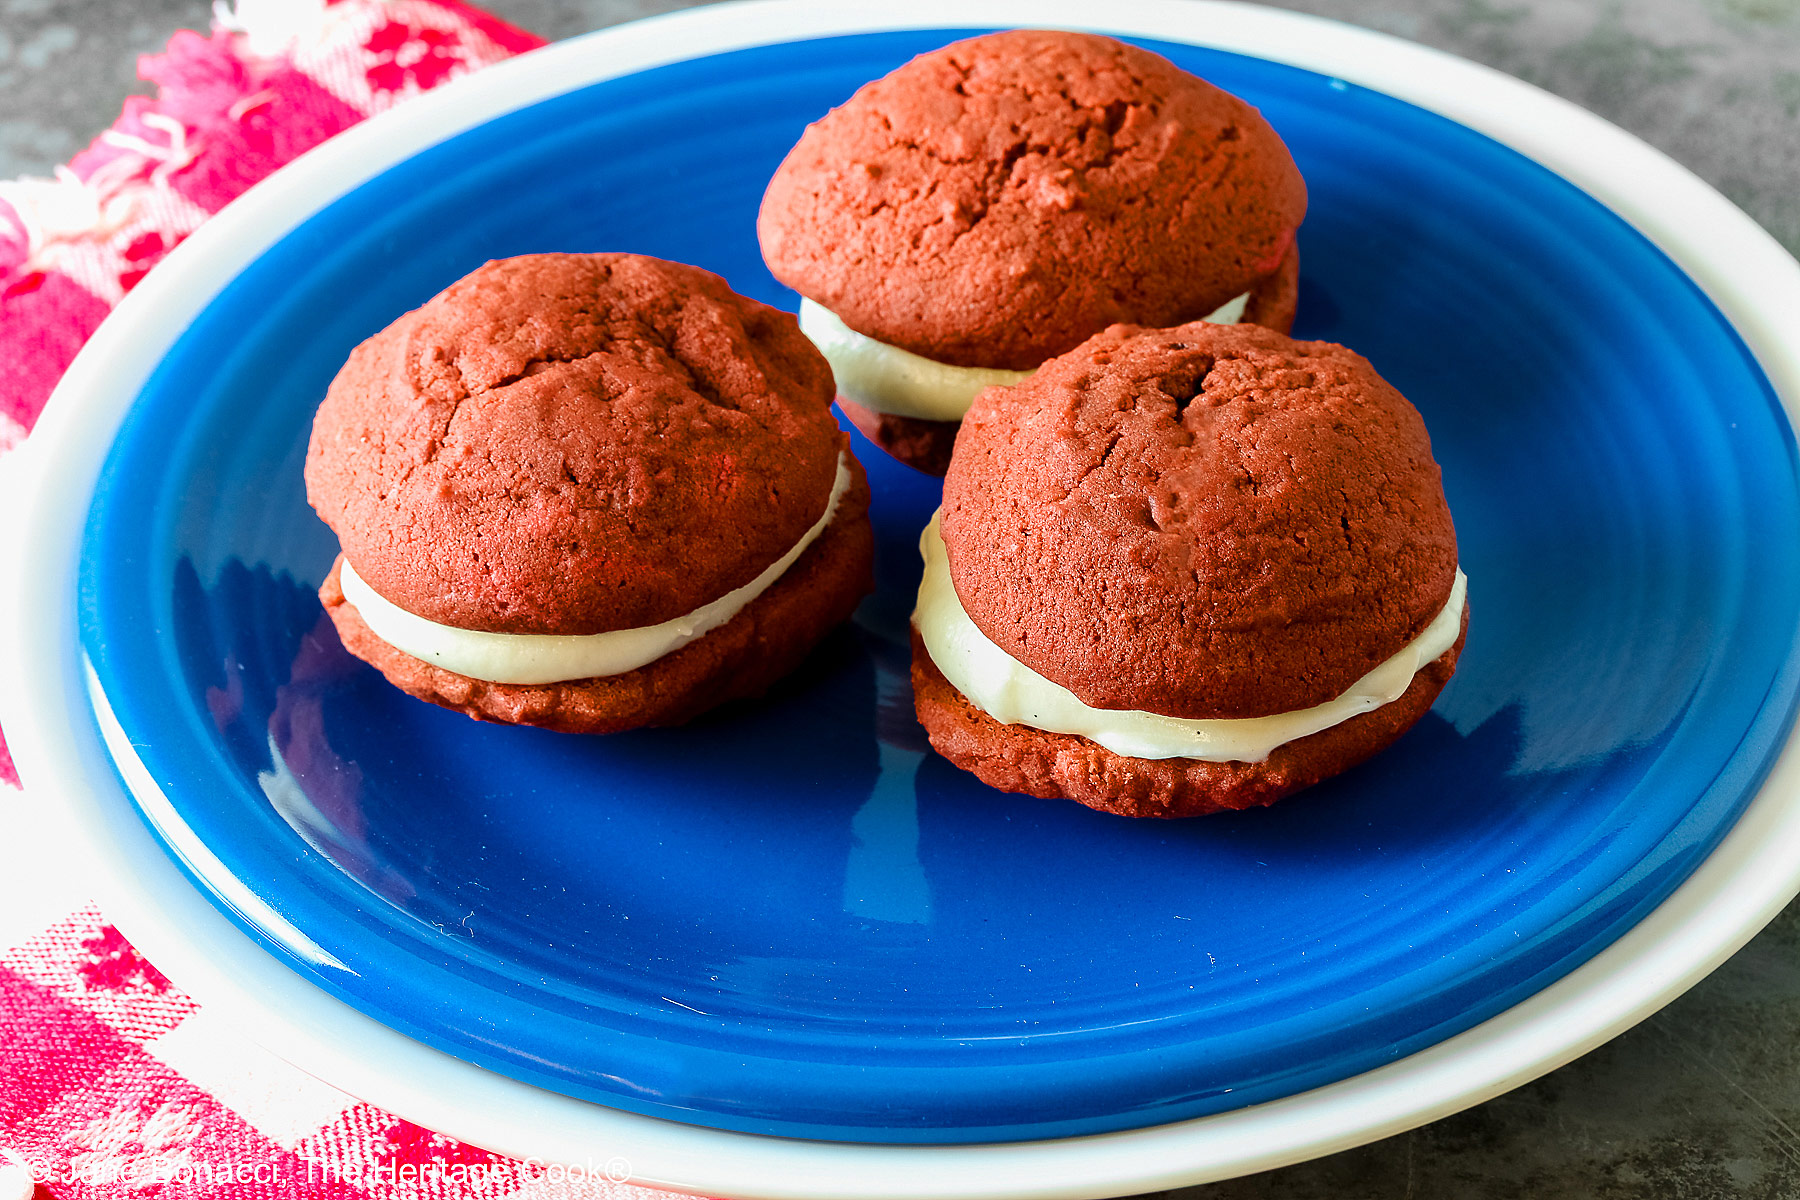
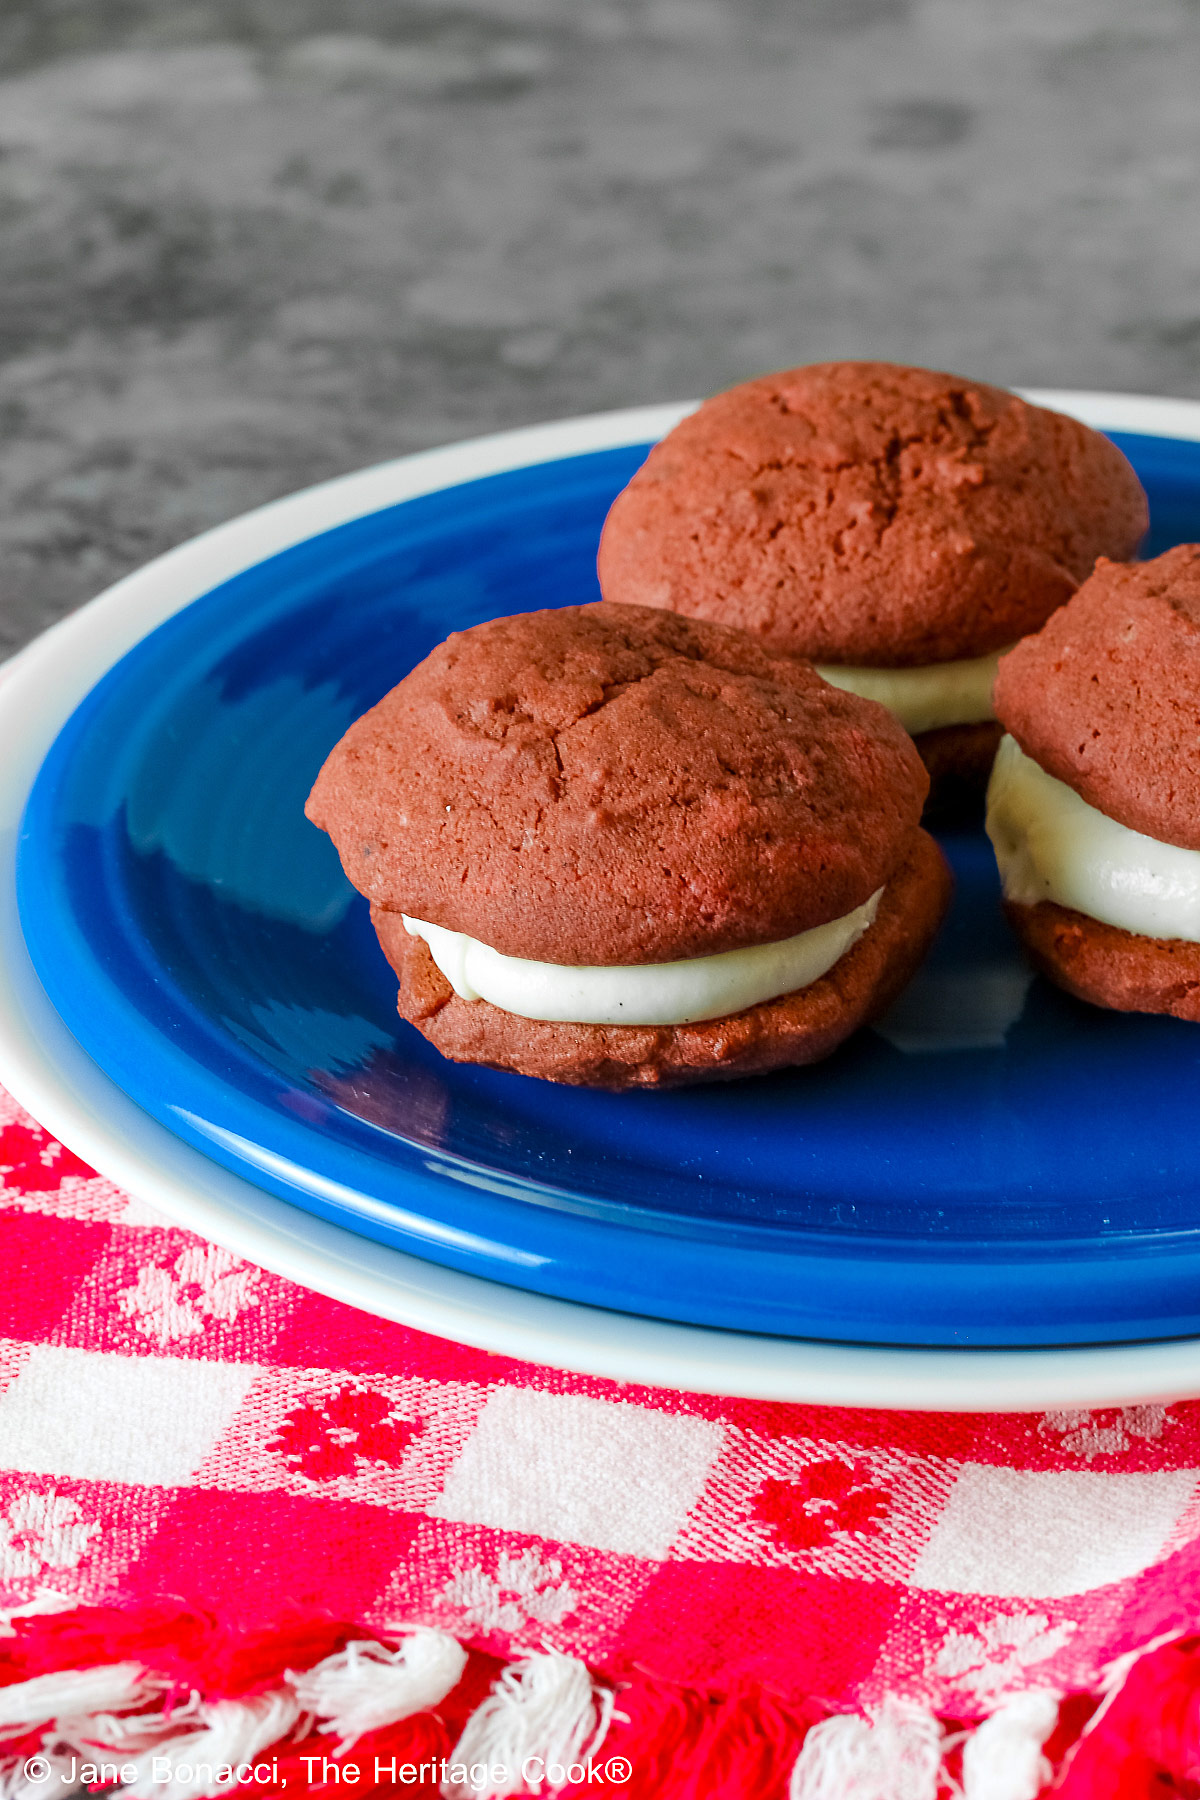
Enjoy these beautiful and adorable Red Velvet Whoopie Pies. They are soft, cakey, and luscious with the cream cheese filling. Have fun making and eating these beauties!

If you try this recipe, let me know! Please leave a star rating in the recipe card, comment below, and don’t forget to snap a pic and tag it @theheritagecook on Instagram! Seeing your creations makes my day and I love hearing from you!
Ingredients needed for Mini Red Velvet Whoopie Pies:
- Whoopie Pies: chocolate, butter, sugar, eggs, sour cream, food coloring, vinegar, vanilla, flour, unsweetened cocoa, baking powder, salt, baking soda
- Filling: cream cheese, butter, confectioners’ sugar, vanilla
- Optional Toppings: white chocolate, chopped pecans
PRO Tip:
Use a cookie scoop with a sweep arm to portion out the dough. You will get evenly sized cookies that bake at the same rate and will fit together more easily.
PRO Tip:
To warm cold eggs, place them in a bowl and cover with very hot tap water. Leave to warm up then add to the recipe when indicated.
How to make Mini Red Velvet Whoopie Pies:
- Make the Whoopie Pies: Melt the semisweet chocolate over simmering water until smooth; set aside to cool. Cream the butter and sugar, then mix in the eggs, sour cream, food coloring, vinegar, and vanilla. In another bowl combine the flour, cocoa, baking powder, salt, and baking soda. Gradually mix into the creamed mixture. Then whisk in the melted chocolate. Refrigerate the dough for 30 minutes.
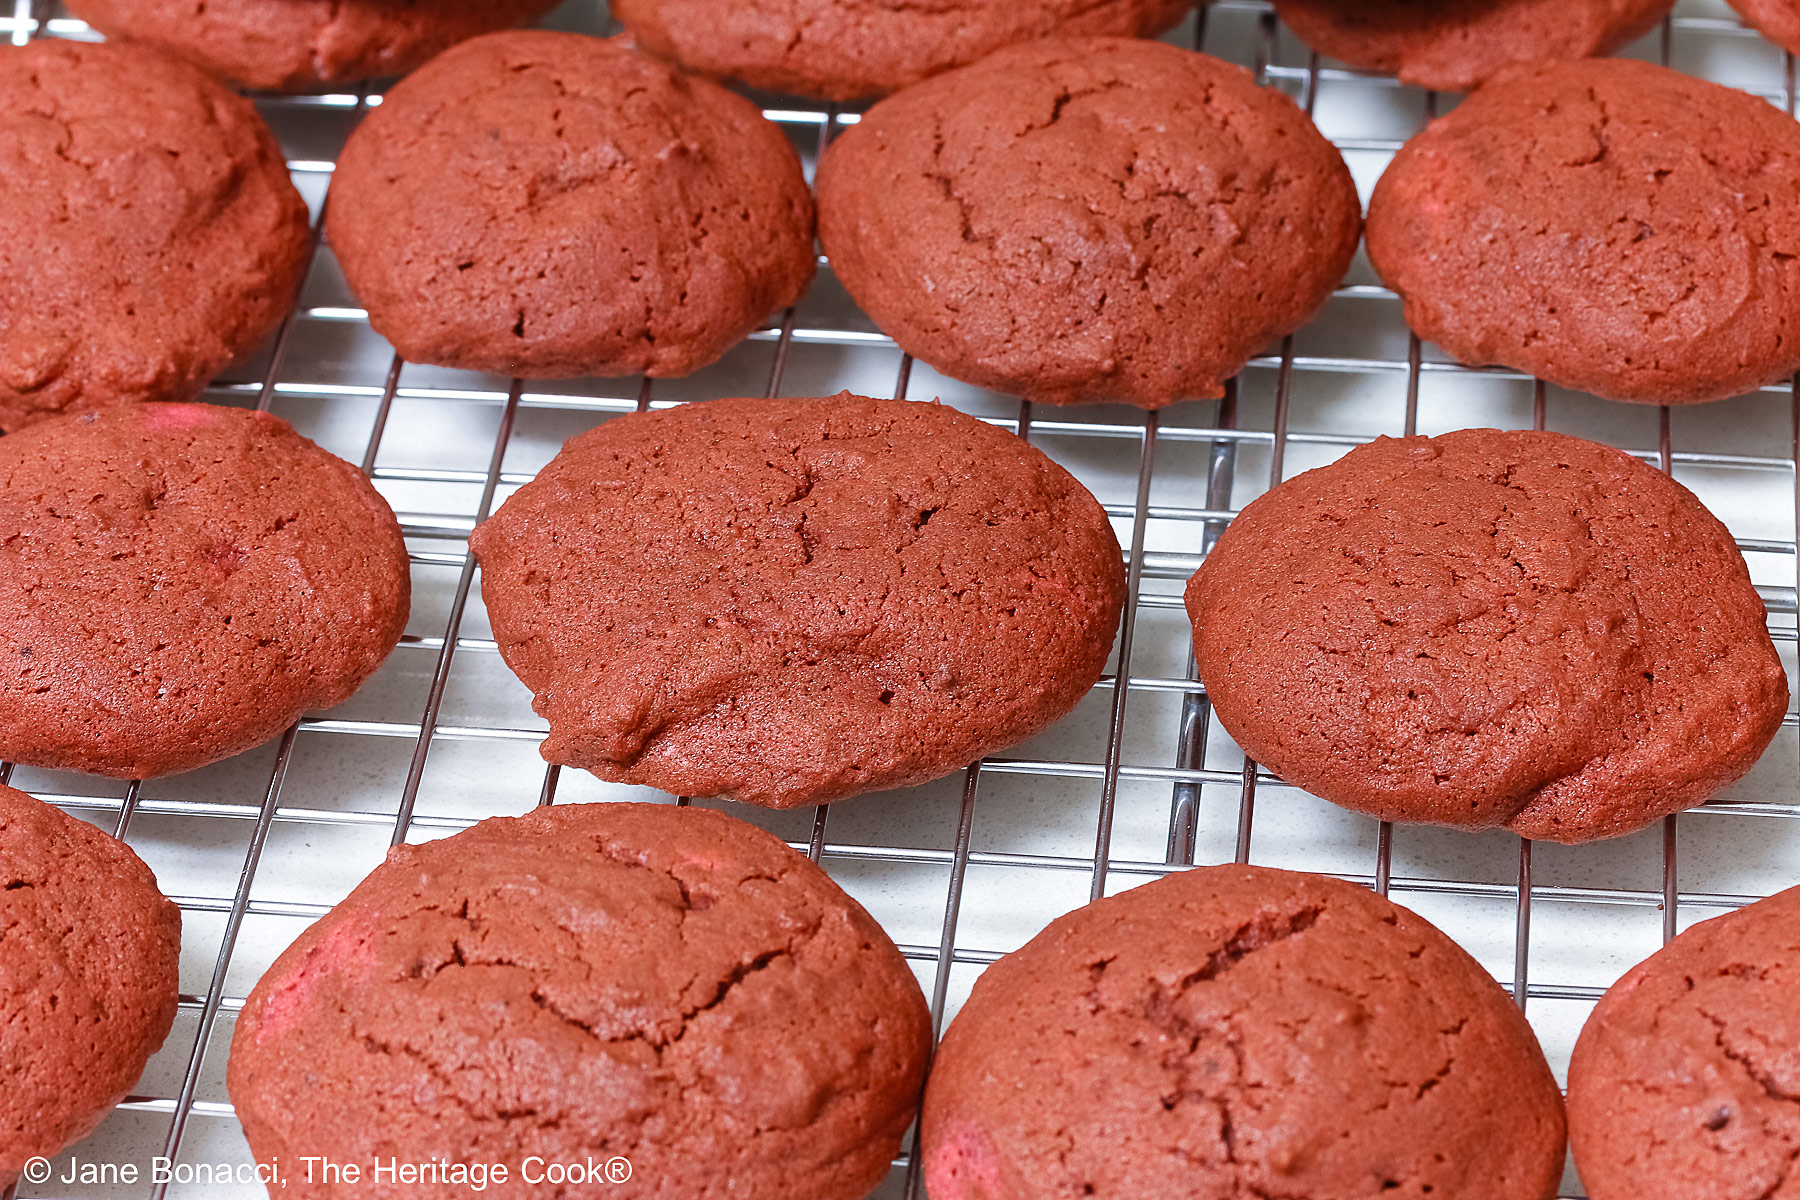
- Bake the Cookies: Drop dough by tablespoonfuls about 2-inches apart on parchment-lined baking sheets; bake at 375°F (191°C) for 8 to 10 minutes until the edges are set. Cool on the baking sheets for 2 minutes then transfer to a rack to cool completely.
- Prepare the Filling: Beat the cream cheese and butter together then beat in the sugar and vanilla until fluffy and smooth. Spread the filling on the bottom of half the cookies and top with remaining cookies, rounded side up.
- Decorate the Cookies: If you want, melt the white chocolate with a little cream over gentle heat and drizzle it over the tops of the cookies. And you can sprinkle with very finely chopped pecans if you like.
PRO Tip:
You can either spread the filling on the cookies with an offset spatula or you can pipe it on. Whichever is easier for you! A jumbo round tip would be more traditional, but a 1M open star would give you beautiful ruffles.
PRO Tip:
When I am baking I line all the ingredients out on the counter. As I add them to the mixing bowl, I move them to another part of the kitchen. Then I don’t miss any ingredients and everything gets added!
Recommended Tools (affiliate links; no extra cost to you):
- Kitchen scale
- Chef’s knife
- Baking sheet pans
- Parchment paper or silicone baking mats
- Saucepan
- Stand mixer or hand mixer
- Mixing bowls
Gluten-Free Tips:
*You can adjust any baking recipe to gluten-free by using 120 grams per cup of my favorite gluten-free flour blend. If you are using another brand of flour or regular flour, whisk it, spoon it lightly into a measuring cup until mounded, level off the top with a knife, and weigh the flour left in the cup. Use that weight as your standard per cup of that specific flour. Do this for each flour blend you use. Commercial gluten-free blends such as Pamela’s All-Purpose Artisan Blend, Bob’s Red Mill 1-to-1, or King Arthur Measure for Measure are all good gluten-free choices.
You will get the best and most consistent results by using a digital kitchen scale and weighing your ingredients, especially when you are baking. And use grams, they are much more accurate than pounds and ounces.
All recommended ingredients are gluten-free as of the writing of this article. Always check to be sure the products haven’t changed and are still safe to consume.
Mini Red Velvet Whoopie Pies (GF)

Mini Red Velvet Whoopie Pies are a perfect option for your 4th of July barbecues and other parties all year long. They are a crowd favorite and everyone will rush to grab one before they disappear! There are many ingredients that need to be at room temperature in the recipe, be sure you plan ahead. Have fun making and eating these beauties!
Ingredients
Whoopie Pies
- 2 oz (57g) semisweet bar chocolate, chopped into chunks, such at Guittard brand of baking chocolate in small boxes
- 1 to 2 tbsp heavy cream
- 3/4 cup (170g) butter, softened to room temperature
- 1 cup (198g) granulated sugar
- 2 large eggs, at room temperature
- 1/2 cup (113g) sour cream, at room temperature
- 1 tbsp regular liquid red food coloring or a couple drops of gel coloring then add more to get the depth you want
- 1-1/2 tsp white vinegar
- 1 tsp vanilla extract or paste
- 2-1/4 cups (270g*) gluten-free all-purpose flour* or regular all-purpose flour like Gold Medal*
- 1/4 cup (21g) natural unsweetened cocoa powder, like Hershey’s
- 2 tsp baking powder
- 1/2 tsp kosher salt
- 1/4 tsp baking soda
Filling
- 8 oz (1 package; 227g) cream cheese, softened to room temperature
- 1/2 cup (1 stick; 113g) butter, softened to room temperature
- 2-1/2 cups (284g) confectioners' sugar
- 2 tsp vanilla extract
Optional Topping
- 1/2 cup (85g) white chocolate or white baking chips, chopped and melted with 1 tbsp cream
Instructions
1. Preheat the oven to 375°F (191°C). Line baking sheets with parchment paper or silicone baking mats (Silpats). Melt the semisweet chocolate with the cream in a small saucepan over medium-low heat and set aside to cool a little.
2. Make the Whoopie Pies: In the bowl of your stand mixer or a large bowl if using a hand mixer, cream the butter and sugar until light and fluffy, 5 to 7 minutes. It will turn white. Scrape the bowl. Mix in the eggs, sour cream, red food coloring, vinegar, and vanilla. The mixture will look grainy but will smooth out when you add the dry ingredients.
3. In another bowl, whisk together the flour, cocoa, baking powder, salt and baking soda; gradually beat into the creamed mixture. Scrape the bowl. Whisk in the cooled melted chocolate. Refrigerate the dough, covered, for 30 minutes to reduce spreading. Also, refrigerate the dough between baking batches, especially if the baking sheets are still warm to hot..
4. Bake the Cookies: Drop the dough by tablespoonfuls 2-inches (5cm) apart (use a rounded 2 tsp; #60 cookie scoop) onto parchment-lined baking sheets. Bake 8 to 10 minutes or until the edges are set. Cool on the pans 2 minutes. Transfer to wire racks to cool completely.
5. Prepare the Filling: Once all the cookies are cooled, In a large bowl, beat the cream cheese and butter together until fluffy, about 3 minutes. Beat in the powdered sugar and vanilla until smooth. If too thin, add a little more sugar, if too thick, add a tsp of cream. Spread or pipe the filling on the bottom of half the cookies. Then top with remaining cookies, rounded side up.
6. If desired, melt the white chocolate with the cream, stirring until smooth. Transfer to a resealable plastic bag and move it into one corner. Holding it point end up, cut a tiny piece of that corner off with scissors. Drizzle assembled cookies with melted white chocolate if desired. Refrigerate until serving.
7. Store the whoopie pies in an airtight container in the fridge for up to five days. Place sheets of parchment paper between the layers to prevent them from sticking together.
8. You can freeze the red velvet cookies (without the filling or toppings) in a freezer-safe container or zip-top bag for up to three months. Thaw them in the fridge overnight before filling and decorating as directed.
Recipe found at www.theheritagecook.com
Notes
* You can adjust any recipe to gluten-free by using 120 grams per cup of my favorite gluten-free flour blend. If you are using another brand of gluten-free flour, whisk the mix, spoon it lightly into a measuring cup without a spout until mounded, level off the top with the back of a knife, and weigh the flour left in the cup. Use that weight as your standard per cup of that specific flour. Do this for each flour blend you use. Commercial blends such as Pamela's, Bob's Red Mill 1-to-1, or King Arthur Measure for Measure are all good gluten-free choices. Many regular all-purpose wheat flours weigh 120g/cup as well.
You will get the best results by using a digital kitchen scale and weighing your ingredients, especially when you are baking. And use grams, they are much more accurate than pounds and ounces.
All recommended ingredients are gluten-free as of the writing of this article. Always check to be sure the products haven’t changed and are still safe to consume.
Adapted from a recipe by Taste of Home
Nutrition Information:
Yield:
24Serving Size:
1Amount Per Serving: Calories: 177Total Fat: 6gSaturated Fat: 3gTrans Fat: 0gUnsaturated Fat: 2gCholesterol: 28mgSodium: 156mgCarbohydrates: 23gFiber: 1gSugar: 2gProtein: 6g
The nutritional information for recipes on this site is calculated by online tools and is merely an estimate. If you need nutritional calculations for medical reasons, please use a source that you trust.
If you enjoyed this recipe, be sure to follow me on social media so you never miss a post:
Create a New Tradition Today!
Welcome! The suggestions here are not intended as dietary advice or as a substitute for consulting a dietician, physician, or other medical professional. Please see the Disclaimers/Privacy Policy page for additional details. Unauthorized use, distribution, and/or duplication of proprietary material from The Heritage Cook without prior approval is prohibited. If you have any questions or would like permission, please contact me. We participate in the Amazon Services LLC Associates Program, an affiliate advertising program designed to provide a means for sites to earn advertising fees by advertising and linking to amazon.com. As an Amazon Associate, I earn a small amount from qualifying purchases without any additional cost to you. This page may contain affiliate links. The author makes no claims regarding the presence of food allergens and disclaims all liability in connection with the use of this site.