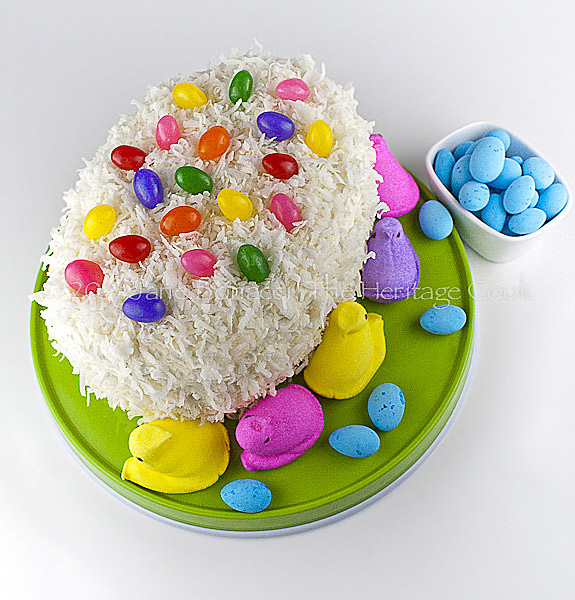
Easter Egg-Shaped White Chocolate Coconut Cake – Wouldn’t this be fun for your Easter Dinner!!
Easter is always one of the really fun holidays because here in America. That rascally Easter Bunny is known to deliver a treasure-trove of goodies to children across the country. When I was young I would carefully cook the eggs and color them, set them in my Easter basket and add a few carrots to say thank you. In the morning I awoke to a basket filled with candies and treats, the carrots gnawed and then had the fun of finding all the eggs the Bunny had hidden in the night.
My mother was always a huge lover of all holidays and made them fun and special for all of us. Even as an adult, if I was at my parent’s home for the holiday, I would wake up and discover a trail of candies leading from my bed to my basket.
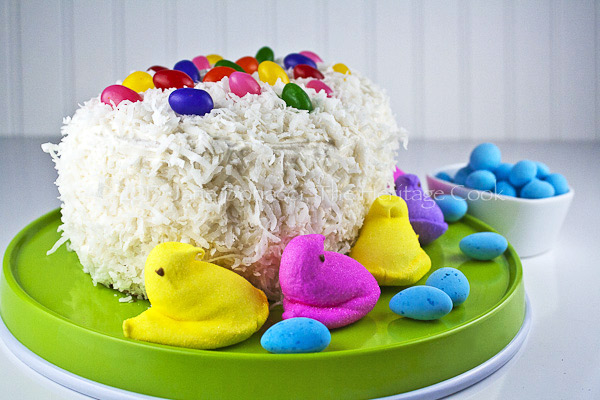
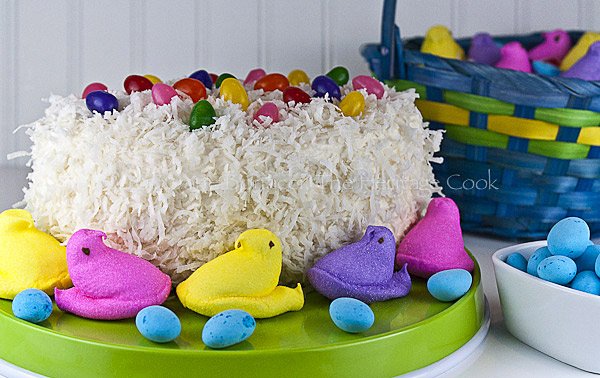
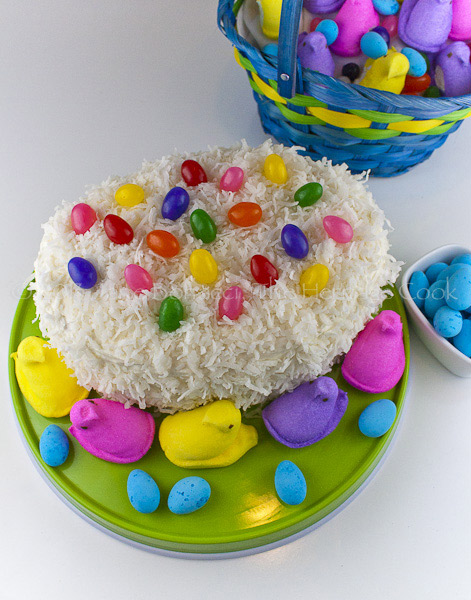
With so many people focused on the main course, I thought it would be fun to help you do something special and different for your holiday dessert. I made a double-layer egg shaped cake, but you could make individual egg-shaped cakes just as easily. Everyone will love your creativity and get in the spirit!
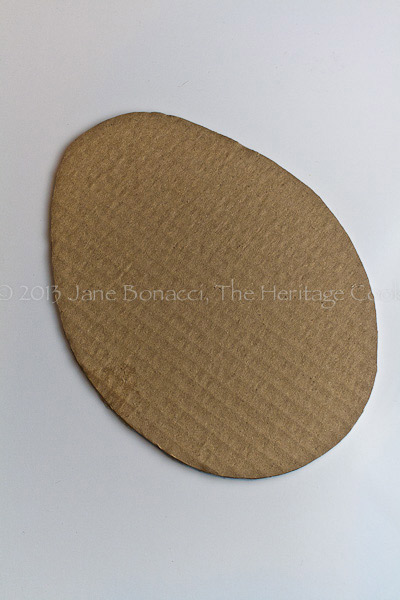
Cardboard Template
The Artist was kind enough to draw a template for me. I cut it out of cardboard and then used that guide to make two nearly identical layers of the cake. I have an old serrated knife that used to belong to my mom. It is about 6-inches long, really narrow and perfect for sawing unusual shapes in baked cakes. I bought it for her years ago in our local grocery store. It isn’t a fancy expensive knife, but it works better at so many tasks than knives costing 10 times as much!
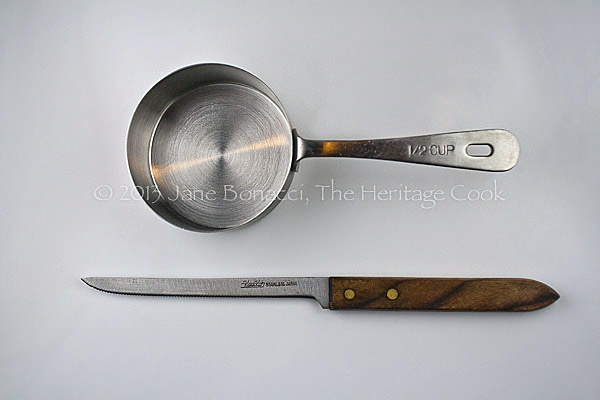
The perfect serrated knife
One of the tricks to beautifully frosted cakes is the “crumb coat.” You start by putting your cake layers together with frosting between each layer. Then put a very thin first coat of frosting all over the top and sides of the cake. Carefully place it in the refrigerator and let chill for about 15 to 20 minutes. The thin layer of frosting helps contain any loose crumbs. Once cool, return to your work surface and finish applying the frosting to the entire cake.
Another trick is to use coconut or chopped nuts pressed against the sides of the cake. This helps hide any mistakes you may have made while frosting, giving your more leeway and is particularly helpful if you are a beginner at decorating cakes.
Break up the coconut so there are no major clumps. Take a handful of the coconut and gently press your palm against the top half of the sides of the cake, pressing the coconut into the soft frosting. Excess will fall alongside the cake and you can use it to fill in any holes or divots.
If you are a lot of gluten-free baking, you may want to consider buying a wonderful product from King Arthur Flour called Cake Enhancer. It helps cakes stay moister longer and in the case of gluten-free, also helps guard against dry and crumbly cakes. It is a combination emulsifiers that help fats and liquids combine more easily. I think it adds a wonderful creamy texture to my cakes.
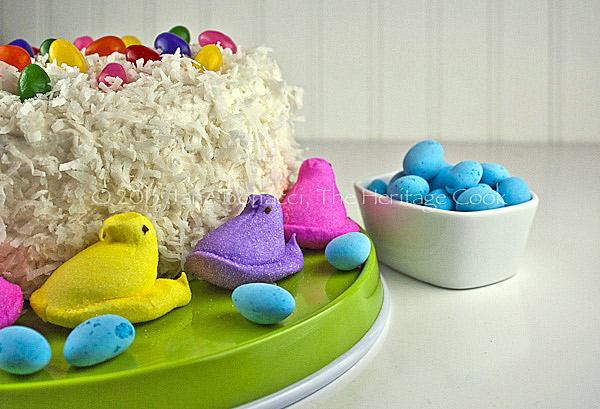
I had hoped to find Peep Bunnies for a fun accent around the cake, but all I could find were the chicks. I think they are pretty cute and add a lot of color to the table.
Children will love to help you decorate this cake and they can go crazy with the candies and coconut. If you wanted to get even more inventive, you can tint your coconut green and create a grass-like surface for a pretend Easter egg hunt on the top of your cake.
This is a really lovely, gently flavored cake that lends itself to many different flavorings. You could use only vanilla, try some lemon or orange oils, or other flavorings depending on the season and your personal preferences.
I hope you wake up on Sunday to a basket filled with your favorite treats and all the eggs hidden for you to find. Happy Easter everyone and Happy Chocolate Monday!
Jane’s Tips and Hints:
Tear up a sheet of parchment paper into strips about 3-inches wide and arrange them overlapping on your serving platter so that the entire surface is covered. Place the bottom layer of the cake in the center and frost the cake. When you are done spreading the frosting, gently and carefully remove the parchment strips. Your platter will be clean and photo ready!
Gluten-Free Tips:
I often add almond or hazelnut meal to cake batters for the extra flavor, nutrition and texture. In this case, I think the cake benefits from the silky smooth texture of a rice flour/tapioca starch/potato flour blend. It suits the creaminess of the melted white chocolate.

- Cake
- 2-1/2 cups cake flour or gluten-free flour blend
- 1 tsp baking powder
- 1/2 tsp salt
- 2 tbsp Cake Enhancer, optional
- 8 oz white chocolate
- 1 cup (2 sticks) unsalted butter, at room temperature
- 2 cups sugar
- 4 eggs, separated
- 1 tsp pure vanilla extract or paste
- 1/8 to 1/4 tsp coconut oil, optional
- 1 cup buttermilk*, at room temperature
- White Chocolate Buttercream Frosting
- 2 oz white chocolate, chopped finely
- 1/2 cup (1 stick) butter, at room temperature
- 2 cups sifted powdered sugar
- 1 tsp pure vanilla extract or paste
- 1 to 2 tbsp heavy cream
- Garnishes (optional)
- 1/2 cup slivered almonds
- 2 to 3 tbsp coconut
- Butter and flour a 9x13-inch baking pan. Preheat the oven to 350°F with a rack in the center of the oven.
- Make the Cake: In a medium mixing bowl, combine the flour, baking powder, and salt. Whisk briskly until thoroughly blended. Set aside.
- In a medium saucepan bring 2 inches of water to a simmer over medium heat. Place a heatproof bowl over the saucepan and add the white chocolate. Melt the chocolate, stirring often until completely melted. Remove from the heat.
- In the bowl of your standing mixer, beat together the butter and sugar on medium until creamy and lightened in color (this is called creaming). Beat in the egg yolks until completely incorporated. Stop the mixer and scrape the sides and bottom. With the mixer running, pour in the melted white chocolate and vanilla, beating on low speed until completely smooth. Add the dry ingredients to the batter, alternating with the buttermilk. Start and end with the dry ingredients. Stir in the coconut.
- In a separate bowl, beat the egg whites until stiff peaks form. Gently fold 1/3 of the beaten whites into the batter. This lightens the batter making it easier to fold in the remaining whites. Add the rest of the beaten egg whites and fold in until no white streaks remain.
- Pour batter into the prepared pan. Bake for 45 to 55 minutes or until a toothpick inserted in the center comes out clean. Remove cake from the oven and place on a cooling rack. Leave the cake in the pan until completely cool.
- Make the Frosting: In a small saucepan, over medium-low heat, melt the white chocolate stirring often. Reduce heat to low and keep warm.
- In the bowl of your standing mixer, fitted with the paddle attachment, beat the butter on medium speed until smooth and fluffy, about 2 minutes. Stop the motor, scrape the sides and bottom of bowl and add the powdered sugar. Gently beat the sugar into the butter until smooth. Add the vanilla and 1 tbsp of the cream; beat on medium speed for 2 to 3 minutes until light and fluffy. With the motor running, beat in the melted white chocolate. If you want a thinner consistency add another tbsp of cream.
- Decorate the Cake: Using an off-set frosting spatula, smooth the frosting over the top of the cake. Create swirls with the tip of the spatula if desired. Sprinkle the top with the almonds and coconut if desired.
- Yield: about 10 servings (4 if you are making the egg-shaped cake plus extras for nibbling)
- *To make a buttermilk substitute, combine 1/2 cup half and half with just short of 1/2 cup heavy cream. Add enough white vinegar to make 1 cup total liquid. Let sit at room temperature, stirring occasionally. The acid in the vinegar will sour the milk and cream and thicken them to a consistency similar to buttermilk.
To Make an Easter Egg Cake
Bake the cake as directed and let cool completely. Use a knife or plastic spreader to run around the edges of the cake. Flip cake out of pan onto a parchment paper-covered cutting surface. The safest way to do this is to place the parchment on top of the cake, top with a baking sheet or cutting board and holding all of them together, invert the cake pan. Cut cake in half, creating two 9 x 6-1/2 inch rectangles.
Create an egg-shaped pattern using cardboard that fits within the 9 x 6-1/2 inch rectangle. Mine was 5-1/2 x 7-3/4 inches. Place the pattern on top of one of the cake pieces and using a thin, sharp, serrated knife slowly cut out the shape being careful not to move the pattern as you cut. Repeat with the remaining cake piece.
Make the buttercream frosting (tint lightly with food coloring if desired) and spread a fairly thick layer on top of one of the egg-shaped cakes. Place the second cake on top and finish frosting the sides and top of the cake. (You can also do a crumb coat as described above.) Sprinkle the top with the coconut and/or almonds or you can use seasonal candies if you prefer.
You can nibble on the extra cake that you cut away to make the egg shapes, or combine them with a little extra frosting to make cake pops!
Create a New Tradition Today!
Unauthorized use, distribution, and/or duplication of proprietary material on The Heritage Cook without prior approval is prohibited. This includes copying and reprinting content and photographs. If you have any questions or would like permission, I can be contacted via email: theheritagecook (at) comcast (dot) net. Feel free to quote me, just give credit where credit is due, link to the recipe, and please send people to my website, www.theheritagecook.com. Please see the Disclaimers page (under the “About” tab above) for additional details.
Thank You!



April @ Angel's Homestead
Your cake turned out beautifully Jane! I love that it’s gluten free, and will definitely try it once I can eat a regular diet again.