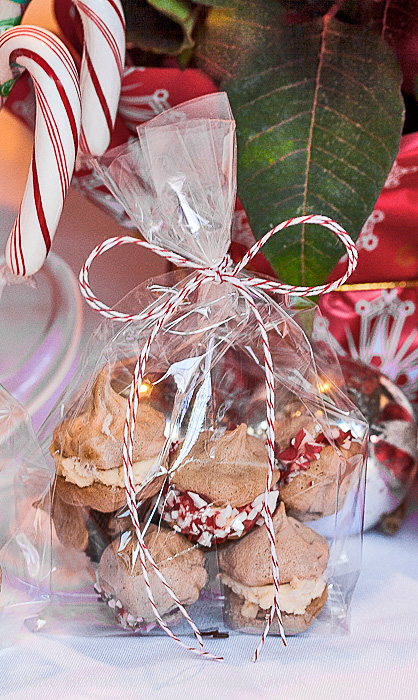
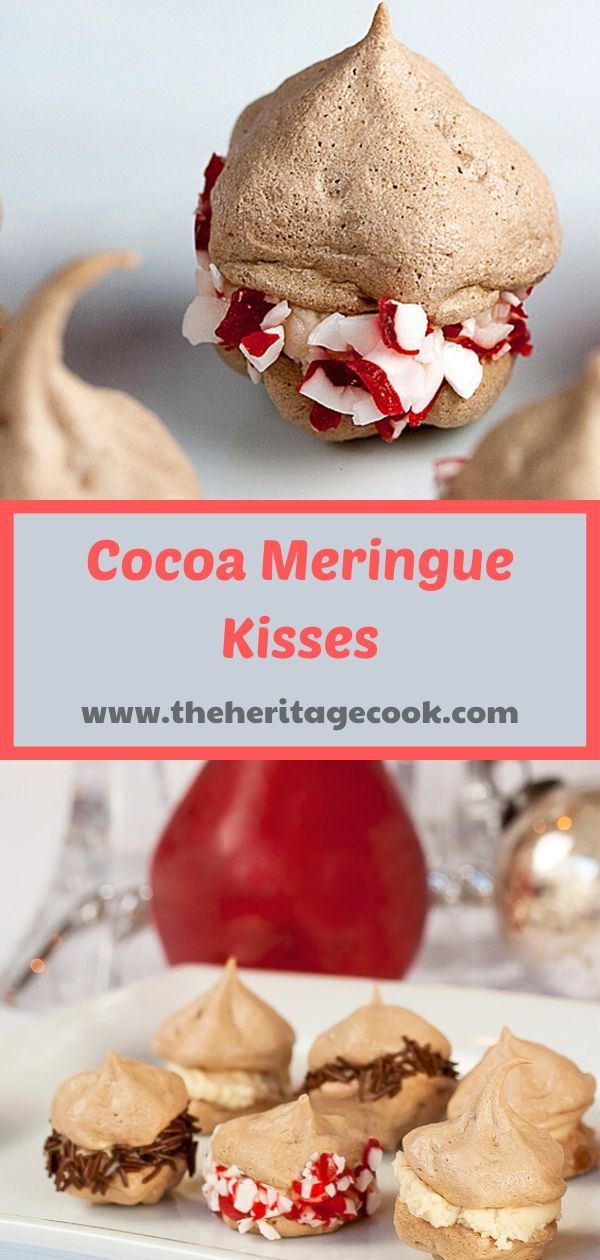
These Cocoa Meringue Kisses are the perfect addition to your holiday dessert buffet platters. They are delicious, a special treat, and look very festive, especially if you use the crushed peppermint pieces on the edges.
Christmas is just a few weeks away and the stress is starting to build. Did I do all the things I wanted to do ahead of time? Do I have enough cookies baked? Is the house ready for guests? Do we have gifts for all the family? Are there enough little gifts to fill all the stockings? Oh no, I still have to send out cards … the to-do list at this time of year seems endless. Relax, take a breath, and enjoy today’s recipe.
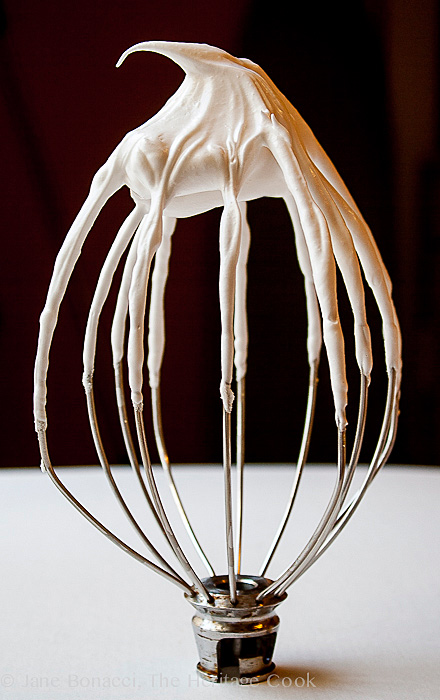
Perfectly whipped egg whites and sugar create a glossy meringue
I love meringue cookies. Not only are they beautiful, they are naturally gluten-free, and are a lovely addition to any dessert platter. The other benefit is that while they do take a long time to make, bake, and cool, most of that time is unattended, leaving me free to get other things done while they are baking and cooling in the oven. Unlike cut-out cookies, which are labor intensive, these are easy to make and a real crowd pleaser.
Today I decided to make mini meringues and fill them with a lightly sweetened mascarpone cheese flavored with chocolate extract. They are the perfect size for popping whole into your mouth and would be a wonderful addition to your holiday dessert buffets. You can make a larger version if you prefer, just use a larger piping tip, and you do not have to adjust the baking time.
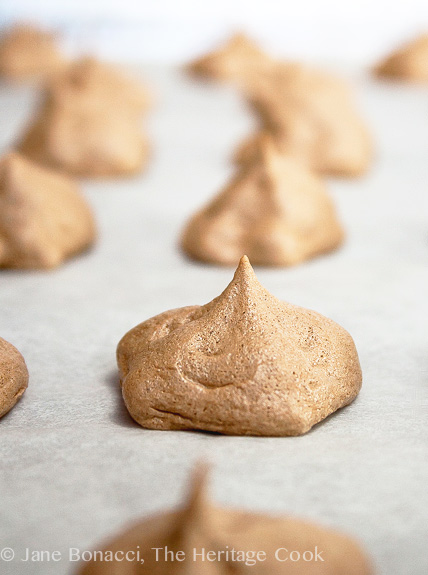
Piped meringues, ready to assemble
When I was growing up there was only one kind of meringue cookie – plain white vanilla. These days you can add nearly any flavoring to the beaten egg whites to create a variety of colors, flavors, and combinations. Today I folded in cocoa powder and used some chocolate extract in the filling making them perfect for Chocolate Monday.
If you want to experiment with other flavorings, separate the beaten meringue into small bowls and stir different extracts into each bowl. Add a couple drops of food coloring to each bowl so you can easily tell the flavors apart.
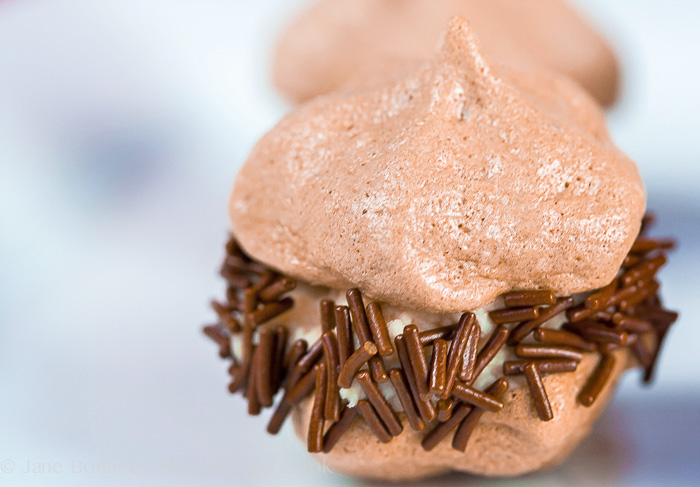
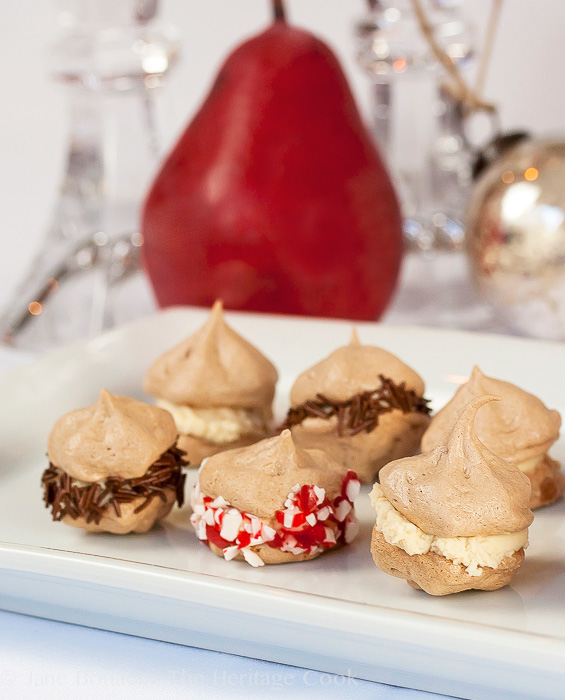
Chocolate Jimmies add whimsy and fun to these little sandwich cookies
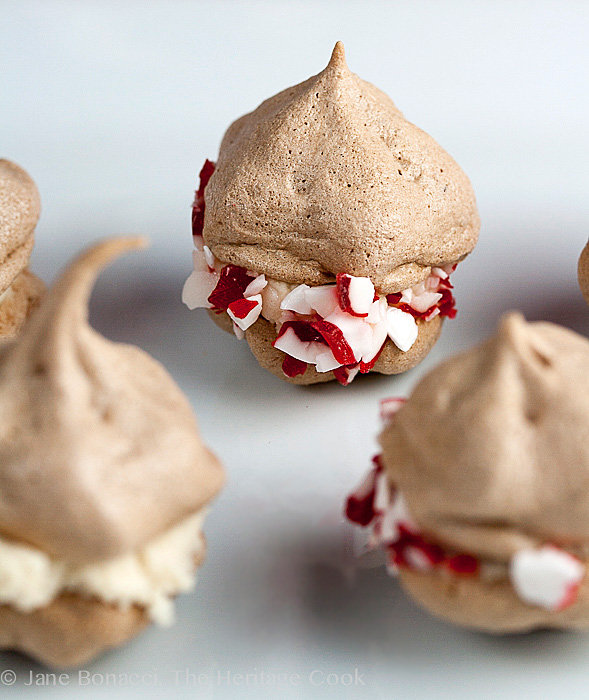
You can make these cookies as simple or fancy as you like. I had crushed peppermint candies and chocolate jimmies on hand so I rolled a few of today’s treats in those for a little change of pace and fun color. Finely minced fresh mint leaves would also be fun to add – when included with some of the crushed peppermints you’ve created the classic red and green colors for Christmas.
If this is your first time making meringue, you are in for a treat. This is best made with a powerful stand mixer. Doing this with a hand mixer or, heaven forbid, by hand with a whisk would be challenging even for the hardiest of souls. My KitchenAid mixer gives me the freedom to move around the kitchen while it does the work!
Piping can be intimidating to some so if you don’t want to do that or don’t have the equipment, just use two teaspoons and drop little dollops onto the parchment-covered baking sheets.
The only challenge with these cocoa meringue kisses is that once they are filled, they will dissolve rather quickly. So don’t fill them until right before you are ready to serve them – no more than an hour and you should be fine.
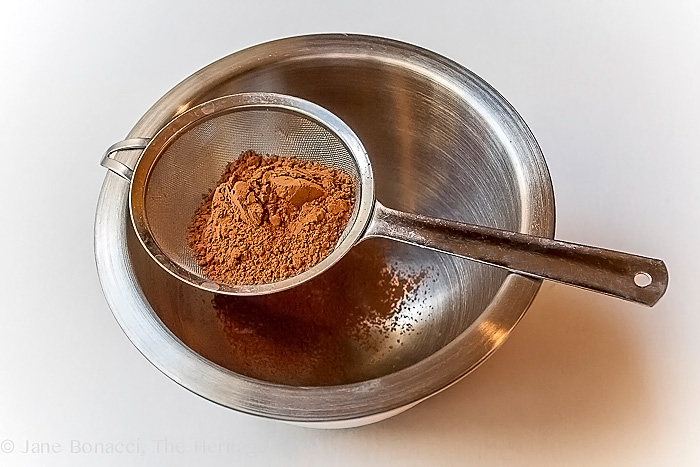
Cocoa powder in wire sieve, ready to sprinkle over meringues
If you have extra filling left over, don’t worry. It would be great on waffles, pancakes, blinis, or toast. You could thin it slightly with a little milk and turn it into a dip for other cookies. There is no way this delicious cream will go to waste!!
Enjoy these wonderful Cocoa Meringue Kisses and have a wonderful Chocolate Monday everyone!
How to make Cocoa Meringue Kisses:
- Whip together the egg whites, salt, cream of tartar, and vanilla
- Add in the superfine sugar; beat until thickened, stiff, and glossy
- Fold in the cocoa powder until there are no streaks
- Pipe the meringues using a piping bag and star tip; flatten the tops of half the cookies
- Bake for 1 to 1-1/2 hours, then leave the in the oven to finish cooling, another 2 hours
- Make the filling and pipe it onto the flattened cookies and top with the pointed cookies
- Sift a little powdered sugar or cocoa powder over the tops if desired and you can roll the edges in decorations – I really love the crushed peppermints for the holidays!
- Serve within an hour of filling – if making ahead, do not fill them until just before serving
How do you warm eggs to room temperature?
Many recipes call for egg whites at room temperature (or whole eggs for that matter). Having egg whites at room temperature gives them more height when you whip them – yes, it really does make a difference! But it is hard for me to remember to put the eggs out to warm up enough in advance, so I use an old trick.
Fill a large bowl with about 2-inches of hot tap water. Carefully set the bowl with the egg whites into the water and set aside to warm. If needed, replace the hot water by first removing the bowl with the whites and setting it aside. Pour out the cool water, replace it with hot, and set the bowl of whites back into the water to continue warming.
When the egg whites are no longer cold to the touch and just slightly cool to the touch, they are at room temperature and ready for beating into a magnificent meringue!
How do you separate eggs?
When a recipe says to use separated eggs, it means that the egg whites and yolks need to be in different containers. Working over a medium bowl, crack one of the eggs and holding the egg upright in your hand, carefully remove top half the shell. Allow the whites of the egg to drop into the bowl and carefully “pour” the remaining egg white and yolk into your opposite hand. Very gently pass the yolk back and forth between your hands, allowing the whites to flow into the bowl while keep the yolk intact. Place the yolk in a separate bowl and repeat with remaining eggs.
Key Ingredients for this Recipe
- Egg whites
- Salt, cream of tartar, and vanilla
- Superfine sugar (use a food processor to make from regular granulated sugar)
- Unsweetened cocoa powder
- Mascarpone cheese
- Confectioners’ sugar
- Chocolate extract or liqueur
- Decorations if desired
Kitchen Tools I Use to Make This Recipe (affiliate links)
- Food Processor
- Baking sheets
- Parchment paper
- Stand mixer with whisk attachment
- Large flexible spatula
- Piping bag plus star tip and round tip
Other Cookie Recipes You May Enjoy:
- White Choc Chip Macadamia Nut Cookies (GF)
- Chewy Almond Joy Cookies (GF)
- Cranberry White Chocolate Chip Cookies (GF)
- Chewy Oatmeal Chocolate Chip Cookies (GF)
- Ginger Thumbprint Cookies with White Chocolate Topping (GF)
- White Chocolate Glazed Shortbread Cookies (GF)
- Vanilla Bean Cannoli Cookies (GF)
- Big Fat Snicker’s Cookies (GF)
Gluten-Free Tips:
Meringues are naturally gluten-free. As always, be cautious with the ingredients you add to the egg whites and sugar to be certain they do not contain any gluten-filled ingredients; read all the labels carefully.
Cocoa Meringue Kisses (Gluten Free)
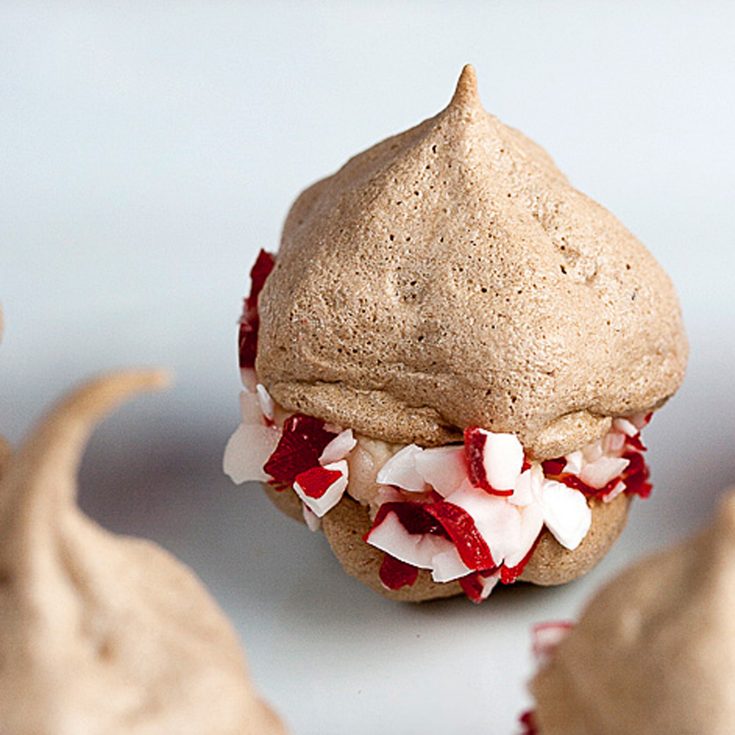
These Cocoa Meringue Kisses are the perfect addition to your holiday dessert buffet platters. They are delicious, a special treat, and look very festive, especially if you use the crushed peppermint pieces on the edges.
Ingredients
Cocoa Meringue Cookies
- 5 egg whites, at room temperature
- 1/4 tsp kosher salt
- 1/4 tsp cream of tartar
- 1/2 tsp vanilla extract
- 1 cup granulated sugar, pulsed in a food processor to make superfine sugar
- 1/4 cup unsweetened cocoa powder, sifted (gluten-free if needed)
Filling
- 8 oz (about 1 cup) mascarpone cheese, chilled
- 3 to 4 tbsp confectioners’ sugar
- 1 tsp vanilla extract
- 2 tsp chocolate extract or chocolate liqueur
- Cocoa powder and confectioners’ sugar, for dusting
Instructions
- Set oven racks in the center and upper third of the oven and preheat to 225°F. Line two baking sheets with parchment paper.
- Make Meringue: In the bowl of a standing mixer fitted with the whisk attachment, beat egg whites until foamy. Add the salt, cream of tartar, and vanilla and beat on medium speed until soft peaks form. Gradually add superfine sugar, 1 tablespoon at a time, and continue to beat on high until meringue is stiff and glossy, about 1-1/2 minutes longer. Continue beating until you can no longer feel any sugar grains in the mixture (pinch a little between your fingers). The egg whites and sugar will be beaten so stiff that you can literally hold the bowl upside down over your head and they won’t fall out of the bowl!
- Remove bowl from the machine and set the whisk attachment aside. Using a large flexible spatula, gently fold in the cocoa powder until there are no more streaks.
- Form and Bake Meringues: Transfer mixture to a piping bag fitted with a star tip. Twist the top closed and pipe small cookies, about 3/4-inch diameter, onto the prepared sheet. Try to make them all the same size. Leave a little room between each one to allow the hot air to circulate easily. Using damp fingers, press half of the tops flat (these will be the bottom cookies).
- If you have extra meringue like I did, use a spring-loaded ice cream scoop and make another baking sheet full of round meringue cookies.
- Place baking sheets in the hot oven and bake until thoroughly dry, about 1 to 1-1/2 hours. Turn off the oven and leave the cookies in the oven until completely cool, another 2 hours.
- Prepare Filling: In the bowl of a standing mixer fitted with the paddle attachment, combine the mascarpone, sugar, vanilla, and chocolate liqueur. Stir together until smooth. The mixture should be the consistency of a soft frosting. Don’t over beat or the mixture will get grainy.
- Assemble Cookies: Working with the flattened “bottom” cookies, spread a little of the filling on the top of each cookie. You can do this with a mini off-set spatula or you can pipe a dollop on each one. (Piping is much faster.) Top with one of the “top” cookies (the ones with the pointed tops (flat side on the filling). Set back on the parchment-lined sheet, and repeat until all of the ones you are serving are filled.
- Decorate the Cookies: When the cookies are all filled, place a little powdered sugar in a wire sieve and sift lightly over the tops of half of the cookies. Repeat with sifted cocoa powder on the second half. You can also roll the edges of the filling in some crushed peppermint candies or chocolate jimmies if you like. Best served within an hour of when they are assembled.
- Make Ahead: The meringue cookies can be made up to several days in advance, but do not fill them. Store in an airtight container. On the day you plan to serve these, make the filling and sandwich the cookies together with some of the filling. Sprinkle on some cocoa powder and serve.
Notes
Inspired by a recipe from The Twice Baked Twins
Nutrition Information:
Yield:
20Serving Size:
1Amount Per Serving: Calories: 144Total Fat: 4gSaturated Fat: 2gTrans Fat: 0gUnsaturated Fat: 1gCholesterol: 11mgSodium: 117mgCarbohydrates: 23gFiber: 0gSugar: 22gProtein: 4g
If you love this recipe, be sure to follow me on social media so you never miss a post:
| Facebook | Pinterest | Instagram | Twitter |
Create a New Tradition Today!
First Published: 16 Dec 2013
Last Updated: 6 Dec 2019
Welcome! The suggestions here are not intended as dietary advice or as a substitute for consulting a dietician, physician, or other medical professional. Please see the Disclaimers/Privacy Policy page for additional details. Unauthorized use, distribution, and/or duplication of proprietary material from The Heritage Cook without prior approval is prohibited. If you have any questions or would like permission, please contact me. We participate in the Amazon Services LLC Associates Program, an affiliate advertising program designed to provide a means for sites to earn advertising fees by advertising and linking to amazon.com. This page may contain affiliate links.



Louise
Hi Jane!
What darling cookies. I’m always nervous when I see the word meringue in any recipe but, I’ve actually made these types of cookies before, never cocoa though, and I have gotten much better at it. Thanks for the inspiration. Your “newly wed” friends are sure to love them!
Thank you so much for sharing…
Jane Bonacci
No need to be nervous Louise, these are a snap to make! Once the meringue is fully whipped (won’t fall out of the upturned bowl), it is very stable. The cocoa mixes in easily and really punches up the flavor!! I hope you enjoy these tiny bites or a larger version if you prefer. Happy Holidays!
April @ Angel's Homestead
Yum! I make something similar using chocolate chips instead of cocoa, but I need to try them with filling like yours. Great Christmas cookie.
Jane Bonacci
Thanks April! I’ve made the chocolate chip version before too. These would be great with chips as well if you want even more chocolate in every bite!!