Today’s Cherry Topped Upside-Down Chocolate Cakes are sure to please everyone and are perfect for holidays and special occasions. Upside-down cakes are always a treat, and this one is reminiscent of a European classic, Black Forest cake with the sinfully good combination of chocolate and cherries. If you’ve never had one, you are in for a real treat!
The classic German cake most likely originated in the Black Forest region of today’s Germany in the late 1500s. The area is also known for Kirsch or Kirschwasser, a brandy made from sour Morello cherries so it isn’t surprising that chefs combined their passion for chocolate desserts with the local sour cherries. The modern version appears to have been created around 1920 and has become one of Germany’s most famous desserts.
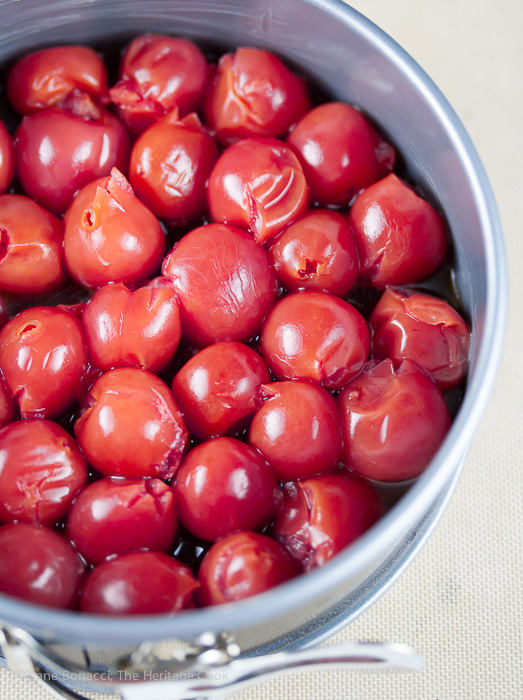
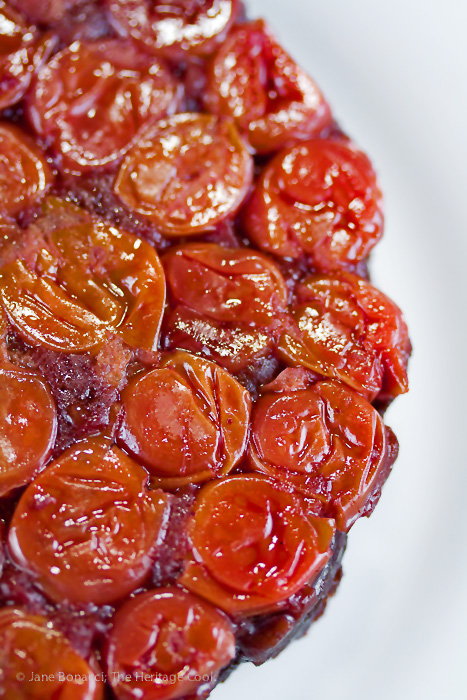
Cherries packed tightly in the baking pan before topping with the cake batter
The classic version is usually a 4-layer cake that is quite time consuming and challenging for beginning cooks. By using the same flavor profiles and simplifying the method, anyone can create these delightful cherry topped upside-down chocolate cakes.
One of the tricks to this dessert is to use jarred sour cherries. They’ve got a little added sugar but still maintain the tartness that balances the sweetness of the cake. Montmorency is a common type of cherry grown primarily in Canada, France, and the upper mid-west states of the U.S. and they make the best pies and desserts.
Once these cakes come out of the oven, let them cool for about 15 minutes. Then you can easily get the cakes out of the pans. If you let them cool too much you may have a struggle getting them out without ruining the top.
If you don’t already have Silpat silicone baking sheets, you should put them on your wish list. They come in handy for so many applications and today was no exception. I used one on my baking sheet to help keep the mini springform pans from slipping around as I moved them in and out of the oven.
But I quickly learned why the original recipe called for ramekins. I didn’t think the springform pans needed to be wrapped in foil, but I was wrong. The caramel leaked out and was all over the baking sheet. But because I had the Silpat on there, there was no hassle with clean up because nothing sticks to it, even the stickiest candies! I lifted it off the baking sheet, put it under running water in the sink and the caramel slipped right off! It would have taken at least an hour of soaking if the Silpat wasn’t there!
This recipe is designed for an intimate dinner for two, but you can easily double the recipe to feed four. If you have more people coming to dinner, I would recommend you make two recipes for four. Doubling again rarely works with baked goods. Something always seems to go haywire. It’s better to be safe and make one batch, then whip up the second one while the first four cakes bake.
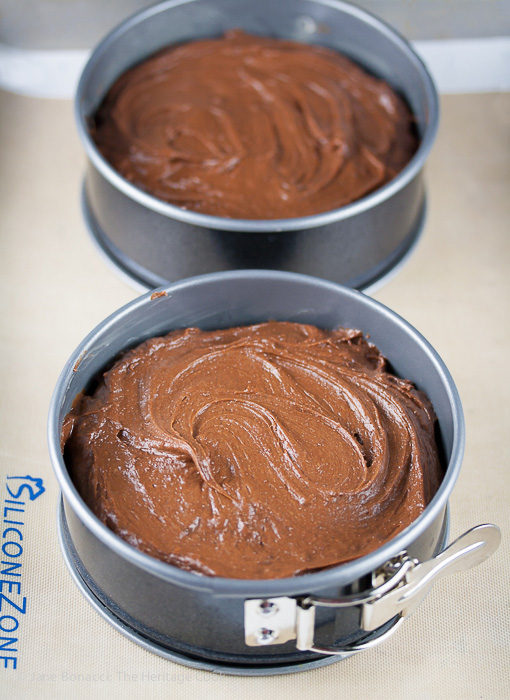
Ready to bake!
The sweet chocolate cake and whipped cream are offset by the tart cherries, a balance you will love! Whether you are having a romantic dinner for you and your love, you are looking for a beautiful dessert for the holidays, or if you want to make something special for your Valentine, these little cakes are the perfect choice!
I hope you will give these Cherry Topped Upside-Down Chocolate Cakes a try soon. Happy Chocolate Monday!
How to make Cherry Topped Upside-Down Chocolate Cakes:
- Lightly butter two 8-oz ramekins or mini springform pans
- Melt together butter, brown sugar and cherry juice then pour into the bottoms of the baking dishes
- Arrange cherries tightly packed layer over the bottom of the pans
- Mix the cake batter together and pour over the cherries
- Place on a baking sheet lined with a Silpat to keep them from sliding around; bake for about 30 minutes then cool for 15 minutes
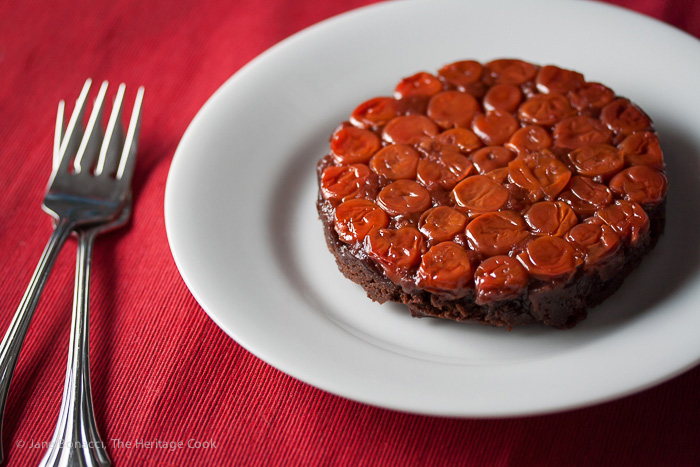
- Run a knife around the edges and invert the cakes onto serving plates
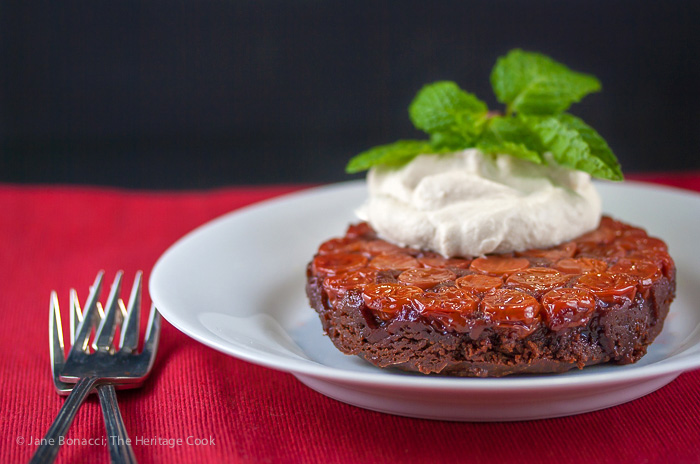
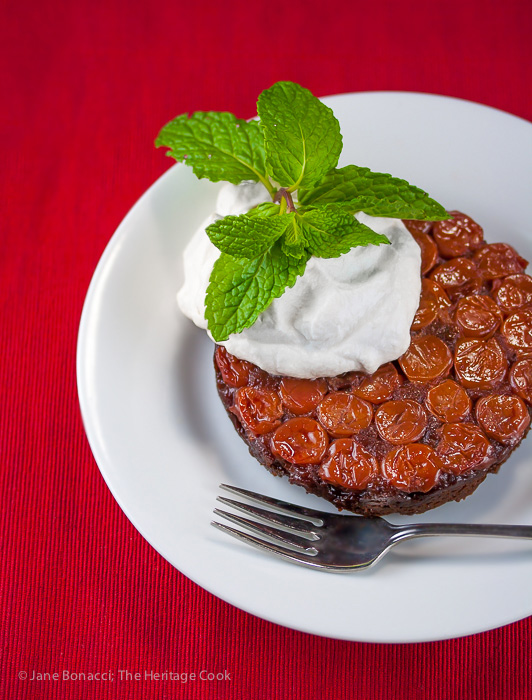
- Top with freshly made whipped cream and a sprig of mint
Is flipping over an upside-down cake hard?
When a recipe calls for inverting onto a serving plate, it means that you are going to be serving the recipe with the bottom on top. The easiest way to do this is to hold the cake pan on one palm, set the serving plate on top and holding the two together, quickly flip it over. If you’re lucky you won’t get too much movement or liquid on the plate (depending on what you are making). If the baking pan is still hot, make sure you use hot pads, preferably that are no-slip and be very careful!
Alternative serving option:
If flipping the ramekins or baking pans over is too intimidating for you or if you waited too long and they won’t release easily, you can always serve them straight from the ramekins. This will give your guests a beautiful surprise as they dig down and discover the cherries on the bottom!
PRO Tip:
Because this is an upside-down cake, remember that what faces the bottom of the pan will become the top of the cake. You want the prettiest cherries facing down. They will get flattened while baking, but they will still be pretty.
Key Ingredients for this Recipe
- Sour cherries, preferably from a jar
- Butter
- Brown sugar
- Flour or gluten-free flour blend
- Cocoa powder
- Baking powder and salt
- Egg yolk
- Vanilla
- Whole milk or half and half plus heavy cream
Kitchen Tools I Use to Make This Recipe (affiliate links)
Gluten-Free Tips:
Use a gluten-free flour blend (preferably with xanthan or other gum in it) in place of the regular flour. If it doesn’t have xanthan or another gum in it already, add a pinch to the dry ingredients. As always, read the labels of all your ingredients and contact the manufacturer if you have any questions.
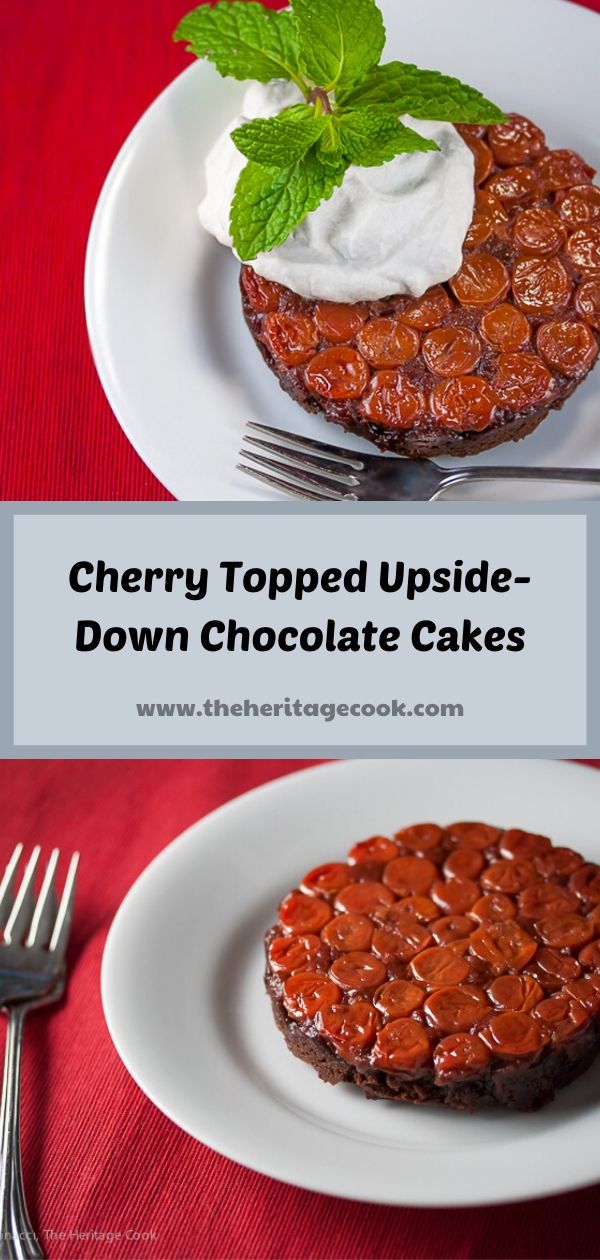
Cherry Topped Upside-Down Chocolate Cakes (Gluten-Free)
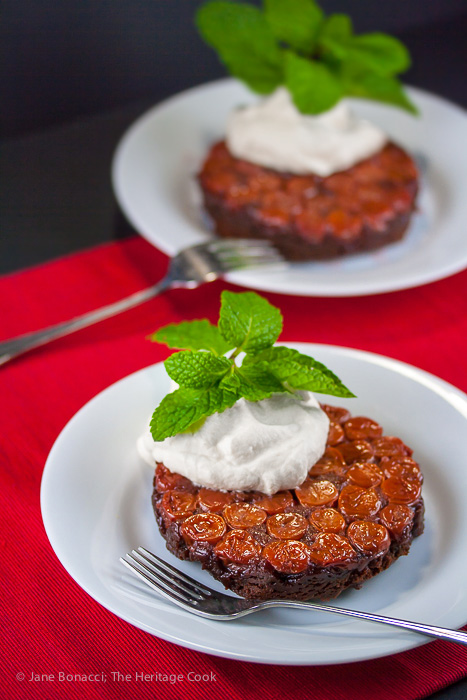
These Cherry-Topped Upside-Down Chocolate Cakes are a delightful surprise and the perfect choice for holidays or special occasions. The perfect blend of rich chocolate and bright cherry flavors, they satisfy everyone's sweet tooth. Make sure you put them on your menu for Christmas, New Year’s Eve, and Valentine’s Day!
Ingredients
Cherry Topping
- 1-1/2 cups (14.5 oz) jarred sour cherries, drained, reserving the juice
- 2 tbsp butter
- 2 tbsp firmly packed brown sugar
- 1 tsp reserved cherry juice from above
Cake
- 1/3 cup all-purpose flour or gluten-free flour blend
- 1/4 cup unsweetened cocoa powder (gluten-free if needed)
- 1/4 tsp baking powder (gluten-free if needed)
- 1/4 tsp kosher or fine sea salt
- 2 tbsp butter, at room temperature
- 1/3 cup firmly packed brown sugar
- 1 large egg yolk
- 1 tsp pure vanilla extract or paste
- 3 tbsp whole milk or half and half
Whipped Cream
- 1/4 cup heavy cream
- 1 tbsp brown sugar or to taste
- 2 tsp kirsch, cassis, red wine, or reserved cherry juice, optional
Instructions
- Preheat the oven to 350°F. Lightly butter two 8-oz (4" in diameter, 2" tall) ramekins or mini springform baking pans. If using springforms, wrap the bottoms and up the sides with foil. Set a rimmed baking sheet next to the stove and line it with a Silpat (for traction) or sheet of parchment.
- Prepare the Cherry Topping: In a microwave-safe bowl, combine 2 tbsp butter, 2 tbsp brown sugar, and 1 tsp of the reserved cherry juice. Microwave until the butter and brown sugar are melted and bubbling, about 30 seconds. Stir well to fully dissolve the sugar. Divide the mixture evenly between the two prepared baking dishes. Arrange cherries in a tightly packed single layer in the bottom of each dish.
- Make the Cakes: In a small bowl, whisk together flour, cocoa, baking powder, and salt. In the bowl of your standing mixer, beat together 2 tbsp butter and 1/3 cup of the brown sugar until lightened in color, about 3 minutes. The friction of the mixer will soften the butter helping it whip. Mix in egg yolk, then flour mixture, vanilla, and milk. Beat until smooth, stopping the mixer and scraping the bowl often.
- Divide batter equally between baking dishes, smoothing the batter to cover the cherries. If you are making these with gluten-free flours, they are heavier and stickier than regular flour. They will need more help - an offset spatula dipped in water will help a lot. And don’t worry if it looks like there isn’t enough batter - there is and the cakes will puff up in the oven, filling in and covering all of the topping.
- Place the baking dishes on the baking sheet. Bake until a toothpick inserted in center of a cake comes out with only a few crumbs attached, about 30 minutes. Let cool on a wire rack, 20 minutes. This gives the topping time to solidify slightly before you turn out the cakes.
- Whip the Cream: Meanwhile, in a small bowl, using your mixer, beat the cream until frothy, the add the brown sugar, and kirsch or other liquid (if using) and beat to firm peaks.
- To Serve: While still hot, run a thin knife or metal offset spatula around the edge of each cake and invert them onto serving plates. Add a dollop of the whipped cream and garnish with a sprig of mint. Serve immediately.
Notes
This recipe was adapted from a recipe by Martha Stewart
My springform pans leaked, so if you choose to use them, wrap them tightly in foil to contain the juices. Ramekins will keep all the liquid with the cherries but may be a bit harder to unmold.
If you love this recipe, be sure to follow me on social media so you never miss a post:
| Facebook | Pinterest | Instagram | Twitter |
Create a New Tradition Today!
Here are more recipes from The Secret Recipe Club just for you!
Welcome to this month’s Secret Recipe Club, another opportunity to discover new-to-you bloggers! This month I was assigned Mellissa’s A Fit and Spicy Life, a very fun blog with tons of great recipes, wine recommendations on Wednesdays, and ways to offset our indulgences with exercise.
First Published: 1 Dec 2014
Last Updated: 16 Dec 2019
Welcome! The suggestions here are not intended as dietary advice or as a substitute for consulting a dietician, physician, or other medical professional. Please see the Disclaimers/Privacy Policy page for additional details. Unauthorized use, distribution, and/or duplication of proprietary material from The Heritage Cook without prior approval is prohibited. If you have any questions or would like permission, please contact me. We participate in the Amazon Services LLC Associates Program, an affiliate advertising program designed to provide a means for sites to earn advertising fees by advertising and linking to amazon.com. This page may contain affiliate links.



LeAndra
Looks delicious (as always) Jane!
Jane Bonacci
Thank you so much sweet LeAndra!
Leigh
Just gorgeous Jane! 🙂
Jane Bonacci
Thank you Leigh – they were just as much fun to eat as they were to make 🙂
SeattleDee
Black Forest anything gets my attention, and these little cuties look too tempting to pass up. They will be favorites at this week’s dessert evening with friends as we watch Seattle’s Christmas Ship Parade pass the house. YUM!
Jane Bonacci
I have always wanted to see that! I hope you all enjoy these. I made the whipped cream pretty sweet to offset the tart cherries. And don’t overbake them. A touch under-baked will make them more like brownies 🙂
Andrea Kruse
As always your post leaves my mouth watering! Great job, Jane. I was so excited to cook from your site for this month’s reveal. I really enjoyed the Eggs Benedict Casserole. So much easier than trying to tackle that favorite for guests. Thank you!
Jane Bonacci
Ah Andrea, you are so welcome. I’m thrilled you enjoyed the Eggs Benedict Casserole ~ it is one of our favorites too. SO much easier when you have company or are feeding a large crowd!! 🙂
sara
I love the idea of combining a black forest cake with an upside down cake…so much fun! This looks really yummy.
Jane Bonacci
It is fun Sara! Give them a try – we loved them!!
Amanda E
This looks fantastic – a nice twist on one of my favorite cakes 🙂 Perfect pick for the SRC!
Jane Bonacci
Thank you Amanda! I love the switch up too!
Mellissa
I had forgotten all about this recipe! Glad you enjoyed them. I may need to make these again and soon.
Jane Bonacci
Thank you for such a lovely dessert Mellissa, these were a huge hit! The Artist was hoping there were more, LOL. This is a wining recipe!!
Kelly Williams
What a unique twist on the classic! Reminds me of when my hubby used to travel to Germany several times a year on business! I bet this was absolutely *divine*! What a lovely choice for the SRC, Jane! 😀 I will have to try this one some day soon! 😉 😀
Jane Bonacci
Thanks so much Kelly! These reminded me of old-fashioned European treats too. I hope you do make them soon 🙂