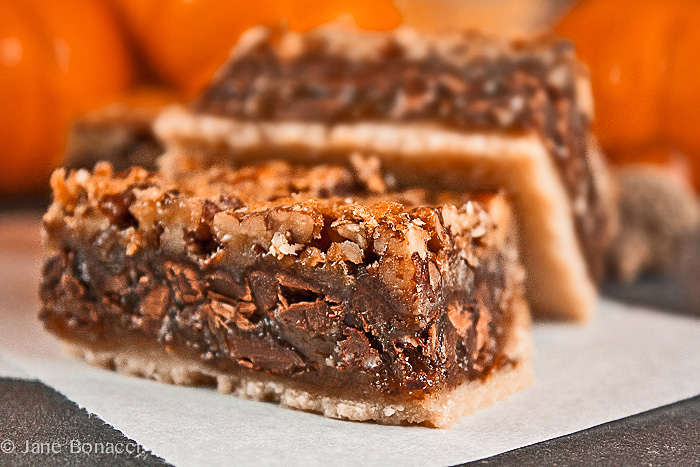
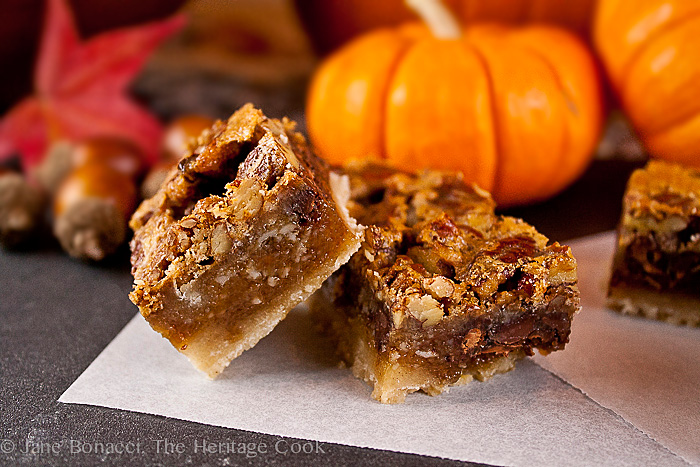
For those of you who are also intimidated by making your own pie crusts from scratch, these pecan pie bars are a fantastic dessert that has all the flavors you want for your Thanksgiving table, travels beautifully if you are visiting friends or family, and is much easier to make than a traditional pie.
Baking has always come easily to me thanks to my grandmother Mimi. From my earliest memories, when I needed to stand on a chair to watch as she cooked at the stove, making homemade candies, desserts, and meals with the sure hand born of years of cooking for her family. I marveled at how good everything tasted when she cooked and was fascinated to learn everything I could from her.
Mimi taught me which ingredients needed to be carefully measured and those that could be added to taste. With her calm and confidence to guide me, I never had the fear of baking that most people grow up with. Mimi died when I was only ten, but she had already given me the foundation of basic skills I needed. She continues to be my inspiration and I can feel her hands guiding mine as I cook and bake.
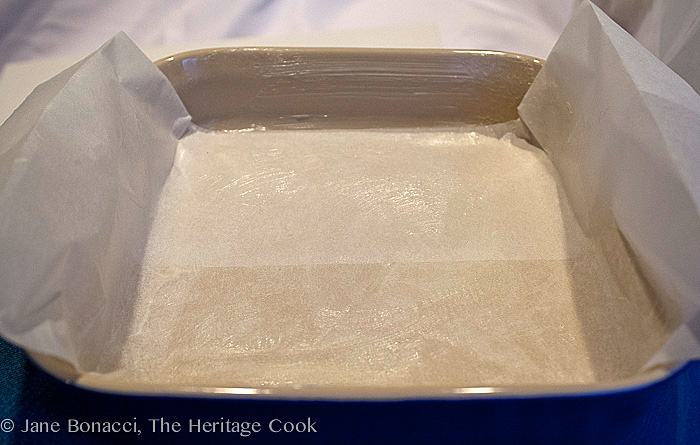
Create a sling with parchment paper to help remove the bars from the pan before slicing.
I started by baking with cake mixes and graduated to making cakes from scratch. It is nearly as easy to put together your own ingredients as it is to use a boxed mix and everything tastes infinitely more delicious. And of course you have far fewer preservatives and additives, making homemade treats much healthier for us as well as making something gluten free.
When I was little I helped my mother roll out the dough and bake, trying to memorize the nuances of each step and all the little tricks. When I was about 12 or 13 I took over the baking for the family. Mom was thrilled to no longer have that responsibility; cooking and baking were not her passions. She preferred puttering in the garden and growing beautiful plants.
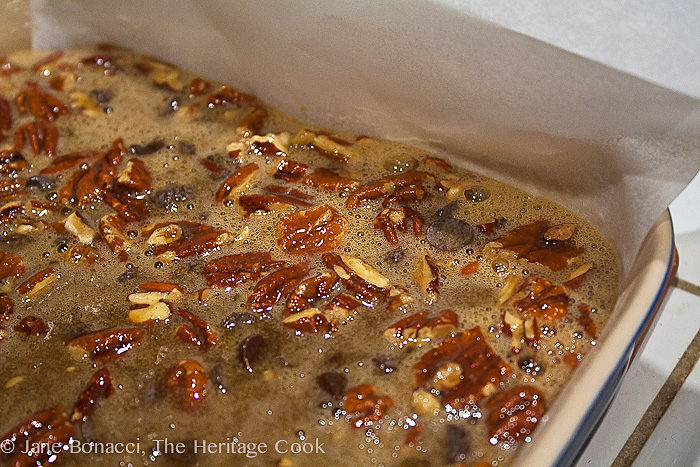
Pecan filling before baking
My oldest brother Mike’s favorite dessert is pecan pie and I made one each year for his birthday and then again for Thanksgiving. I am sure that those early pies were barely edible but my brothers and parents were good sports and very supportive, giving me the much needed approval that any budding artist needs to boost their confidence. Practice definitely helps and in time my pie crusts became a thing of beauty, easy to work with, tender and flaky, winning ribbons when I entered them in competitions.
And then I was diagnosed with gluten-intolerance and the flour that I was used to working with and knew exactly how it behaved had to be thrown out. I have spent the last year learning how the variety of gluten-free flours work, their idiosyncrasies and what adjustments need to be made to regular recipes to make them work.
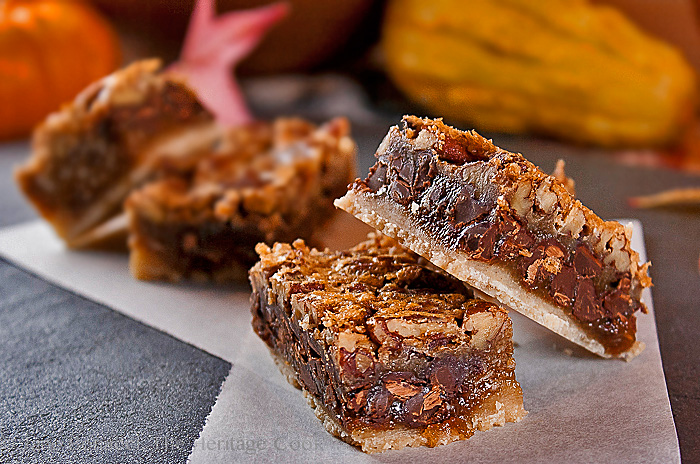
If you are new to eating gluten-free, these bars are a great way to practice!
For the first time in my life I am nervous about baking. I have had great successes with cookies and cakes, making a variety of beautiful desserts. I haven’t tackled pie crusts or bread yet but I probably will be making a pie in the next week or two in preparation for Thanksgiving. I have some incredibly talented friends who bake gluten-free pies giving me guidance so I am hopeful for a decent first attempt!
In the meantime for those of you who are also intimidated by making your own pie crusts from scratch, here is a fantastic dessert that has all the flavors you want for your Thanksgiving table, travels beautifully if you are visiting friends or family, and is much easier to make than a traditional pie.
This is also a fantastic dessert to have your kids help you make. They would love patting the crust into the pan, whisking the ingredients for the filling (you don’t even need to pull out the mixer), and drizzling the chocolate over the top!
I hope you try these fun, easy pecan pie dessert bars. They have all the flavor of pecan pie without any of the pain of making a crust if that scares you. I’m pretty sure my brother Mike would be thrilled with them and hope you will be too!
Happy Chocolate Monday!
Jane’s Tips and Hints:
Whenever you are making bar cookies, brownies or anything that needs to be removed from the baking pan before cutting, create a “sling” with parchment or foil. Extending the length on two opposite sides of the pan gives you “handles” you can use to lift the entire bar out without needing to flip it out and then re-invert back right side up.
Gluten-Free Tips:
*You can adjust any recipe to gluten-free by using 120 grams per cup of my favorite gluten-free flour blend. If you are using another brand of gluten-free flour, whisk the mix, spoon it lightly into a measuring cup without a spout until mounded, level off the top with the back of a knife, and weigh the flour left in the cup. Use that weight as your standard per cup of that specific flour. Do this for each flour blend you use. Commercial blends such as Pamela’s, Bob’s Red Mill 1-to-1, or King Arthur Measure for Measure are all good choices.
All recommended ingredients are gluten-free as of the writing of this article. Always check to be sure the products haven’t changed and are still safe to consume.
Chocolate Chip Pecan Pie Bars
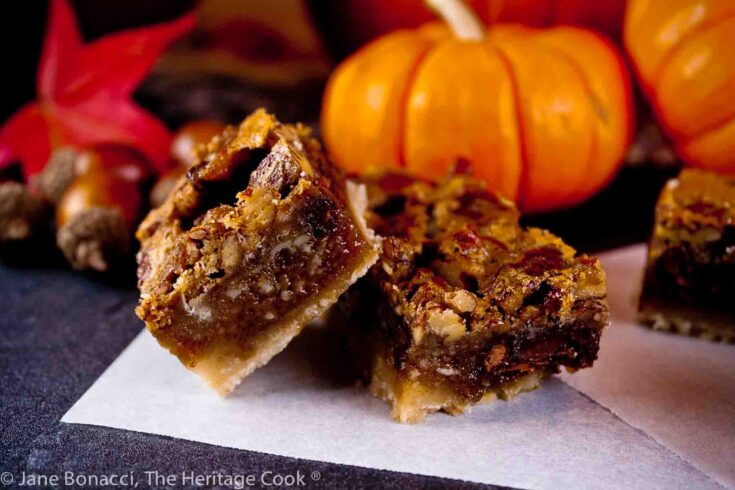
For those of you who are intimidated by making your own pie crusts from scratch, these pecan pie bars are a fantastic dessert that has all the flavors you want for your Thanksgiving table, travels beautifully if you are visiting friends or family, and is much easier to make than a traditional pie.
Ingredients
Crust
- 1/2 cup (1 stick) butter, at room temperature, plus extra for the pan
- 1 cup all-purpose flour, gluten-free all-purpose flour,* or 1/2 cup sorghum flour + 1/2 cup tapioca starch
- 1/4 cup granulated sugar
Filling
- 1 cup pecan halves, coarsely chopped into 1/4 to 1/2-inch pieces
- 2 oz (1/2 stick) butter, melted and cooled slightly
- 3/4 cup firmly packed brown sugar (use dark sugar for more molasses flavor)
- 1-1/2 tbsp unbleached all-purpose flour, sorghum flour, or gluten-free flour blend*
- 3 large eggs, beaten
- 3/4 cup dark corn syrup or Lyle’s Golden Syrup
- 1/2 tbsp pure vanilla extract
- 6 oz semisweet chocolate chips, optional
Topping (optional)
- 6 oz semisweet or milk chocolate chips, for drizzling
Instructions
- Set an oven rack in the center and preheat to 325°F.
- Butter the bottom and sides of a 9x9-inch baking pan. Cut a piece of parchment paper wide enough to fit the bottom of the pan and long enough to hang over two sides to give you “handles”. (This will help you remove the bars from the pan later.) Press into the pan and lightly butter parchment. Set aside.
- Make the Crust: In a small saucepan over medium heat, melt the butter. In a mixing bowl combine the flour* (or gluten-free flours*) and sugar. Pour in the melted butter and whisk until it comes together into a paste-like mixture. Transfer to the prepared pan and using your hands, evenly pat into pan, covering the bottom completely. Bake for 10 minutes. Remove from the oven and set aside while you make the filling.
- Make the Filling: Toast the pecans on a baking sheet in the hot oven until you can smell them, about 5 to 10 minutes. Set them aside to cool to lukewarm.
- In a small heatproof bowl, melt the butter in the microwave; about 30 seconds on High. Set aside to cool slightly.
- In a large bowl, combine the flour and brown sugar, whisking until evenly blended. Add the beaten eggs, corn syrup, and vanilla. Whisk until smooth. Pour in the melted butter, whisking again until smooth. Stir in the chocolate chips and pecans.
- Pour the filling over the crust and make sure the nuts and chocolate chips are evenly distributed.
- Bake the Bars: Place the pan into the preheated oven and bake for 50 to 60 minutes, or until the filling is firm but the center is still slightly jiggly. Remove from the oven and set on a wire cooling rack. The residual heat will finish the cooking. Cool to room temperature. Cover and refrigerate until firm for easiest cutting. You can also place it in the freezer for about 20 minutes.
- To Serve: Use a flexible metal spatula to loosen the sides, and then using the parchment paper “handles” lift the bar out of the pan. Place on a cutting board and using a very sharp knife, first trim a thin strip off each side and then cut into either rectangles or squares. Trimming removes the crunchier part giving you perfect edges, making your baked goods look just like the professionally made ones!
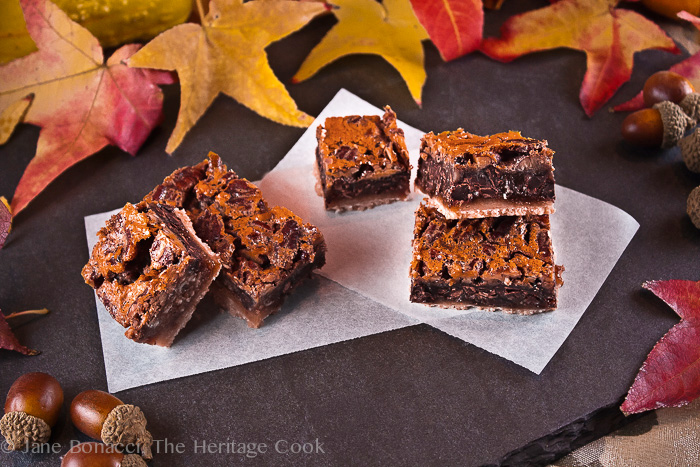
- If you want to add a chocolate drizzle, place the bars on a wire rack set over a sheet of parchment. Melt 6 oz chocolate chips in the microwave and use a spoon to drizzle a thin stream of chocolate over the cut bars.
- Store in the refrigerator, in an airtight container. Set on the counter about 30 minutes before serving.
Notes
* You can adjust any baking recipe to gluten-free by using 120 grams per cup of my favorite gluten-free flour blend. If you are using another brand of gluten-free flour, whisk the mix, spoon it lightly into a measuring cup until mounded, level off the top with the back of a knife, and weigh the flour left in the cup. Use that weight as your standard per cup of that specific flour. Do this for each flour blend you use. Commercial blends such as Pamela's All-Purpose Artisan Blend, Bob's Red Mill 1-to-1, or King Arthur Measure for Measure are all good choices.
All recommended ingredients are gluten-free as of the writing of this article. Always check to be sure the products haven’t changed and are still safe to consume.
Nutrition Information:
Yield:
16Serving Size:
1Amount Per Serving: Calories: 413Total Fat: 13gSaturated Fat: 5gTrans Fat: 0gUnsaturated Fat: 7gCholesterol: 37mgSodium: 53mgCarbohydrates: 72gFiber: 3gSugar: 38gProtein: 7g
The nutritional information for recipes on this site is calculated by online tools and is merely an estimate.
Create a New Tradition Today!
Welcome! The suggestions here are not intended as dietary advice or as a substitute for consulting a dietician, physician, or other medical professional. Please see the Disclaimers/Privacy Policy page for additional details. Unauthorized use, distribution, and/or duplication of proprietary material from The Heritage Cook without prior approval is prohibited. If you have any questions or would like permission, please contact me. To learn more about me, click here. We participate in the Amazon Services LLC Associates Program, an affiliate advertising program designed to provide a means for sites to earn advertising fees by advertising and linking to amazon.com. As an Amazon Associate, I earn a small amount from qualifying purchases without any additional cost to you. This page may contain affiliate links. The author makes no claims regarding the presence of food allergens and disclaims all liability in connection with the use of this site. This post was first shared in Nov 2013. The article was updated in 2023.



Candace
I just wanted to throw this out there… My husband and kids have celiacs and I’m fairly new to the whole thing. I wanted to make them a PECAN PIE for our Thanksgiving meal at our church but had to find a new way to make the crust since they cant have it. So I decided to try a nut crust, I’m sure I’ll have to adjust alittle but I think its a good start since I don’t buy any of the many gluten free flours out there. Your bars look really good by the way!! all the diff flours just intimidate me I guess.
Jane Bonacci
Hi Candace,
I understand feeling overwhelmed by learning gluten-free baking. I was there a little over a year ago. There are only 2 flours needed for my bars (sorghum & tapioca) or buy King Arthur’s GF AP flour blend or Cup4Cup. They can be used 1:1 in place of AP flour in any recipe with near perfect results.
I use a nut crust for my cheesecakes and it is terrific. My husband prefers it to traditional graham cracker now. I used Bob’s Red Mill Almond Meal in place of the graham cracker crumbs and leave everything else the same. It is a winner!
If you have any questions, I’m happy to help you!
candace
I’ve been searching for a cost effective way to purchase the gf all purpose flour, but it is all so expensive! And I love to bake I use to take muffins and cupcakes to church for breakfast every Sunday but not anymore. I love cheesecake I’m gonna have to try that, maybe I’ll find away around the expensive desserts. I only enjoy my kitchen when I’m making desserts! Its been a sad kitchen lately…
Jane Bonacci
I buy most of my GF flours and ingredients online. I find good prices on Amazon usually and sometimes good deals direct from the manufacturers. Get on their mailing lists for special deals. And remember, your health and feeling good is worth the price!!
Candace
I do have a question for you, I havent made this pie yet i plan on doing it this afternoon or tomorrow. If i use the nut crust for pecan pie the recipe i have says to bake the crust first but it doesnt include a filling so how would you go about putting it all together? I cook the pie filling a little on the stove first to ensure it sets right, and thought i could do that then put it in the unbaked shell. im just afraid im going to over cook the crust.
Jane Bonacci
Go ahead and cook the nut crust just like you would before adding the cheesecake filling and baking – only use your own filling recipe. It should work perfectly! You want the crust a little crunchy to stand up to a moist filling, so don’t worry. Just don’t bake it more than about 8 minutes or until you just start to smell the nuts.
Cindy McCord
Dear Jane,
I have been following your wonderful website for over a year now and enjoy it so much! My dear friend and yours also, I understand, Janet Shalinsky (Mulligan) introduced me to you. I had just been diagnosed with border line celiac and needed help! I still need help, so I love getting your recipes. With the holidays approaching, I was just lamenting to my husband that I wished I could make a GF pie crust! It sounds like you are working on it, so I will be patient! I was thrilled to see the pecan pie adaption, as my Grandmother’s pecan pie is our absolute holiday favorite! Now, if only you could also help me with altitude! We moved to Ouray, CO, at 7,600 ft. up in the Rockies from the San Diego area about 5 years ago. Just about the time I thought I was getting on top of the altitude issues I was diagnosed with gluten intolerance. It’s been a double whammy! Thank you for all your help. Good luck with the pie crust. I will be anxiously awaiting the recipe!
Sincerely,
Cindy McCord
Jane Bonacci
Oh my goodness, thank you so much Cindy! I hope you like this recipe as much as I do and if there is anything I can to do help you learn about GF cooking and baking, I am right here! I’ll see what I can find for you on the high-altitude GF baking. That’s a new one to me 😉 Take Care!!
Kate McDermott
Now, that’s a great idea and definitely worth a go!
Jane Bonacci
Thank you darling Kate! I am getting closer to your spectacular GF pies!!